The following is an error that can happen sometimes when you try installing an Intel chipset/display driver on your device. It could also appear due to missing hardware or hardware incompatibility. On a software level, the issue could be because of a version mismatch, or a corrupt driver file.
To fix this, you can update the chipset drivers through Windows update or Intel’s driver support page. For hardware issues, adding, removing or upgrading the components may solve the problem.
Check Drivers
First, we’ll need to know if the drivers installed in the system are correct or not. To check for the installed drivers, you can use three methods.
From System Information
- Press the Windows key + R to open Run
- Type
msinfo32in the dialogue box to open the System information - Now, click on Components and select Display from the list

- From the left, check whether the driver information matches with that of the installed hardware in your system
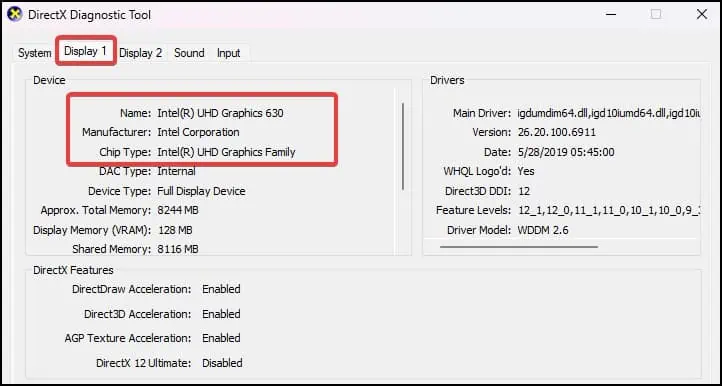
From DirectX Diagnostics
- Open Run and type
dxdiagon the dialogue box
- Click on the Display tab and compare the information with that of the installed Intel GPU hardware
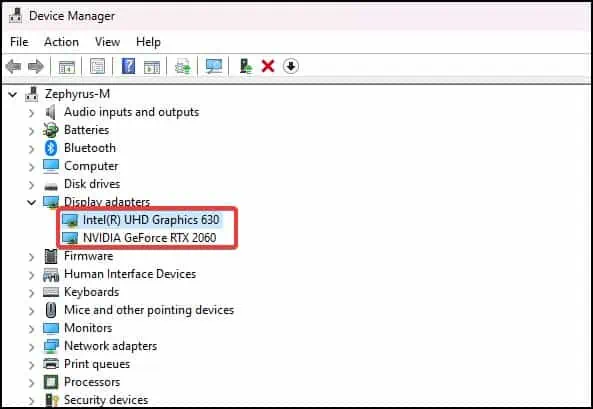
- Open Run again and type
devmgmt.msc - Expand the Display adapters label

- From the list, double-click on the driver to open it

- Click on the Driver tab and then click on Details
Note down any driver information that may be needed later such as the device information, driver version etc.
Uninstall Drivers
To fix this, firstly check if you have installed the correct drivers or not from system information. If the installed drivers are incorrect or if they do not match with that of described specifications, you will need to uninstall the drivers
Note: We strongly recommend users to backup their drivers.
To uninstall the drivers from the device manager,
- Open Run and type
devmgmt.mscto open the device manager - Here, click on the Display adapter label
- From the list, select the Intel display drivers and open it
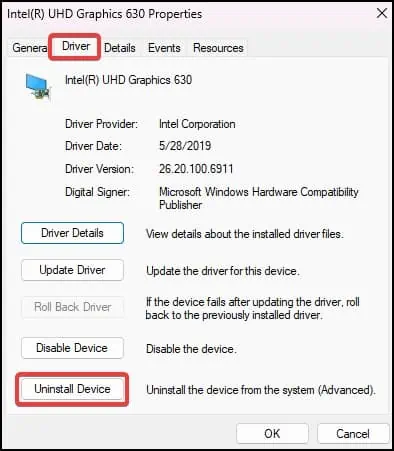
- Click on the Driver tab and then select Uninstall driver

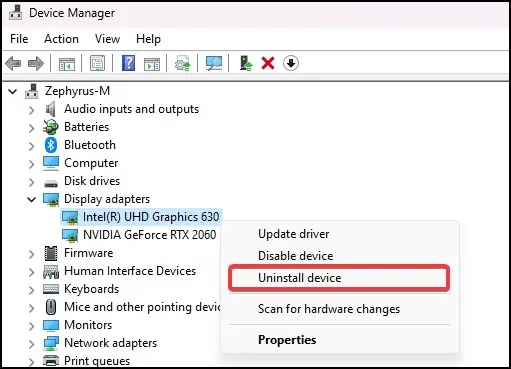
- Alternatively, you can right-click on the Intel driver and then select Uninstall device

- A confirmation will appear. Click on the check box and then select Uninstall
- Restart your device to complete the process
If the driver is a device default driver, it will be uninstalled to its native version. i.e. the earliest version that is still supported by the hardware and the operating system.
Reinstall the Drivers
The error could appear due to corrupt or incompatible Intel chipset drivers. To fix this, you will need to first uninstall them from your device. After uninstalling, re-download the appropriate drivers and install them on your system.
- First, navigate to Intel’s driver download site and then click on Graphics

- From the list, select the drivers that are associated with the Intel graphics installed on your device and click on Download

- Again on the next page, select Download to start the process

- Make sure that the driver is compatible with the OS and the hardware in your device
Alternatively, you can also download and run the Intel Driver & Support Assistant tool to automatically search and download the appropriate drivers on your device.
If your drivers are unavailable from the list, you will need to look for it in Intel’s Legacy Drivers page and download from there.
After the download completes,
- Navigate to the appropriate directory and unzip/extract the file
- Now, launch Device manager and then click on Display Adapters
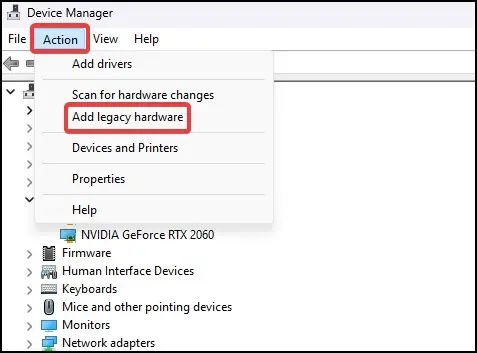
- After selecting, on the Device manager toolbar, click on Action

- From the drop down menu, select Add legacy hardware
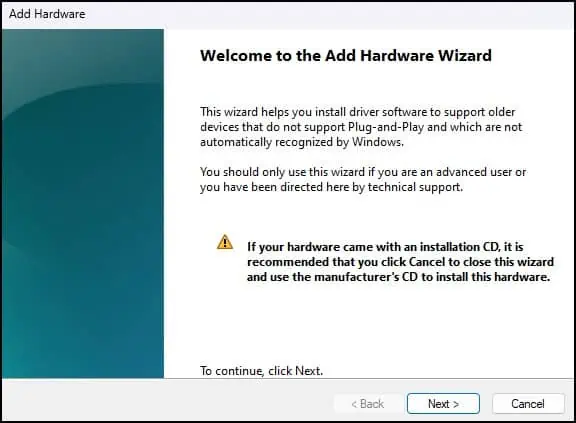
- In the hardware wizard, click Next

- Select Install the hardware manually (Advanced) and click on Next
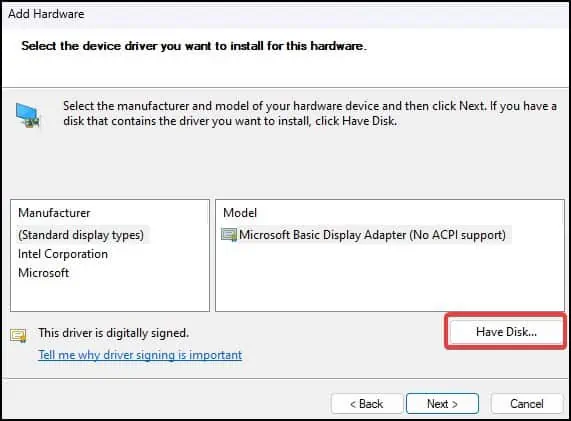
- Click on Have disk and click on Browse

- Navigate to the directory where you have extracted the drivers and inside the folder, select Graphics
- Double click on the setup file to open it and then click on Next
- Let the installation complete and then click on Finish to close the Wizard
- Restart your device to complete the driver installation process
Windows Update
By updating Windows, your device could potentially receive an Intel driver update that can help solve the issue.
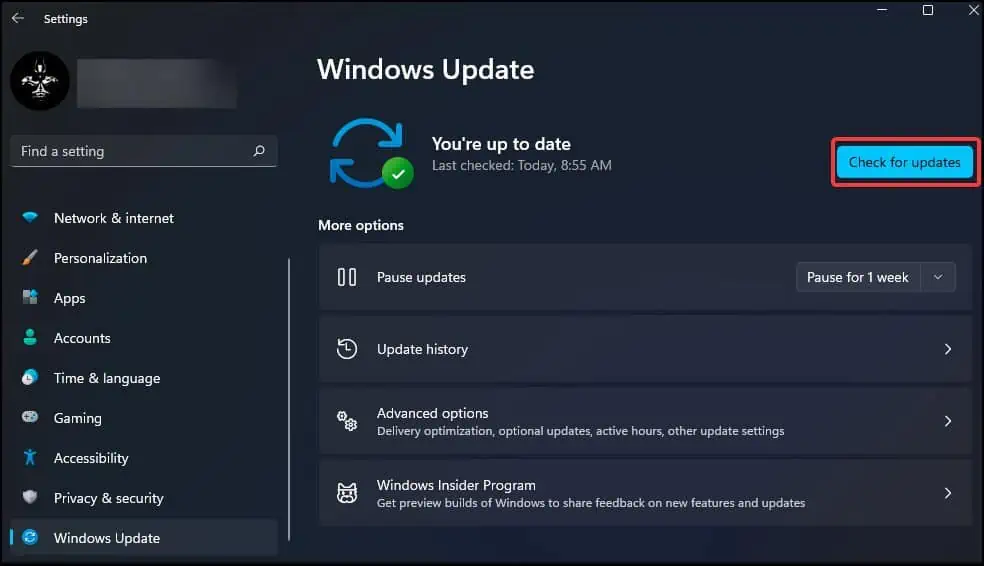
- Open Settings by pressing the Windows key + I
- Here, click on Windows update and from the left, click on the Check for updates button

- If an update is available, click on Download & install
- Wait for the process to complete
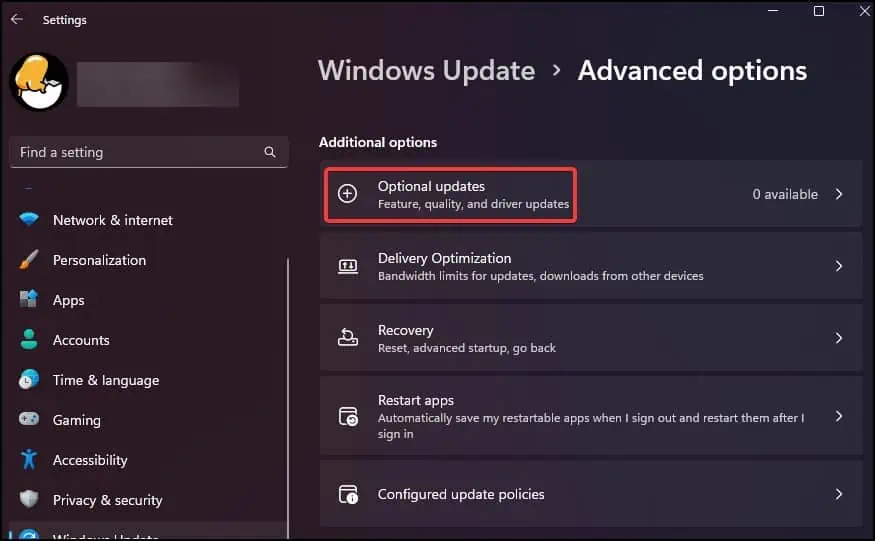
You can additionally check the Optional updates section to check for additional updates that are not bundled with the Windows feature update package
- In the Windows update tab, scroll down and click on Advanced options
- Scroll down and click on Optional updates

- If updates are available, you can follow the on-screen prompts to update them
Update the BIOS
A BIOS update can provide compatibility and support for the installed Intel hardware on your device which can, in turn, resolve the error. To check if a BIOS update is necessary/available, you can
- Firstly open System Information and check the BIOS version installed in the device
- Note down the necessary information such as the BIOS version/date, and the BIOS architecture
- After noting down, visit the manufacturer’s support page and compare the latest available BIOS with that installed on your device
- Download the latest BIOS version compatible with your device
- To install the update, perform the steps as explained or recommended by the manufacturer.
This guides should be helpful in updating bios for
Upgrade Components
If the error happens due to other old or incompatible devices, or insufficient graphics processor, upgrade the components as necessary and see if that solves the error from appearing.

