Headsets that use USB connectors are extremely convenient to use on a computer. You don’t have to distinguish the connector or port for the microphone and the speaker. Additionally, the audio sounds better with a USB headset.
However, there are some scenarios where the USB headset stops working altogether. It usually happens due to issues with the USB ports or drivers on your system. Improper audio configuration is also equally liable to cause the issue.
In this article, we go through all the possible causes and provide their possible solutions.
Causes for USB Headset Not Working
Here are the potential reasons for USB headset not working on your system:
- Damaged device or USB port.
- Improper default sound device setting.
- Lack of permissions for microphone.
- Headset Driver issues.
- USB selective suspend option blocking the port even after inserting the headset’s USB connector.
How to Fix USB Headset Not Working?
Before moving on to the solutions below, try waiting for some time, especially for USB-C headsets. Many Macbook Pro users have discovered that they have to wait about 2-4 minutes before the headset starts working.
If the headset doesn’t start working automatically after some time, move on to the possible solutions below.
Check Device and Ports
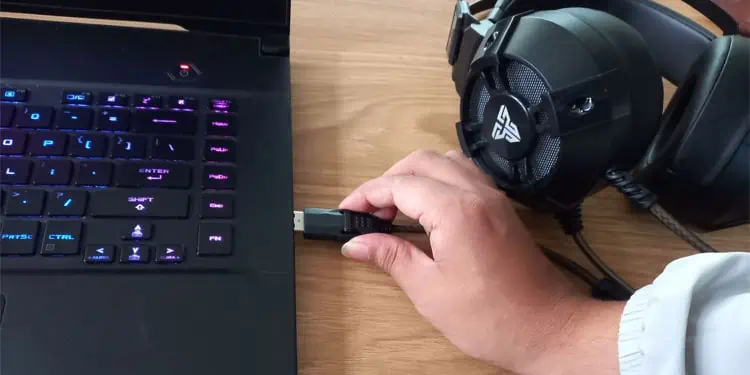
The first thing you should do if your USB headsets aren’t working properly is to check the device and the USB ports. You can perform the following preliminary checks to determine which component has issues:
- Some headsets contain a USB connector for the LED lighting and separate audio connectors. If you have such a device, try entering the audio connector to the port and check if it starts working.
- Make sure that the headset is not muted or has 0 volume. Some headsets also have a separate physical control for volume. So, check it as well.
- Use some other USB ports to connect the headset. The USB ports directly connected to the motherboard receive more power so it’s better to try those.
- Directly connect the headset to the PC and not a hub or dock.
- Unplug the headset from the USB port and restart your PC. You can also power cycle the PC to clear the charge in USB ports.
- Connect the headset to another PC without using any peripherals.
If you determined that there are some issues with the headset, you need to take it to a hardware expert and see if they can repair it. If they can’t, you should buy a new one. You can also replace your USB port if it is not working properly.
If these are not the reasons for your problem, you need to move on to successive solutions to troubleshoot software issues within your system.
Run Troubleshooters
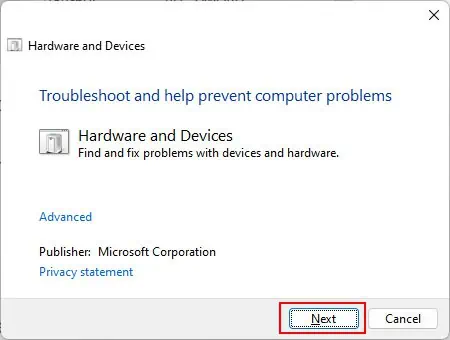
Windows comes with dedicated troubleshooters that scan and fix minor issues with your system components. The Hardware and Devices Troubleshooter does just that for your peripherals, which also includes USB ports and devices.
So you should try running this feature whenever your headsets don’t work. Here’s how you can do so:
- Open Run by pressing Win + R.
- Enter
msdt -id DeviceDiagnosticto open the troubleshooter. - Select Next and follow the onscreen instructions.

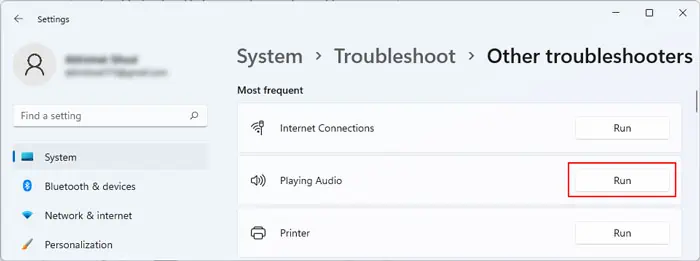
You can also try running the audio troubleshooters to troubleshoot potential issues with the audio rather than the USB. To do so,
- Open Run and enter
ms-settings:troubleshoot. - Select Other troubleshooters or Additional troubleshooters.
- Click Run next to Playing Audio or select Playing Audio and click Run this troubleshooter.

Check Sound Settings
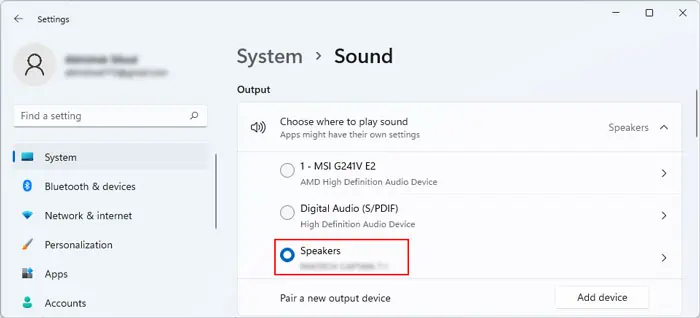
Your computer contains some settings that specify the current output and input sound device. If the USB headset is not set as the current or default sound device, it won’t work. To check and change this setting,
- Open Run and enter
ms-settings:soundto open the Sound Settings. - Select Choose where to play sound to expand it.
- Make sure to check the radio button next to the USB headset and not other devices.

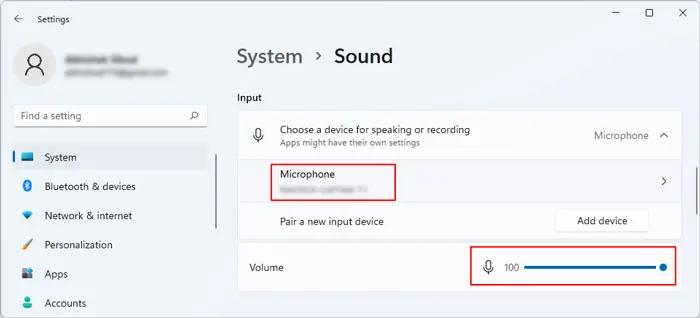
- Also, if the microphone on your headset is not working, you can scroll down to Input and select this device. Then, make sure that the Volume is not low or disabled.

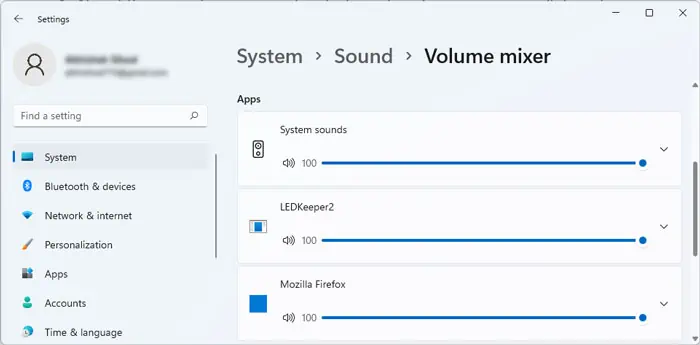
- Now, scroll down and go to Volume Mixer to ensure that the apps have proper volume.

Check Sound Privacy Settings
If the headset’s microphone is not working, you should also check the Privacy Settings and make sure that the apps have access to this device. Here’s how you can do so:
- Open Run.
- Enter
ms-settings:privacy-microphoneto open the Microphone Privacy Settings. - Make sure the switches next to Microphone access as well as the necessary apps are On.

Disable Exclusive Control by Apps
Another thing you can do is disable the option that allows apps to take exclusive control of the headset. It is possible that some application that is not playing audio is taking control of the device and preventing it from producing any sound.
Here’s how you can disable the option:
- Open Run and enter
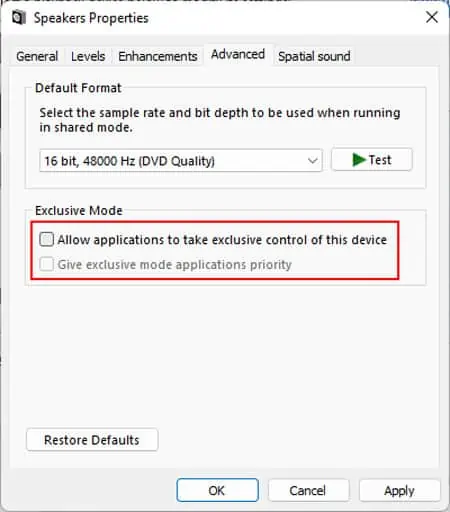
mmsys.cplto open the Sound Properties. - On the Playback tab, double-click on your headset’s speakers and go to the Advanced tab.
- Uncheck Allow applications to take exclusive control of this device and click OK.

- Go to the Recordings tab and execute the same steps for the headset’s microphone.
Update or Reinstall Drivers
Outdated or problematic drivers are some of the main reasons for this issue, especially if the device is old and you have a recent system version. You need to update the driver to the latest version to resolve such issues. To do so,
- Open Run and enter
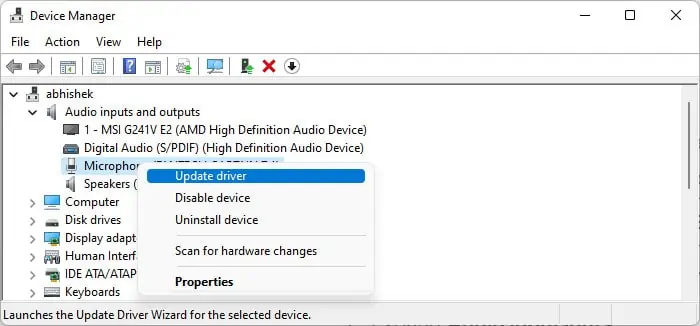
devmgmt.mscto open the Device Manager. - Expand Audio inputs and outputs.
- Right-click on the headset device and select Update driver > Search automatically for drivers.
- Do so for both Microphone and Speakers.

- Now, expand Sound, video and game controllers and update the driver for the headset.
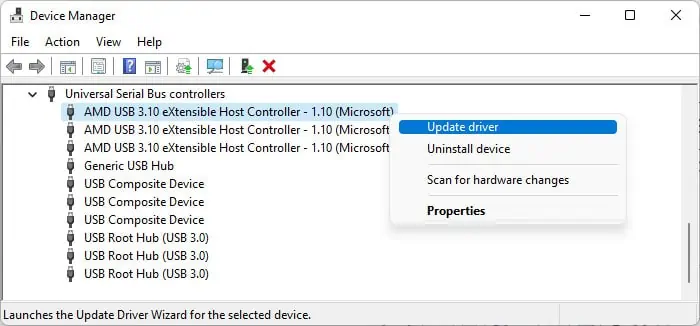
- Then, expand Universal Serial Bus controllers.
- Update the drivers for all USB controllers.

If you already have the latest audio drivers for the headset, you need to reinstall them. To do so,
- Open the Device Manager.
- Expand Audio inputs and outputs.
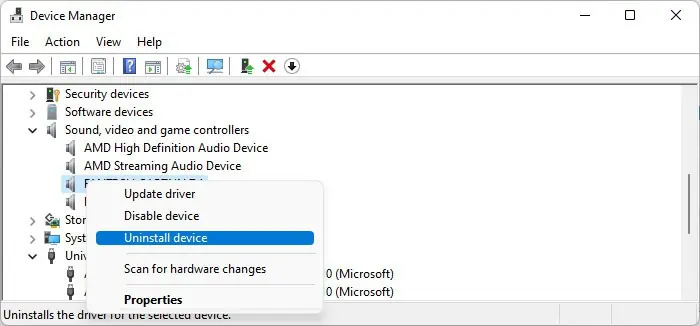
- Right-click on the headset device and select Uninstall device > Uninstall.
- Do so for both Microphone and Speakers.
- Perform the same steps for the headset device inside Sound, video and game controllers.

- Then, download the latest drivers from the official website and install them.
If other USB devices also show some issues, you can try reinstalling the USB controller drivers, especially for hubs.
Disable Conflicting Devices
Some incompatible audio or sound drivers may conflict with the headset drivers causing it to not work. You can try disabling the unnecessary audio devices to fix the conflict. Many users have been able to resolve this issue by disabling the Intel Smart Sound Technology for USB Audio driver.
To uninstall the conflicting device:
- Open the Device Manager.
- Expand Sound, video and game controllers.
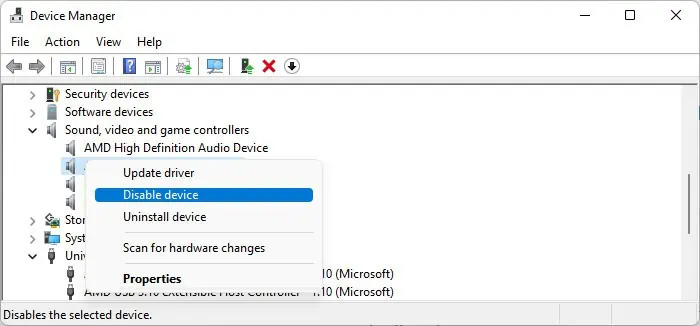
- Right-click on the device and select Disable device.

- Confirm with Yes.
Restart your PC and check if the headset starts working.
Disable USB Selective Suspend
Your system includes an option to selectively suspend a USB port when it’s in idle condition. However, sometimes the USB doesn’t wake up when inserting an audio USB device as the device does not provide the wake-up signal to the USB itself.
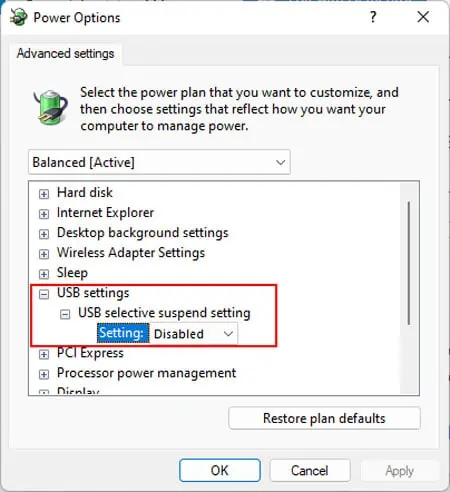
You can disable USB selective suspend to prevent such issues. To do so,
- Open Run and enter
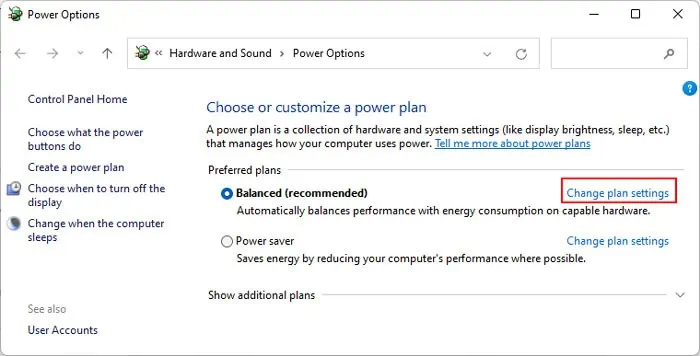
powercfg.cplto open Power options. - Choose Change plan settings for your selected power plan.

- Click on Change advanced power settings.
- Expand USB settings > USB selective suspend setting.
- Set the options inside to Disabled.

- Then, open the Device Manager.
- Expand Universal Serial Bus controllers.
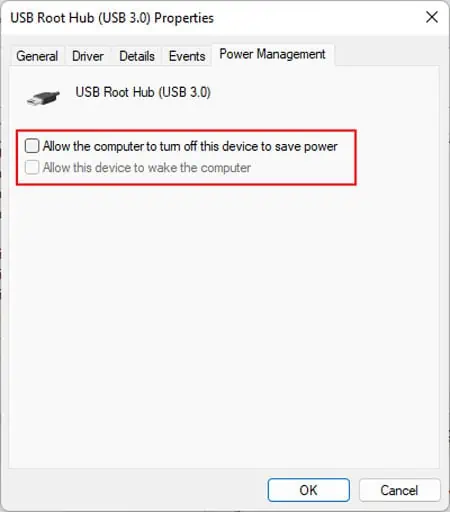
- Double-click on a Hub driver to open its properties.
- Go to its Power Management tab and uncheck the options.

- Click OK.
