While running a Virtual Machine on your computer, you may have felt the need to copy and paste text or files from VirtualBox to the host PC or the reverse. Though being super useful, it isn’t something you can enjoy right after the normal installation of VirtualBox.
VirtualBox doesn’t enable this feature by default. However, you can have the workaround by installing VirtualBox’s Guest Additions on your virtual machine and toggling the settings.
Read through this article for detailed steps to enable copy-paste and fix its issues as well for Virtualbox.
How to Fix Copy Paste on Virtualbox?
Some of the fixes that will help you solve the copy-paste not working problem are discussed below.
Install/Update Guest Additions
Copying and pasting from your PC to Virtual Box or vice-versa won’t work by default. You will have to Install the VirtualBox Guest Additions to enable the various tools along with the copy-paste feature. Proceed with the steps mentioned below:
On Windows
The steps mentioned below will help you in installing Guest Additions:
- Open your Virtual Machine and go to Devices in the top nav-bar menu.
- Select Insert Guest Additions CD image…

- Choose and open the CD drive with VirtualBox.
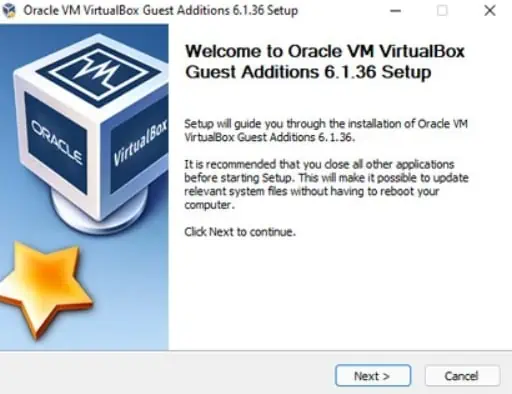
- Double-click the file named VBoxWindowsAdditions-amd64.exe
- It will start the installation process and locate your destination folder.
- Click on the Next button.

- Go with the on-screen prompts till a dialog box with an Install button appears. Click on the button.
- Upon completing the installation process, choose Reboot now and go with the Finish button.
In case the Devices option isn’t showing in your nav-bar menu, you can follow the steps mentioned below to install the Guest Additions:
- Open VirtualBox and click on the Virtual Machine once to load a menu on the right section.
- Now within the Storage menu card, click on the [Optical Drive] Empty link corresponding to the storage controller.

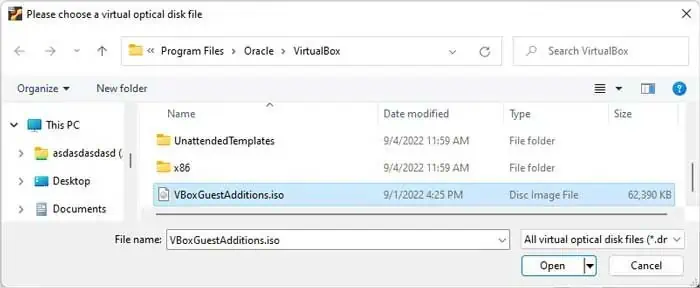
- Select the Choose disk image… option.
- It should open your VirtualBox installation folder. Choose VBoxGuestAdditions_”version number” among the files.
- Click on the Open button.

- Now start your Virtualbox and check if it solves the issue.
On Mac
Follow the steps to install Guest Additions on Mac:
- Press Command + Space
- Type Terminal and hit Return.
- Enter Recovery Mode by running the commands:
sudo nvram “recovery-boot-mode=unused”sudo reboot - Deactivate System Integrity Protection with the commands:
csrutil disable
spctl kext-consent add VB5E2TV963nvram -d recovery-boot-modeReboot
- Open Terminal in normal boot mode and run:
sudo mount -uw /sudo chown :admin /System/Library/Extensions/sudo chmod 775 /System/Library/Extensions/
- Then, Install Guest Additions from Devices. Now, open Terminal and execute:
sudo chown :wheel /System/Library/Extensions/sudo chmod 755 /System/Library/Extensions/sudo nvram “recovery-boot-mode=unused’sudo reboot - It boots you into the recovery mode, now re-activate System Integrity Protection by the commands:
csrutil enablenvram -d recovery-boot-modereboot
On Linux
To install Guest Additions on Linux virtual machine, follow:
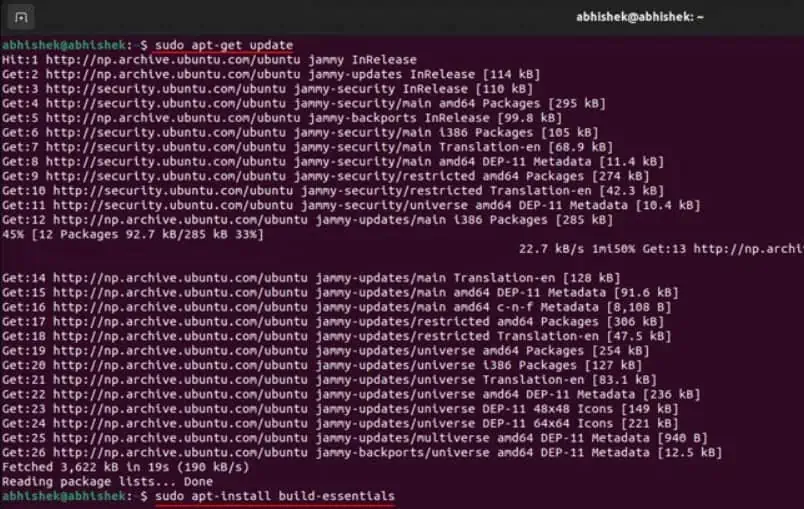
- Go to Terminal and run:
sudo apt-get updatesudo apt-install build-essentialssudo reboot
- Open VirtualBox and select Choose a disk file from Devices > Optical Disks
- Choose the VBoxGuestAdditions.iso file from the VirtualBox folder.
- Then, open the Terminal and run the commands:
sudo mkdir /mnt/cdromsudo mount /dev/cdrom /mnt/cdromcd /mnt/cdromsudo sh ./VBoxLinuxAdditions.run - nox11sudo restart
Enable Shared Clipboard
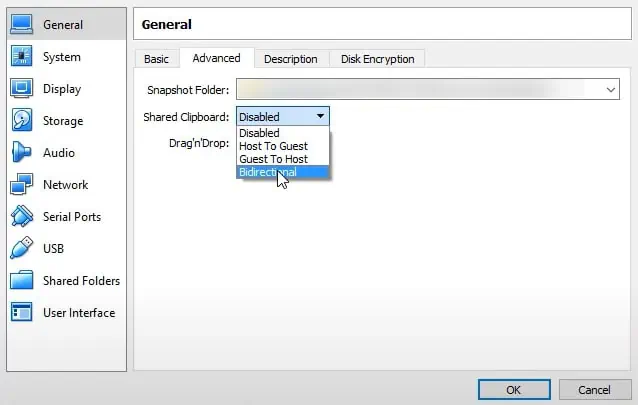
Even after you installed the Guest Additions for VirtualBox, the copy-paste may not work due to the misconfigured settings. You need to change settings to Bidirectional for Shared Clipboard and Drag’n’Drop features. Follow along the given steps to do so:
- Open VirtualBox Manager and select the desired Virtual Machine.
- Click on the Settings.

- Go to the Advanced tab within the General section.
- Choose the Bidirectional option from the Shared Clipboard: dropdown menu.

- Select the same option from the Drag’n’Drop: dropdown menu situated below.
- Click on the OK button.
- Restart VirtualBox, power on your Virtual Machine, and check if it works.
Restart VirtualBox Client
Users have reported copy-paste not working for guest OS of VirtualBox even after installing guest addition and changing settings to bidirectional. To fix it, you can manually restart your VirtualBox client, or you can run the following commands on your Ubuntu guest in the terminal:$ killall VBoxClient$ VBoxClient-all
Switch Virtual Box Version
Users have reported issues with VirtualBox 6.1.4 version while trying the copy-paste feature, even if they had already enabled it. This might be a bug of that particular version. Thus, it is recommended to either downgrade/roll back to an earlier stable version, which in this case is VirtualBox 6.1.2. Or you can download the latest version available.
Use Shared Folders
If nothing fixes the copy-pasting issue, you can try an alternative by using a shared folder to transfer files. Whichever file you want to copy and paste from the host machine to your VirtualBox can be placed within a folder. And that folder can be used from the Virtual Machine as a Shared folder. Follow the steps mentioned below to do so:
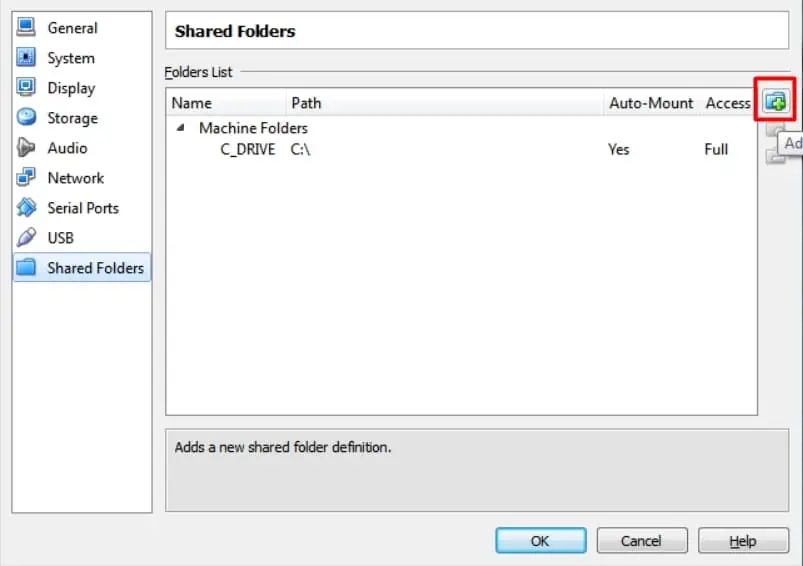
- Go to Devices>Shared Folders
- Within the Shared Folder Settings, click add new folder icon.

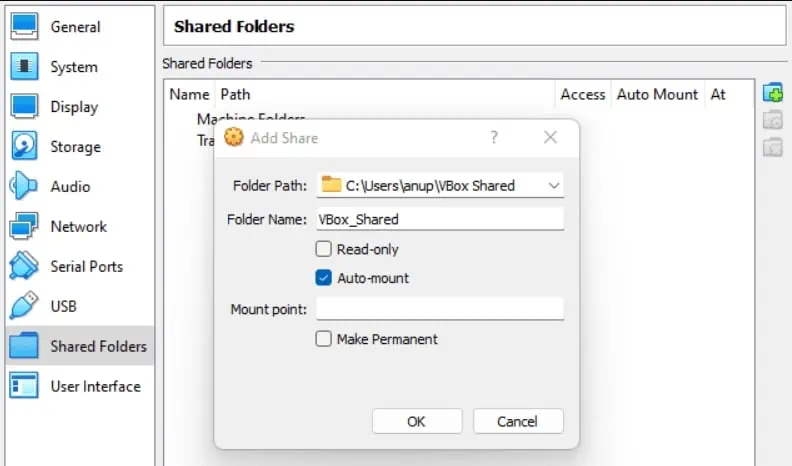
- Browse and choose the desired folder of your host machine by selecting Other in Folder Path:
- Check on the Auto-mount and click on the OK button.

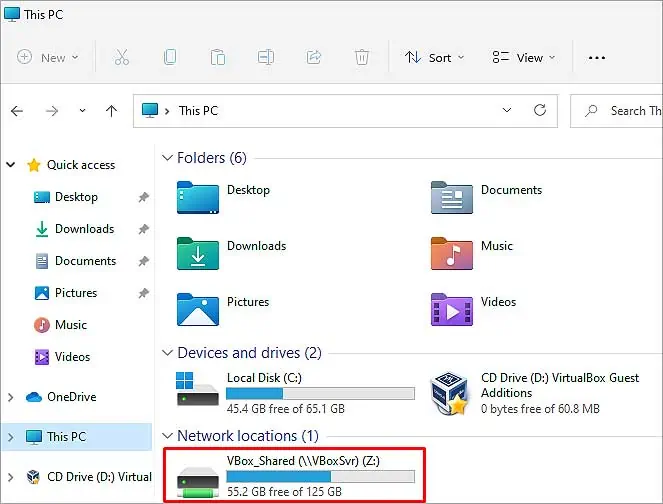
- The shared folder on the host system will be the one you specified in Step 3. The folder should appear in the Guest OS as a new drive.


