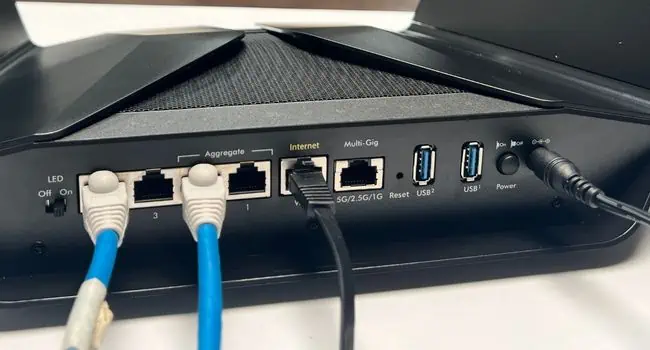
If you examine the ports on your networking devices, you’ll find at least one port that connects you to the internet. Cable routers have a WAN port used for connecting to a modem. On the other hand, DSL routers come with an ADSL port (for connecting the phone line to the router) or PON (for fiber-optic connection directly from the ISP) port.
In either of these routers, you might encounter problems with the cable connection or misconfigured network settings. This can lead to a WAN Connection Error in different forms.
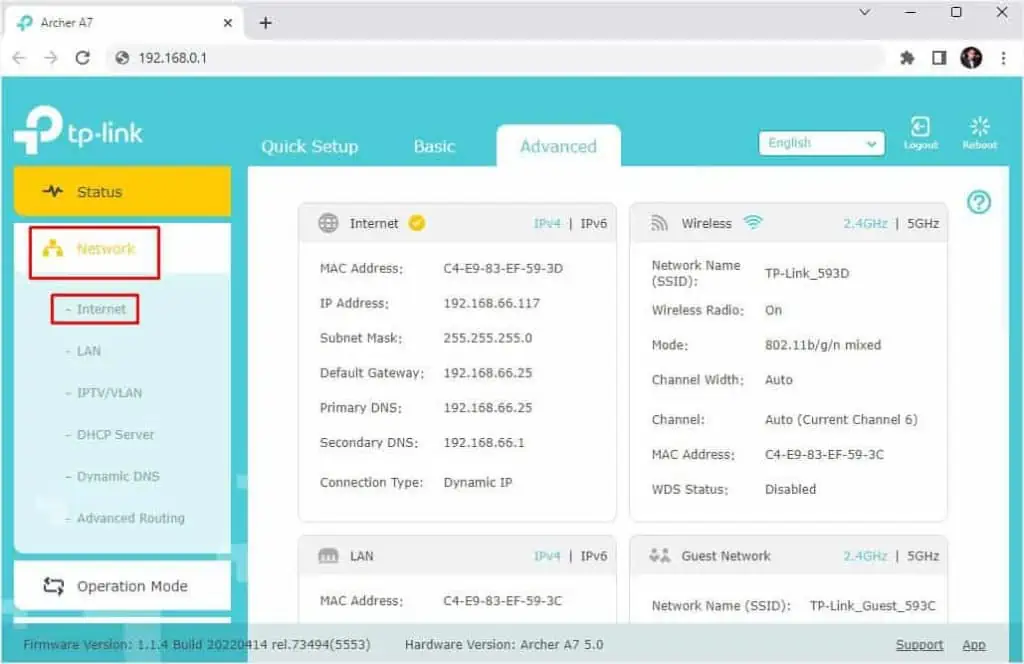
Most users claim their WAN parameters do not show on the router’s configuration page. When this happens, you’re unable to use the internet, and even the dedicated LED on your router stops blinking.
Note: For demonstration, we have used TP-Link Archer A7 in this article. The steps might vary for other models and brands.
Basic Troubleshooting
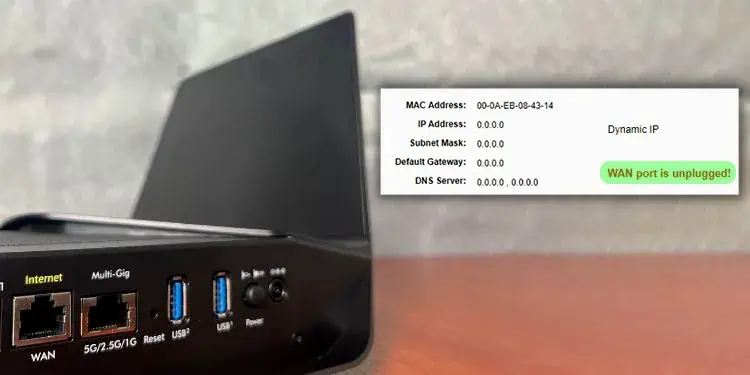
- If you encounter a ‘WAN Port is unplugged’ error in the Status section, make sure the ethernet cable is securely plugged into both the router and modem ports. Try reconnecting and see if this solves the problem.
- If you do not have a modem and only a router with PON or ADSL port, try reconnecting the fiber optics or RJ-45 connector.
- Check the LED on both Internet and PON. If it’s not blinking, there’s probably an issue with the ISP or your networking device.
- Sometimes, a simple restart can fix the issue. So, try turning off the device, wait for a few seconds, and turn it back on.
Power Cycle Your Networking Devices
If the aforementioned troubleshooting tips didn’t work out, we recommend power cycling both the router and modem. This will fix all types of software glitches by reestablishing internet connectivity.
- First of all, disconnect all the devices that are connected to your router’s LAN ports.

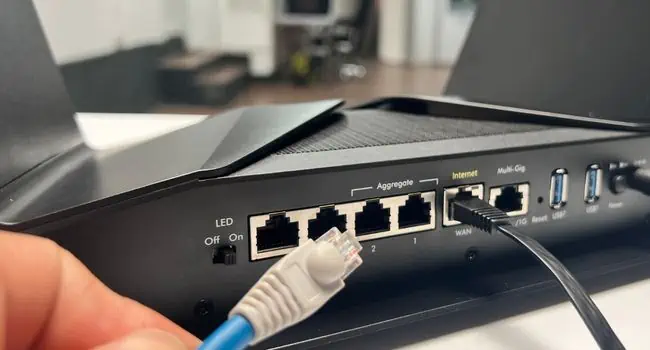
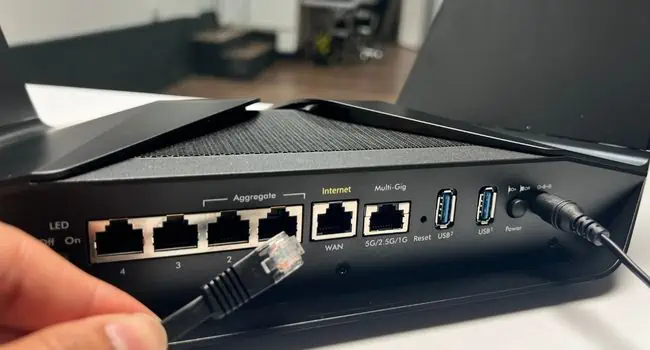
- Then, unplug the ethernet cable that connects your router to the modem.

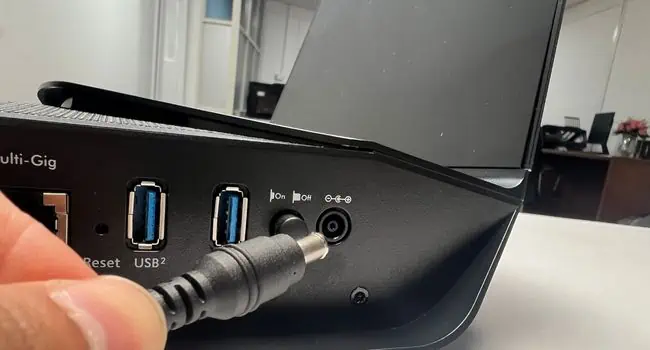
- Now, press the power button on your router and modem to switch them off.
- Next, disconnect the power adapters from both networking devices.

- Wait for about 2 to 5 minutes before reconnecting everything.

- Check the WAN/internet LED on your router again.
- Navigate to your router’s configuration page and identify if the parameters are now showing. If everything is fine, your internet should work.
Clone Mac Address
When you add an additional router to your network, the ISP may not recognize it. This happens because some service providers initially register your primary computer’s MAC address. A simple workaround to this problem is to clone the MAC address.
- Open your web browser and use the LAN IP to open your browser’s configuration page.
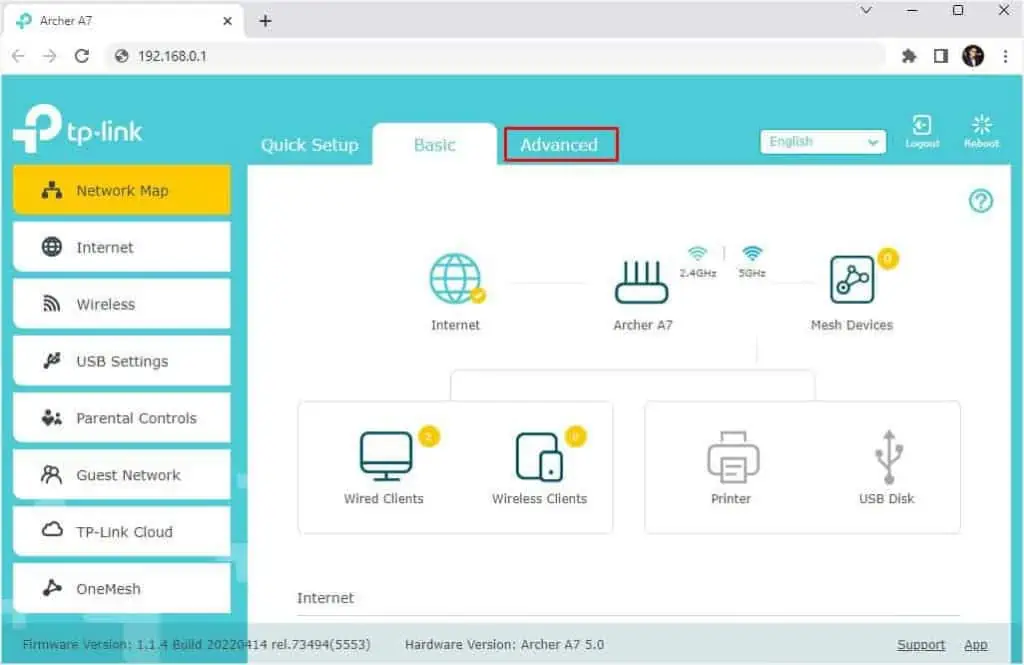
- Then, get to the Advanced option.

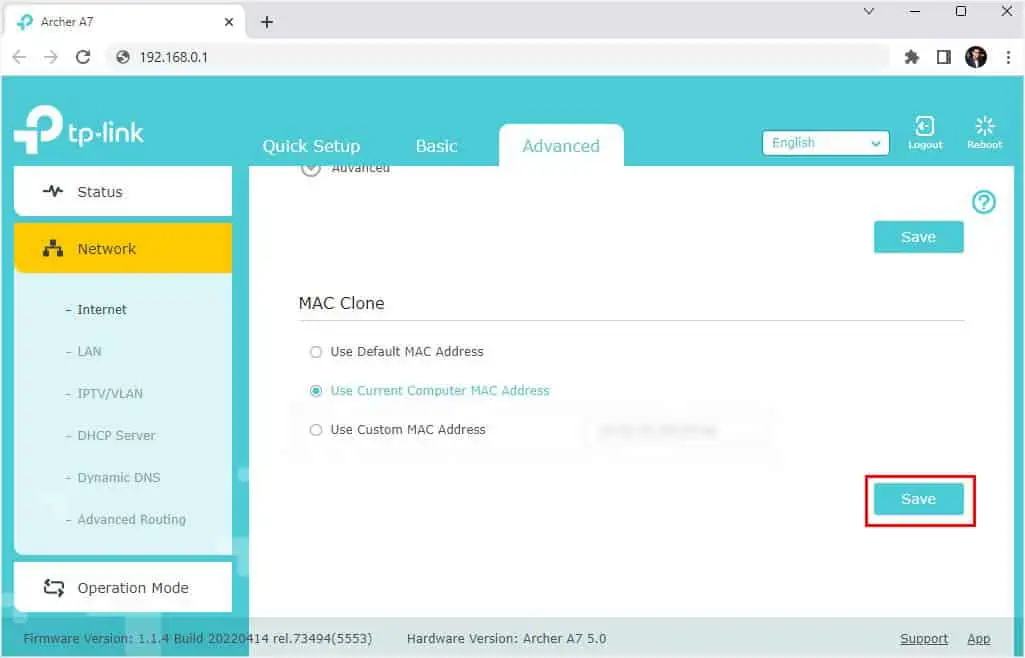
- Now, expand Network and pick Internet/WAN.

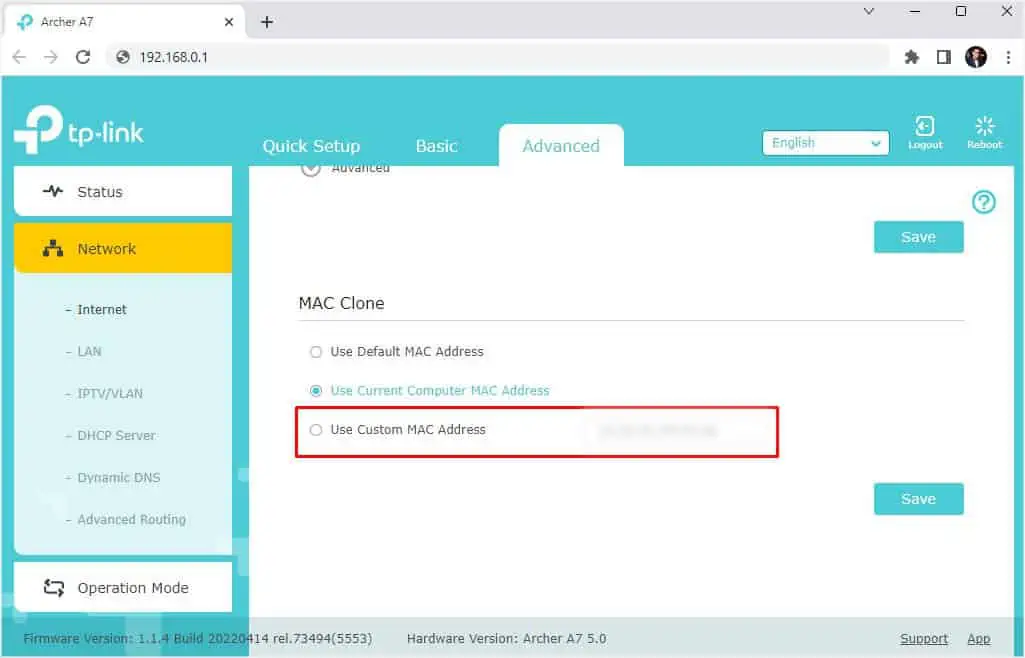
- Look for the MAC Clone section.
- By default, it’s set to Default Mac address. Change this to your PC’s MAC address.

- In case you do not have such an option, select Use Custom Mac Address and input the appropriate one. To find yours, here’s what you need to do:
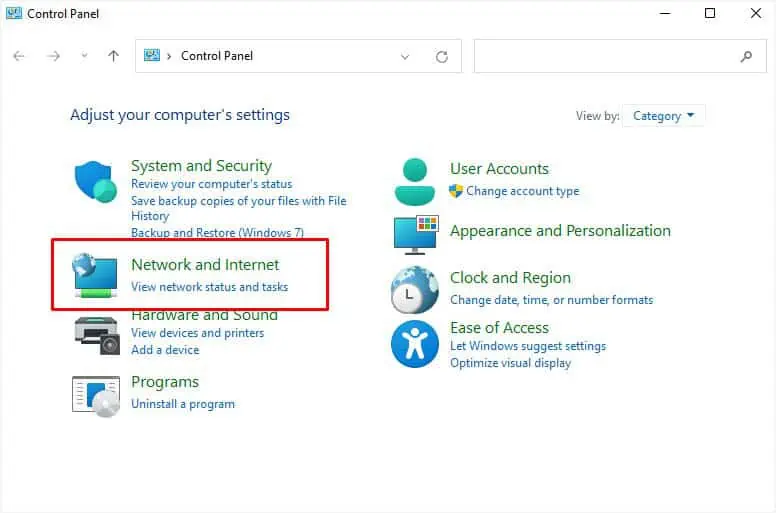
- Open Control Panel.
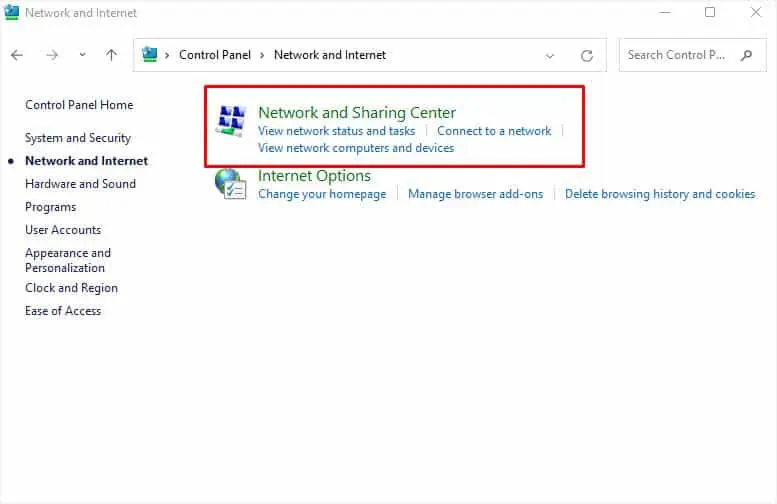
- Go to Network and Internet.

- Select Network and Sharing Center.

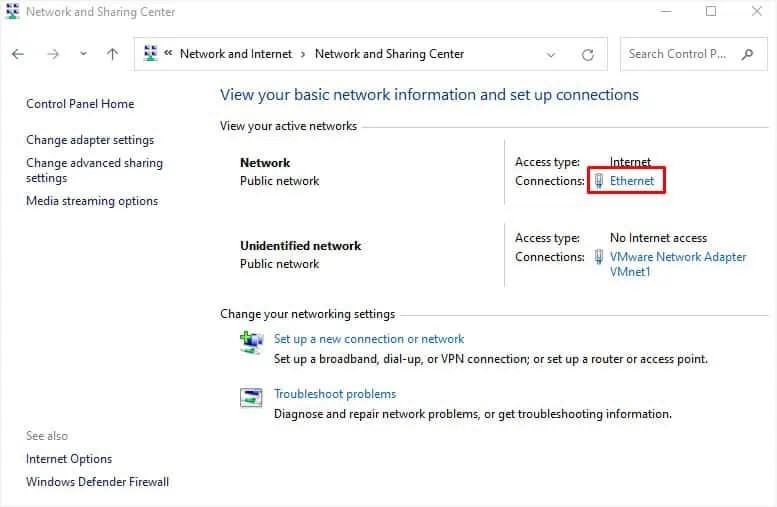
- From the View your active networks section, select your current connection.

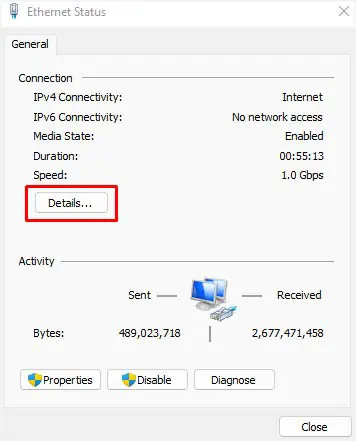
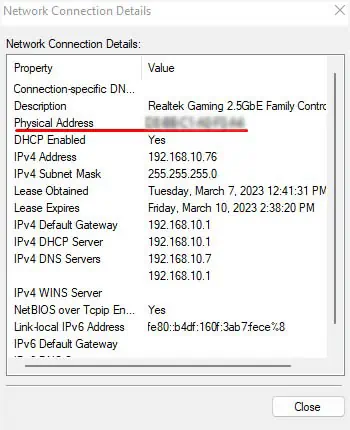
- Once the Ethernet Status field pops up, press the Details button.

- In the new dialogue box, check the Physical Address field. This is your PC’s MAC Address.

- Finally, click on Save and check if the issue is resolved.

Perform a Quick Setup
If MAC cloning didn’t help you out, you could try setting up the router. Most router configuration pages have a dedicated section to do this. This way, you do not have to reset the device.
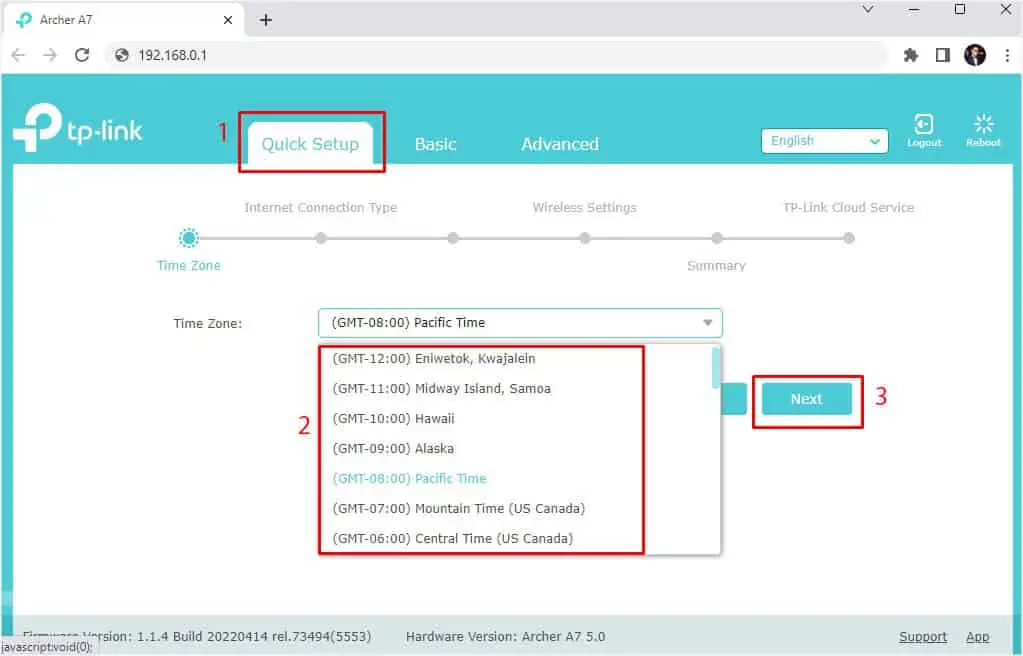
- Get to the Quick Setup section, as shown below. The location varies based on your router model.
- Select your Time Zone and hit Next.

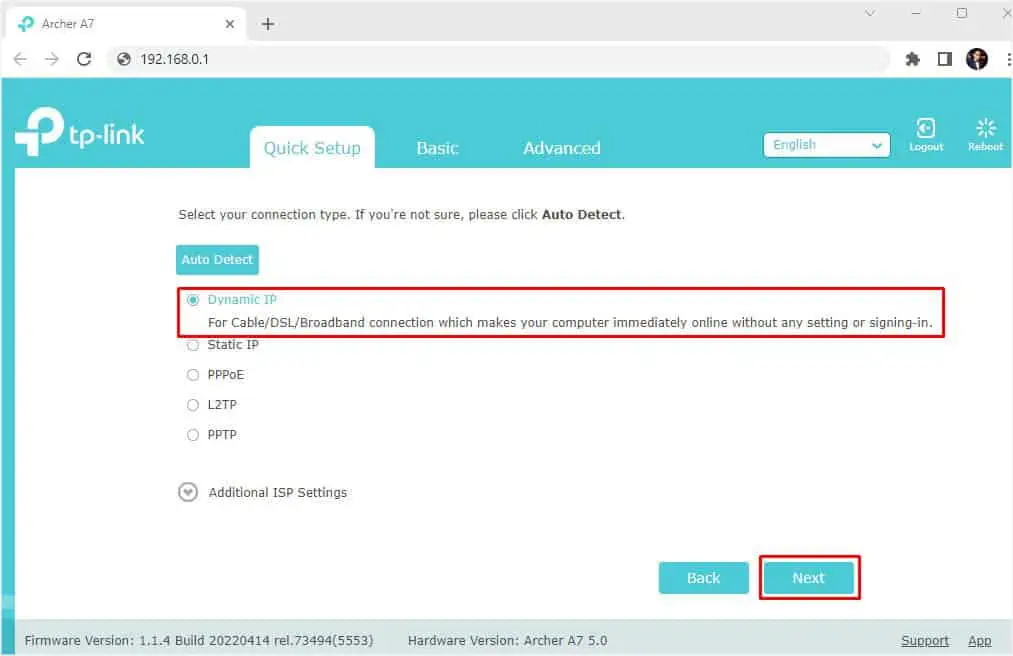
- Next, pick Dynamic IP and press Next.

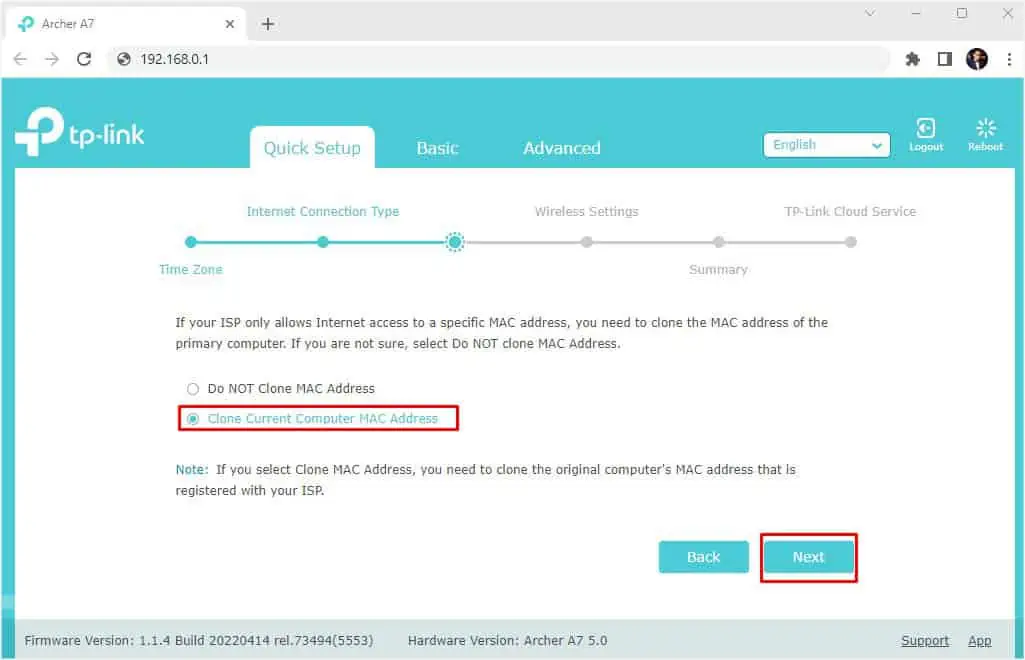
- Then, choose Current Computer Mac Address and tap Next.

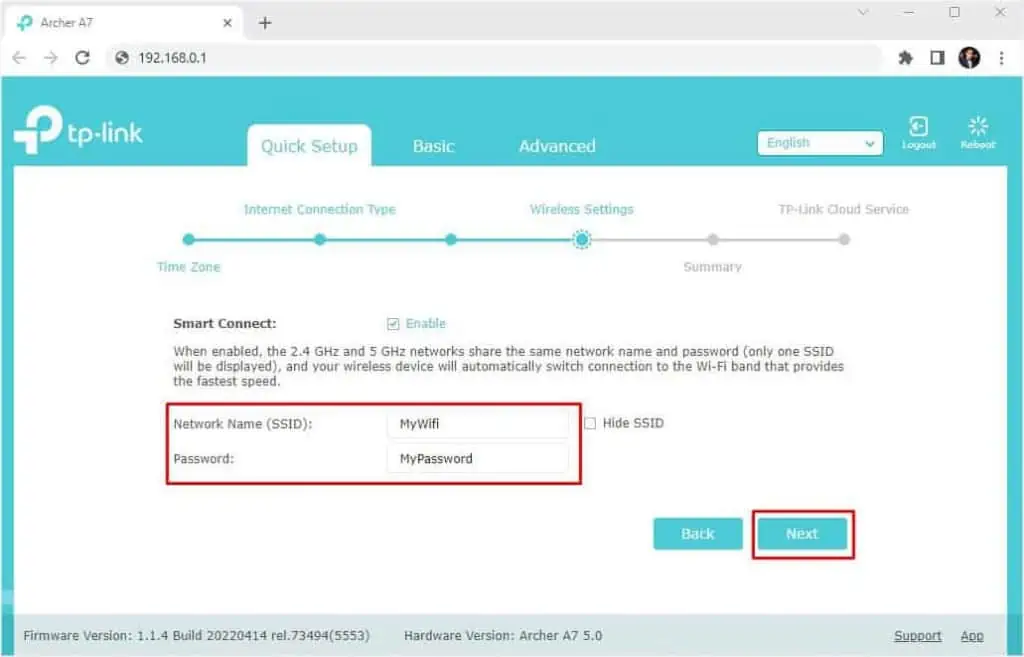
- Now, set your network’s name and password for Wi-Fi.

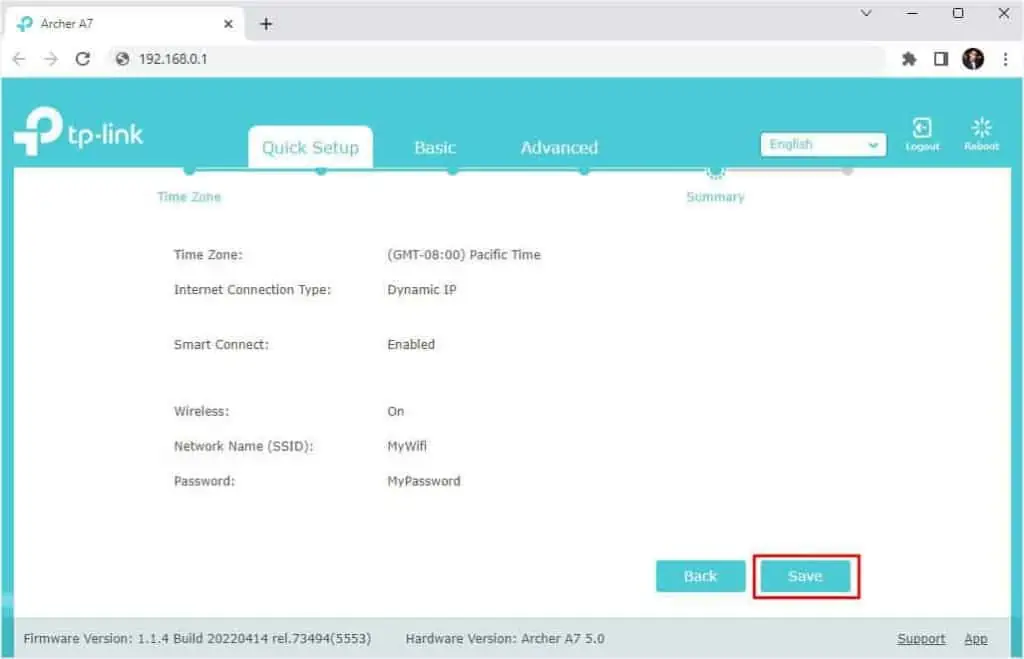
If your laptop supports 5Ghz bandwidth, you get two options. In such cases, you can even disable 2.4 GHz. Once done, click on Next. - In the Summary section, press the Save button.

- Wait for a few seconds until the quick setup is complete.
- Now, you can log in to your TP-Link account. Otherwise, simply choose Log In Later.
- Hit the Finish button and you should be back on the configuration page. Here, check whether the WAN parameters are now showing and also ensure there’s no error message.
Additional Tip: You can even perform a router reset using the dedicated button or directly from the configuration page. Then, set up the router from scratch and check if the problem resolves.
Perform Firmware Upgrade
While some routers check and upgrade the firmware automatically, others need to be updated manually. If you’ve used the device for too long, we highly recommend doing so:
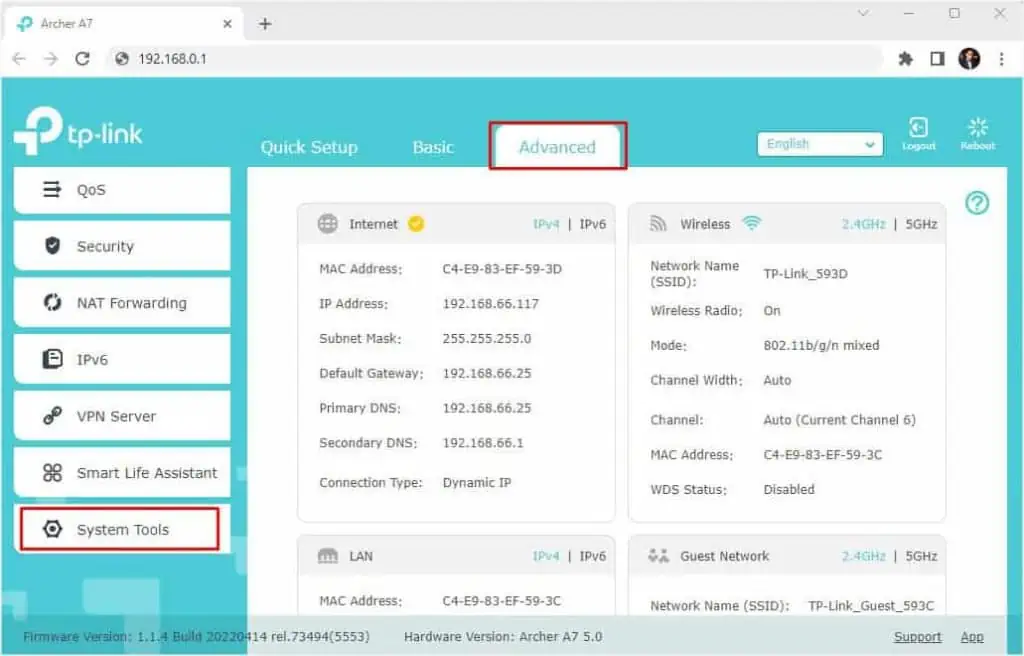
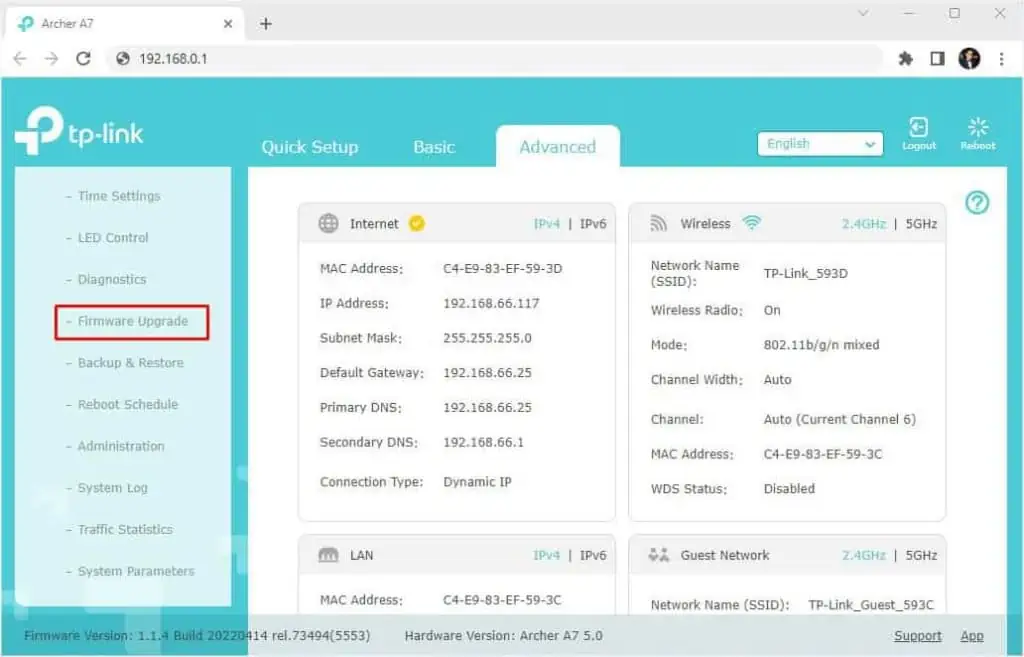
- Switch to the Advanced tab on your router’s dashboard.
- From the left pane, expand System Tools.

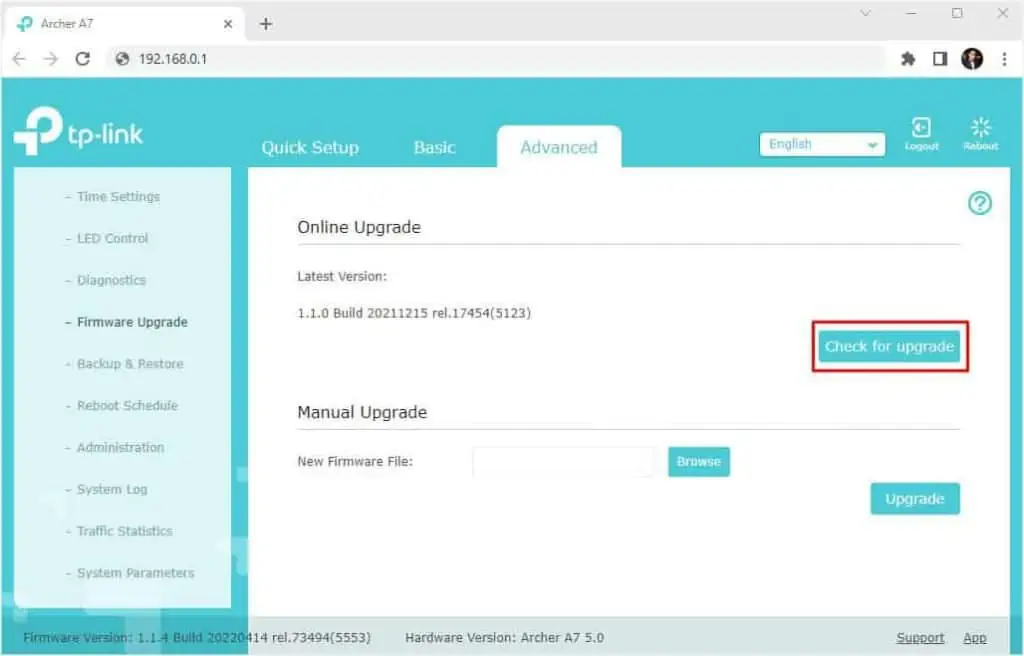
- Then, pick Firmware Upgrade.

- Under Online Upgrade, click on Check for upgrade.

- Wait until an available update pops up. Hit the Firmware Upgrade button and the update should start.
- After you have upgraded your laptop’s firmware, try reconnecting to the network and check if the issue prevails.
Call Your Service Provider
Fiber breakage or power surges are common, and they can lead to internet failures or even damage your networking components. So, the final and best option to fix the WAN connection error would be to contact your ISP.
They will look into the problem in much more detail. While you’re at it, don’t forget to mention the troubleshooting you have done from your side.

