After upgrading to the 22H2 version of Windows 11, some users reported that their Wi-Fi disconnects automatically quite often. A similar issue was also reported in some Windows 10 devices a few years back.
The problem mostly affects Windows devices with Intel Wi-FI 6 AX200 wireless drivers. Microsoft has rolled out an update, KB5020044, to deal with such connectivity issues. Sometimes just updating Windows won’t fix the problem immediately—you might need to reconfigure some wireless network settings or even fix the drivers.
Troubleshoot Connectivity Issues
Before we proceed with the windows related fixes, it’s good to ensure that the wireless connection is working well.
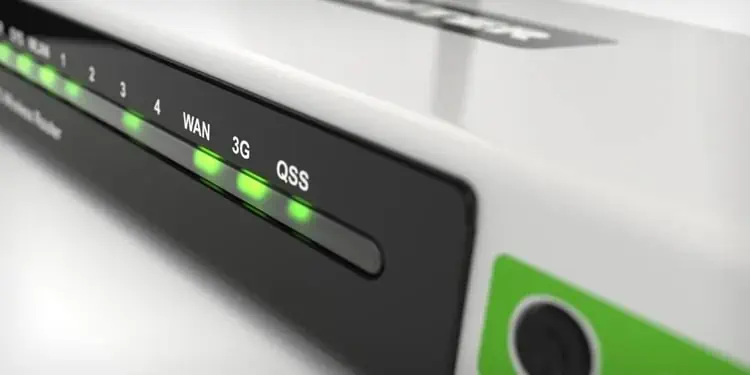
- Most Wireless Access points (AP) or routers have a LED indicator for WLAN or Wi-Fi that denotes the wireless network status. You need to, first of all, verify that these LEDs are flashing normally. If you see no lights or abnormal flashes in these indicators, there’s something wrong with the router itself.
You may also have to consult the router’s user manual to get the details of these LED indicators.
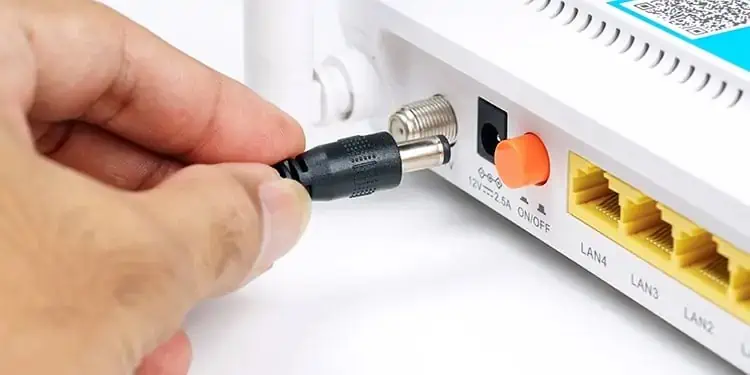
- Usually, power cycling the router usually solves them. For this, power down the router and leave it off for a minute, then turn it back on. While you are at it, you can try restarting the computer and then try connecting to the Wi-Fi.

- Most of the routers can support connections of up to 250 devices at once. However, when more devices are connected at once, there will be more competition for air-time. This could cause the Wi-Fi disconnects on its own time and again. Disconnect some of the devices and see if this solves the problem.
- Your Windows device must be within the range of the router or AP’s coverage. Also, look out for any physical interference in the surrounding that can weaken the wireless signals.
You can use a Wi-Fi analyzer app to test signal strength in different corners of your home to achieve the best coverage area. If the Received Signal Strength Indicator (RSSI) reading is -70dBm or lower, this indicates weak signal strength.
Try getting closer to the routers for greater signal strength and see if the Wi-Fi disconnects. - If you are connected through a Wi-Fi dongle, you need to assure that the peripheral is connected properly.
Perform Windows Update
Windows users have experienced issues with the Wi-Fi drivers after upgrading to the latest Windows 11 22H2. You can roll back the update, but there’s a time limit to it.
However, many issues pertaining to the Wi-Fi were later fixed through the update KB5020044, so you won’t necessarily have to opt for a rollback.
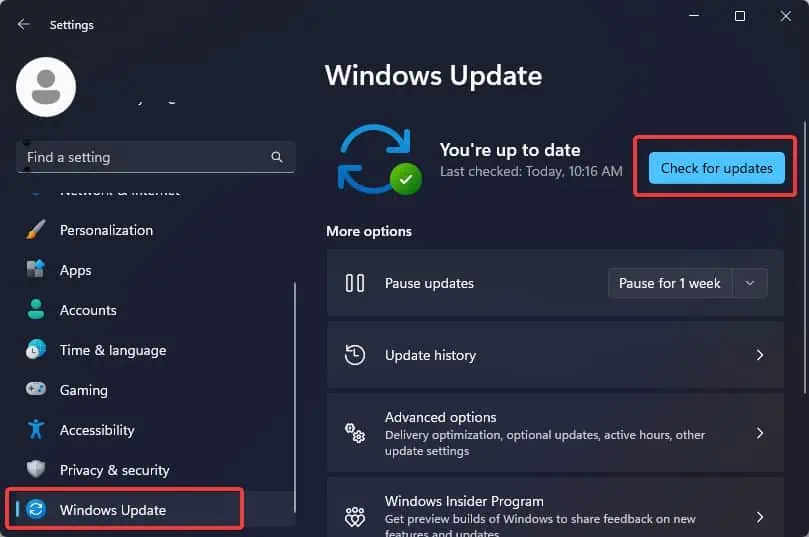
- Press the Windows key + I to open the Windows Settings.
- Go to the Windows Update section and then click on Check for Updates.

- Follow the prompts and install the updates.
Run Network Troubleshooter
Network troubleshooter is the first utility you have to use when it comes to diagnosing and fixing problems related to Wi-Fi connectivity. Although the troubleshooter does not always assure to fix the problem, it does sometimes help to identify the real reason behind the problem.
- Press Windows key + I to open Windows Settings.
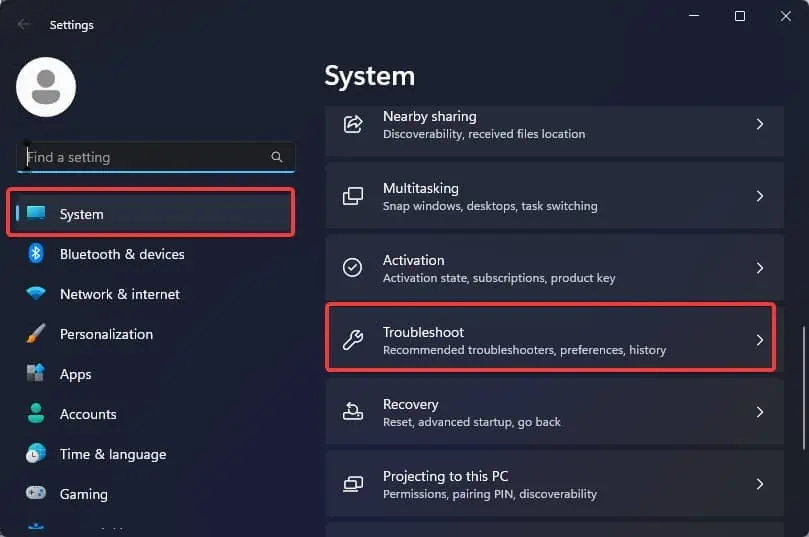
- Go to System > Troubleshoot.

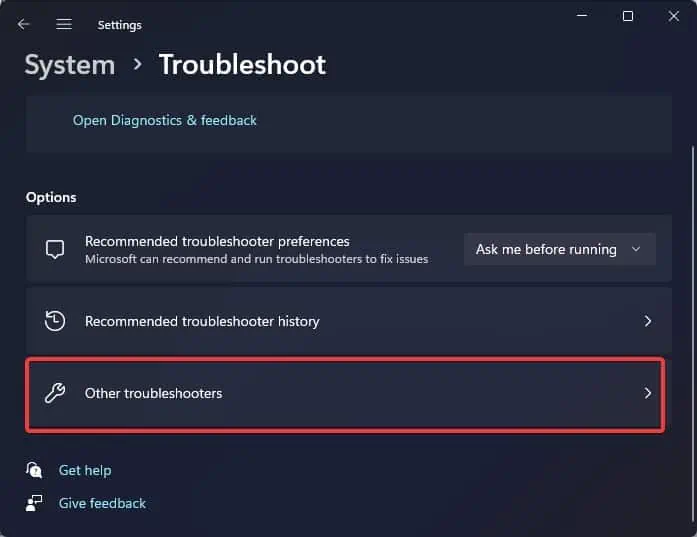
- Click on Other Troubleshooters.

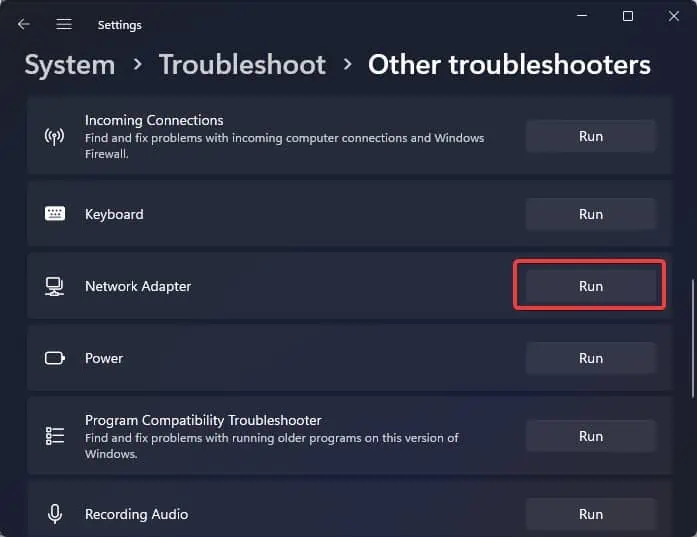
- Find Network Adapter and click on Run.

- Follow the on-screen instructions to complete the troubleshooting. If Windows finds some problem with the wireless network adapter, it will recommend relevant fixes to solve it.
Check the Roaming Aggressiveness Level
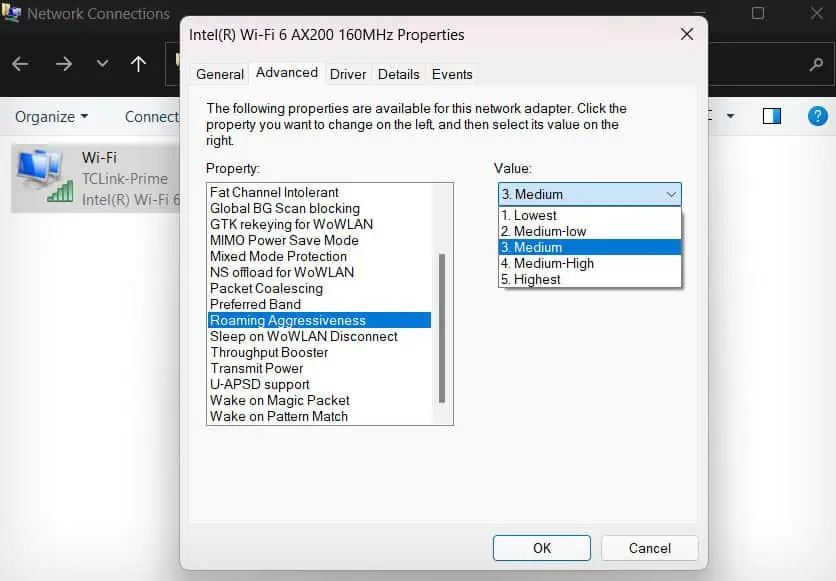
A feature known as Roaming Aggressiveness is responsible for switching between wireless networks based on signal strengths. If aggressiveness is set to high, the Wi-Fi adapter will keep scanning and switching between the networks even when the signal strength is good.
However, if it is set to low, the adapter hardly makes a switch even if the signal strength is poor.
By default, Windows sets the roaming aggressiveness to medium. However, this setting might have been misconfigured and set to high which might be leading to this issue.
- Press Windows Key + R, type
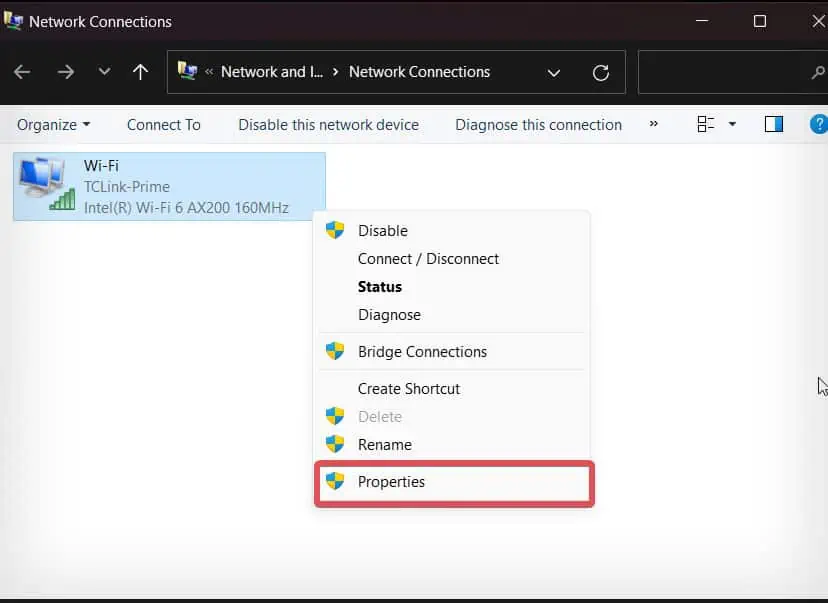
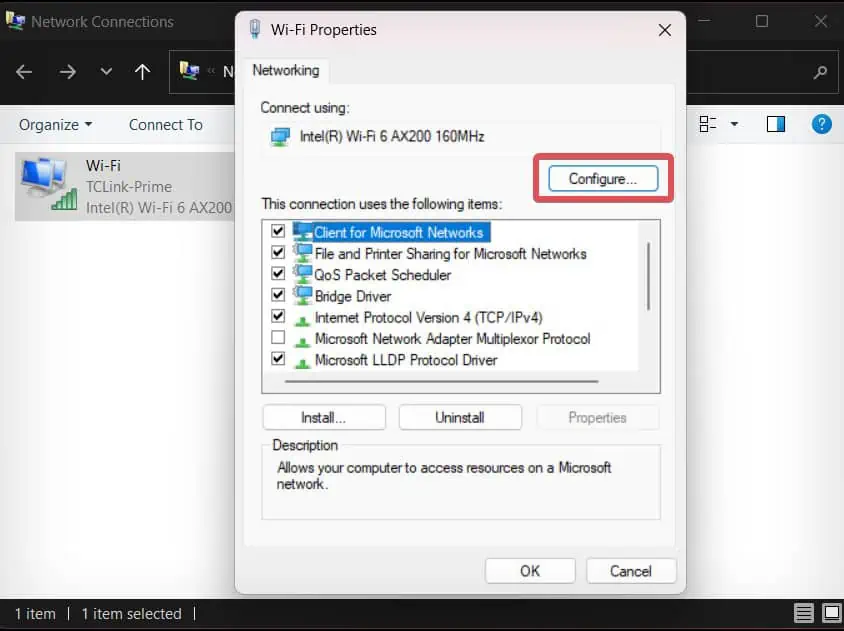
ncpa.cpl, and hit Enter. - Right-click on the Wi-Fi and select Properties.

- Click on the Configure Button.

- Go to the Advanced tab.
- From the Property section, select Roaming Aggressiveness and check its value. It is usually set to Medium. If it is as High, reset it to Medium.

- You can also try changing it to Low for some time to see if this fixes the connectivity problem.
- Finally, click on OK to save the changes.
Restart WLAN Autoconfig Service
Wireless LAN service is the feature that selects and automatically connects to the Wireless network and also configures necessary network settings accordingly.
If this service isn’t functioning normally, you can have frequent network disconnections. You can restart the service to make it function from the scratch and fix the wireless network issues.
- Press Windows Key + R, type
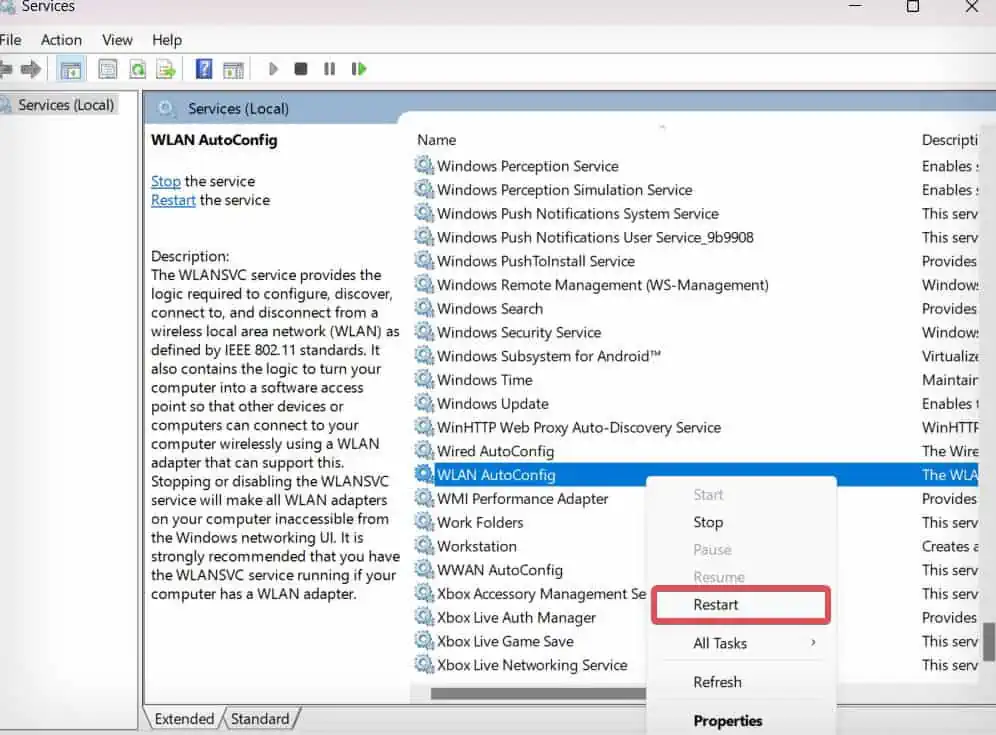
services.msc, and press Enter. - Find the WLAN AutoConfig service and right-click on it.

- Select Restart.
Configure the Wireless Power Management Settings
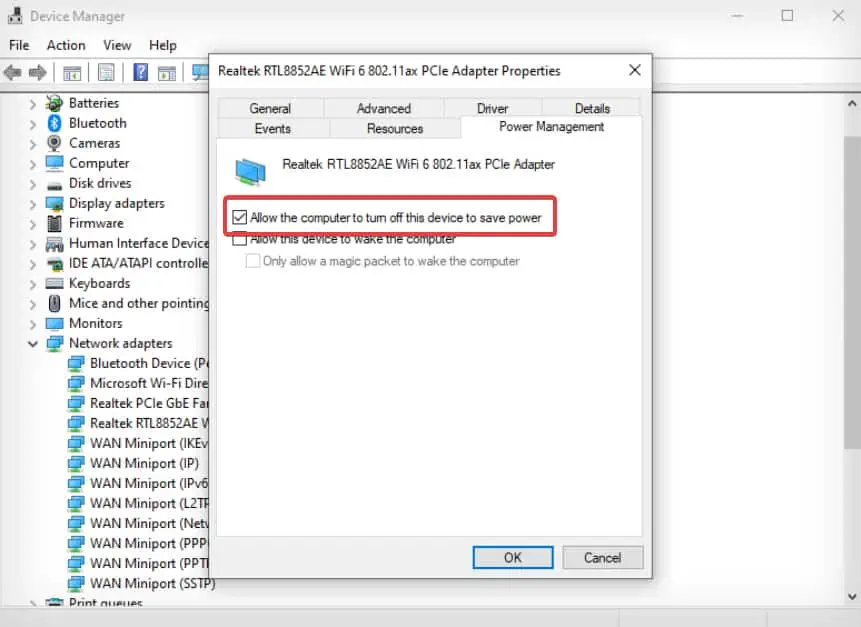
The power management settings on Windows manage the power received by the hardware peripherals on the computer during Sleep and hibernation. If the power configuration is set to allow the computer to turn off the Wi-Fi adapter in order to save power, you can experience frequent Wi-Fi disconnection.
- Press the Windows key + X, and open the Device Manager.
- Click on Network Adapter to expand the list of network devices under it.
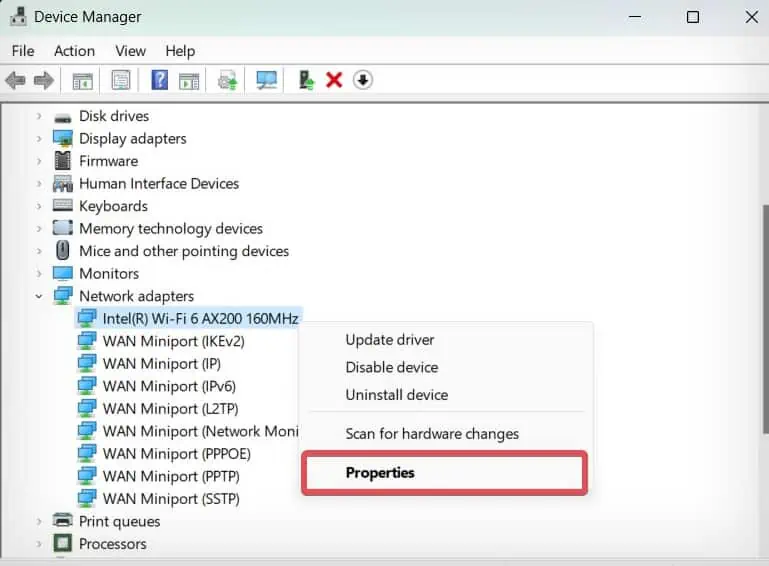
- Right-click on the Wireless network driver and select Properties.

- Go to the Power Management tab and uncheck the Allow the computer to turn off this device to save power option.

This setting might be missing on some of the Windows devices. Here’s how to bring it back.
- Press Windows Key + R, type
regeditand then press Enter. - Navigate to this registry location.
Computer\HKEY_LOCAL_MACHINE\SYSTEM\CurrentControlSet\Control\Power
- See if there’s an entry named as
CsEnabled. Double-click to modify the registry entry.
- If there isn’t an entry labeled as such, right-click on the empty space on the right side of the registry editor window. Then, Select New > Dword (32-bit) Value.

- Name the new entry as
CsEnabledand then open it.
- Set the value to “0” and click on OK.
- Restart the computer for the changes to take place.
Reset Network Settings
If the Wi-Fi connectivity does not still get back to normal and you still are experiencing a similar disconnection issue, you can also try resetting the network settings too. If misconfigurations of some network settings have triggered this problem, resetting them to factory default can certainly fix the problem.
- Press the Windows key + I to open up Settings.

- Go to Network & Internet > Advanced network setting.

- Open Network reset.

- Click on the Reset now button.

- Once the reset is complete, restart the computer and try connecting to the Wi-Fi.
Update Wi-Fi Driver
Outdated drivers are known to create different network-related problems that get solved after updating the adapter drivers. So, you can try updating the wireless driver and see if it solves the problem.
- Press the Windows key + X, and open Device Manager.
- Click on Network Adapter.
- Right-click on the Wireless device and select Update driver.

- Select Search Automatically for drivers and follow the prompt. Windows will search for the latest drivers and install them.

Note: Some laptop manufacturers roll out their own updates for wireless drivers. In such a case, you need to manually download the update packages and install them. You can follow this detailed article on our website for a thorough guide on how to update Wi-Fi driver.
If you have encountered this problem after a driver update, you have the option to roll back the driver to its previous functional state.
- Open the Device manager and click on Network adapter.
- Right-click on the Wireless device and select Properties.

- Go to the Driver tab and click on the Roll Back Driver button.

- Follow the prompt and the driver will be reverted to its previous version.
Reinstall Wi-Fi Driver
If none of the given fixes work, we can suspect the corrupted or faulty wireless drivers to cause the wireless connectivity issues. You can reinstall the drivers to eliminate any problems with the drivers.
- Open the Device Manager.
- Click on Network Adapters to expand the list of devices under it.

- Right-click on the Wi-Fi device and select Uninstall.

- Again, click on Uninstall to give the final confirmation.
- Restart the computer. While the system is booting up, Windows reinstalls the generic Wi-Fi drivers.
Note: If you are connected to the Wi-Fi network through a Wi-Fi dongle, you might have to reinstall the OEM wireless driver manually by downloading it from the manufacturer’s website.

