In the current age, not a day goes by without connecting to the internet through Wi-Fi. So, it is a serious inconvenience if you are not able to enable Wi-Fi on your system. Yes, you can use the internet through an Ethernet connection. However, it really hinders the portability of your device, especially if you use a laptop.
This issue usually happens due to problems with your Wi-Fi drivers and services. However, there may be other causes as well. In this article, you can find all possible reasons along with their corresponding solutions.
Causes for WiFi Not Turning On in Windows
Here are the potential reasons why you are not able to enable WiFi on a Windows system:
- Wi-Fi device or driver is disabled.
- Abrupt power failure affecting the Wi-Fi adpater.
- Important services not starting or running.
- Buggy or missing Wireless LAN drivers.
How to Fix WiFi Not Turning On inWindows?
First, restart your PC a couple of times and check if you still encounter the issue. If you do, follow the possible solutions below to resolve your issue.
Check Physical Wi-Fi Switch
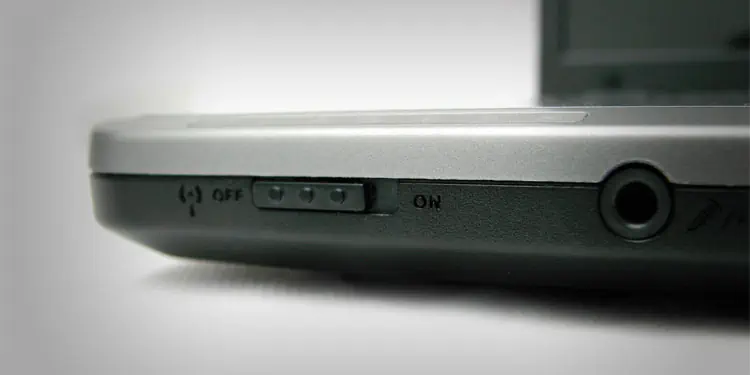
Some laptops also come with physical buttons for enabling/disabling Wi-Fi. So you need to check for such a switch and make sure it is On. You can check on the official website of your laptop to know whether such a button exists as well as its location.
Most laptops also have the Wi-Fi toggle function integrated with a function. You can also press it to enable your Wi-Fi if it’s disabled.
Enable Wi-Fi from Control Panel
You won’t be able to enable Wi-Fi if it is disabled on your settings. You can check if it’s disabled as well as enable it from the Control Panel. Here’s how you can do so:
- Open Run by pressing Win + R.
- Type
ncpa.cpland press Enter to open Network Connections. - If Wi-Fi is disabled (grayed out), right-click on it and select Enable.

- Otherwise, you can try resetting it. First, right-click on it and select Disable. Then, right-click on it again and select Enable.
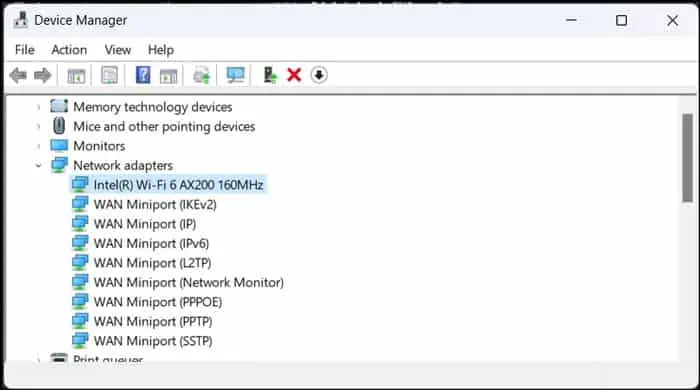
You can also enable Wi-Fi from the Device Manager (devmgmt.msc on Run) > Network Adapters.
Enable and then Disable Airplane Mode
You can also try enabling and then disabling airplane mode if you encounter this issue.
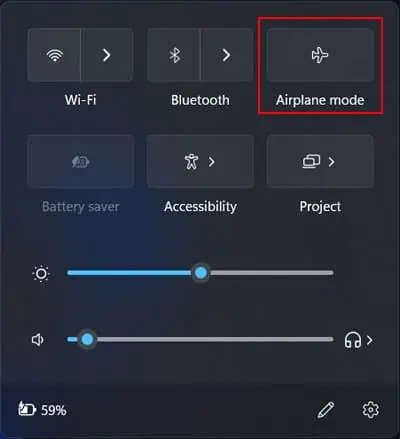
It is possible to enable Wi-Fi in airplane mode, but turning airplane mode on always disables Wi-Fi. So you can toggle the mode On and Off to refresh the option for enabling Wi-Fi and resolve some temporary issues.
You can toggle the mode using the steps below:
- Click on the network icon on your Taskbar.
- Click on the airplane icon.

Power Cycle PC

Another method you can try is to power cycle your PC, especially if you started encountering the issue after a power failure. Power cycling drains any residual charge from the capacitors in the device and properly refreshes the hardware devices, including Wi-Fi adapters.
Here’s what you need to do:
- Shut down your system and remove all peripherals.
- Disconnect the power cable and removable battery (if available).
- Press and hold the power button for 30 seconds.
- Reconnect necessary devices like keyboard and mouse along with the power cord or the battery.
- Boot up your PC and check if the issue resolves.
Run Network Adapter Troubleshooter
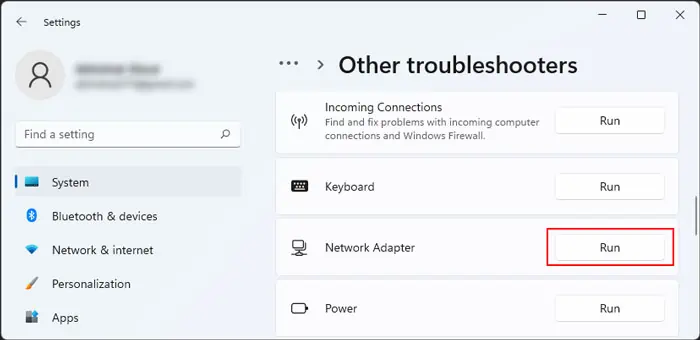
Windows comes with dedicated troubleshooters to troubleshoot errors in the system components. It also has a Network Adapter troubleshooter, which you can run to resolve many issues with the network devices such as Wi-Fi adapters. Here’s how you can run this troubleshooter:
- Open Run.
- Type
ms-settings:troubleshootto open Troubleshooter Settings. - Click on Other troubleshooters or Additional troubleshooters.
- Select Run next to Network Adapter or Network Adapter > Run this troubleshooter.

Reset Wi-Fi Service
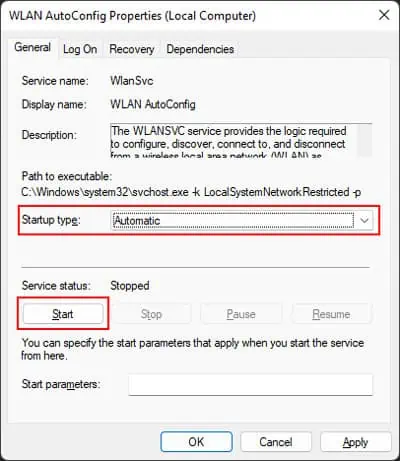
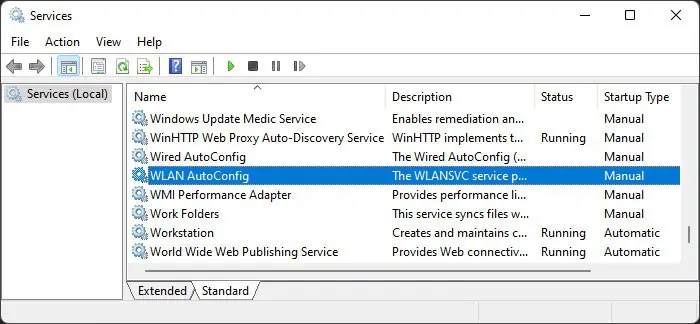
You also won’t be able to enable Wi-Fi if the Wireless service, WLAN AutoConfig, is not running on your system. Additionally, it is also possible for the service to get stuck, leading to the same issue even if it’s running. So you need to start the service if it’s not running and reset the service by disabling and then re-enabling it if it is running. To do so,
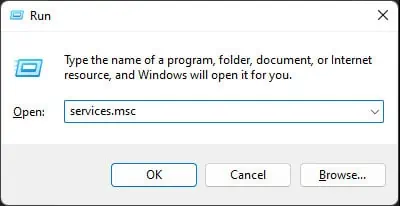
- Open Run.
- Type
services.mscand press Enter to open Windows Services.
- Look for and double-click on WLAN AutoConfig.
- If the Startup type is Disabled, set Startup type to Automatic and click on Start, then OK.

- Otherwise,
- Set Startup type to Disabled and click OK.
- Restart your PC and open Windows Services again.
- Double-click on WLAN AutoConfig and set the Startup type to Automatic.

- Click on Start and then OK.
Now, check if you can enable Wi-Fi this time.
Update or Rollback Wi-Fi Driver
You may also suffer from this issue due if your Wi-Fi or WLAN driver is outdated or buggy. You need to update it to the latest version to prevent such issues.
On the other hand, if you started encountering this issue recently after a driver or system update, there are likely some unresolved bugs in the software. You can resolve this problem by rolling back the driver.
Here are the necessary steps to determine what you need to do and how you can do it:
- Open Run.
- Type
devmgmt.mscand press Enter to open the Device Manager. - Expand Network Adapters and double-click on your Wi-Fi device.

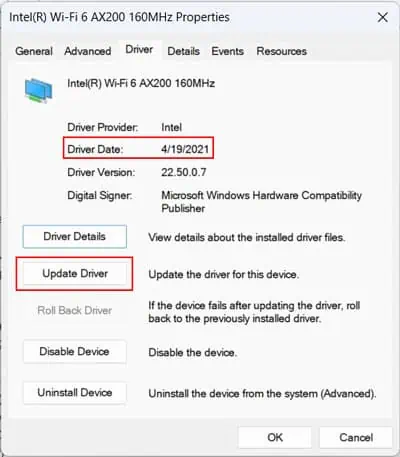
- Go to the Driver tab and check the Driver date.
- If it is not recent, click on Update Driver > Search automatically for drivers.

- Otherwise, select Roll Back Driver and follow the on-screen instructions.
Reinstall Wi-Fi Driver
If you already have the latest driver, you can reinstall it to reset the software and remove any bugs within the software. Here’s how you can do so:
- Open the Device Manager.
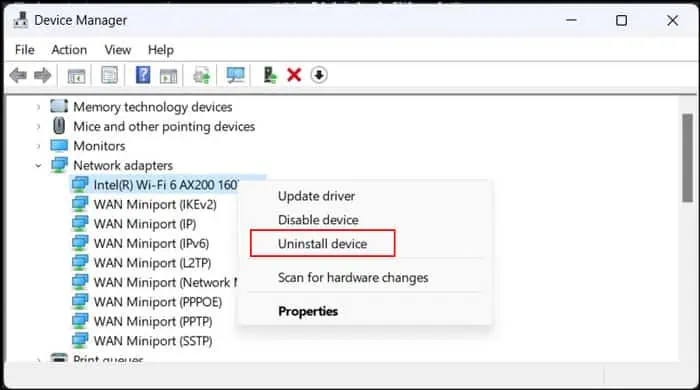
- Expand Network Adapters and right-click on your Wi-Fi device.
- Select Uninstall device > Uninstall.

- Restart your PC. Your system should automatically install the Wi-Fi driver.
Change Network Setup Service Properties
Along with WLAN AutoConfig service, the issue may also occur if Network Setup Service fails to start properly. Unlike the former, this service starts only when you try installing network drivers and while configuring low-level network settings.
So, if you can’t resolve the issue even after updating or reinstalling the wireless driver, you need to make a few changes to this service and perform those tasks again. Here’s what you need to do:
- Open Windows Services.
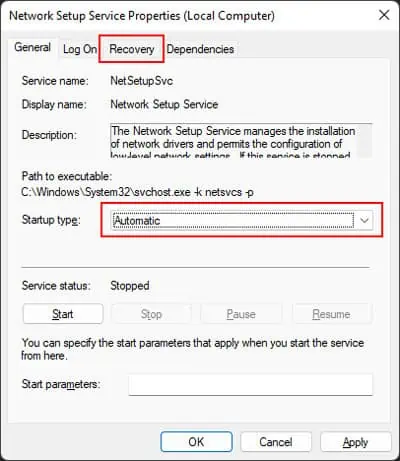
- Look for and double-click on Network Setup Service.
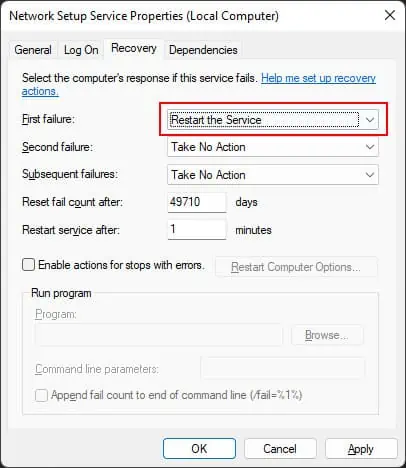
- Set Startup type to Automatic and go to the Recovery tab.

- Set the drop-down box next to First Failure to Restart the Service.

- Click Apply and OK.
Restart your PC and update/reinstall the driver. Then, check if you can enable Wi-Fi this time.
Reset Network Components
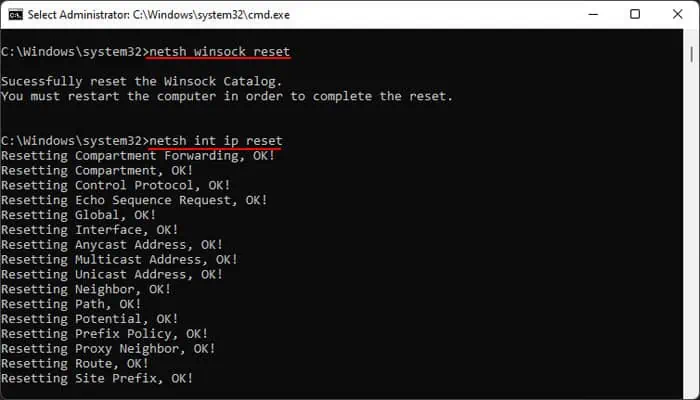
Another possible solution you can try is to reset your network components. Some misconfigured network settings may also be responsible for the issue. You can resolve such issues by resetting the network components. To do so,
- Open Run.
- Type
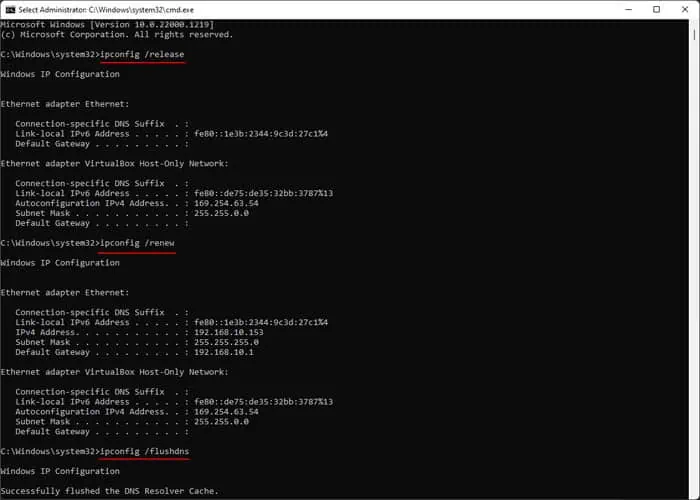
cmdand press Ctrl + Shift + Enter to open the Elevated Command Prompt. - Enter the following commands:
ipconfig /releaseipconfig /renewipconfig /flushdns
netsh winsock resetnetsh int ip reset
Update Windows
The KB4549951 Windows update included a bug that caused many errors, including one that prevented users from enabling Wi-Fi. The KB4559004 update resolves this issue, and Microsoft has already pulled down the previous update. Nevertheless, it is also possible for some future updates to carry such bugs.
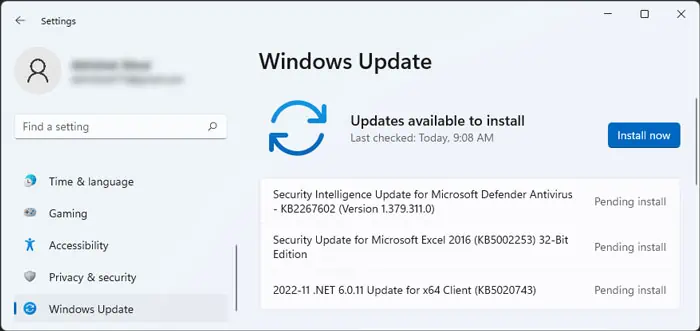
So, we always recommend updating your system to the latest version to avoid such issues, especially if you have a much older system. Here’s how you can do so:
- Open Run and enter
ms-settings:windowsupdateto open Update Settings. - Click on Install now if updates are available and Check for Updates otherwise.

