When you have an active wireless internet, any devices connected to it should automatically work. On mobile and computer systems, connecting to the internet requires many components to function simultaneously.
However, unlike mobile devices, there are a lot of settings you can configure when connecting to the internet on a computer. This includes changing settings like the IP addresses, the network adapter properties, and many more. Incorrect internet settings on your computer might be causing the Wi-Fi to work on a phone but not a computer.
Besides this, you can also configure the router to only provide internet to specific devices, say a phone. This could be why you can only access the internet on your phone but not on a computer.
Why is Wi-Fi Working on Phone but Not the Computer?
As discussed above, you can reconfigure many internet settings on the computer when accessing the internet.
- Incorrect IP address
- Firewall blocking Internet Access
- Router configured to only work on hand-held devices
- Outdated Network adapter Driver
- Computer’s Wi-Fi Adapter disabled
- SSID disabled in the router
Wi-Fi Works on Phone But Not Computer. Here’s How to Fix It.
Although there is a multitude of things that can result in internet issues on your computer, make sure you perform basic troubleshooting steps. These steps include restarting your router and enabling/disabling Wi-Fi on your PC.
Furthermore, laptops will have a physical Wi-Fi button or switch that you need to enable to use Wi-Fi. Make sure that the Wi-Fi on your computer is on.
You can also try connecting the router and the computer using a LAN cable. The issue you face could just be caused due to a low Wi-Fi signal. An ethernet or LAN cable directly connects the computer to the router, resolving said issues.
If these steps do not fix the issue, you can move on to the troubleshooting steps mentioned below.
Run Internet and Network Adapter Troubleshooter
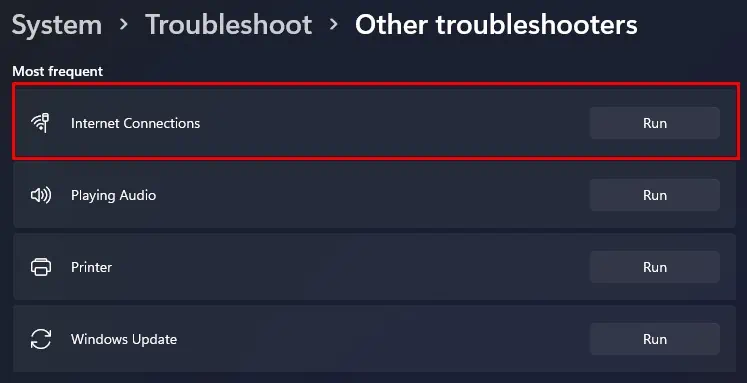
Running the Internet Connection troubleshooter scans your PC for possible problems in network configuration and web connectivity that may be causing the issue. If it finds any problems, the troubleshooter will change the necessary settings to fix said issue.
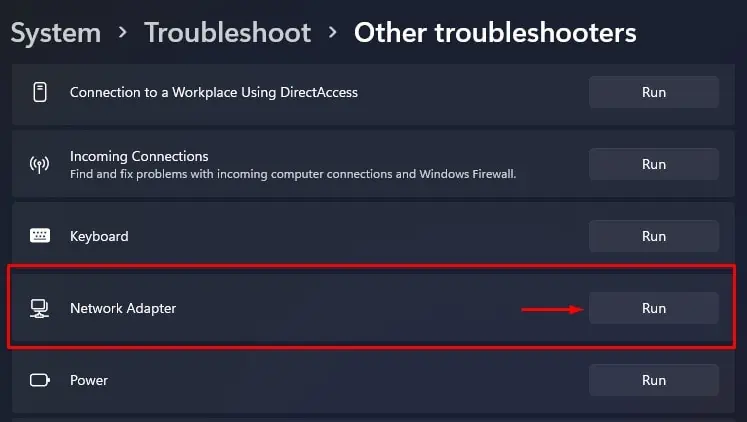
Similarly, network adapter troubleshooter scans and fixes any errors in the network adapter in your PC.
- Press the Windows + I key to open Settings.
- Go to System > Troubleshoot > Other troubleshooters.
- Run Internet Connections troubleshooter.

- Click Troubleshoot my connection to the internet.
- If it finds any issues, it will recommend specific network configurations to fix the problem.
- Now run the Network adapter troubleshooter and follow the troubleshooting steps.

Assign IP Address Automatically
When you connect to a router, it automatically gives you an address. The router then uses this address to identify your computer and connects it to the internet. However, you can also manually set IP addresses, so your PC only uses one dedicated address.
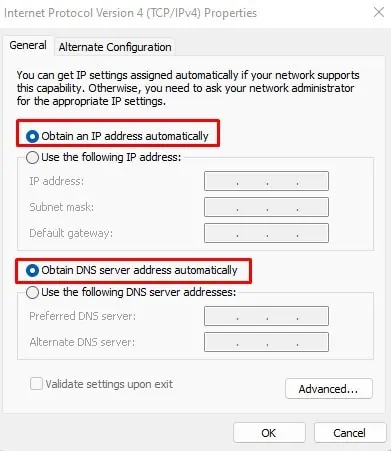
However, setting the wrong IP address may stop the device from accessing the internet via Wi-Fi. To fix this, you need to obtain an IP address automatically.
- Press the Windows + R key to open Run.
- Type
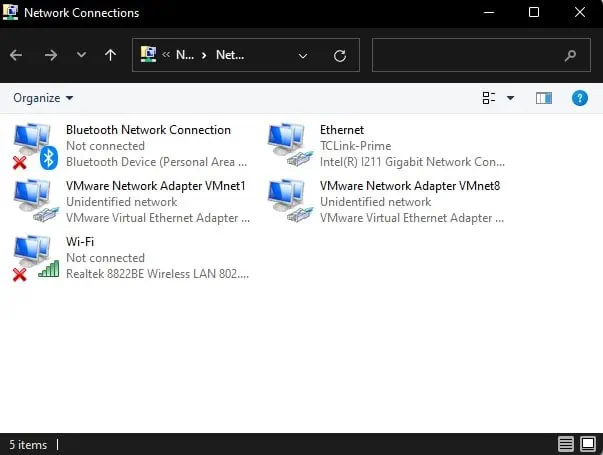
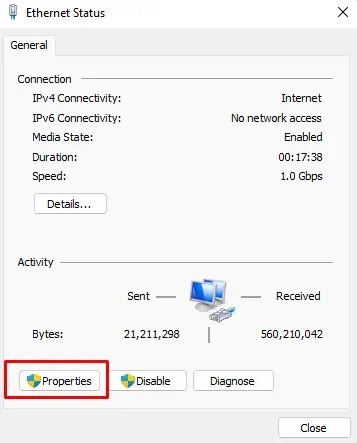
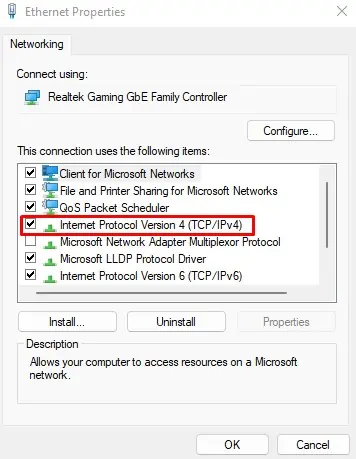
ncpa.cpland press Enter to open Network Connection. - Double-click on either Ethernet or Wi-Fi, whichever the PC is connected to.

- Click on properties.

- Select Internet Protocol Version 4 (TCP/IPv4)

- Set Obtain IP address automatically.

- Select OK.
Reset Network Configuration
When you reset network configuration, it resets the TCP stack and the DNS. By doing this, the computer sets all network-related settings to its original state. Therefore, if any error on network settings was causing the issue, resetting them should fix Wi-Fi not working problem.
You can either reset Network settings using Windows Settings or Command Prompt.
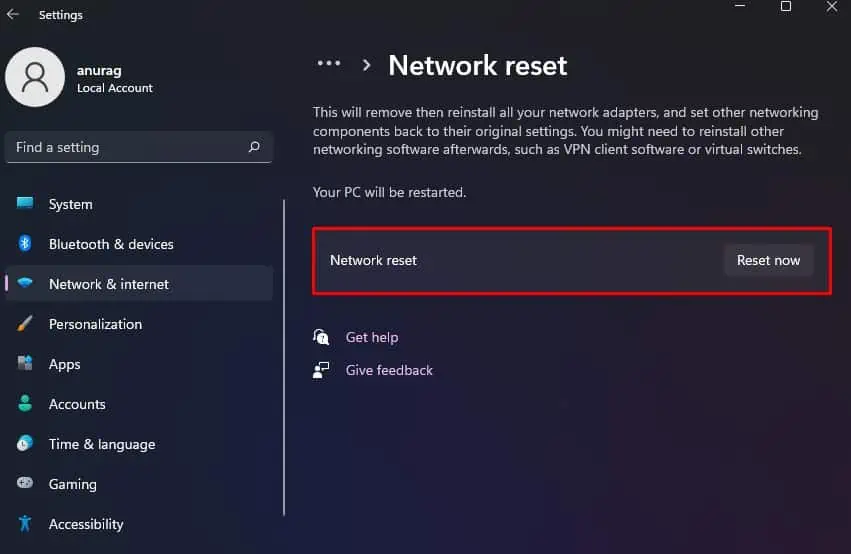
From Windows Settings
- Press the Windows + I key to open Settings.
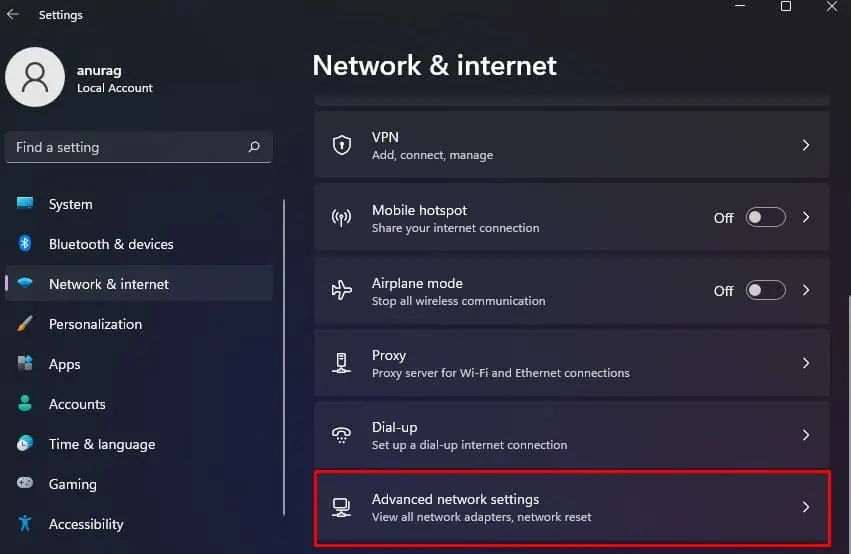
- Navigate to Network & internet > Advanced network settings.

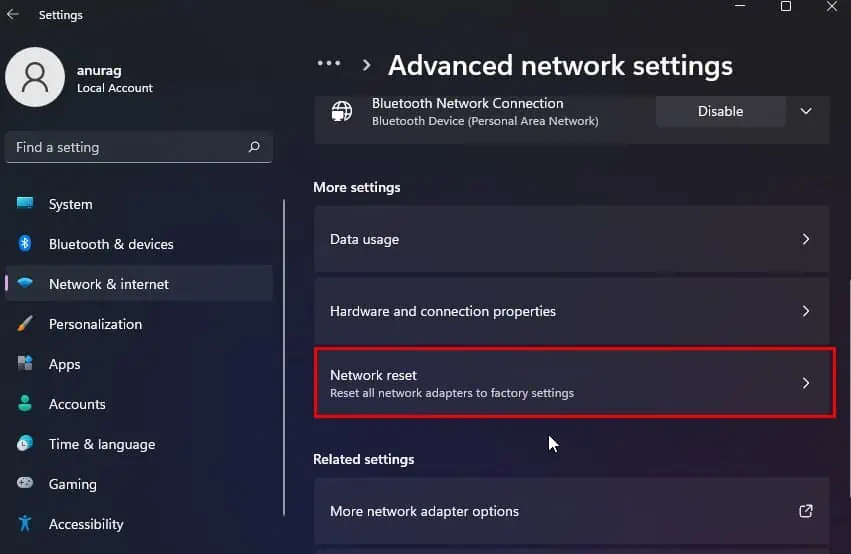
- Select Network reset.

- Select Reset now.

- Restart your PC and check if the Wi-Fi works.
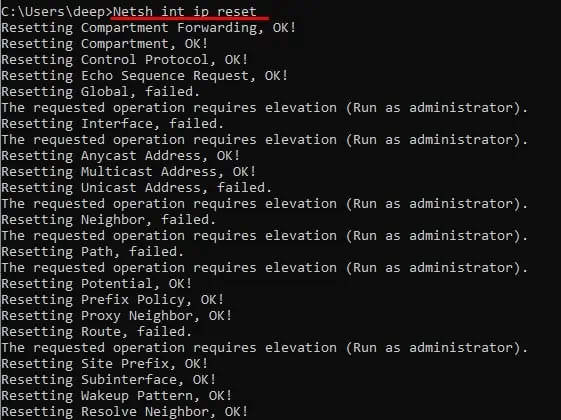
Using Command Prompt.
- Press the Windows + R key to open Run.
- Type
cmdand press Ctrl + Shift + Enter to open Command Prompt as Administrator. - Type the following commands.
Netsh winsock reset: resets component that handles network requests
Netsh int ip reset: it resets registry values related to TCP/IP service
Ipconfig /flushdns: clears DNS information
Ipconfig /release: clears network adapter configurationIpconfig /renew: resets networking configurationIpconfig /registerdns: Re-registers DNS information
- Restart your computer and connect to the Wi-Fi to check if you can access the Internet.
Change Wi-Fi Signal Transmission Frequency
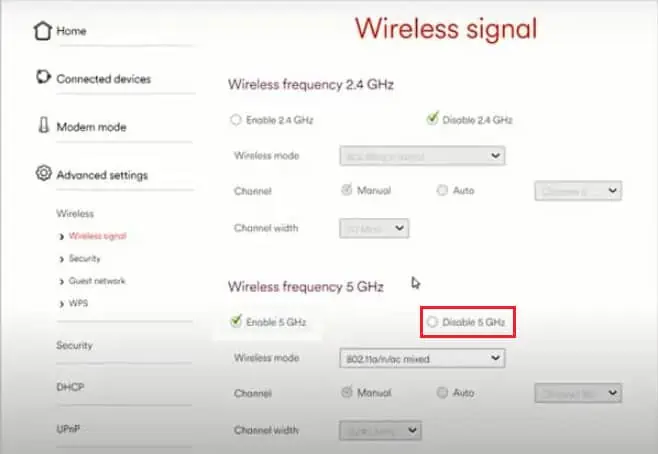
Most routers nowadays are programmed to transmit Wi-Fi signal in both 5GHz and 2.4 GHz. However, not all laptops support newer 5GHz signal. If your laptop does not support this frequency, you need to configure your router to send Wi-Fi signal in 2.4GHz frequency.
- Connect to the router using an Ethernet cable
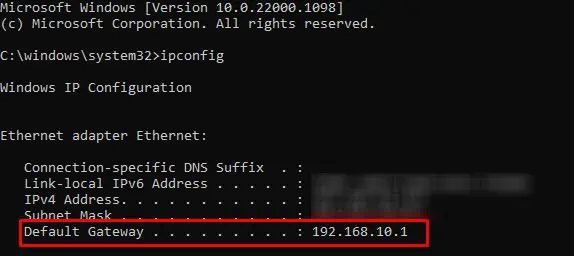
- Open Command Prompt.
- Type
ipconfigand press Enter. - Check the Default Gateway to access router settings.

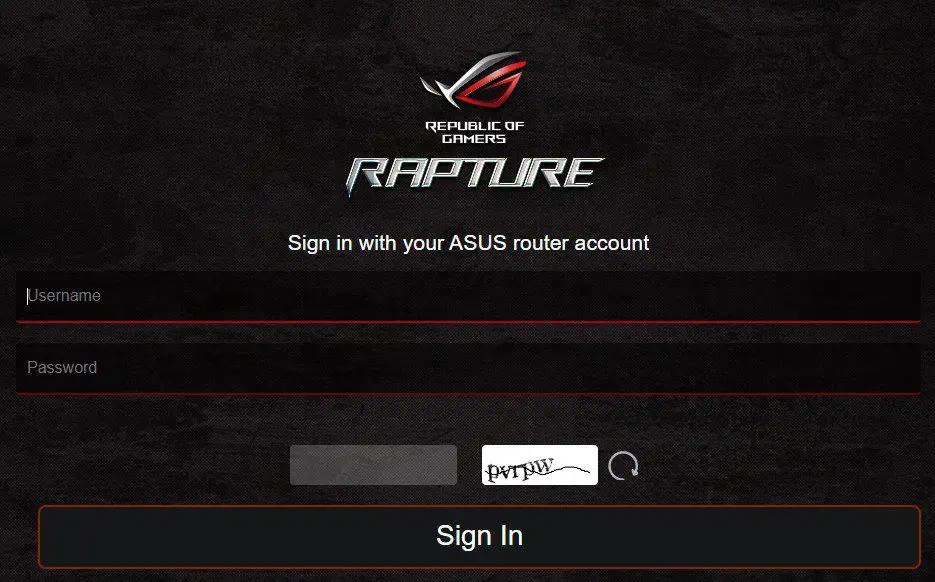
- Copy the default gateway and paste it on your browser’s address bar.
- Login using the router’s username and password.

- Here, navigate router setting and search for settings named Wireless Signal.
- Select 2.4Ghz frequency.

- If you cannot find these settings, search for setting named Seperate Bands and disable it.
- Save router settings.
Disable Firewall
The firewall checks data traffic that comes in and goes out of your system. Enabling firewall prevents unauthorized access to your computer. Although it is a preventive measure against malicious activity, allowing it could be why you cannot access the internet if a firewall mistakes traffic for an unauthorized one.
To check if this is true, temporarily disable the firewall.
- Press the Windows + I key to Open Settings.
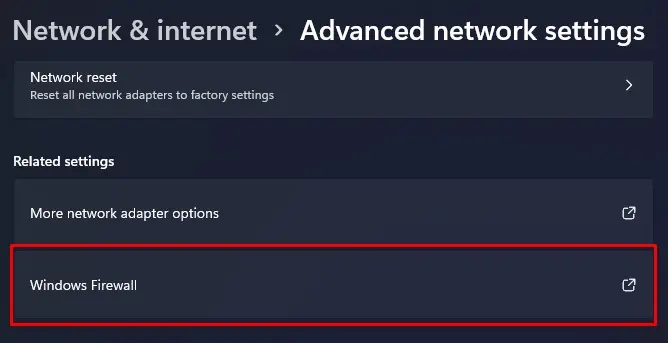
- Go to Network & Internet > Advanced network settings.
- Select Windows Firewall.

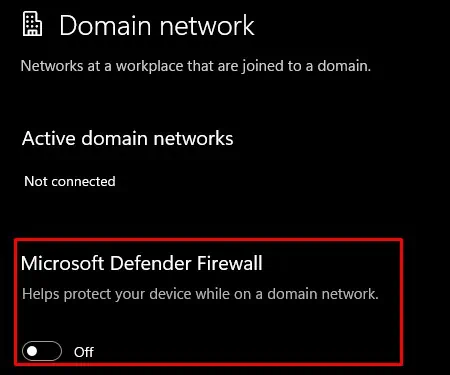
- Click on Domain network and set Microsoft Defender Firewall to Off.

- Repeat the same step for Private network and Public network
- Check if the internet works. If it does not, Enable Microsoft Defender Firewall right away.
Update Network Adapter Driver
The network driver handles everything from the network connection to data transfer. And the network adapter driver is responsible for communication between the network adapter and the Operating System.
If this driver is outdated or corrupted, the computer may have issues communicating with the OS, resulting in connection issues. To fix this, we recommend that you keep your drivers up-to-date.
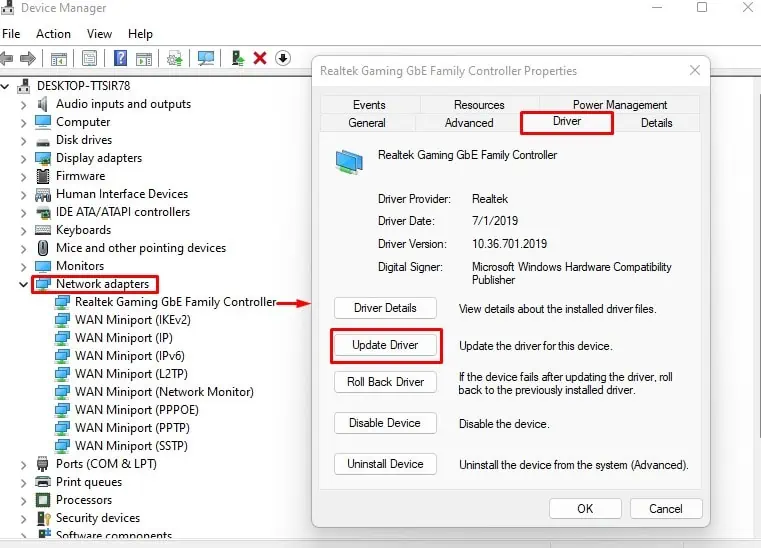
- Press the Windows + X key and select Device Manager.
- Expand Network adapters to list all the network adapters connected to your system.
- Double-click on your network adapter to view its properties.
- Go to the driver tab and select Update Driver.

- Select Search automatically for drivers.
- Once the Update is complete, restart your PC.
Restart Router
Excessive cache saved on the router may be why you cannot access the internet on your computer. This data may even cause the router to be unresponsive. Restarting a router cleans all its cache data, such as IP address and several other network settings.
Remove the power cable from the router for a few minutes and plug it back in. Connect to the Wi-Fi to check if it fixed the issue.
Factory Reset Router
When you factory reset a router, it completely erases all router configuration like SSID, password, encryption type, and many more. Basically, it sets your router to out-of-box state. If none of the solutions work, you may need to reset router to its factory state to fix the issue.
When you reset, any router configuration that may be causing the issue will revert back to its original state. This should fix any issues that you face.
- Make sure that the router is plugged in
- Check for a reset button on the back side or under the router.
- Use a small pin to access the reset switch.

- Press and hold the reset button for 60 seconds. There may be LED indicators that you can use to determine when the reset process is complete.
- Once the reset is complete, the router will now restart.
- Now connect the PC with router using an ethernet cable.
- Enter the routers configuration in your web browser using the Default gateway address.
- Refer the routers manual if you do not know the router’s IP address.
- Now, you can reconfigure all your router settings.


