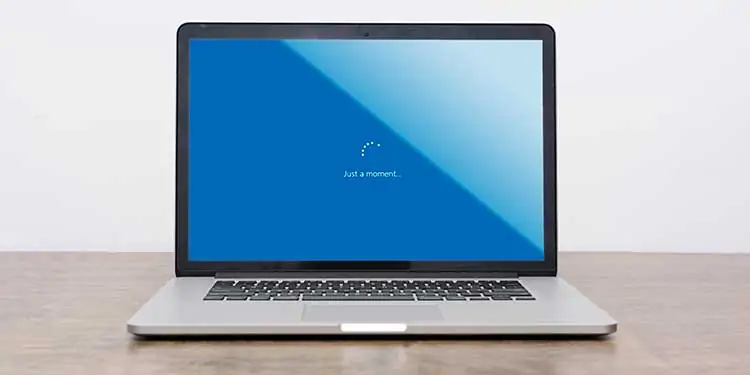
Is your PC stuck on Just a moment loop? Your Windows may have failed to install one or more updates properly and caused a system failure. Or a software you installed may have corrupted the system files. Or something may have corrupted your boot partition.
The simplest solution that you can do is to perform a restart of your PC. Windows should try to reload the required updates again. Hopefully, this should prevent the loop screen from appearing. But if it doesn’t work, you may have a real problem here.
Below, I have compiled a few approaches to help resolve the issue. I have arranged the methods in the order of severity of the issue. Make sure you start working from the first approach. Continue working your way down until the endless Windows 10 blue screen goes away.
Logging Into Safe Mode
Before diving into the actual steps, it is important to learn how to boot your Windows 10 into safe mode. Safe mode is a feature of Windows that boots Windows with the least number of required files. This means disabling any additional drivers, startup software, anti-virus programs, etc.
Safe Mode also restricts the use of certain applications so you cannot use it the same way as normal mode. It is merely for troubleshooting purposes. Once you are done using Safe Mode, you can just restart the computer and it will boot back to normal mode.
Use the following steps to log into Windows with safe mode enabled.
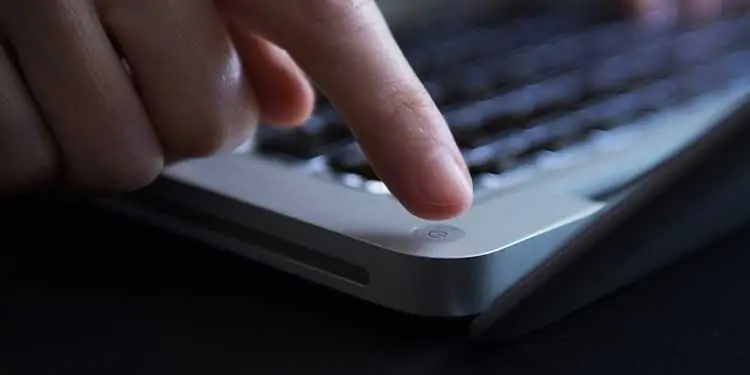
- Force shut down your device by holding the power button for at least 10 seconds.
- Press the power button. When the manufacturer’s logo appears, hold the power button for 10 seconds again.

- Press the power button again.
- When the Windows logo appears, hold the power button for 10 seconds.
- Press the power button again one last time.
- When the device starts up, it will enter winRE(Recovery Environment).
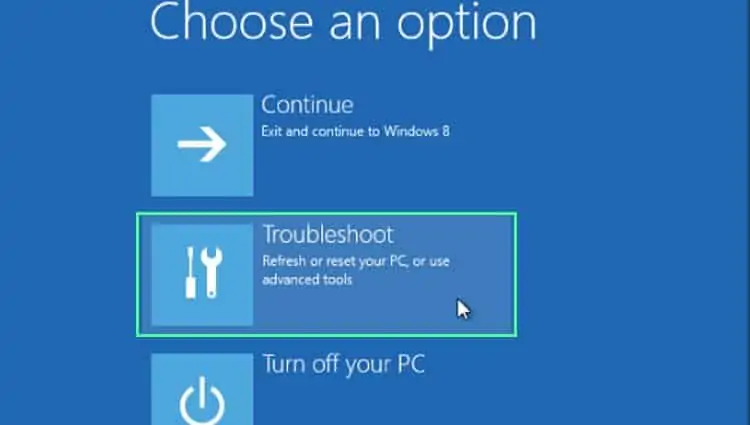
- Under Choose an option, select Troubleshoot.

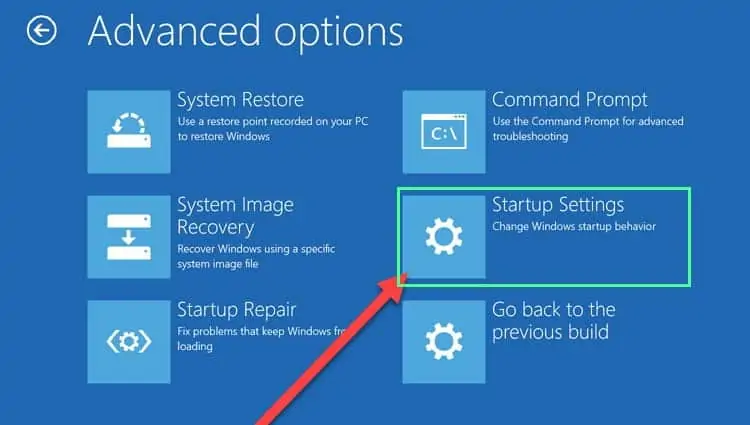
- Select Advanced options.
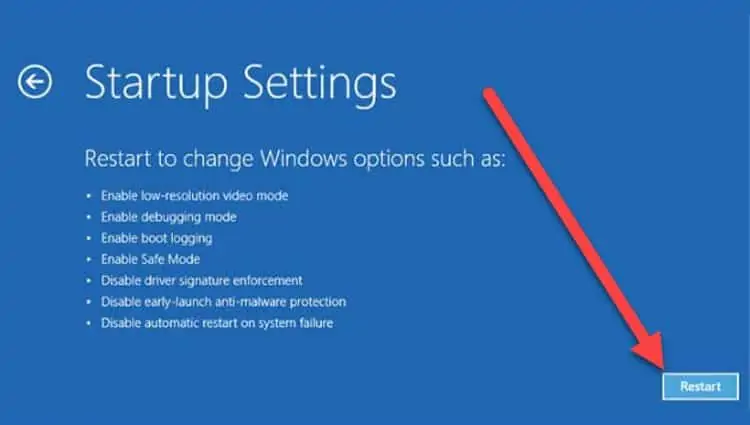
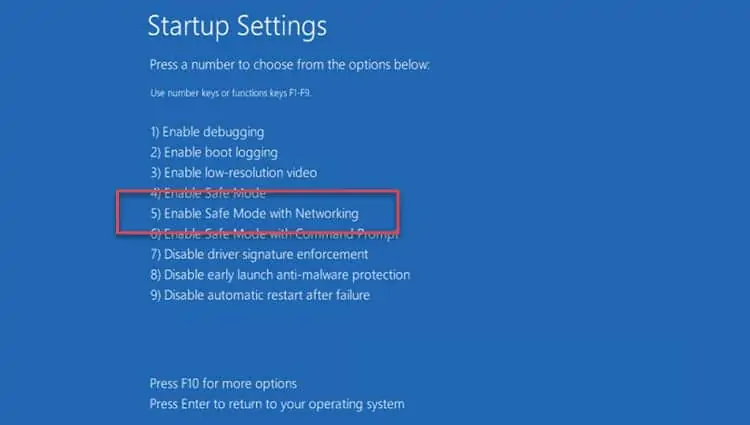
- Select Startup Settings.
- Select Restart.

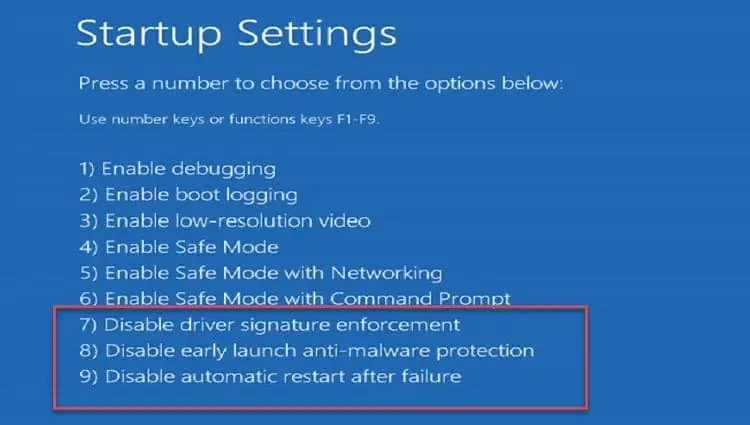
- When the device restarts, under the list of options select option 5. You can also press F5 for Safe Mode with Networking.

Fix Windows 10 Stuck On Just A Moment Loop
Modifying System Notifications
- Start Windows in Safe Mode.
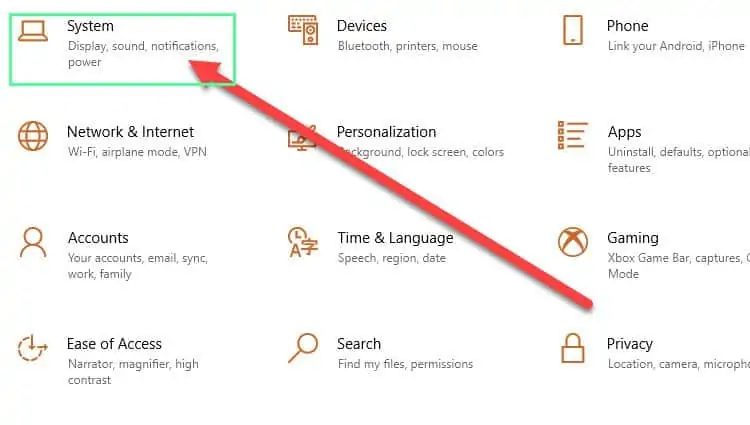
- Right-click on the Start Menu and select Settings.
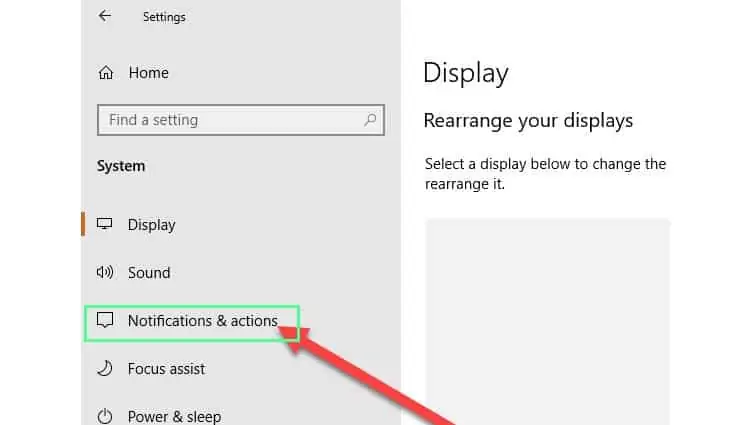
- Select System option in the new window.

- Under the left navigation pane, select Notifications & actions.

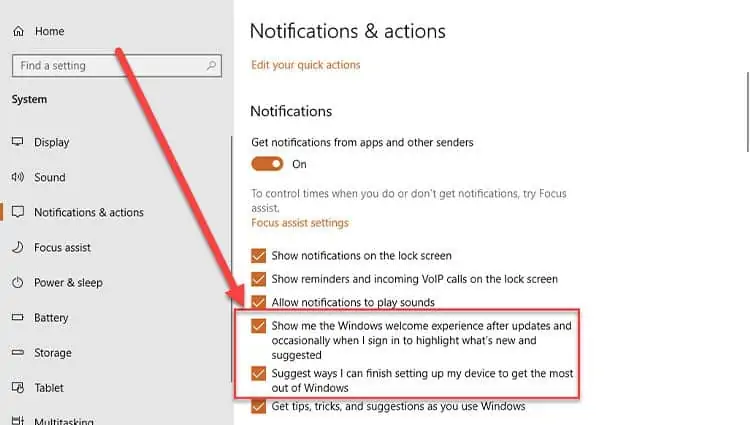
- Uncheck the following two options under Notifications.
- “Show me the Windows welcome experience after updates and occasionally when I sign in to highlight what’s new and suggested“
- “Suggest ways I can finish setting up my device to get the most out of Windows“

- Restart your PC and try logging back into Normal mode.
Disable Automatic Restart
- Start Windows in Safe Mode.
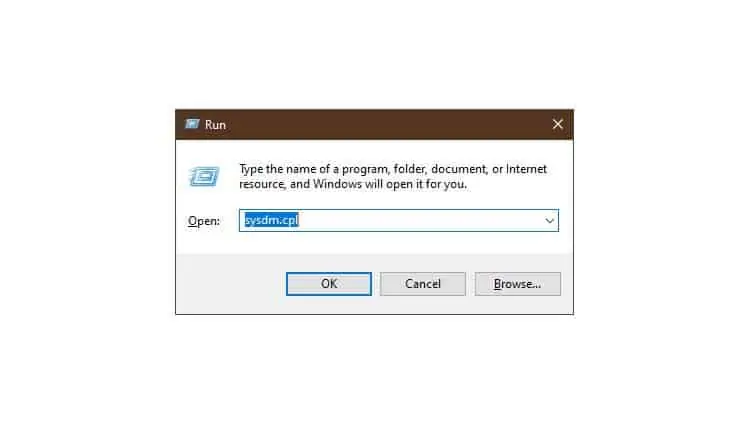
- Press Win key + R to open the Run window.
- Type
sysdm.cpland press OK to bring up a new window.
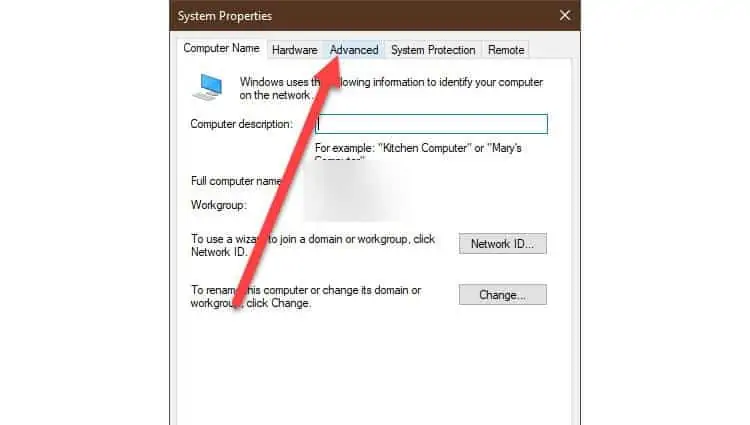
- Go to the Advanced tab.

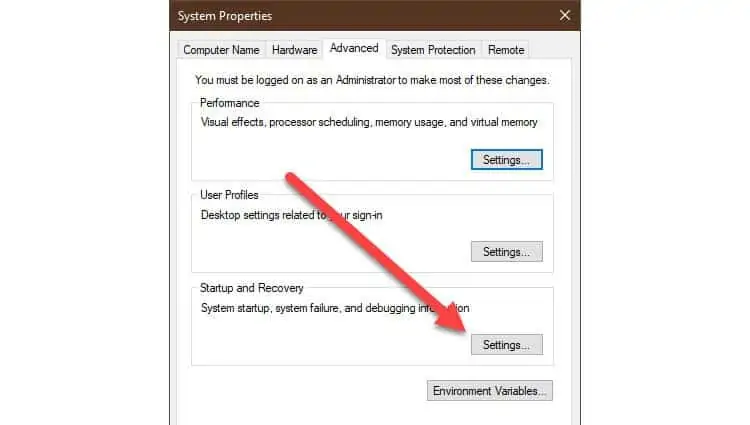
- Under Start-up and Recovery, select Settings.

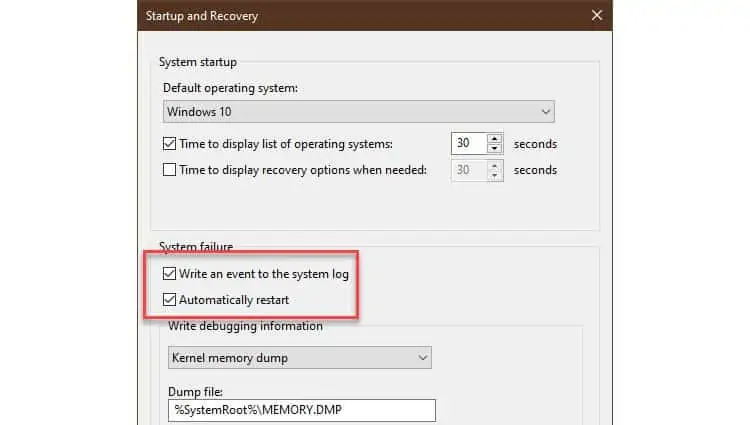
- Uncheck the Automatically restart option.
- Check the Write an event to the system log option.

- Press OK.
- Select Apply and OK to close the window.
- Restart PC into normal mode.
Using Windows 10 Media Creation Tool
- Start Windows in Safe Mode.
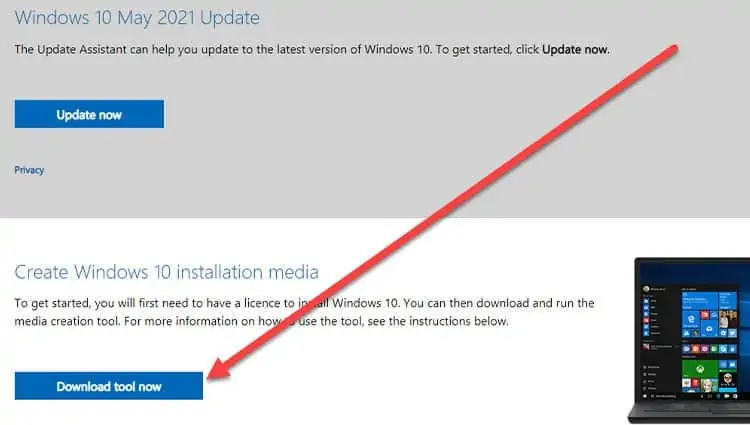
- Go to this link in the browser.
- Click on the Download tool now.

- Once complete, head over to the Downloads folder.
- Double-click on the newly-downloaded MediaCreationTool2xxx.exe file to open it.
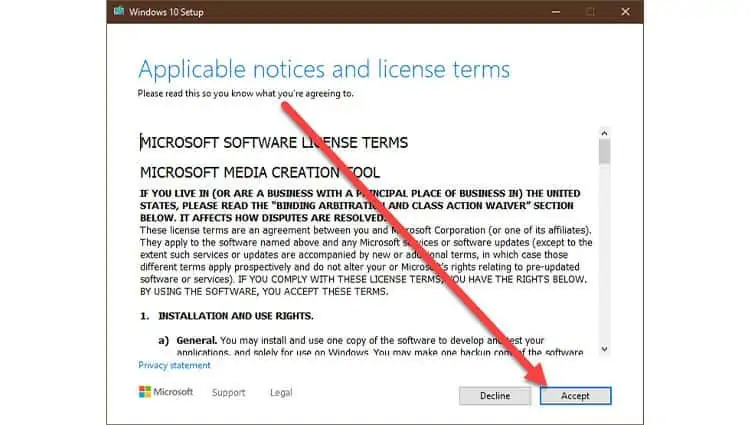
- Select Accept to accept all applicable notices and license terms.

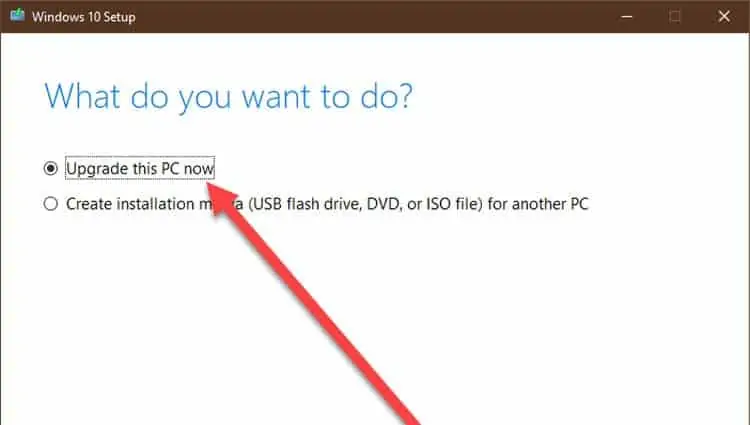
- Select Upgrade this PC now.

- Click on Next.
- The system tool will now download and install Windows 10 upgrade on its own. Note that you do not need to enter a product key to reinstall Windows 10.
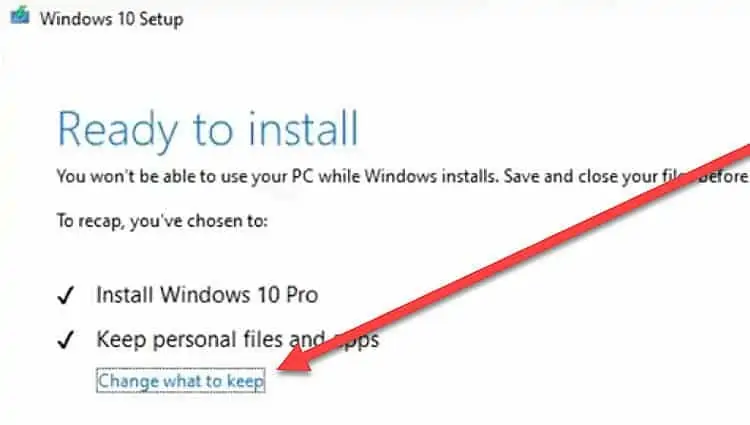
- When the tool completes downloading, select Change what to keep.

- Select Keep personal files and apps or Keep personal files only. If you select Nothing it will remove everything and install a fresh copy of Windows 10 instead.
- When ready, select Install.
- Note that it is normal for Windows 10 to restart multiple times when installing.
Using Windows Registry Editor
- Start Windows in Safe Mode.
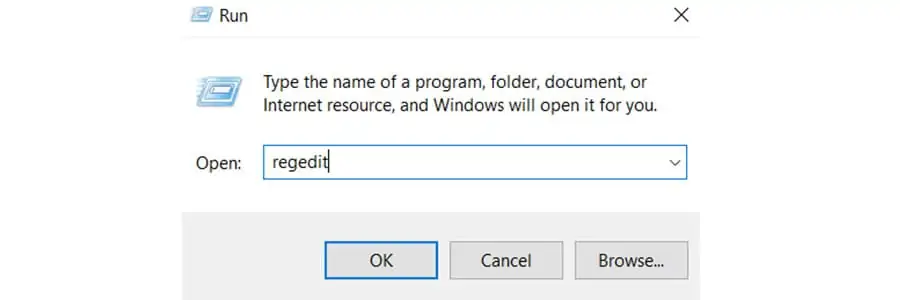
- Press Win key + R to open the Run window.
- Type
regeditand press OK to bring up a new window.
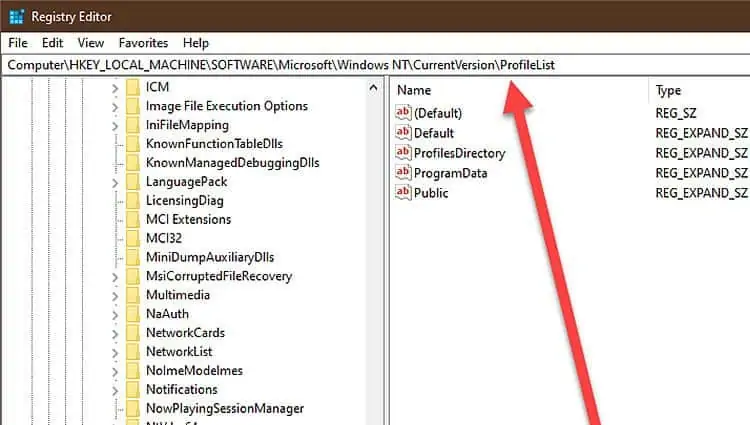
- Navigate to the following path.
HKEY_LOCAL_MACHINE\SOFTWARE\Microsoft\WindowsNT\CurrentVersion\ProfileList
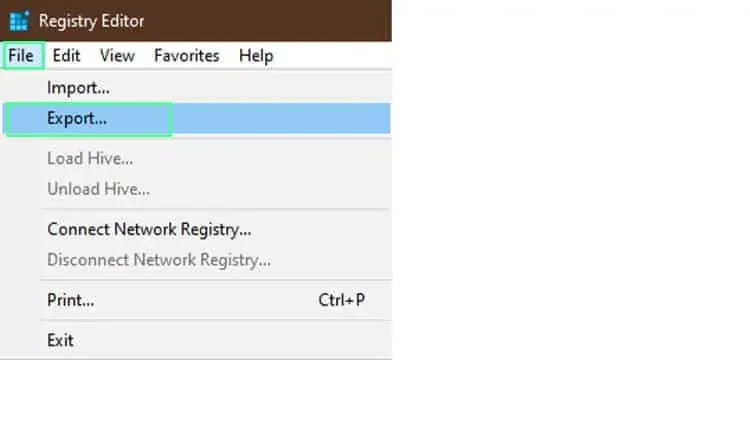
- Firstly, back up the registry key by going to the File menu and selecting Export.

- Save the file to a secure location.
- Now, expand the ProfileList from the left navigation pane.
- Select the first entry under ProfileList.
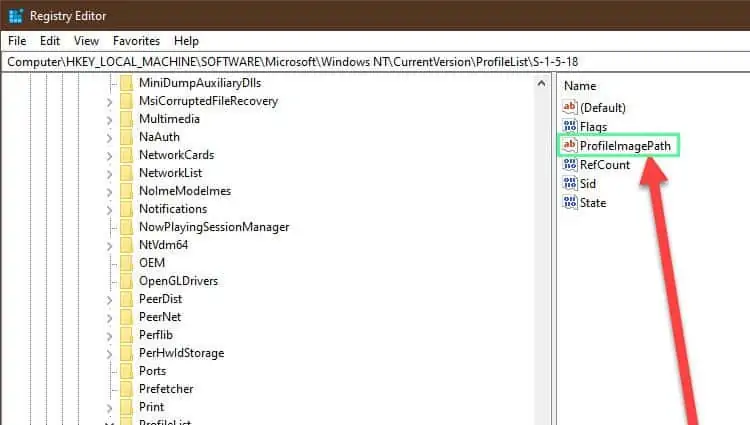
- Check to see if there is a ProfileImagePath registry key on it.

- If yes, remove the entry completely by pressing the Delete key.
- Repeat Steps 7-9 for each entry under ProfileList.
Using Bootrec Command
- Start Windows in Safe Mode.
- Right-click on Start Menu and select Windows Powershell(Admin) to open a new window.
- Type the following commands one after the other.
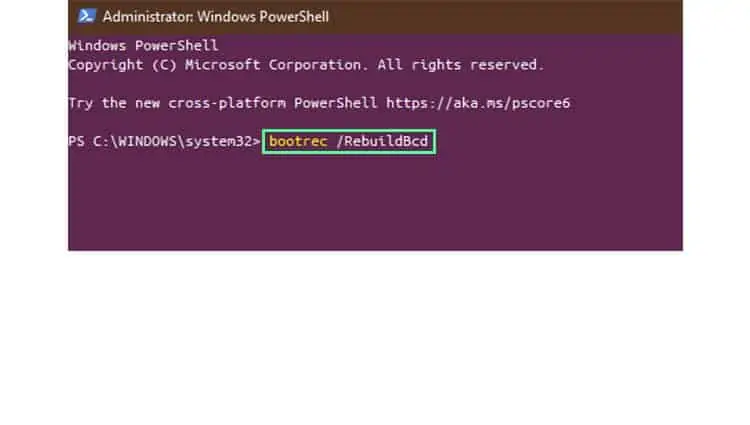
bootrec /RebuildBcdand press Enter. This option is useful when the BCD store is missing, corrupted, or misconfigured./rebuildbcdrebuilds the boot configuration data store.
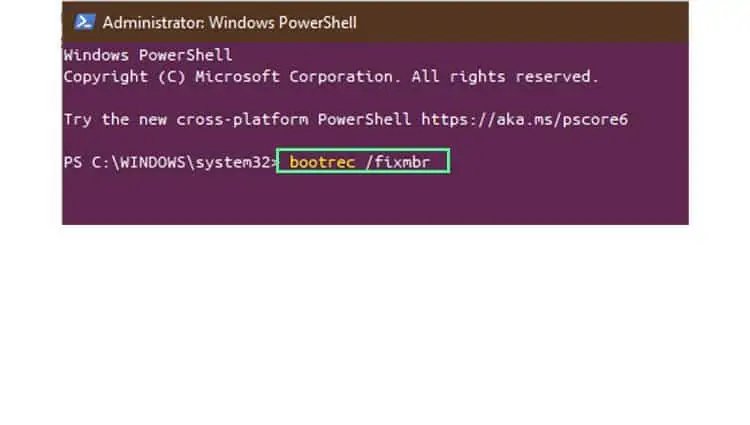
bootrec /fixmbrand press Enter. /fixmbr will try to fix a corrupt master boot record. If you have incorrect dual boot entries, you can use this option to remove them. For example, you may have decided to remove a previously installed Linux and want to fix the boot process.
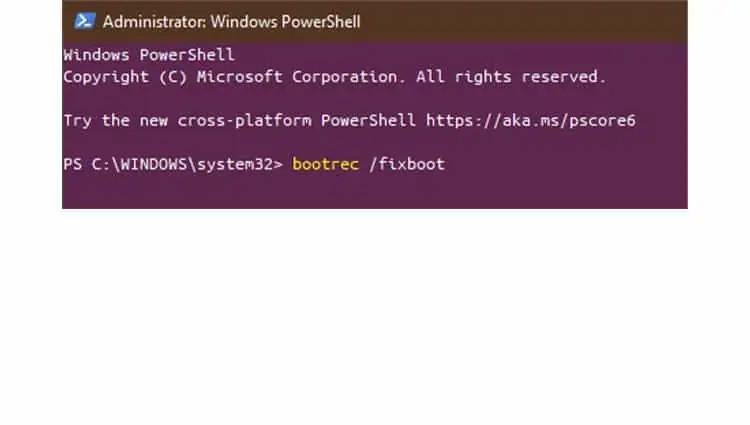
bootrec /fixbootand press Enter. /fixboot completely rewrites a new boot sector to the system partition. This is useful when the boot sector is damaged or replaced with a non-standard boot loader.
- Once completed, restart your PC after exiting safe mode.
Using Automatic Repair
- Power off Windows by pressing the power button for 10 seconds.
- Power it back on.
- When the logo appears, hold the power button for another 10 seconds to power it off.
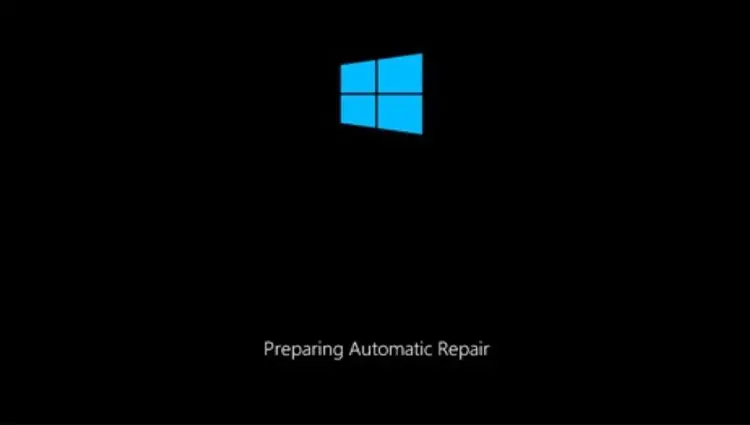
- Repeat Steps 1-3 several times. You will see the Preparing Automatic Repair message underneath the Windows logo screen.

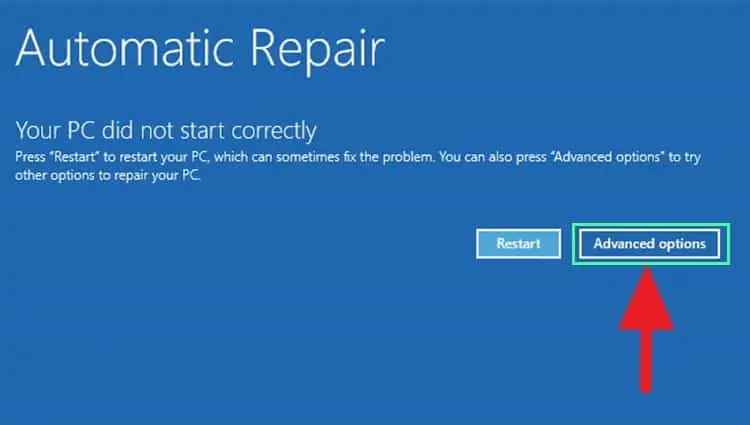
- Under the Automatic Repair screen, select Advanced options.

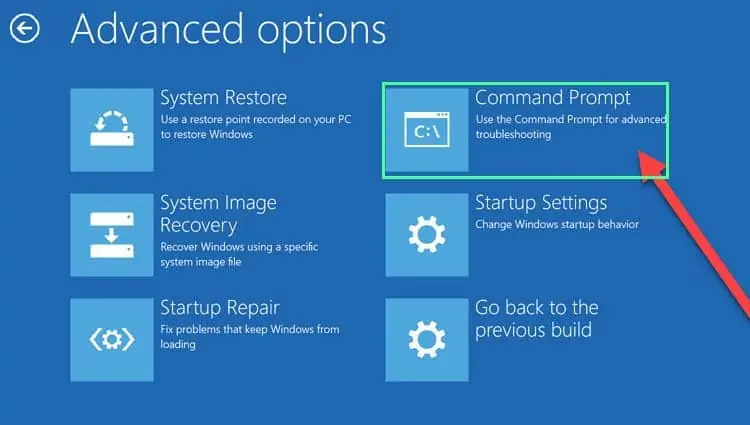
- Select Troubleshoot.
- Select Command Prompt.

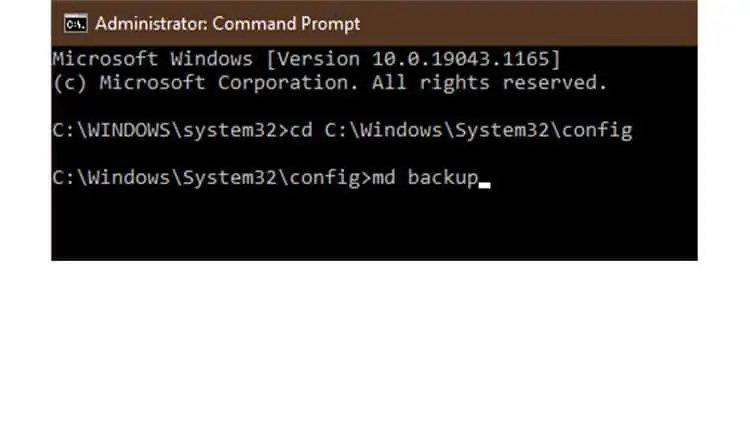
- Type the following to enter into the system config folder.
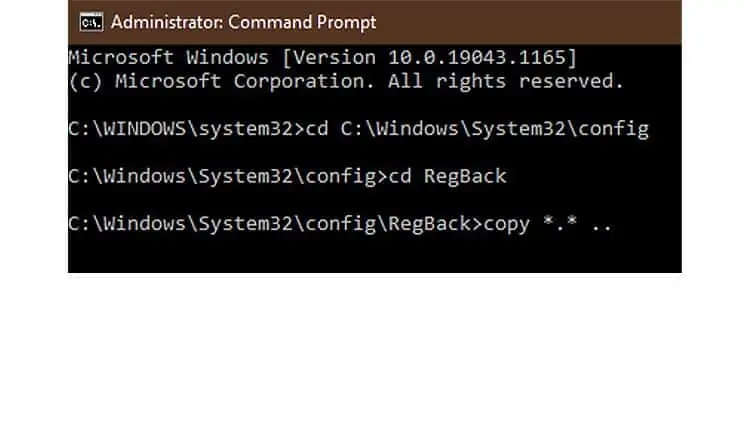
cd C:\windows\system32\config Md backupto create a new backup directory. You need this in case you need to restore your config files.
Copy *.* backupto copy all system config files to the backup folder.Cd regbackto go to the regback folder.Copy *.* ..to copy all files inside regback to the system config folder.
- A to select All from the input prompt to overwrite all files.
- Exit to close the command prompt.
- Select Turn off your PC.
- Power it back on.
Using Reset Your PC
- Start Windows in Safe Mode.
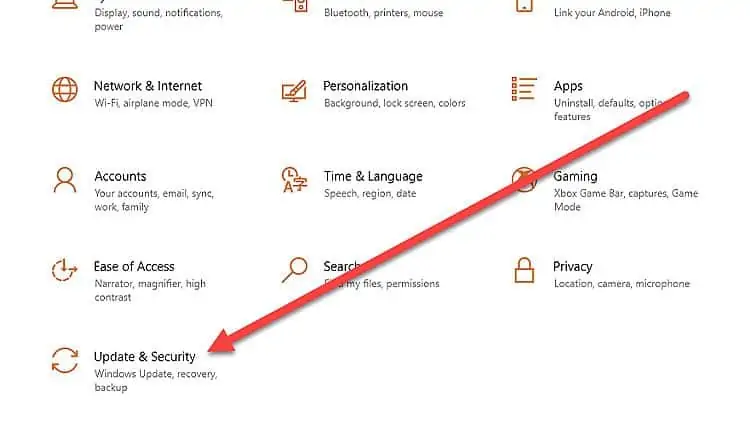
- Right-click on Start Menu and select Settings.
- Select Update & Security.

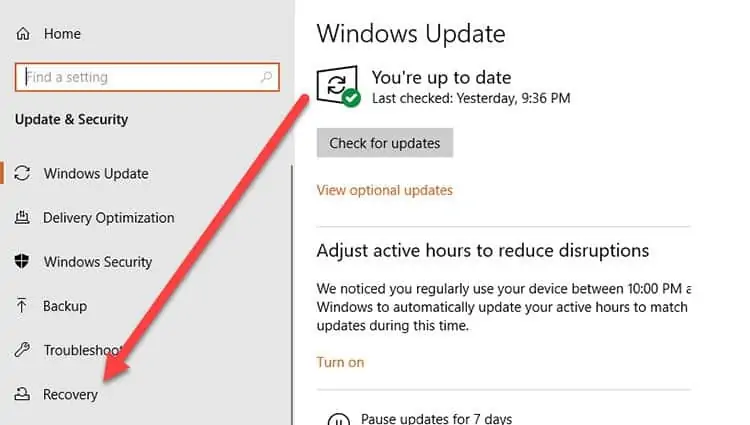
- On the left navigation pane, select Recovery.

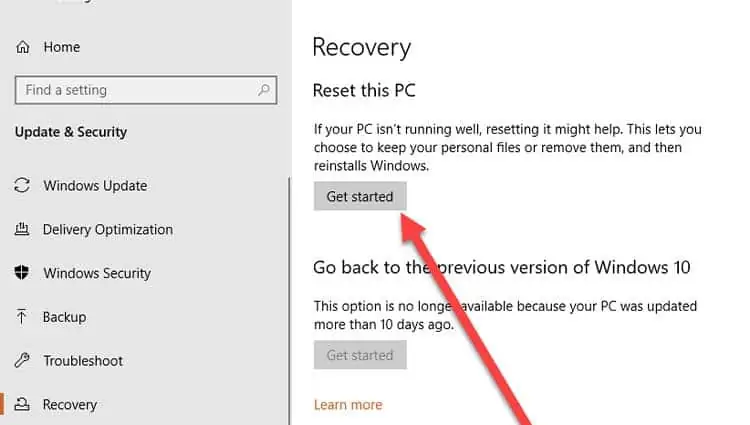
- Under Reset this PC, select Get started.

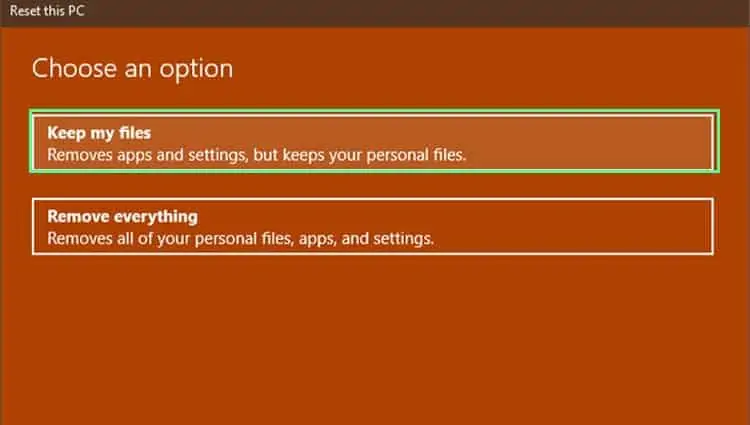
- Select one of two options.
- Keep my files when you need to remove just the apps and keep your files and data.
- Remove everything when you need to remove all apps and personal files.

- Once complete, restart your PC normally.
Using Startup Settings
- Power off Windows by pressing the power button for 10 seconds.
- Power it back on.
- When the logo appears, hold the power button for another 10 seconds to power it off.
- Repeat Steps 1-3 several times. You should see the Preparing Automatic Repair message on the Windows logo screen.

- Under the Automatic Repair screen, select Advanced options.

- Select Startup Settings.

- Select Restart.

- When Windows restarts, try with one of the following options disabled.
- Driver signature enforcement by pressing 7 or F7
- Early-launch anti-malware protection by pressing 8 or F8
- Automatic restart on system failure by pressing 9 or F9

- Continue on the boot process to see if you can get past the Please wait screen.
- If unsuccessful, repeat the steps and try disabling the next option.
- Repeat until you identify what caused the issue.
Using System Restore
- Power off Windows by pressing the power button for 10 seconds.
- Power it back on.
- When the logo appears, hold the power button for another 10 seconds to power it off.
- Repeat Steps 1-3 several times. You should see the Preparing Automatic Repair message on the Windows logo screen.

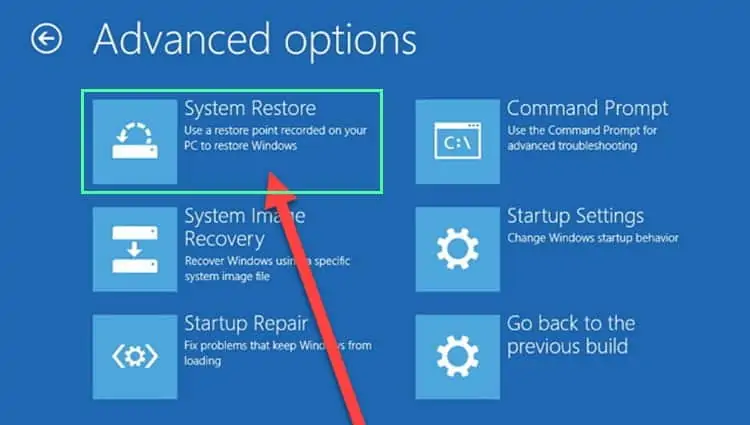
- Under the Automatic Repair screen, select Advanced options.

- Select System Restore.

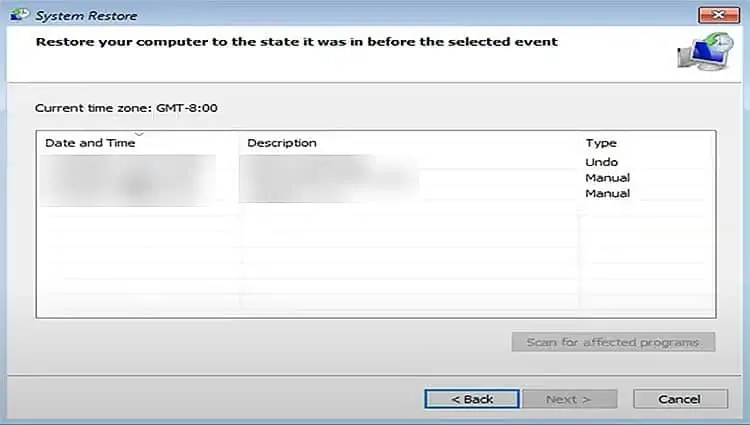
- Select a restore point that you would like to restore to. All files and data that were created or modified past this restore point will be deleted. This will include apps as well as data.

Using System File Checker and CHKDSK Utility
- Start Windows in safe mode.
- Right-click on Start Menu and select Powershell(Admin).
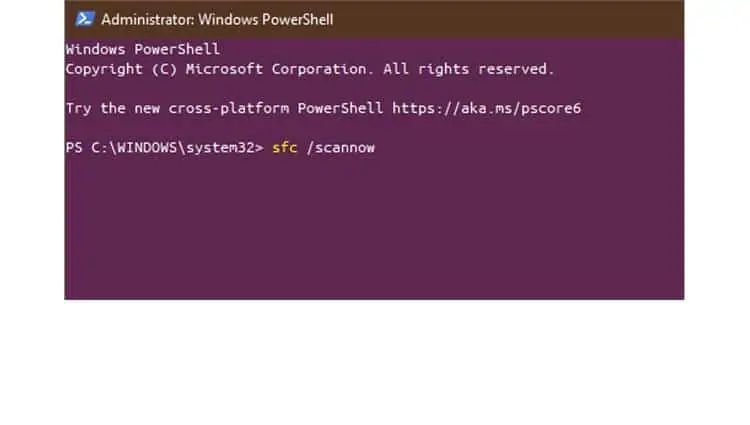
- Type
sfc /scannowand press Enter. This will launch the system file checker tool to scan all system files and reports if corrupted. It replaces the files with a cached copy located in a compressed folder at C:\System32\dllcache.
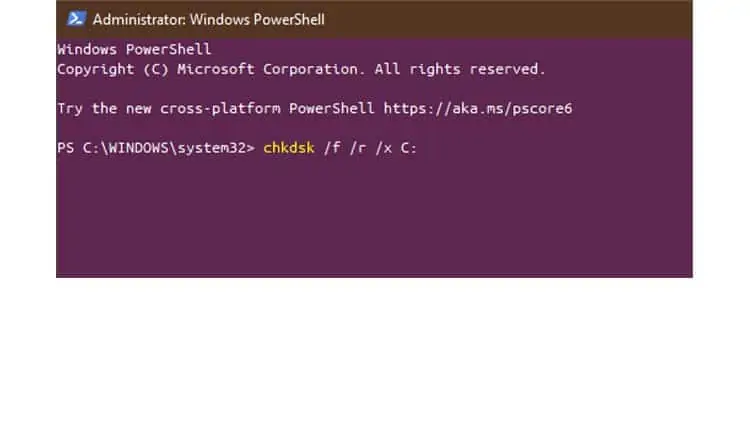
- Type
chkdsk /f /r /x C:and press Enter. This will do the following operations.- /f will lock the disk and fixes any errors
- /r will locate the bad sectors and recover readable information
- /x will force the disk to dismount and invalidate all open handles to the drive
- C: is the target disk where you have installed your Windows 10.

- Once completed, restart Windows in normal mode.
Perform a Clean Installation
- Get a USB thumb drive with at least 8GB of storage.
- Start Windows in Safe Mode.
- Plug the USB drive into your PC. Make sure that you back up any files in the drive before moving ahead.
- Go to this link in the browser.
- Click on the Download tool now.

- Once complete, head over to the Downloads folder.
- Double-click on the newly-downloaded MediaCreationTool2xxx.exe file.
- Select Accept to accept all applicable notices and license terms.

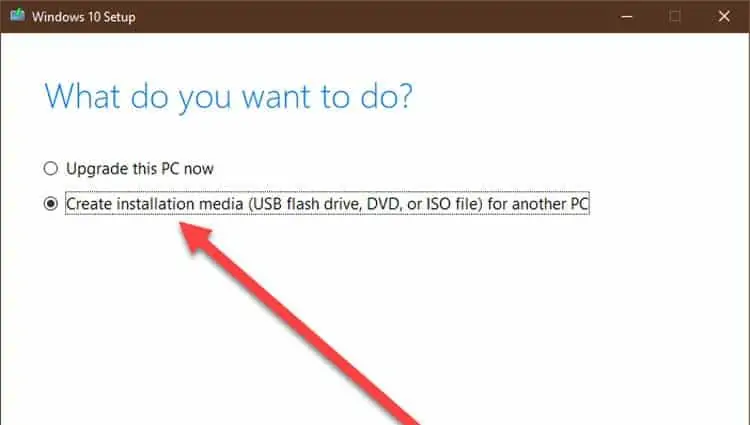
- Select Create installation media.

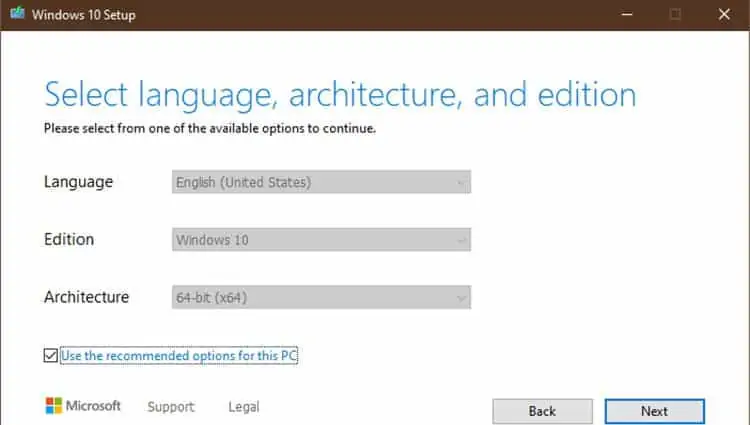
- Check Use the recommended options for this PC option. This will automatically fill in the details required to fix your current PC.
- Alternatively, if you are doing this on a second PC, make sure you fill in the proper information needed for your broken PC.

- Select Next.
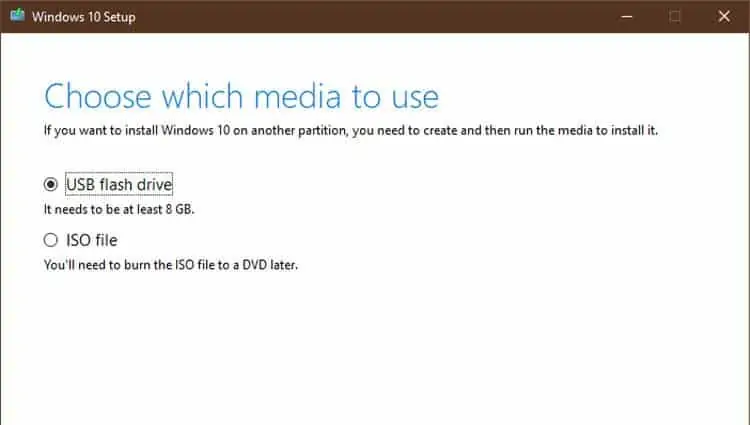
- Select USB flash drive and click on Next.

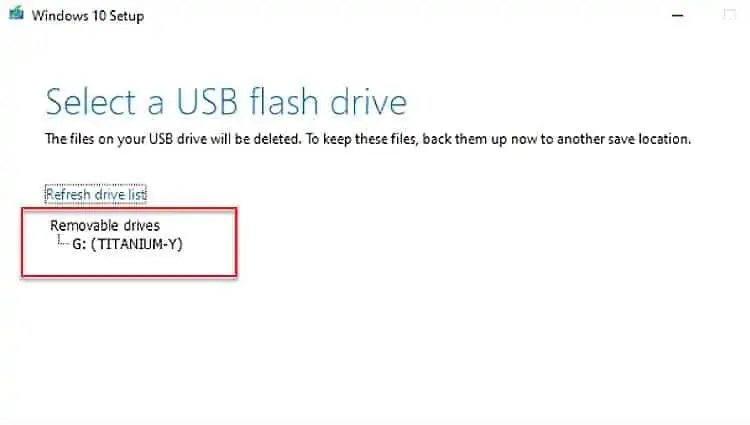
- Select the USB drive letter from the displayed list.
- Select Next.

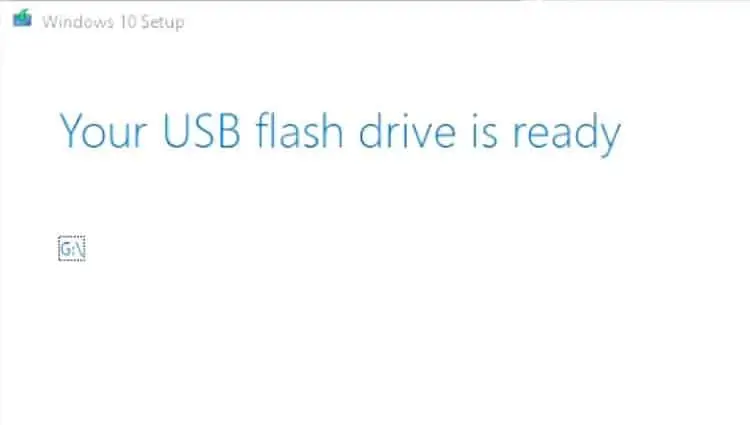
- Wait until you see the Your USB flash drive is ready message and click on Finish.

- With the USB drive still plugged in, restart your PC.
- Boot into the USB drive. Check your manufacturer to see how you can change boot order settings inside the BIOS menu.
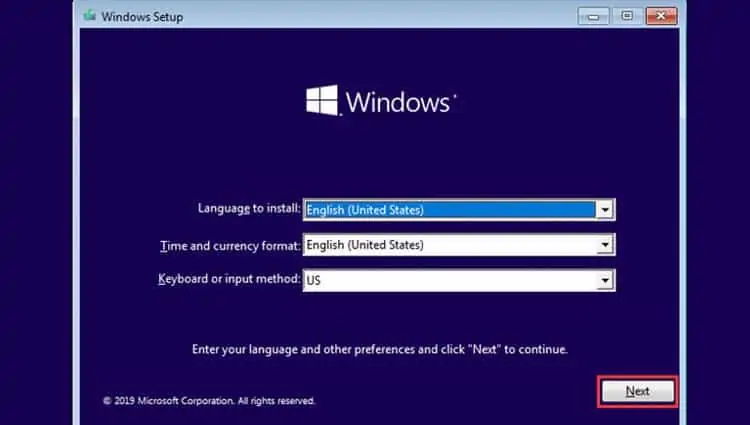
- In the Windows Setup window, select Next.

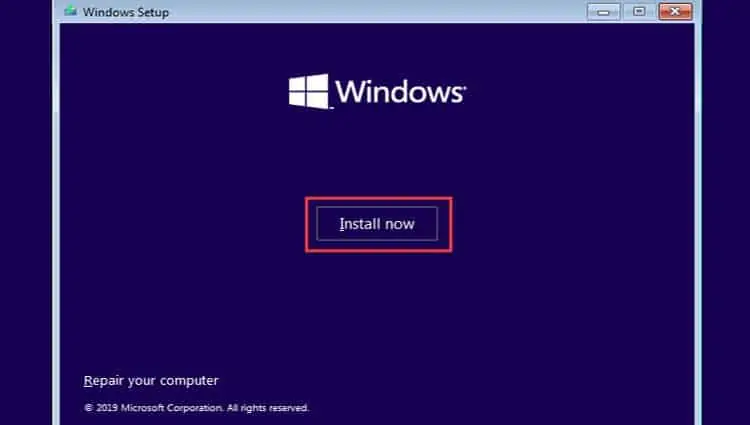
- Select Install now.

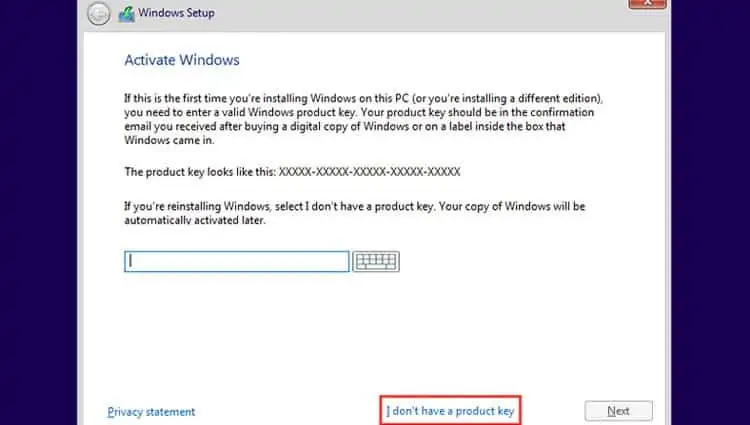
- As you already have a licensed Windows, you don’t need to enter the product key. Click on I don’t have a product key. Windows will later verify your copy of Windows digitally.

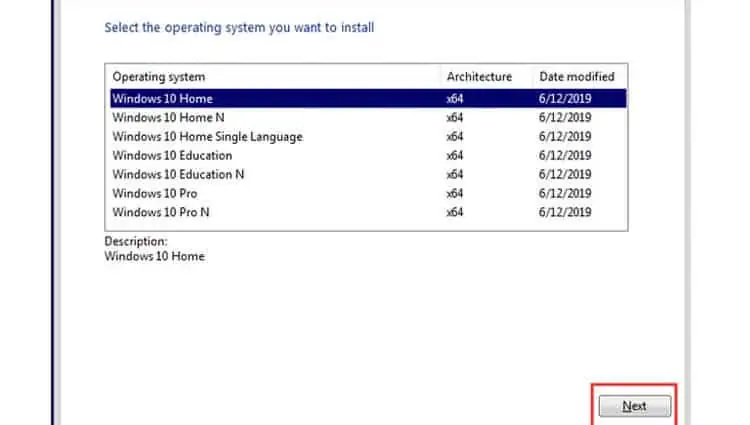
- Select the edition of Windows 10 that you own.

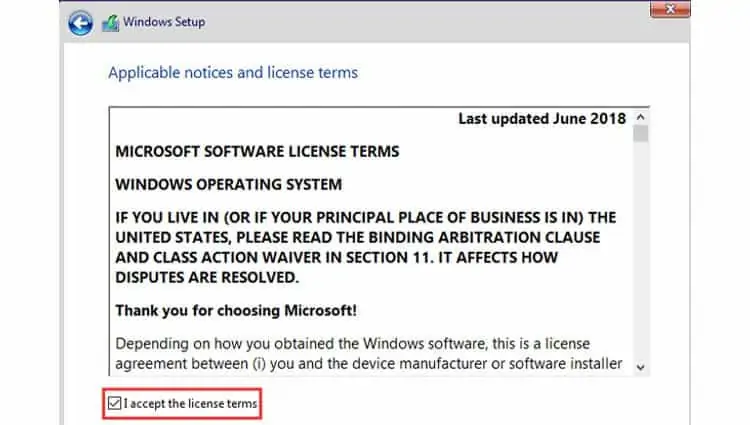
- Check the I accept the license terms option and select Next.

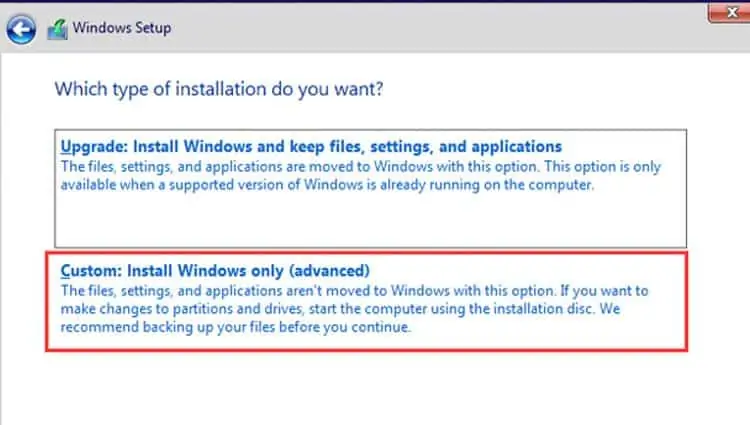
- Select Custom: Install Windows only.

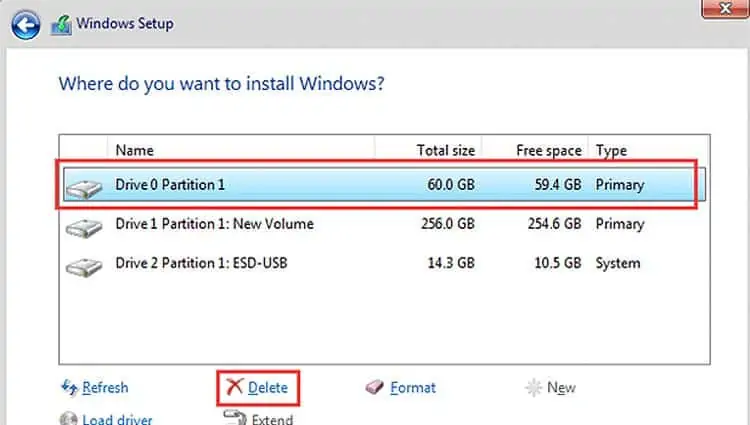
- Select which drive you want to install Windows on. Normally, the first drive Drive 0 corresponds to the drive C where Windows is currently installed. The goal here is to replace current Windows but keep files in all other drives untouched.

- Select Drive 0 and click on Delete.
- After deleting, choose the empty partition and click on Next.
- Wait until Windows 10 is installed in the system properly. All your files will be intact but the Windows 10 is replaced with the latest version of it. Note that you will need to reinstall all of your software and apps again after this.

