After logging in to the computer, instead of showing up your desktop, you might encounter a black screen with only a movable cursor, or, sometimes not even it.
Incorrectly opened or corrupted Windows explorer process is likely to cause Windows black screen after login. Besides corrupted windows explorer, Display drivers, third party antivirus and also windows updates are well known to cause the issue.
Restarting the process is usually a patch if you can access the Task Manager. However, in such scenarios, Windows can be unresponsive, requiring some other not-so-convenient fixes.
How to fix Windows Black Screen after Login?
Pressing Windows + Ctrl + Shift + B keys will refresh the graphics driver. A beep sound with a flickering screen will appear. Windows will also try to re-initialize the screen during that time.
If the black screen is caused by a frozen display drivers, this should fix the issue and your screen should be back alive.
Power Cycle
If the computer doesn’t respond to the previous key combination, Windows is being unresponsive. It can be caused by various reasons, from faulty peripheral devices to misconfigured firmware.
An efficient method to fix so would be to perform a power cycle which will help to reinitialize the I/O devices.
- Detach all the peripherals attached to the computer and turn it off.
- Disconnect the computer from its power source. Remove the battery in case of a laptop.
- Press and hold the power button for more than 20 seconds to drain all the charges from the components.
- Reconnect the power source and boot up the computer.
- Check if it resolves the issue.
Restart Windows Explorer
Windows Explorer is responsible for handling the visible GUI elements on your desktop. If it’s opened improperly, you can restart the process from the task manager.
- Press Ctrl + Shift + Enter keys to open Task Manager.
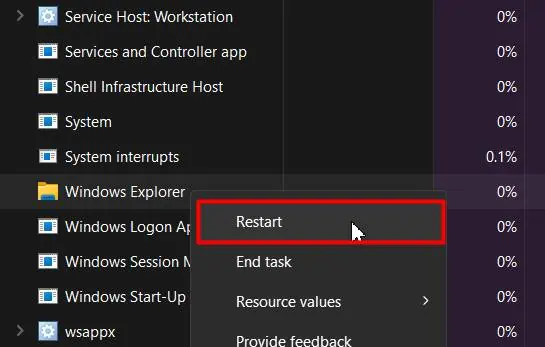
- Search for Windows Explorer, and right-click on it and then, click on the Restart option.

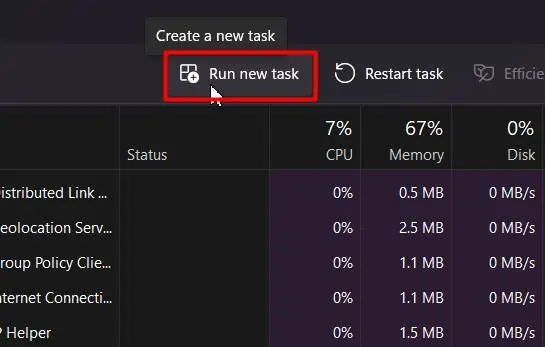
If Windows Explorer isn’t running at all, create a new task and run it.
- Open Task Manager.
- Click on Run new task.

- Type
explorer.exeand hit Enter.
Enter Safe Mode
The above solution would work if only the Task Manager showed up. But if task manager doesn’t open, try to boot into safe mode to perform other fixes.
- Force restart your computer three times by holding the power button.
- You will Enter the Advanced Startup menu on the third attempt. Choose Troubleshoot from there.

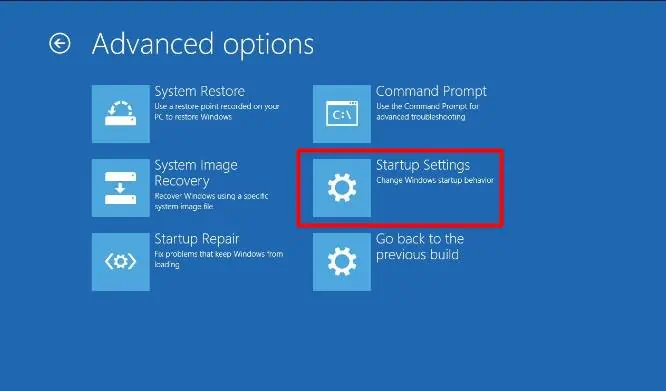
- Then go to Advanced Options > Advanced Startup Options > Startup Settings

- Press the 4 or F4 key to open Safe mode.
If the Safe Mode doesn’t load as well, skip to the System Restore solution.
Roll-back Display Driver
Some bugs within the display drivers may cause the black screen issue if you have recently updated Windows. Rolling back the Display driver might solve the problem of such a case.
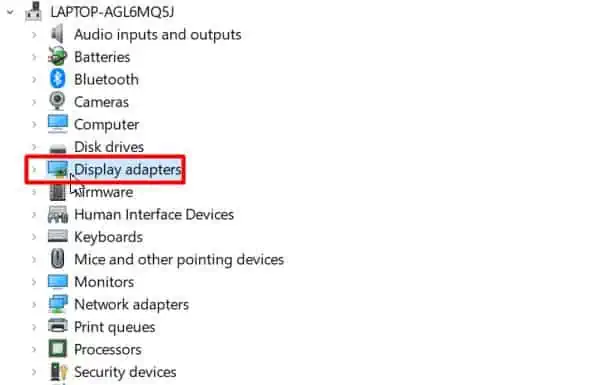
- Type Device Manager on Windows Search and hit Enter.
- Double-click on the Display adapters category to expand it.

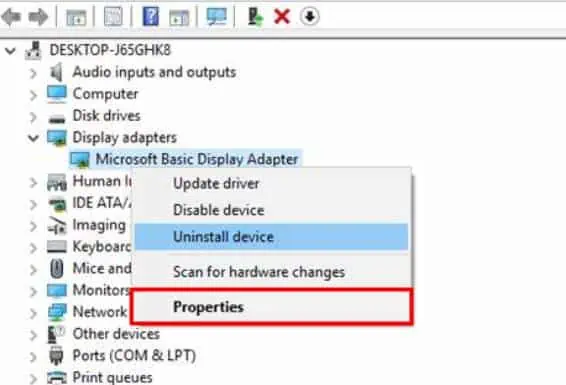
- Right-click on the driver within the category and choose Properties.

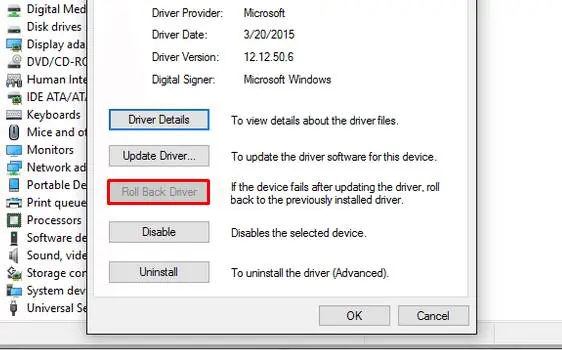
- Go to the Driver tab and hit the Rollback button.

- Click Yes to confirm and restart your computer.
Reinstall Display Drive
If rolling back the driver didn’t work, try reinstalling the display driver. It will fix the issue if the cause is corrupt driver files.
- Open Device Manager and expand the Display adapters category.
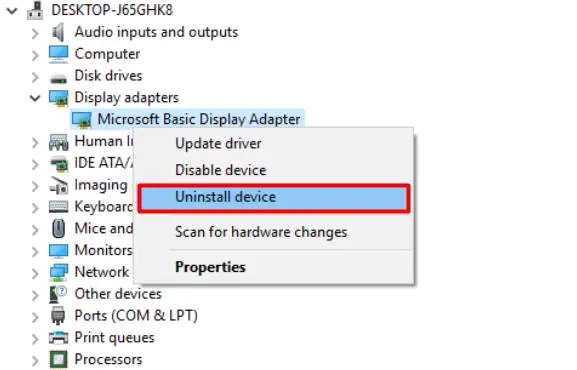
- Right-click on the driver and choose Uninstall device.

- Hit the Uninstall button on the prompt.
- Restart the computer, and Windows should automatically install the driver upon restart.
- Check if it fixes the problem.
Remove Antivirus Software
Since antivirus attaches themselves to the kernel, it usually has permission to handle all running processes. Thus, they can stop essential processes like explorer.exe from loading, which causes the black screen issue.
So, you can enter the safe mode and remove the active third-party antivirus software. Since antivirus programs operate on kernel mode, they cannot be removed like any normal programs.
However, the general methods would be to,
- Open Anti-Virus program.
- In the dashboard, find and select settings.
- There has to be some option to disable/remove the program.
Uninstall Recent Updates
Before moving to system restore, if you remember installing a Windows update recently, you can uninstall it to check if the issue solves.
- Open Settings from the start.
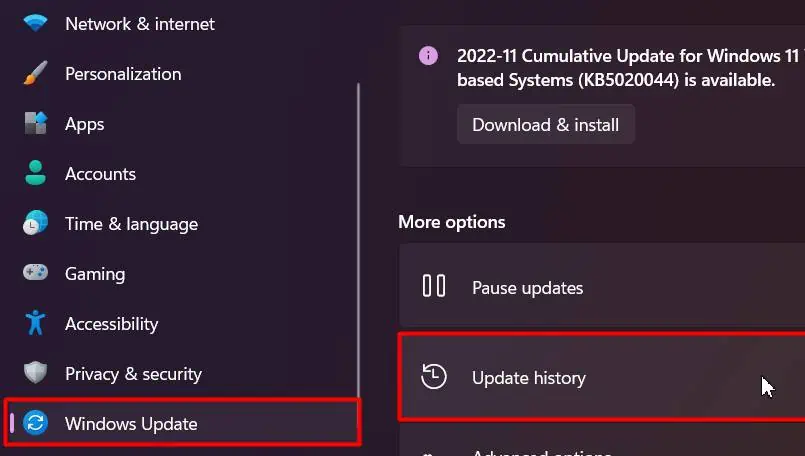
- Go to Windows update and then, Update history.

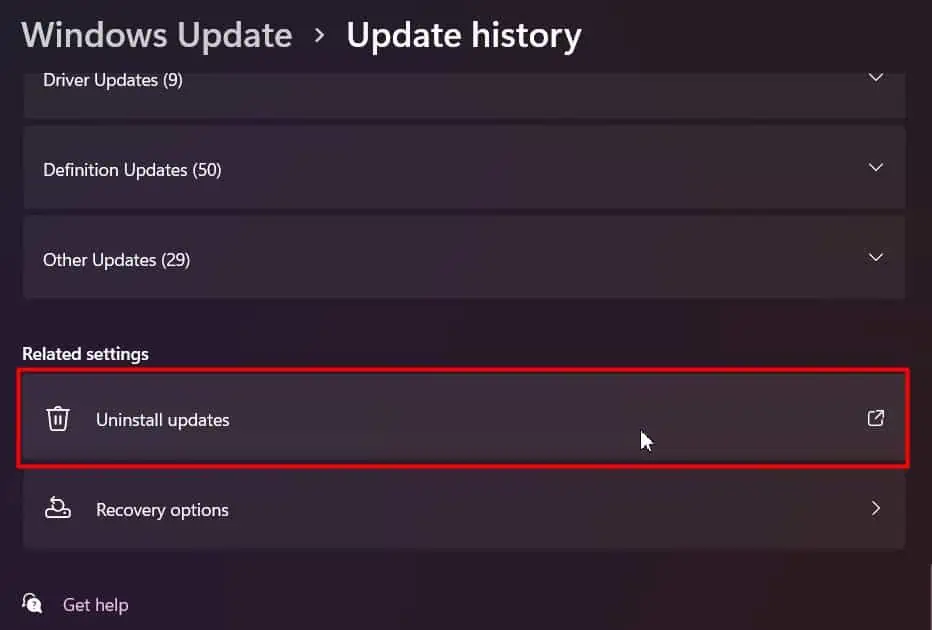
- Click on Uninstall updates.

- Then, click Uninstall on the latest update from the list.

- Hit the Uninstall button to confirm.
- Restart Windows and inspect if it solves the issue.
System Restore
If nothing above fixes your problem, other changes in the registry can be a possible cause. It usually is because of some application or malware tweaking the registry. If you’re exactly aware of the changes, better to perform a system restore to a healthy point.
- Force restart your computer three times, and Windows will enter Advance boot options on the third attempt.
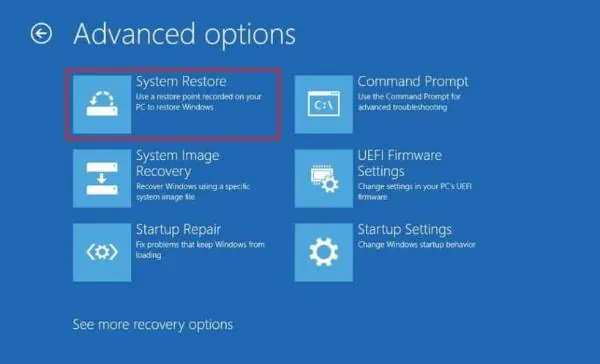
- Go to Troubleshoot > Advanced options > System Restore

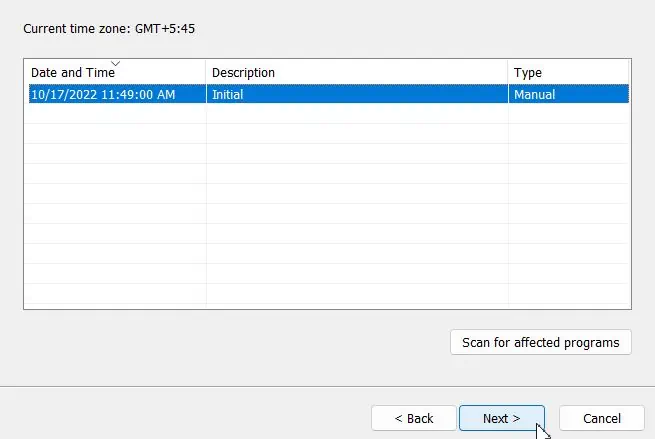
- Click on the Next button and choose a restore point.

- Hit Next and then, the Finish button.
System Reset
A system reset will bring your computer back to factory mode. All the default settings will be restored and the registry will be reset as well.
So, you can perform a system reset on your device if you are unable to restore the system to a point or it didn’t work.
- Open Windows Advanced boot options as above.
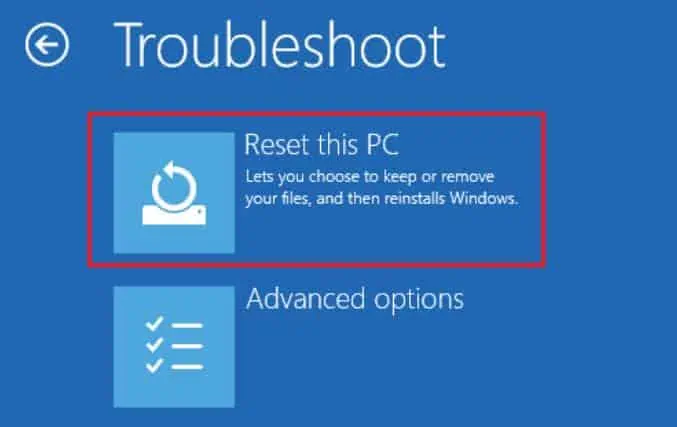
- Go to Troubleshoot and then, Reset this PC.

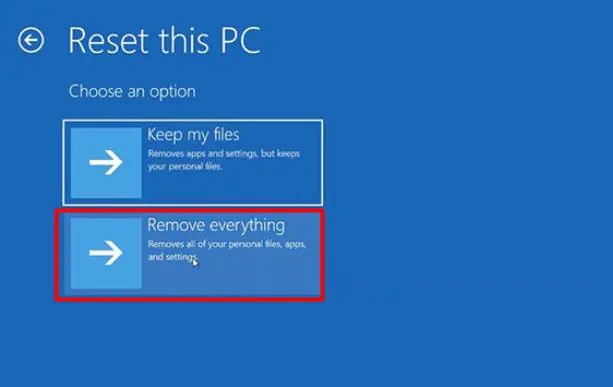
- Choose Remove Everything.

- Hit the Reset button and wait till the process ends.
Clean Installation
Since no other solution worked, you will now be left with your last bid of clean installing Windows. It will delete everything and install a fresh copy on Windows, and resolving issues will corrupt installation files.
- Create a bootable USB with Windows 11 ISO file and insert it into your computer.
- Click the Next button on the setup.
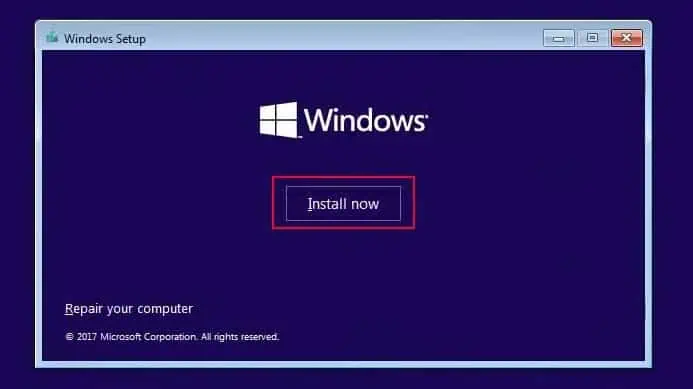
- Proceed with the Install now button.

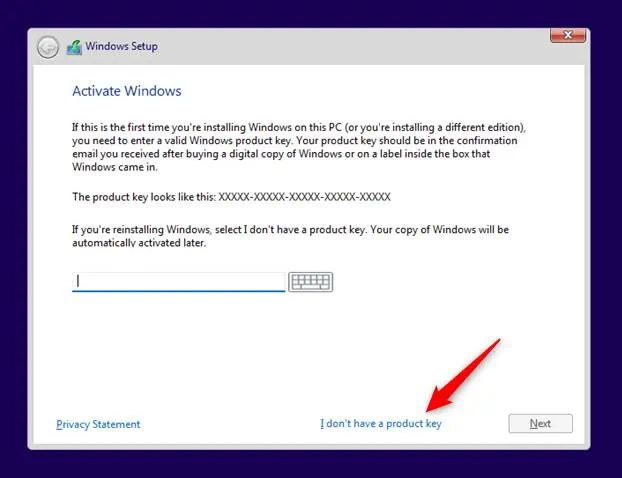
- Choose I don’t have a product key.

- Click on the Next button, select your Edition of Windows and then, Next again.
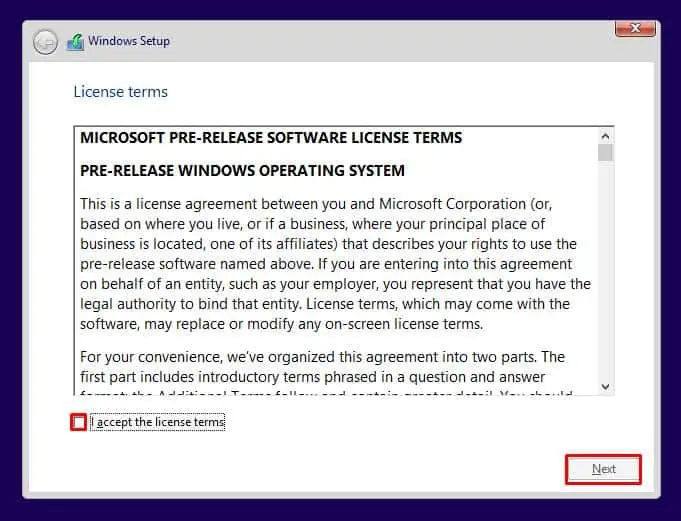
- Choose I accept the license terms and hit Next.

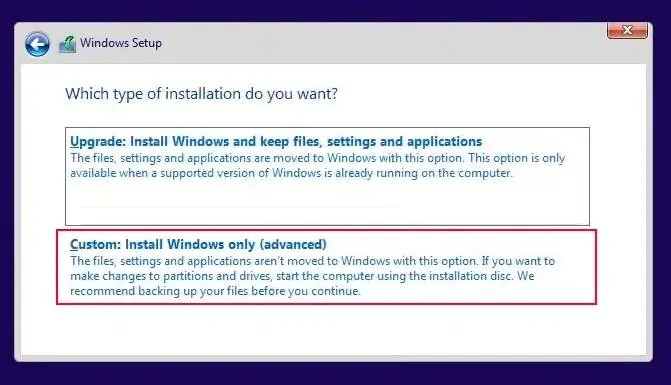
- Select Custom: Install Windows only (advanced)

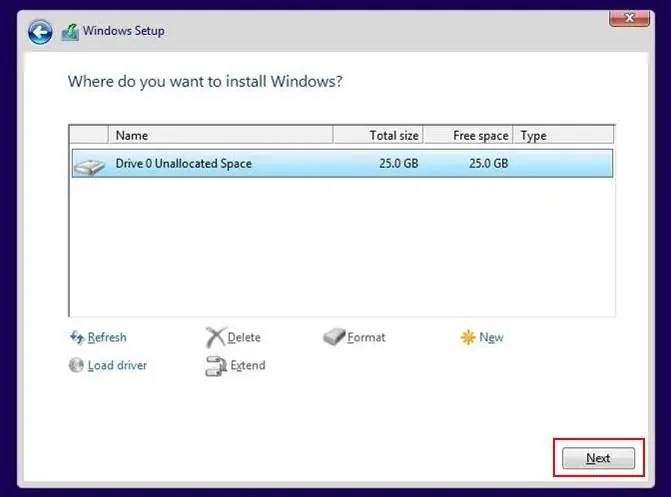
- Pick your current OS partition and click on Delete which would unallocated that space.
- Now, choose the unallocated space and hit Next to install Windows on that partition.


