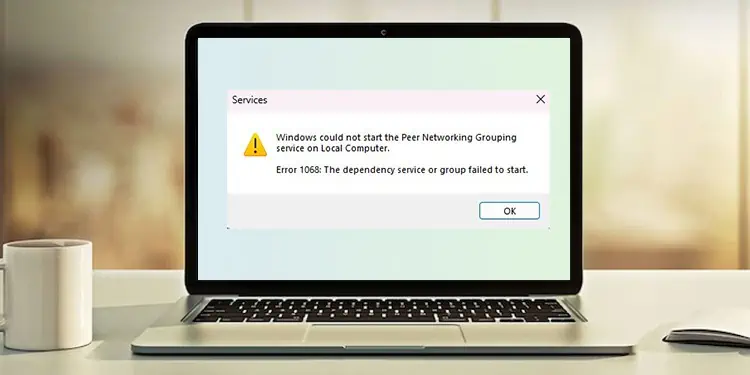
The error Windows Could Not Start The Service on Local Computer shows when the PC is not able to load a particular system service while performing some task. It accompanies the name of the service that the system was unable to start as well as the particular error code.
For instance, if there is some issue with the Windows Time service, then you will see Windows Could Not Start the Windows Time Service on Local Computer with error code 1079. Apart from this, there are several other services, such as Wireless Service, DHCP Client service, etc., that may have faced the error.
The actual cause for this issue depends on the nature of the service that failed. However, as the service name or error code is known, it is usually easy to track the cause and apply the fixes accordingly. And the solutions are also mostly similar for every case.
In this guide, we are going to provide the working fixes that will help you get rid of this error.
Causes For the Windows Service Could Not Start Error
Your computer may experience several bugs that can hinder the working of system services. Also, it may not always be the fault of that particular service. You can see this error even when other related programs and services are malfunctioning.
Let’s look at a few causes of Windows Service Could Not Start Error.
- Dependency services not working or accidentally stopped
- Services not able to load with enough security privileges
- Services being blocked by security applications
- Malware infection
- Corrupt system files
- Outdated drivers
- Faulty system settings
Fixes For the Windows Service Could Not Start Error
Sometimes, the issue can be minor and temporary because of blockage by applications or even system components themselves. So, restarting the PC can fix the problem if that’s the case.
However, you probably may have tried it already. And, if the issue still persists, let’s move on to the fixes straightaway.
Start the Service Manually
It may be just that the service that faced the error was stopped due to some error. In such cases, you should manually start the service and change its startup type to automatic.
Let’s see how you can do it.
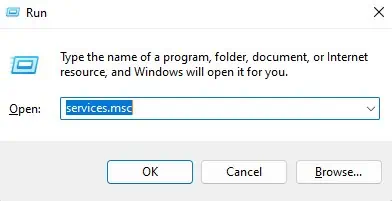
- Press Windows + ‘R’ and type
services.mscto open Windows Services.
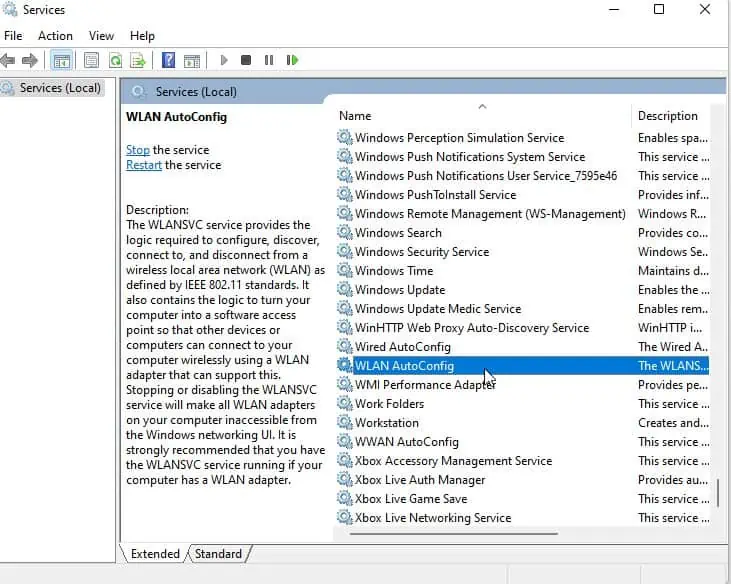
- Find the service that Windows is not able to open. For instance, if the error appeared as Windows could not start the WLAN Autoconfig service, then find WLAN Autoconfig in the list.
- Double-click on the service to open its properties.

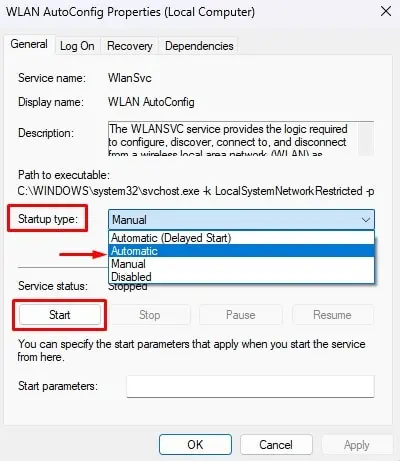
- Set the Startup type to Automatic and click on Start.

Run the application again and see if the issue appears again. You can also change the startup type of the service through the Registry editor if the above method does not allow you to do that. However, the steps can be different for each service. So, we recommend you look for the steps on the internet.
Reboot your system to find the service running again.
Check and Start the Dependency Services
Most Windows services depend on a few other system components and services to function properly. If any of these services are stopped or malfunctioning, then you will see the said error.
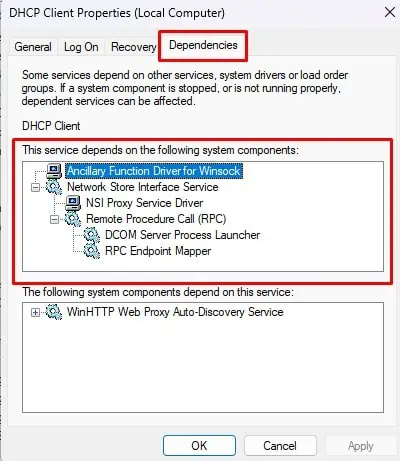
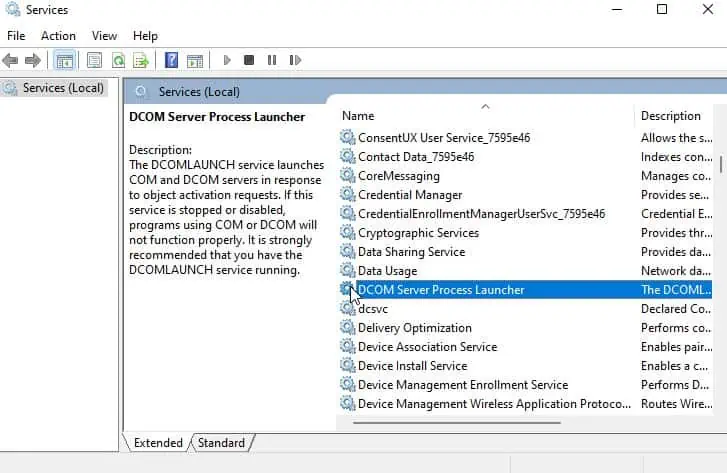
For instance, the DHCP Client service has Ancillary Function Driver for Winsock, Network Store Interface Service, DCOM Server Process Launcher, etc., as the dependencies. So, if you receive the Windows is unable to start DHCP Client service, then an error in these dependencies may be the cause.
So, you should restart all these services as well.
- Press Windows + ‘R’ and type
services.mscto open Windows Services. - Double-click on the service that is unable to load.
- Go to the Dependencies tab. You will find a list of components on which the service depends.
- Expand those components by clicking on the “+” sign.

- Find all the dependencies and look for them back on the home page of Windows Services.
- Ensure that these services are running. If not, go to their properties, set their Startup type to Automatic, and click on Start by following the steps mentioned in the earlier fix.

- If you are not able to start them manually, do it through Registry Editor.
Restart your system and see whether the issue still exists. Since Windows experiences this issue from errors in different services, the dependencies may also vary. You should navigate to the ones particular to the issue you are facing.
Run Windows Troubleshooter
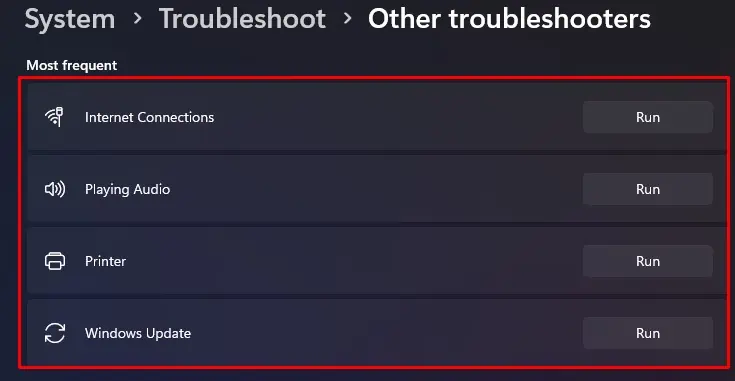
If the problem had occurred due to some minor errors, then the Windows Troubleshooter can help identify and solve it. So, you should run the troubleshooter for the respective service on your PC.
- Press Windows + ‘I’ to open Settings.
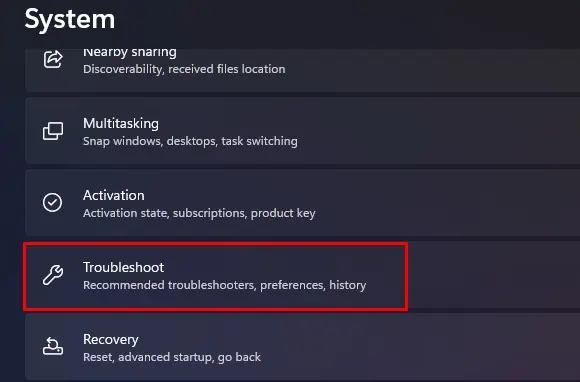
- Under the System menu, find Troubleshoot.

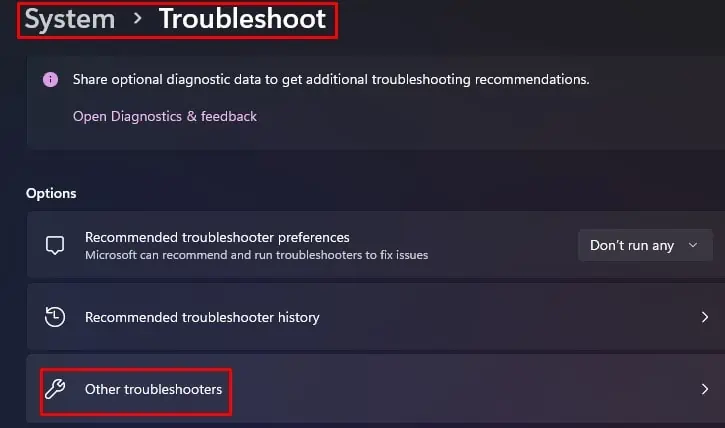
- Go to Other Troubleshooters.

- Find the service that is causing the issue and click Run.

- Follow the instructions, and the troubleshooter will try to resolve the problem.
Run the program again to see if the issue is fixed.
Change the Log On Permission of the Service
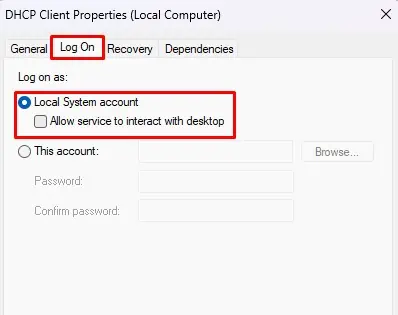
Some services may require higher permission to do their tasks. But, the services are set to run on your system without giving them the complete privilege. This may cause the service to not load on your computer. So, you can try giving full permission to the service by changing the login identity to local system account.
- Open Windows Services.
- Find the service causing the issue and double-click on it.
- Go to the Log On tab.
- Select Local System account and press OK.

Now restart the service and observe whether the problem is gone. You may also have to reboot your PC as well to ensure the services and system operations are synced.
Inspect and Run Necessary Settings, Programs, and Applications
Apart from the dependencies, the system services also depend on several other components and settings. For example, if your Wireless service is not running, then it may be that you have not enabled your WiFi.
So, turning on the Wi-Fi can solve the issue sometimes. And sometimes, you may have to look at the advanced settings, such as resetting the Winsock. Apart from this, every service has its own programs, applications, or settings that are needed to be run, enabled, or disabled. Similarly, outdated drivers and applications can equally be the culprit.
But it is difficult to pinpoint these causes on your own. So, you can look into the event log to find the root cause and perform the fix accordingly.
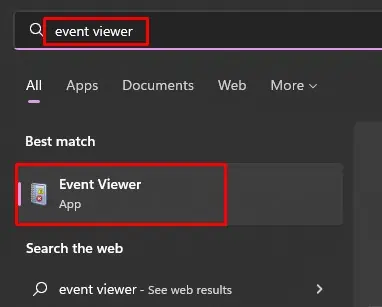
- Press the Windows key and type event viewer on the search bar.
- Click on Event Viewer.

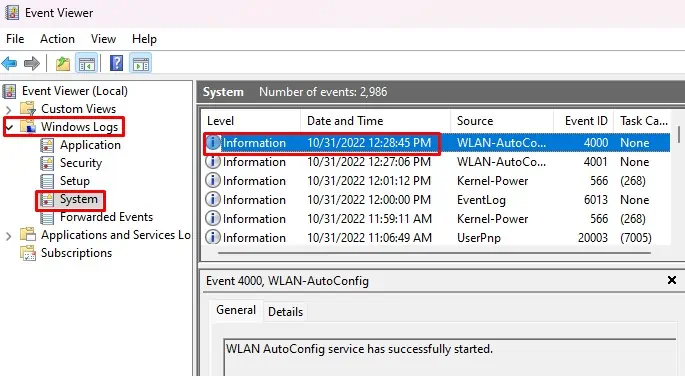
- Navigate to Windows log and click on System to view System event logs.
- Double-click on the error event that troubled you and look at the details. You can find the right one by matching the date and time stamp of the event and the time when you experienced the error.

Once you find the culprit, you should perform the task, such as enabling any settings, updating drivers, etc., accordingly to fix the issue.
Rename Any File With Same Name as the System Folder
When the system tries to run a service, it navigates to its path to find that particular service file. While doing so, if it finds any program or file that has the same name as the folder in any of the folders in the file path, then it won’t be able to start the service.
For instance, there is always a folder named Program Files inside the System Drive. If there also exists another file named Program or Program Files, then the error will appear.
Similarly, the file can also be located anywhere along the path. For instance, if there is a file named System32 inside C:\Windows, which also consists of a System32 folder, the issue is likely to occur. Most of the services generally reside inside the System32 folder. Make sure such naming does not exist in order to address the issue at hand.
So, if you have such files inside the directory where the services are located, then you should rename those files. Run the program again to see if it worked.
Disable or Remove Third-party Antivirus or Windows Firewall
Most of the time, the antivirus program blocks the services from running. If the issue is network related, then the culprit may be Windows Firewall. So, whenever you run a program that requires the blocked service to function, then Windows won’t be able to start that service, hence showing the error.
Thus, you should disable the antivirus program to fix this issue. If you have installed third-party antivirus, then you should uninstall it from your system. You can do this by going to the software’s interface and clicking on the Remove or Uninstall option.
Similarly, you can try disabling the Windows Firewall as well. Let’s see how to do it.
- Press Windows + ‘R’ and type
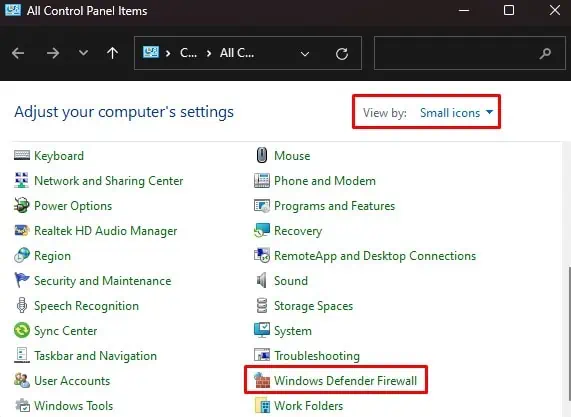
controlto open Control Panel. - Select View by Small Icons.
- Find Windows Defender Firewall and click on it.

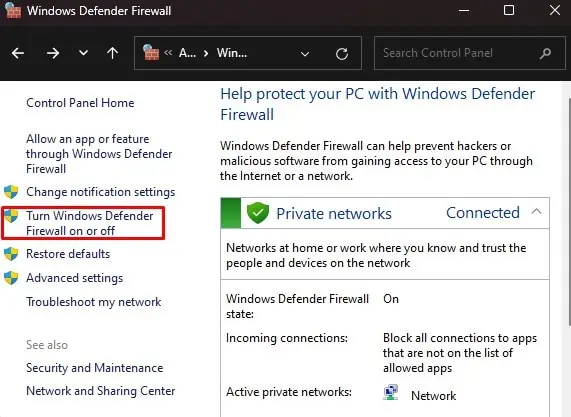
- Click on Turn Windows Defender Firewall on or off.

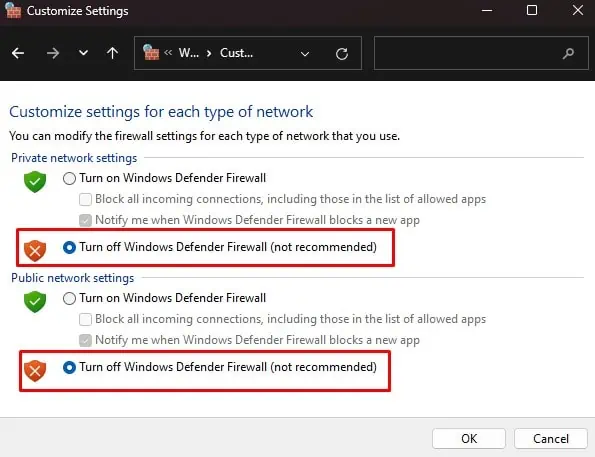
- Select Turn off Windows Defender Firewall (Not recommended) for both private and public network settings.

Run the program to find the service running again.
Repair System Files
If the system files and processes are damaged, then the services won’t start. In such cases, repairing the system files should do the job.
You should run a few system scans that will identify the damaged files and repair them.
- Press Windows + ‘R’ and enter
cmdto open the Command Prompt. - Press Ctrl + Shift + Enter to run Command Prompt in administrative privilege.
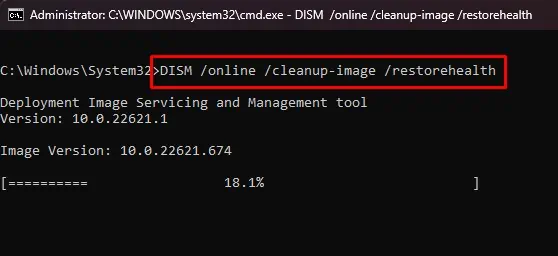
- Type
DISM /online /cleanup-image /restorehealthto perform a DISM scan. It will repair the cache files by downloading them directly from Windows Update.
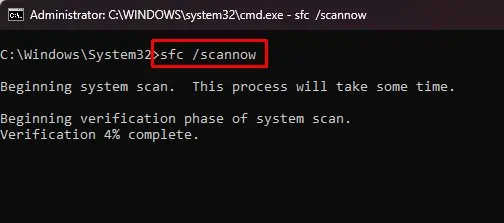
- Type
sfc /scannowto run an SFC scan. This will fix all the corrupted system files by using the healthy ones available in the cache downloaded earlier.
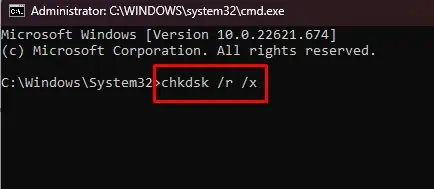
- Type
chkdsk /r /xto perform a CHKDSK scan that repairs the disk errors.
Reboot your PC and see if the problem is fixed.
Perform System Restore
The problem may also occur after a Windows update or after installing new applications. You can remove those particular programs or update them to solve the problem. But you may not be able to pinpoint them all. Or, uninstalling them may not completely remove their stored cache and configurations.
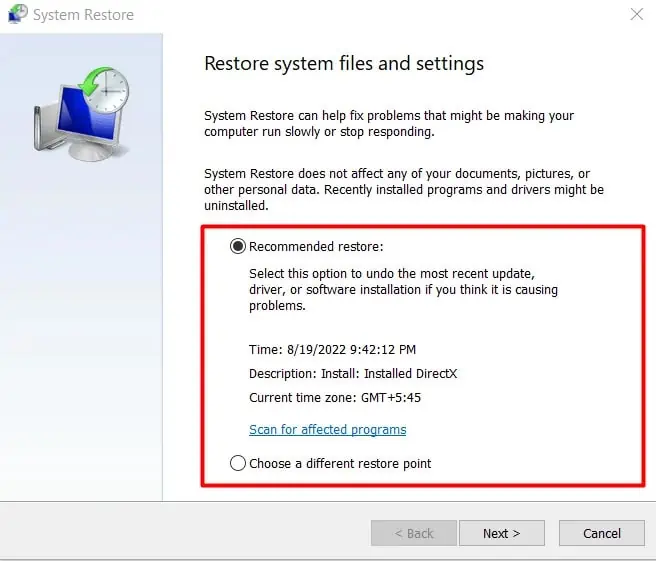
Thus, you can perform a system restore to take your PC back to the point when it was healthy. Your computer creates a restore point every once in a while or before an update or program installation is going to happen. Let’s see how you can revert your PC back to that healthy time.
- Press Windows + ‘R’ and type
rstrui.exeto open System Restore. - Choose any custom restore point or the recommended one.

- Click Finish to start the process.
Once the restore completes, you should find the problem solved.
Perform In-place Upgrade
If the system scans and system restore do not fix the error, then you may have to perform the repair upgrade of your Operating system. This way allows you to reinstall the operating system mending the broken files, processes, and services without losing any personal files and applications.
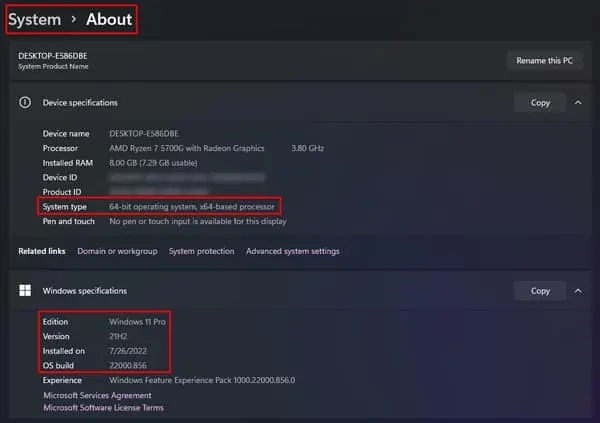
- Press Windows + ‘I’ to open Settings.
- Go to the About section in the System menu.
- Look at the architecture, version, and build of your Windows.

- Download the ISO file for the same Windows OS from Microsoft’s page.
- Mount the ISO image and run
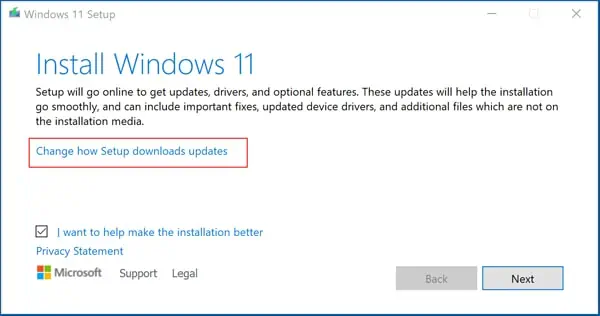
Setup.exefound inside the installation drive. - Select Change how setup downloads updates and choose Not right now.

- Move forward by clicking next as per the instructions.
- Insert an external storage drive with 10 GB and above space.
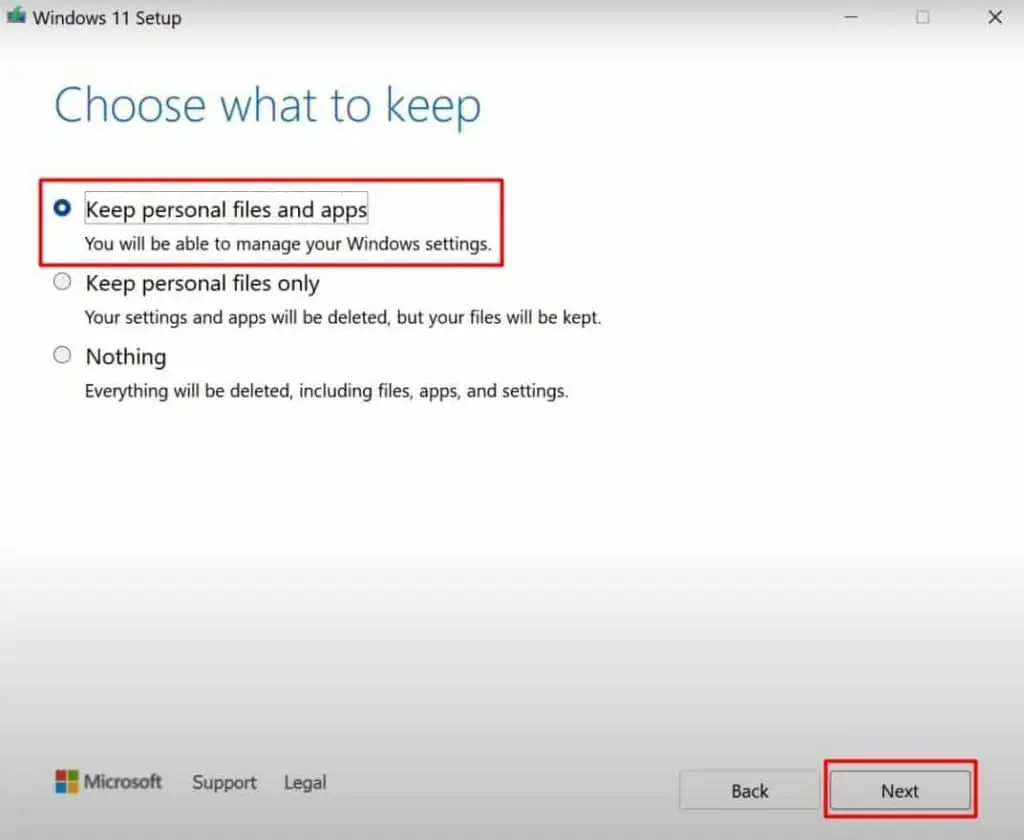
- Click Change what to keep and check the Keep personal files and apps radio after it is ready to install.

- Click Install to start the process.
After the repair upgrade completes, run the program and see if the error has gone away.

