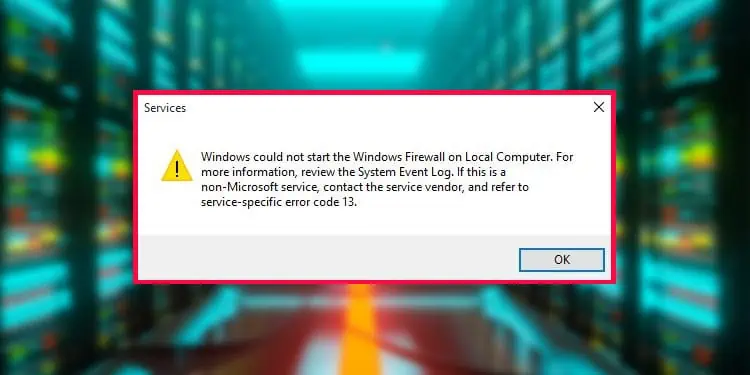
The “Windows could not start the Windows Firewall Service” is a general error that occurs whenever your system can’t run the Firewall Service. There are many possible error codes that come with this error. The Error 1068 code indicates that the dependencies of the service could not start, leading to this error.
Since this indicates problems with the dependency service or accounts, you need to troubleshoot these processes or groups to resolve the error. Sometimes the Firewall Service itself may have some issues which you can resolve by reinstalling it.
There may be a few more additional solutions you need to apply depending on the exact cause on your end. In this article, we have explained all the probable causes along with their corresponding solutions.
What Causes “Windows Could Not Start the Windows Firewall Service on Local Computer”
Here are the potential causes of the above error:
- Dependency services failing to start.
- Errors with the Windows Defender Firewall Authorization Driver.
- System file corruption.
- Malware infection.
- Registry permission issues.
How to Fix “Windows Could Not Start the Windows Firewall Service on Local Computer”
First, make sure there are no internet connection issues. Then, apply the possible solutions below to successfully start Windows Firewall service on your system.
Check Necessary Services
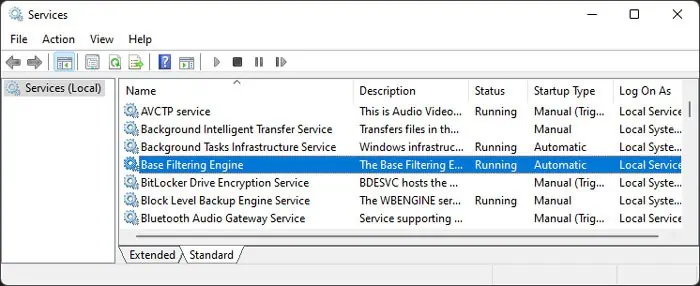
Windows Firewall depends on a few services for its operation. So the first thing you should do is make sure they are running properly. Here’s how you can do so and set the proper setting to run them automatically:
- Boot your computer in safe mode. To do so,
- Open Run by pressing Win + R.
- Type
cmdand press Ctrl + Shift + Enter to open the Elevated Command Prompt. - Enter the command
bcdedit /set {current} safeboot minimal
- Restart your PC.
- After booting in safe mode, open Run.
- Type
services.mscand press Ctrl + Shift + Enter to open Windows Services as admin. - Look for the following services and check their Status:
- Base Filtering Engine
- Remote Procedure Call (RPC)
- DCOM Server Process Launcher
- RPC Endpoint Mapper
- Network Store Interface Service
- Windows Defender Firewall

- If any service is not running or its Startup Type doesn’t show Automatic,
- Double-click on it.
- Set the Startup type to Automatic and click OK.
- After that, open the Elevated Command Prompt and enter the command below to disable safe mode on the next boot:
bcdedit /deletevalue {current} safeboot
Restart your PC and check if you still encounter the issue.
Restore Windows Defender Firewall Authorization Driver
Your Windows Defender Firewall uses the Windows Defender Firewall Authorization Driver mspdrv.sys to run properly. So, you also need to make sure this driver has no issues. Here’s how you can do so:
- Open the Elevated Command Prompt.
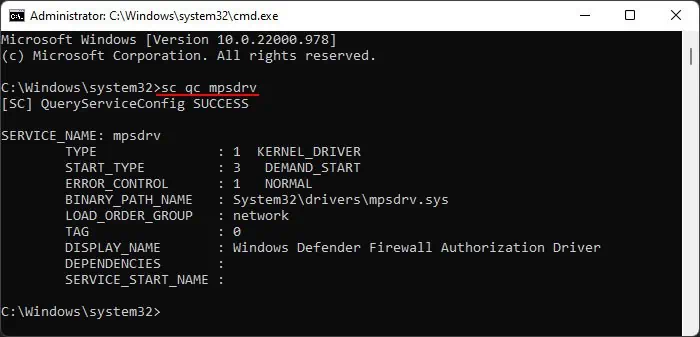
- Enter the following command to check the status of the driver:
sc qc mpsdrv
- You need to make sure the START_TYPE shows DEMAND_START. If it’s different, enter the command:
sc config mpsdrv start=demand - Restart your PC and check if the error occurs again.
- You can also run
sfc /verifyfile=C:\windows\system32\drivers\mpsdrv.syson the Elevated Prompt to check if the file has some issues.
- If it finds an integrity violation, try running
sfc /scanfile=C:\windows\system32\drivers\mpsdrv.sys
Also, you can’t run these commands if the file is missing so check the location through the file explorer in such cases. If the file is missing or SFC can’t fix the corruption, you need to transfer a working copy from a different computer.
Reinstall Windows Firewall
You can also try reinstalling the Windows Firewall altogether to resolve any errors within. This resets any changes you made to the Firewall profile, however it is better than not being able to run this process at all. Here’s what you need to do:
- Open the Elevated Command Prompt.
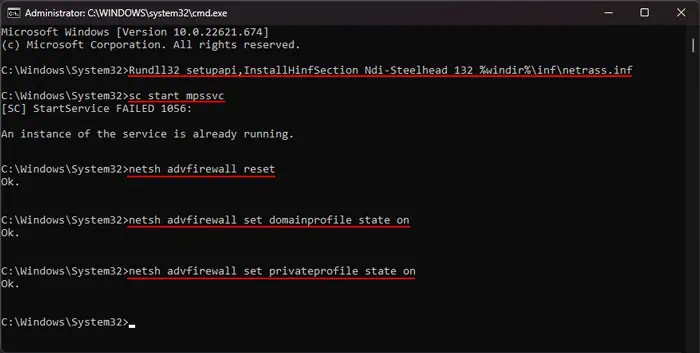
- Enter the following commands:
Rundll32 setupapi,InstallHinfSection Ndi-Steelhead 132 %windir%\inf\netrass.infsc start mpssvcnetsh advfirewall resetnetsh advfirewall set domainprofile state onnetsh advfirewall set privateprofile state on
Restart your PC and check if the issue resolves.
Repair Corrupt System Files
We have already mentioned that the Windows Firewall service relies on many dependencies. So, if any one of such files is corrupt you will experience the above error. You need to run the System File Checker on all system files to check for and repair any potential corruption to prevent such issues. To do so,
- Open the Elevated Command Prompt.
- Enter the command
sfc /scannow
Scan for Malware
By default, Windows is configured to have the proper settings and files for running Windows Firewall. So unless you made the unnecessary changes, any errors in the settings or files are likely due to some malware script.
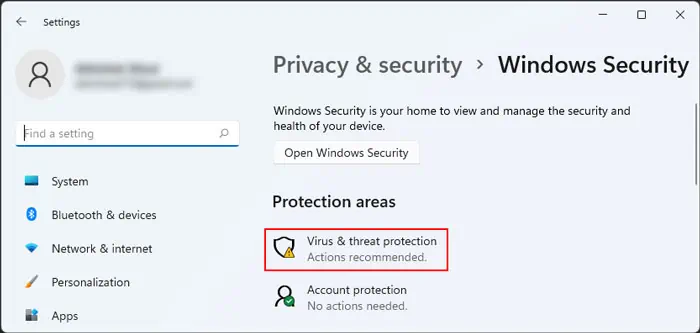
The above methods may help resolve your issue, but you need to detect and remove the malware to prevent the error from occurring again. Here’s how you can do so using the built-in Windows Security or Defender:
- Open Run and enter
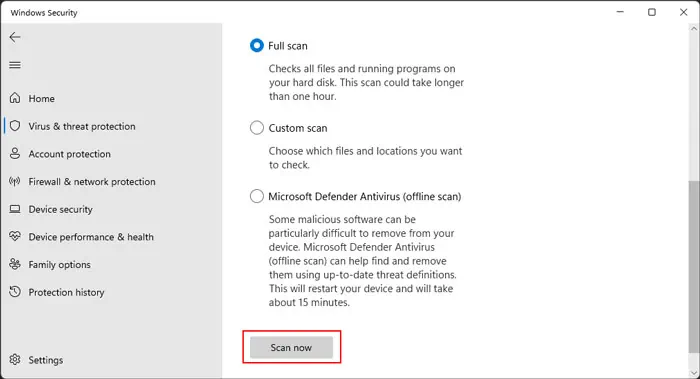
ms-settings:windowsdefender - Go to Virus & threat protection and then Scan options.

- Check Full scan and click on Scan now.

Disable Third-Party Antivirus
Many third-party antiviruses are responsible for blocking dependency services from starting. While they may actually contain malware or threats, usually it’s a false positive.
Windows already contains a fantastic antivirus, the Windows Defender, so you don’t really need other security apps. If you still want to use them, you can try disabling them temporarily and see if the Windows Firewall service can start without any issues. However, make sure that your computer does not contain any threats before doing so.
The process to disable the antivirus differs between the different software. So, we recommend checking the official website if necessary.
Set LocalService and NetworkService Users to Admin Group
You can also encounter this error if there are permission issues related to the LocalService or NetworkService groups. Windows Firewall logs on through the LocalService account so such issues prevent starting the Firewall.
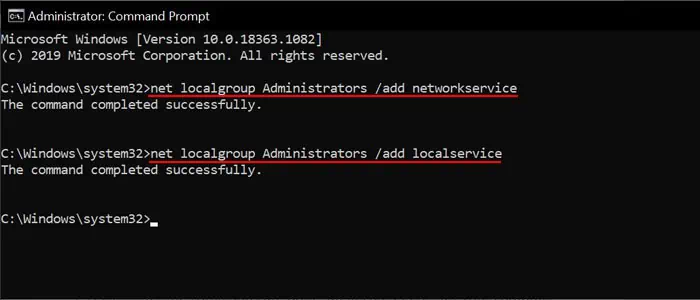
You can try creating a new user account to avoid this issue. However, if you want to resolve the problem in your original account, you can try adding the above users to the Administrators group which bypasses the original permissions. Here’s how you can do so:
- Open the Elevated Command Prompt
- Enter the following commands:
net localgroup administrators localservice /addnet localgroup administrators networkservice /add
Restart your PC and check if the issue persists.
Perform a System Restore
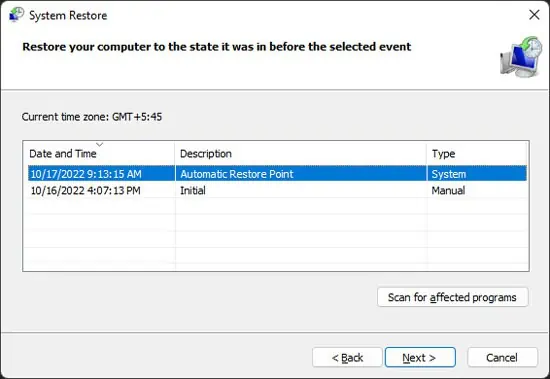
If you have a suitable restore point where the Firewall could start without any issues, you can try restoring your system back to that point. This takes care of any registry errors as well as system file corruption that your system encountered afterward. To do so,
- Open Run and enter
rstruito launch the app. - Select the appropriate restore point and follow the on-screen instructions.

