Routers generally act as a DHCP server and dynamically assign unique IP addresses to devices on the network. They lease these IP addresses from a predefined pool known as the DHCP Scope.
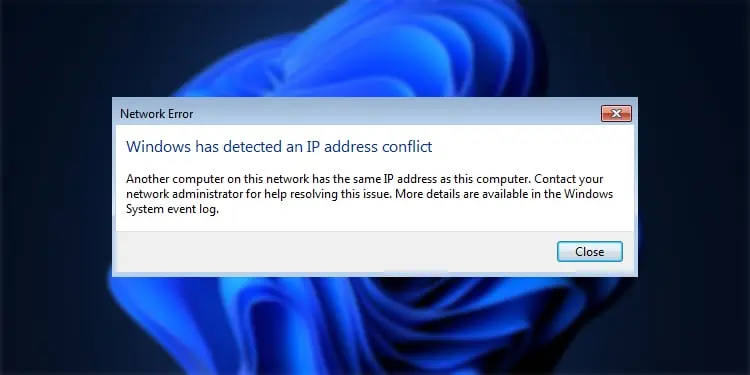
If a Static IP is set within this range and it conflicts with a DHCP-assigned address, you’ll encounter the “Windows has detected an IP Address conflict” error.
Sometimes, users also encounter this error without setting any static IPs due to a faulty DHCP server or due to overlapping IP pools. We’ve detailed how you can resolve this error in all such cases in this article.
Ways to Fix the IP Address Conflict
Checking the list of connected devices via router settings and troubleshooting the problematic IP is the most reliable way to deal with this error. However, some other general fixes have also helped against this error in some cases. As such, we recommend trying the solutions in the order listed below.
Re-enable Network Adapter
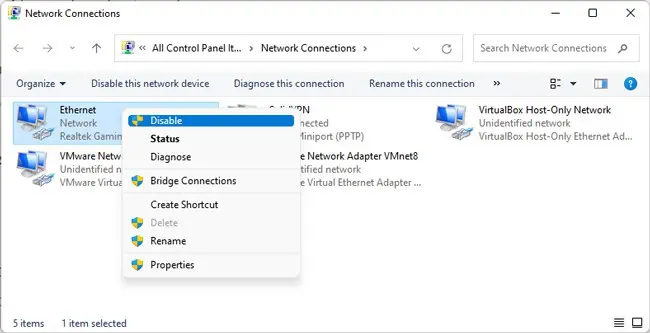
Disabling and re-enabling the network adapter is an easy fix for a host of common networking problems, including this one. Here’s how you can try this:
- Press Win + R, type
ncpa.cpl, and press Enter. - Right-click the network adapter and select Disable.

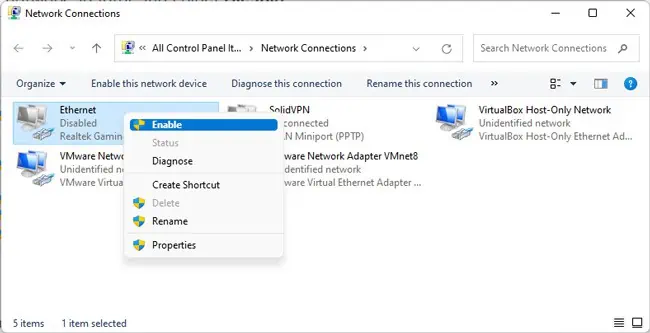
- Now repeat the same but Enable it this time.

- Check if the IP Address issue is resolved. If not, move on to the next fix.
Check Devices Connected to Router
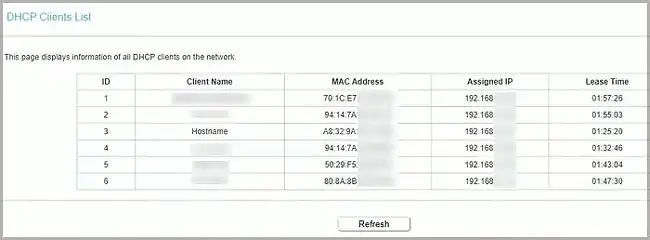
As stated, you can check the list of clients (PC, phones, printers, etc.) connected to your router via the router settings. Once you find the conflicting addresses from this list, you should check the DHCP or Static IP sections further below as appropriate. With that said, here are the necessary steps:
- Press Win + R, type
cmd, and press Enter. - Type
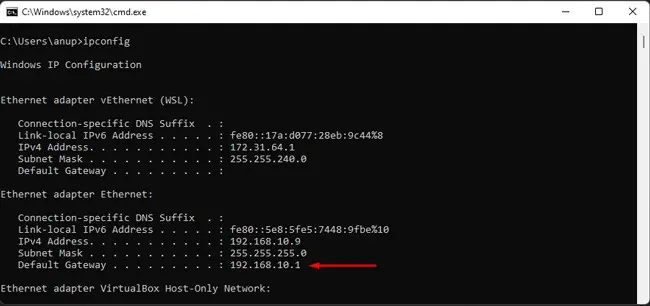
ipconfigand press Enter.
- Note the Default Gateway of your network adapter.
- Launch any web browser and enter the router IP from Step 3 into the URL bar.
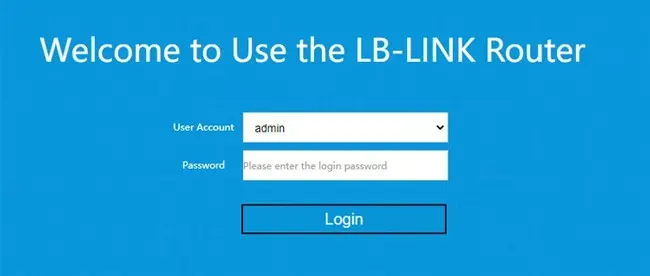
- Enter your router’s credentials to access the settings page. The default values should be written on the back of your router.

- In the router settings page, go through a number of tabs. The connected devices list may be displayed on the home page or under sections like Administration, DHCP Client List, or Network Map.

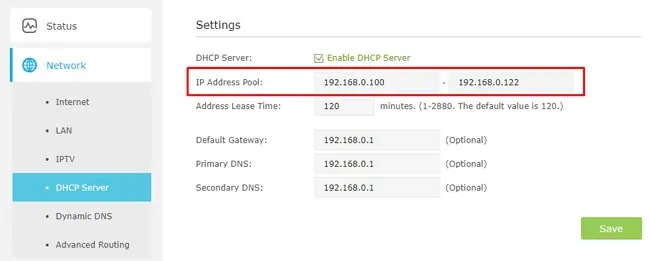
- After checking the list, if the conflicting addresses seem to be due to overlapping IP pools, you’ll want to adjust the DHCP scope.

- If a Static IP is causing the conflict instead, you should ensure the IP is set outside of the DHCP scope.
Renew DHCP Lease
DHCP servers assign IP addresses for a certain lease period (e.g., 120 mins). Once half of this lease period has passed, clients attempt to renew the lease by sending a DHCPREQUEST message to the server.
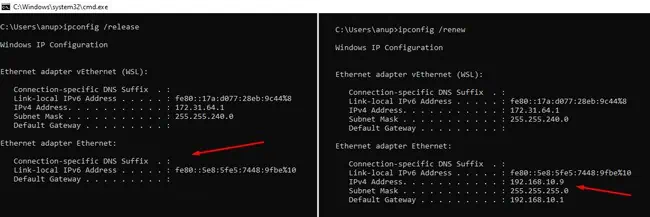
If the renewal fails and the lease expires, the DHCP server may notice the conflicting addresses and allocate proper IP addresses. But a more hands-on approach would be to manually release and renew the IP yourself. Here’s how you can do this:
- Press Win + R, type
cmd, and press Enter. - Execute the following commands:
Ipconfig /releaseIpconfig /renew
- Check if the IP Address conflict is resolved.
Change Static IP
If a static IP set within the DHCP range is causing this issue, you can fix it by simply changing the static IP. The same is also true if the same IP has been assigned to two or more devices. Here’s how you can fix the issue in such cases on Windows devices:
- Press Win + R, type
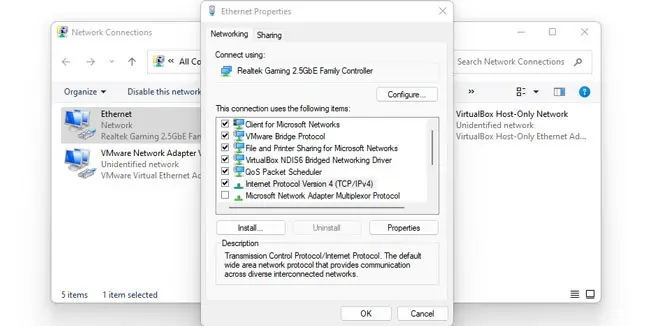
ncpa.cpl, and press Enter. - Right-click your network connection and select Properties.
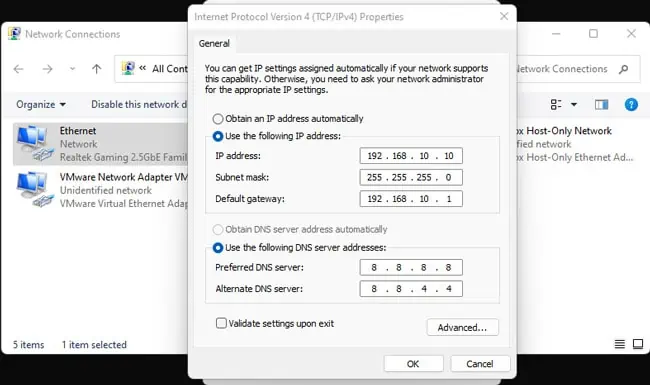
- Select Internet Protocol Version 4 (TCP/IPv4) and click on Properties.

- In the Use the following IP address section, set the new IP and press Ok. Make sure this IP is set outside of the DHCP range that you checked earlier via router settings.

If you need to change the Static IP on other platforms like Mac or Android, we have a detailed article on changing IP addresses that you may find helpful. Aside from these, if you need to change the IP address for certain smart devices like printers or TVs, we recommend referring to the manual or support knowledgebase for your specific device.
Upgrade Router Firmware
Although somewhat niche, bugs in your router’s current firmware revision could be the reason why the DHCP server is having problems. You can try updating the router’s firmware in such cases.
As with any other device, make sure the firmware update process doesn’t get interrupted. With that said, the exact steps will vary slightly depending on the router model, but the general process is shown below:
- Launch any browser and access the router setup page, as done earlier.
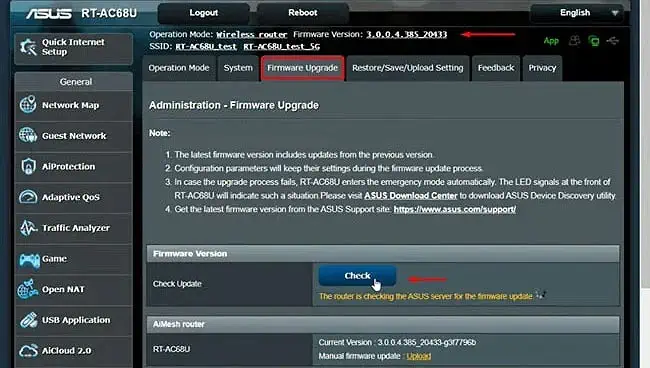
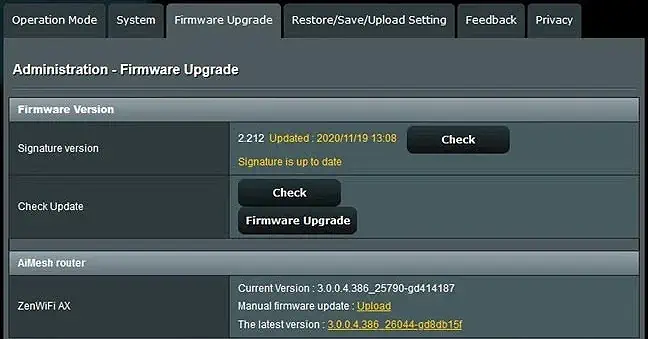
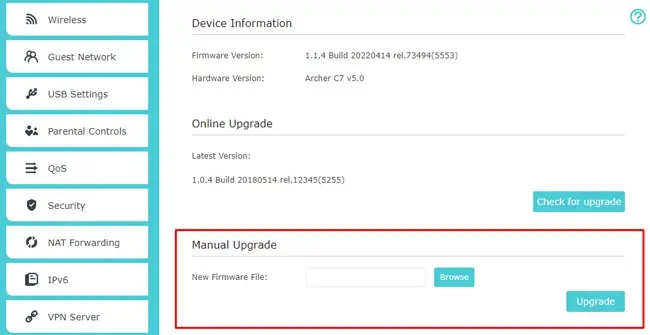
- Look for the Firmware Update or Upgrade option in sections such as Firmware, Advanced, Administration, Management, or something similar.

- If the router allows you to check for available updates, press the Check button. Use the Upgrade Firmware or Update Software option afterward to auto-update the firmware.

- If Step 3 isn’t applicable in your case, you must update manually. To do this, note the router’s model number first.
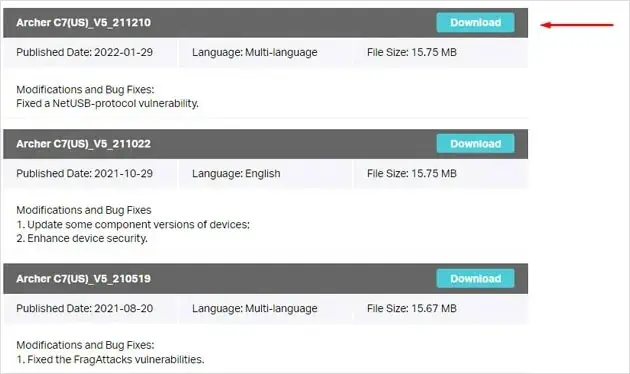
- Open your router manufacturer’s support site and head to the Firmware section.
- Use the model number from Step 4 to locate and download the firmware update file.

- Switch back to the router settings page. In the Firmware section, click on Browse, Upload file, or similar option.

- Select the file downloaded in Step 6 and press Ok to proceed with the upgrade.

