It is common for the installation of software and drivers to get stuck with error messages in the middle.
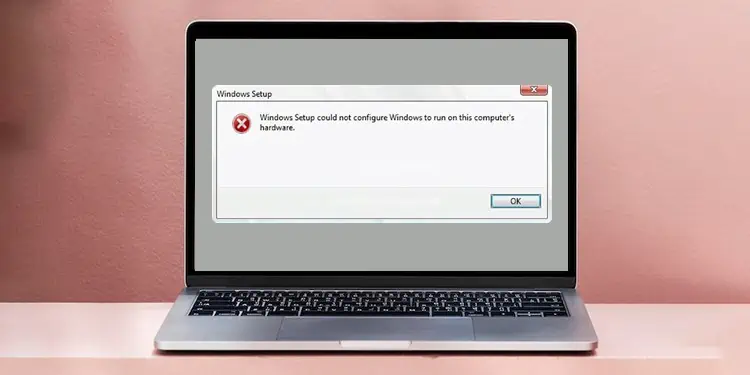
But it can also happen when you try to install a fresh Windows operating system to your PC or upgrade it to the latest one. The installation may not complete with an error message “Windows Setup Could Not Configure Windows To Run On This Computer’s Hardware”.
This appears when the process reaches or finishes the “Completing Installation” phase right at the end. You may have tried to restart the system and the process, but it will eventually end up with this error message. Some systems will not open at all after this issue, and some end up with frequent issues, such as BSOD and crashes, while you use it.
So, in this guide, we have provided the fixes to get rid of this error and help you continue with the Windows installation.
How to Fix Windows Setup Could Not Configure Windows Error
- For instance, the installation can continue normally after you simply close the error message by pressing the ‘X’ icon. It is much easier, and you can try this before moving to any other fixes. But it does not always work.
- Similarly, if you have inserted any additional hardware, then the OS may not be able to recognize their driver, hence displaying the error message. So, you can try removing any new devices, such as USB Keyboard, Speaker, etc., and run the installation again.
- Furthermore, a few of the users have reported that they faced the issue due to the battery in the case of a laptop. It may be probably due to the battery driver conflicting with the OS. Thus, if you have a removable battery, then disassemble it and run the laptop directly from AC power. This should solve the issue for you.
But if the problem still persists, then let’s move on to the fixes right away.
Install Msoobe Manually
When you install the Windows Operation System, it needs to be activated and registered for the OS to be loaded properly, which is performed by the msoobe.exe program. If it is not able to activate the software automatically, then the said error can appear during the installation.
In such a case, you may have to force the msoobe.exe setup during the process. Let’s see how you can do it.
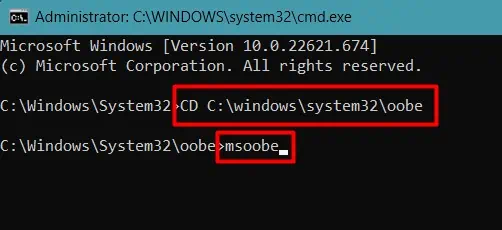
- Press Shift + F10 to open the command prompt when the error appears on your screen during installation.
- Type
CD C:\windows\system32\oobeto get to the oobe folder inside system32 and hit Enter. You may have to replace the letter C: with the letter assigned to your drive. - Again, type
msoobeand press the Enter key.
- Close the Command Prompt window by clicking on the ‘X’ icon at the top.
- The error message will disappear, and the customization window will appear, indicating the installation has been completed.
But, sometimes, the PC may shut down immediately after receiving the error message, and you might not have had any time to perform the fix. In such a situation, you should restart the system and perform the fix even before the error shows up.
Or, you can run the msoobe.exe file within the short time frame between the appearance of the error and the closing of the system.
Also, sometimes, the error message may still appear even after installing the msoobe.exe program through the command prompt. For such a case, simply closing the error message is also known to fix the issue.
Load Particular HDD Storage Driver
Nowadays, the hard drives are of Advanced Format type, which has a larger sector size and helps in developing higher capacity storages. However, this hard drive type may not be suitable and recognized by older operating systems, and hence the error can appear.
Furthermore, most systems have RAID configuration as the Intel storage controller for the SATA drives. This configuration may not work well with the storage controller driver present in the installation software, causing the issue.
So, you should download another storage controller driver from Intel and load it during the installation. But you will need another system to download the driver and a USB drive to transfer and load the downloaded file. Let’s look at the way to do it.
- Download the Driver from the link by navigating to the Drivers & Software section on another PC.
- Insert a USB Flash drive into the system and copy the driver to it.
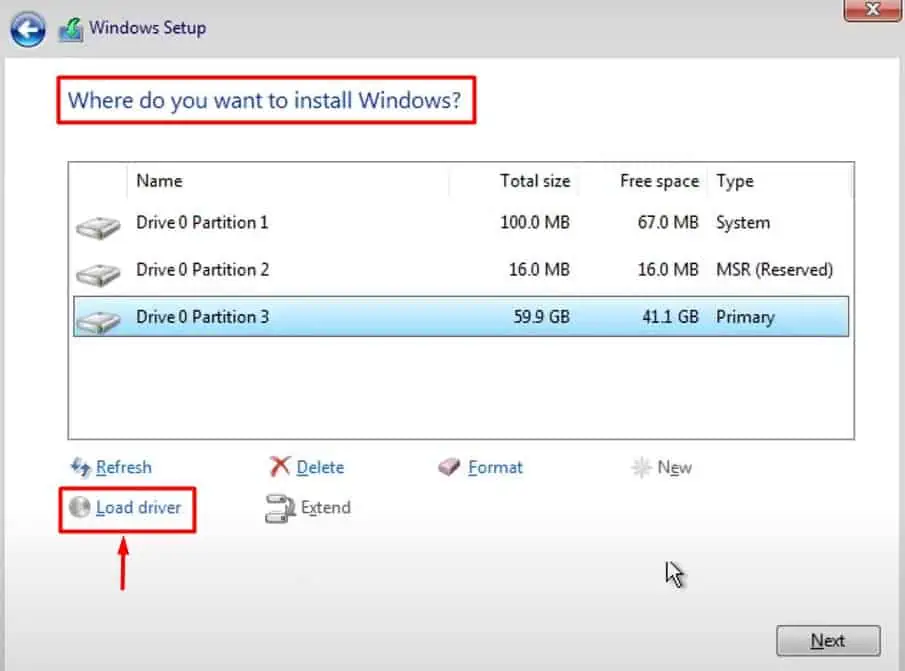
- Start the Windows installation process on your PC and get to the page “Where do you want to install Windows?”
- Insert the USB drive in your system.
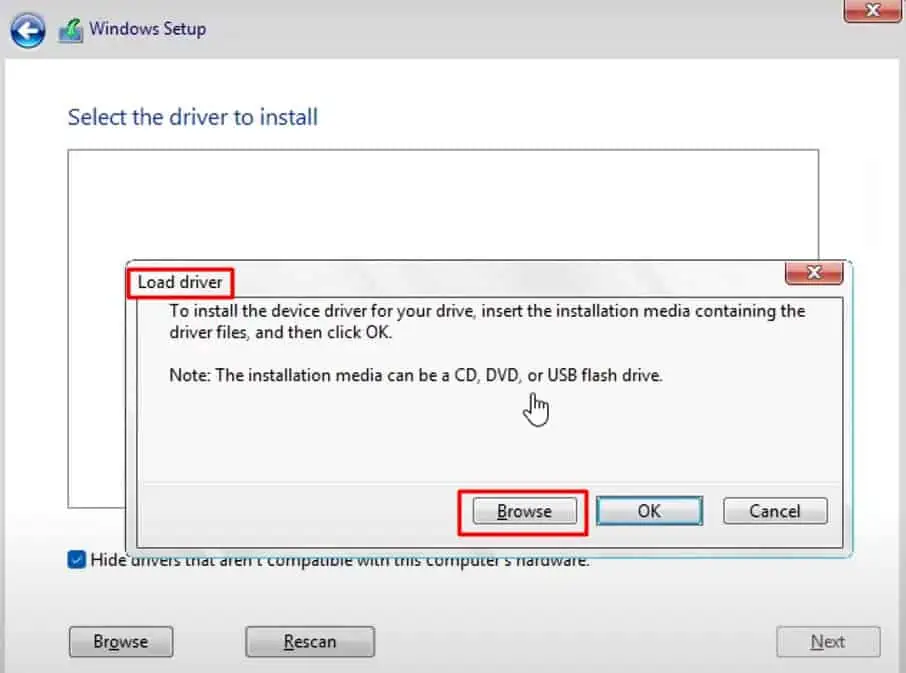
- Click on Load Driver.

- Browse the downloaded driver from the USB.

- Resume the installation of windows after the driver is successfully loaded.
See if the error still appears.
Change SATA Configuration
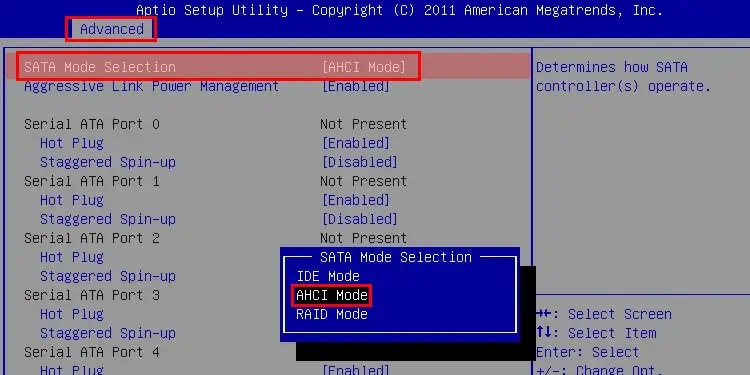
As we mentioned earlier, the RAID configuration can cause this issue for most PC. Sometimes, even after installing the driver, as in the earlier section, the error may persist. To solve this, you should simply change the SATA configuration to IDE or AHCI from BIOS.
- Reboot your system and press F2, F12, Delete, or the respective key repeatedly to get to the BIOS page.
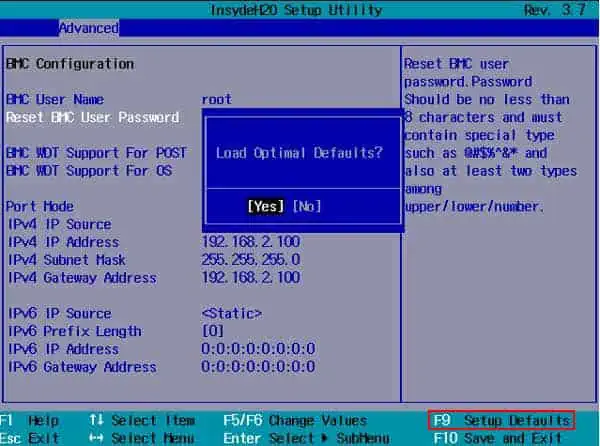
- Press F9 or the respective key to load the default settings in BIOS.

- Now, go to the Advanced menu.
- Find SATA Configuration. The name may vary, and the option may be found in other menus depending on the system.
- Change it to IDE or AHCI.

- Press F10 to save the settings and exit from BIOS.
Start the Windows installation and see if the error has gone now.
Re-install Windows From Another ISO
It may be just that the ISO file you used for installing Windows is corrupted or not compatible. You can download the latest Windows from Microsoft and complete the installation to solve the issue.
If you are not familiar with using a USB drive to install Windows, the process is similar to how you performed the installation earlier. The only difference here is you will have to make the Flash drive bootable. Here are the steps to do it.
- Download the Media Creation Tool from Microsoft.
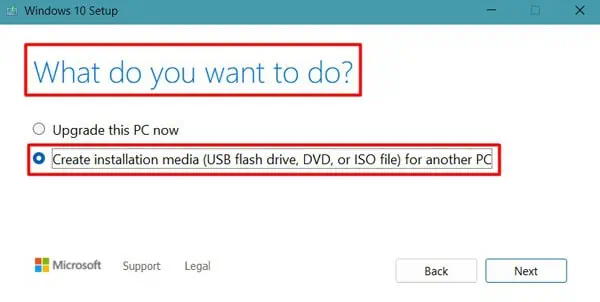
- Run the program and get to the “What do you want to do?” page.
- Insert a USB Flash Drive.
- Check the Create installation media for another PC box and click Next.

- Select the USB drive and press Next.
- Follow the instruction to complete the process.
You can also use third-party programs, such as Rufus, to make the USB bootable by using the downloaded ISO file.
Now start the installation. The error should not appear during the process.

