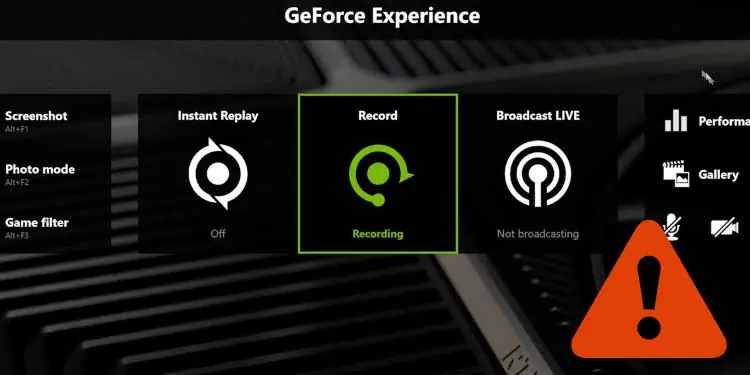
If you own a graphics card from NVIDIA, you are certainly familiar with Geforce Experience and the integrated overlay feature.
The overlay feature is widely used in-game for taking screenshots, recording gameplay, viewing frame rate, streaming, and doing instant replays. However, this convenient tool can sometimes be unresponsive and not work.
There might be multiple reasons why the Geforce overlay stops working. You may not have enabled the feature itself or other programs may be interfering with it.
Whatever the reason, We have listed all the possible workarounds that will help you sort out the problem.
Why Geforce Overlay Stops Working?
Before moving on to the fixes section, let’s point out some causes why the Geforce Overlay stops working.
- Corrupted Graphics driver
- Non-admin access to Geforce experience
- Issues with Microsoft Visual C++ Redistributable Packages
- Disabled experimental features
- Pending Windows Update
- Interfering settings with Steam and Spotify
Fixes for Unresponsive Geforce Overlay
Geforce Experience provides you with a hotkey Alt + Z to launch the overlay feature, but it may not work every time. Fixing this issue is not that tedious and time-consuming. You will be able to sort out the issue once you go through this post.
Here, we have compiled a list of 11 fixes you can apply to solve the issue. Let’s dive straight into them.
Enable in-game Overlay in Geforce Experience
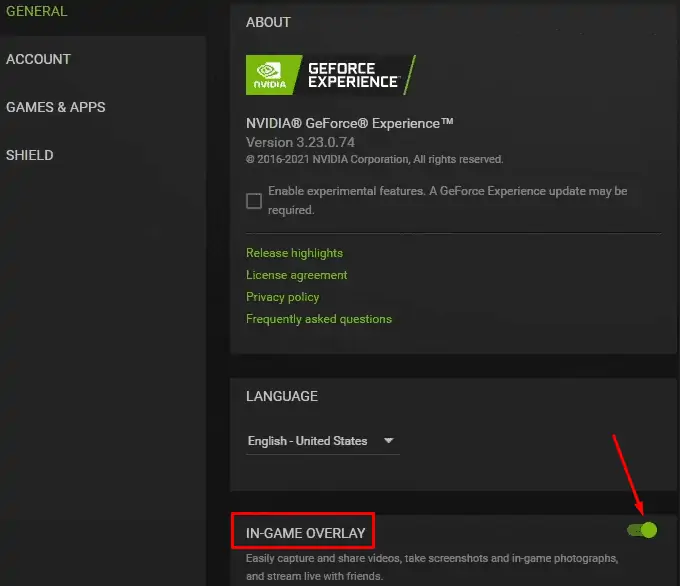
You can not say that your Geforce overlay is not working without enabling it. You must first check if the in-game overlay is enabled inside the Geforce experience. You should open Geforce only after closing all the running games. Follow these steps to check and enable it:
- Launch Geforce Experience.
- Click the Settings icon on the top right corner.
- Select the GENERAL menu from the left pane.
- Then toggle on the IN-GAME OVERLAY option in the right pane.

Keep toggling on and off the option if toggling once does not work.
Reboot Your System
Rebooting is recognized as a problem solver to most of the errors in Windows with no further hassles. It flushes caches and corrupted data in your RAM, possibly interfering with the overlay.
Run Geforce Experience With Administrator Privileges
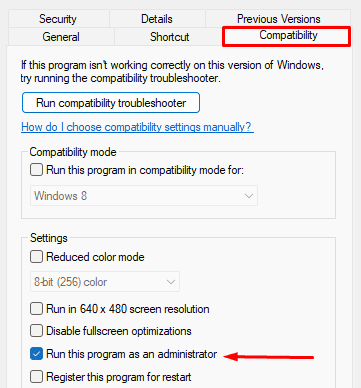
If you are not using Geforce experience as an administrator, you may face the issue with overlay. While on non-admin access, all the features in Geforce are not enabled which may cause it to freeze. Make sure you run it with administrator privileges. Here’s how to do it:
- Right-click the Geforce Experience icon on your desktop and select Properties from the context menu.
- Jump to the Compatibility tab and check Run this program as an administrator.

- Click Apply and then OK to save the changes.
Enable the Experimental Features
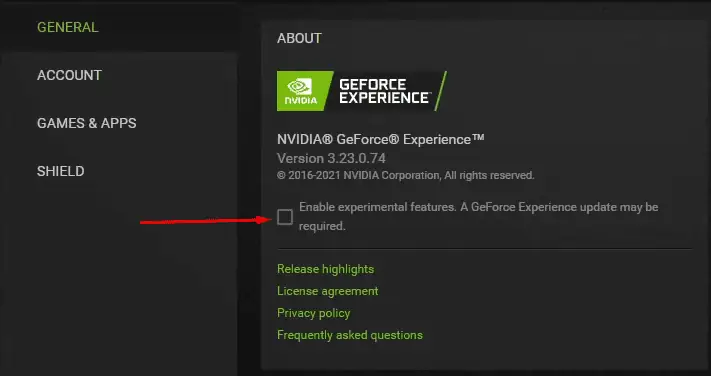
Experimental features in the Geforce experience are the beta features that are not fully public. It consists of the overlay feature along with new drivers and optimization settings. If disabled, you may not be able to use the overlay feature. Try enabling it and see if it solves the problem. Follow these steps to enable it:
- Open Geforce experience and click the Settings icon.
- Select GENERAL in the left section.
- Under the ABOUT section, check the Enable experimental features option in the right pane.

Make Changes in the System Configuration
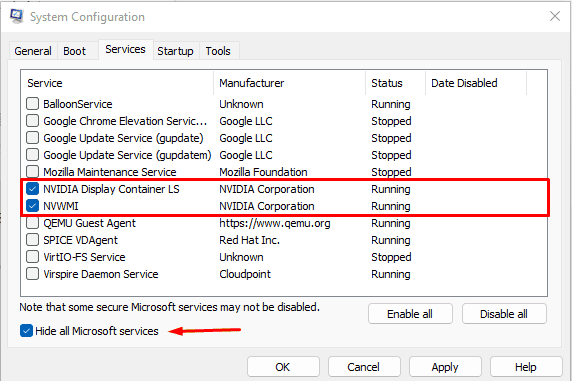
System configuration is a built-in utility tool in Windows for configuring and troubleshooting the startup process. It allows you to change what services can and cannot run. There might be certain services that are preventing Geforce overlay from working.
You can disable services other than Microsoft and NVIDIA and determine which service prevents the overlay from working. Here’s how:
- Type System Configuration in the Windows search box and launch the application.
- Go to the Services tab and check the Hide all Microsoft services option.
- Uncheck all services that are from manufacturers other than NVIDIA.

- Save the changes and restart your computer.
If the Geforce overlay starts working now, you should revert the changes that you just made. Go on enabling the services successively and you will figure out which service was causing the issue.
Update the Graphics Driver
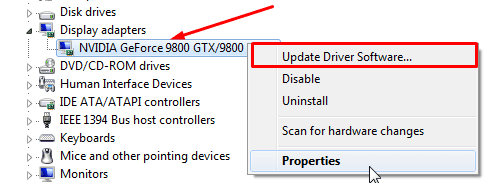
The overlay feature will not work correctly if your graphics driver is corrupted or outdated. You should ensure the latest version of the graphics driver is installed for the proper functioning of the Geforce overlay. Update your graphics driver and see if the issue is solved. Follow these steps to update the graphics driver:
- Hit Windows + R to open the Run dialog box.
- Type
devmgmt.mscin the text field and hit Enter to open the Device Manager. - Expand the Display adapters and right-click on your Nvidia graphics driver.
- From the context menu, choose the Update driver option.

- On the next screen, select Search automatically for drivers. It will download and install the latest version of driver.
- If you have a driver with you, you can proceed with Browse my computer for drivers option.
Install Media Feature Pack
This fix is especially for you if you are a Windows 10 N user. The media feature pack facilitates users with media technologies on your PC. It plays an assisting role in the Geforce experience since it deals with graphics. Note that you should have an updated graphics driver before installing the media feature pack.
Install the media feature pack on your PC and see if it solves the issue. Follow these steps:
- Go to the official Microsoft page to download the Media Feature pack.
- Select the version that you want to download and proceed.

- Follow the on-screen instructions for installation.
- Restart your computer and see if Geforce overlay starts working.
Repair C++ Redistributable Packages
Corrupted C++ Redistributable packages create problems while running the overlay feature. They are the library files that provide a runtime environment for several applications including the Geforce experience.
They must function properly so that you don’t encounter any issues while using the overlay feature. Repair these packages and see if it fixes the problem with the Geforce overlay. Here’s how:
- Press Windows + R on your keyboard to open the Run dialog box.
- Type
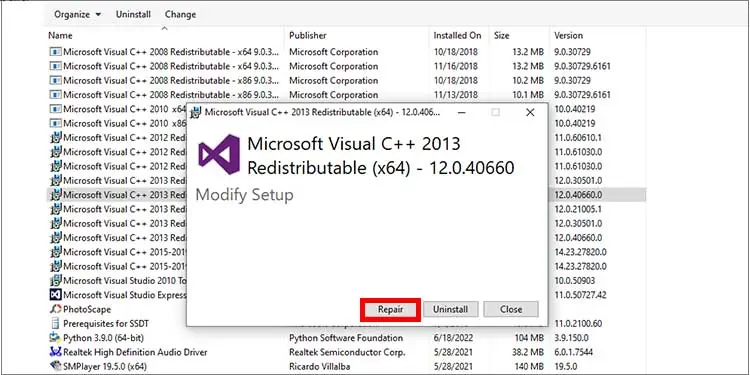
appwiz.cplin the search box and hit Enter. - In the Programs and Features window, find Microsoft Visual C++ Redistributable packages.
- Right-click over it and then click Change.
- In the pop-up window that appears next, click the Repair button. It will repair errors in the package and make it work again.

Repeat the repair process for each of the C++ packages that you see in the Programs and Features window.
Disable NVFBC Capture in Steam
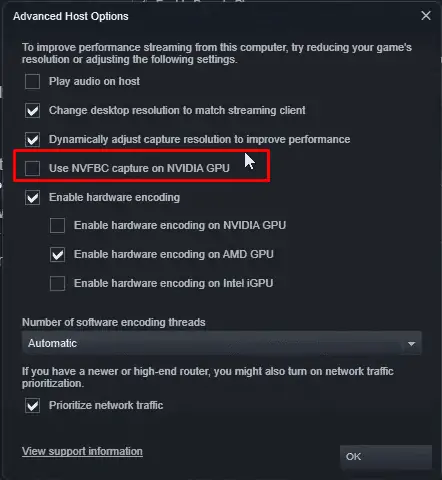
NVFBC capture is one of the multimedia features integrated into the Steam application. It is mainly concerned with streaming. If you use this feature in the Nvidia GPU, it can interfere with the overlay feature. Consider disabling it to see if the issue is solved. Here’s how to do it:
- Launch the Steam application on your PC.
- Click the Steam button at the top right corner of the Steam window and select Settings.
- Select the In-Home Streaming tab from the left section.
- In the right section, uncheck the option Use NVFBC capture on NVIDIA GPU under the Advanced Host Options.

- Exit from the Steam application.
- Try opening the Geforce overlay feature and see if the issue persists.
Change Spotify Settings
If you have Spotify installed, you may also have the Spotify overlay feature enabled. The overlay feature of Spotify can interfere with the overlay feature of the Geforce experience and create issues. You should make minor changes in Spotify so that it won’t create a problem with Geforce Overlay. Follow these steps:
- Launch Spotify on your PC.
- Click the Edit menu in the top left corner of the window and select the Preferences option from the context menu.
- Please scroll down to find Display options and toggle off the Show desktop overlay when using media keys option inside it.

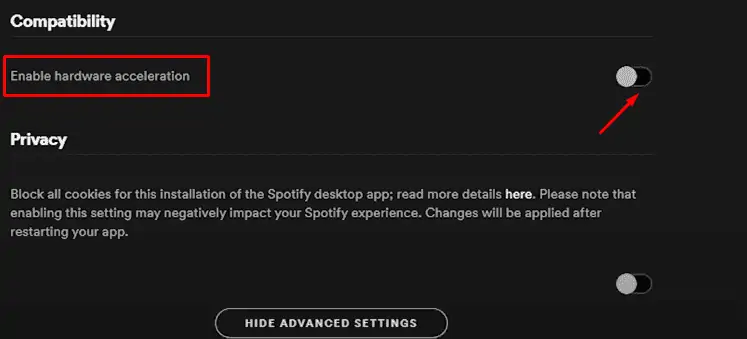
- Scroll further to Show Advanced settings and go to the Compatibility section.
- Inside the Compatibility section, toggle off the Enable hardware acceleration option.

Reinstall Geforce Experience
Many users have reported returning the overlay feature to a working state after reinstalling the Geforce experience. An interrupted installation or file corruption can cause the Geforce experience to malfunction. Or maybe you have accidentally deleted the system files of Geforce, and it may be causing the issue.
Reinstalling would be best in such a case. Here’s how:
- Type Control Panel in the windows search box and open it.
- Navigate to: Programs > Programs and features.
- Locate Geforce Experience, right-click over it and click the Uninstall option. Proceed with the uninstallation.

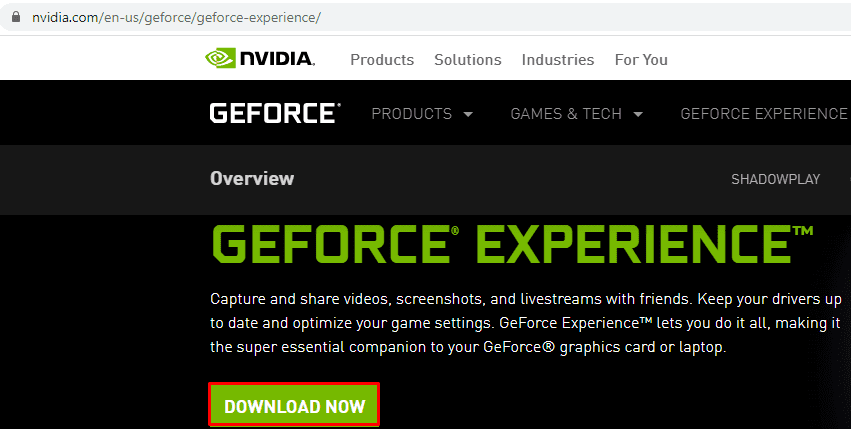
- Next, you need to download Geforce experience from NVIDIA’s official page.

- After the download is complete, run the installation file and proceed with the installation.

