If you’ve run out of output ports on your external GPU, or you’re not using an external GPU at all, you’ll want to utilize your onboard graphics.
You can enable/disable integrated graphics from the Chipset or IO Ports section in your Gigabyte BIOS. Sometimes, this option may be missing though, as was the case on one of our older Gigabyte systems.
So, I’ll explain how to configure integrated graphics on Gigabyte, and what you can do if integrated graphics is not supported in this article.
Verify Integrated Graphics Support
Users often inquire whether their motherboard supports integrated graphics or not but this is an outdated idea. Most modern motherboards actually implement onboard graphics through the CPU.
AMD
AMD uses the term APU (Accelerated Processing Unit) for such processors. Their G series APUs are the ones with built-in graphics (e.g., Ryzen 3400G, Ryzen 5700G, etc.).
There is one exception to this rule. Their professional line of processors (6000 and 7000 series – e.g., Ryzen 9 PRO 7945) also include Radeon Graphics but they don’t have the G suffix in the name.
Intel
Identifying Intel processors is a bit trickier. I recommend going through Intel’s processor list as that’s the easiest method.
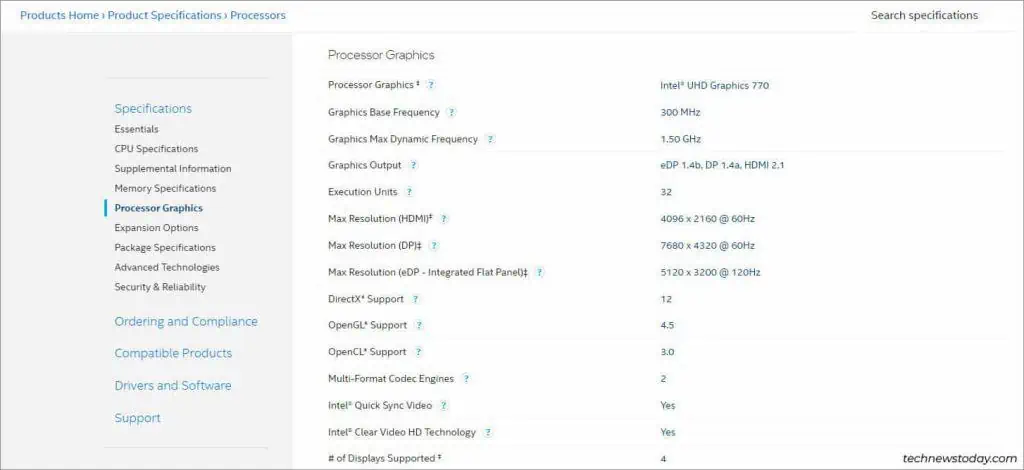
If your processor supports integrated graphics, it’ll be noted in the Processor Graphics section. The Processor Graphics specs will also be listed in detail on the Product Specifications page.
Boot to Gigabyte BIOS
Assuming your processor supports integrated graphics, you’ll be able to enable or disable it from your firmware interface.
Power on your PC and repeatedly press Del/F2 to access the BIOS/UEFI setup utility.

This method may not work if you’ve enabled Fast Boot.
In that case, you can restart your PC 3 times in a row to boot to the recovery environment. There, select Troubleshoot > Advanced Options > UEFI Firmware Settings.
Enable/Disable Integrated Graphics
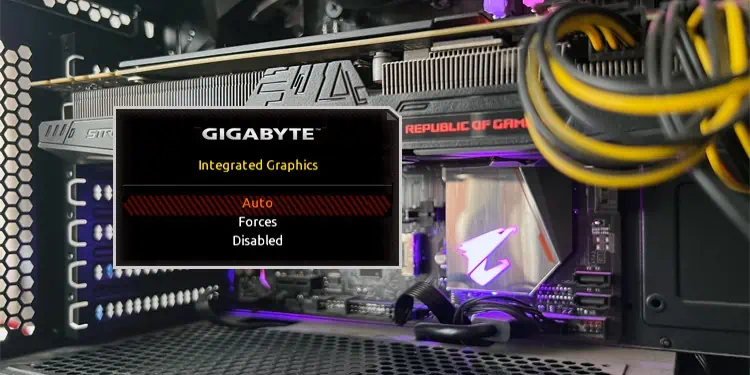
After booting to the BIOS, press F2 (if required) to switch to Advanced Mode. In the Chipset tab, set Integrated/Internal Graphics to the preferred mode:
- Auto – This is the default option. The BIOS automatically enables or disables Integrated Graphics depending on whether an external GPU is installed.
- Forces – Enable Integrated Graphics.
- Disabled – Disable Integrated Graphics.
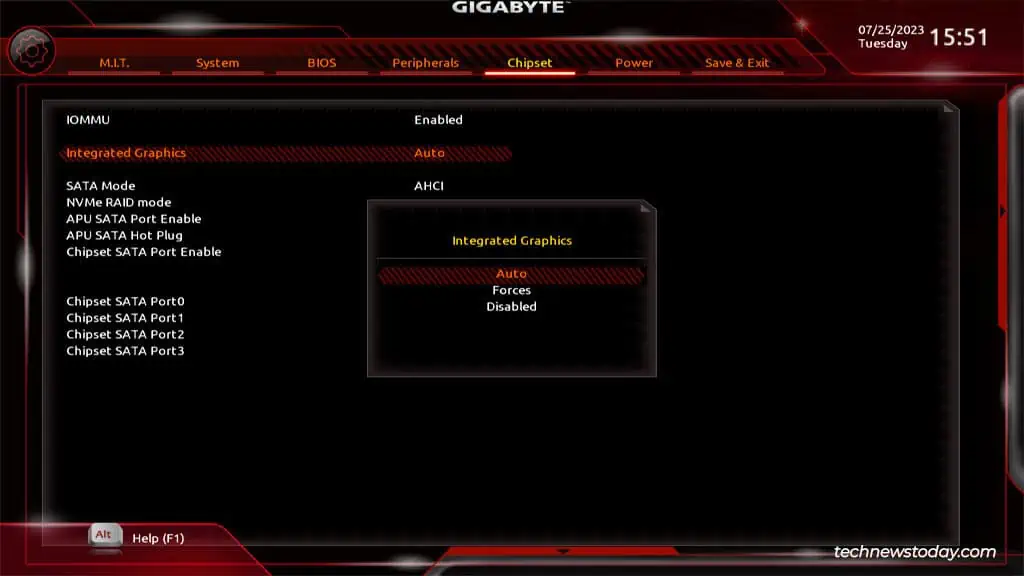
On boards with the new BIOS UI, you can do the same from Settings > IO Ports > Internal Graphics.
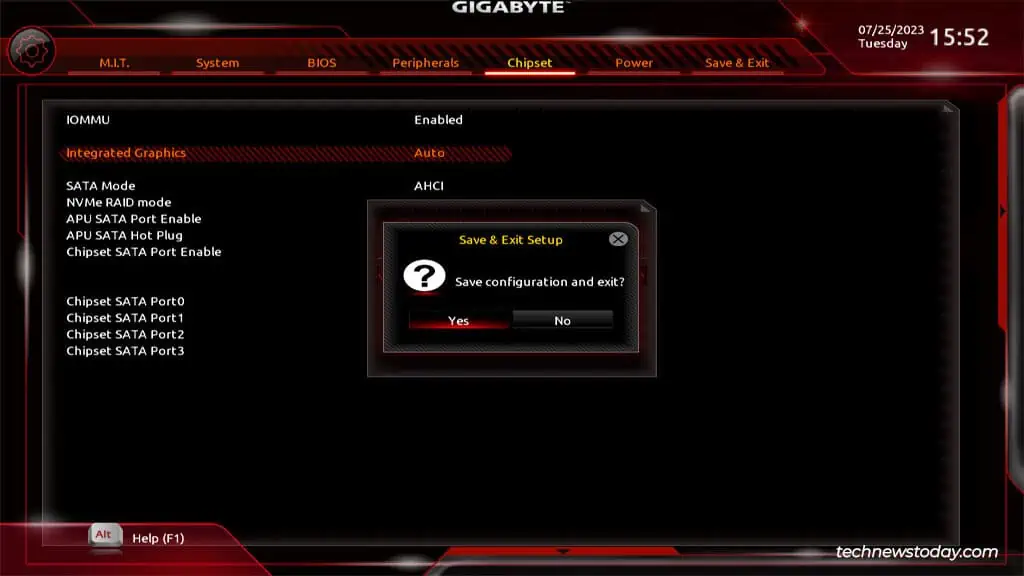
Finally, press F10 to save the changes and exit.
Advanced Configuration & Troubleshooting
The Integrated Graphics option missing entirely from the BIOS seems to be the most common problem among users. This happens either because your CPU doesn’t support integrated graphics, or because your BIOS version is outdated.
For instance, I used a system with a B450 Aorus Elite board and a Ryzen 5 5600G APU for this article. This board only introduced integrated graphics support for newer Ryzen CPUs like the 5600G with BIOS version F40. On older BIOS versions, the integrated graphics option would be missing.
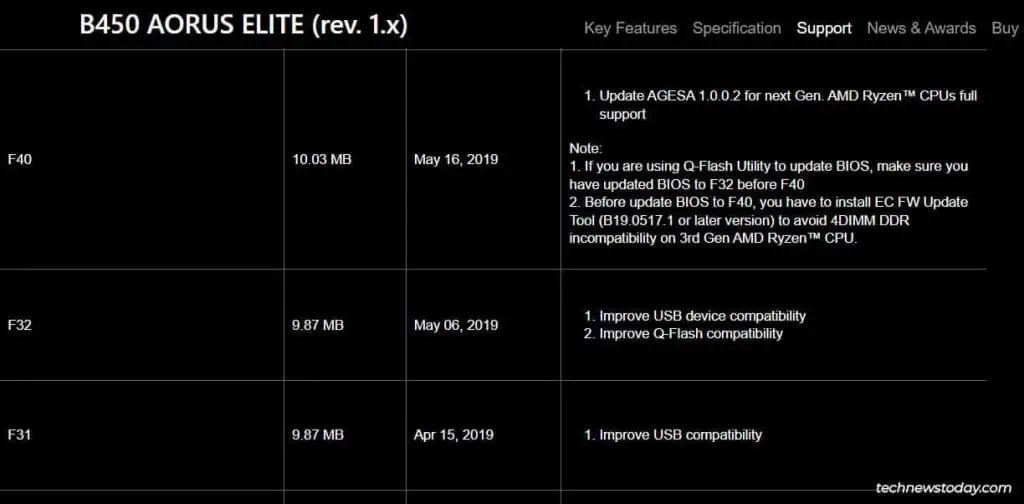
You can verify that there’s no such incompatibility in your case from the BIOS listings on your board manufacturer’s site. Then, if required, you can update the BIOS version.
Moving on, I’ve mostly seen two common queries in terms of further configuration.
Increasing Memory Allocated to iGPU
iGPUs are based on the UMA technology, meaning they work by borrowing some of the system memory. This amount is called the UMA frame buffer size. Generally, setting this to Auto (default) works fine as the size scales based on available system memory.
But in rare cases, you might encounter GPU-related errors or issues like missing textures in video games. In such scenarios, you can manually increase the buffer size.
After setting Integrated Graphics to Force, the UMA Mode becomes configurable. Set it to UMA Specified and select the UMA Frame Buffer Size.
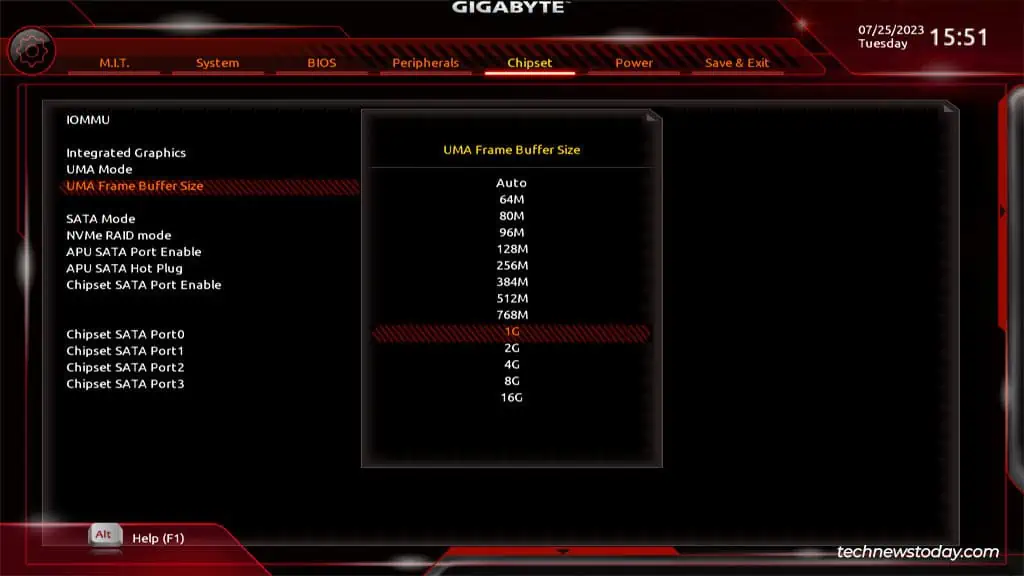
Before saving the changes (F10), make sure you haven’t overallocated memory to the UMA buffer to the point where your overall system performance may be compromised. For instance, allocating 2GB on a system with 8GB RAM is fine, but doing so on a system with 4 GB RAM is a bad idea.
Configuring Default Output
The second query is about selecting the default display output if you’re using an external GPU with the iGPU, or if you have a multi-monitor setup. You need to modify a couple of settings for this.
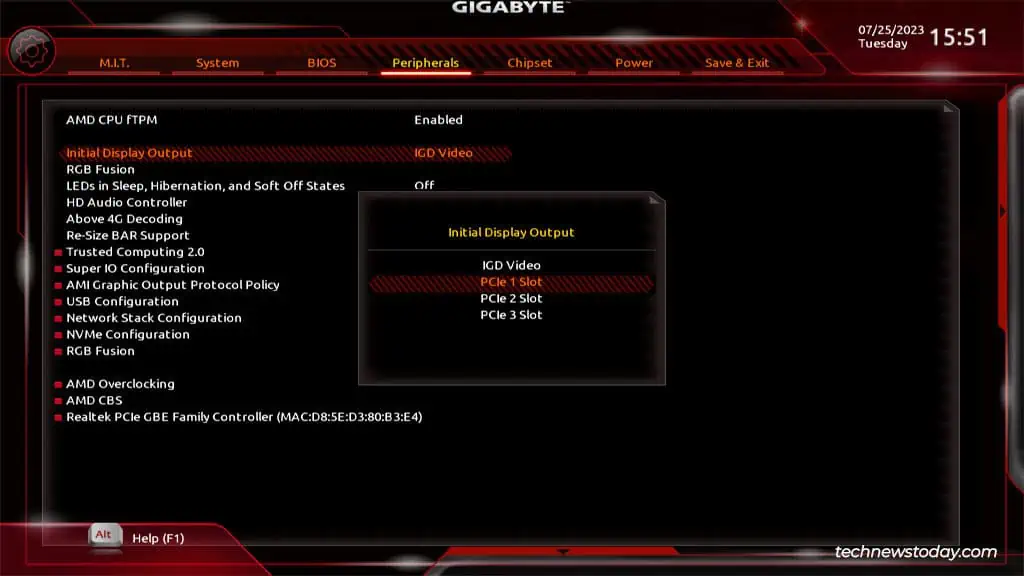
- Go to the Peripherals tab and select Initial Display Output. This lets you pick the onboard graphics or an external GPU on a specific PCIe slot as the first display.

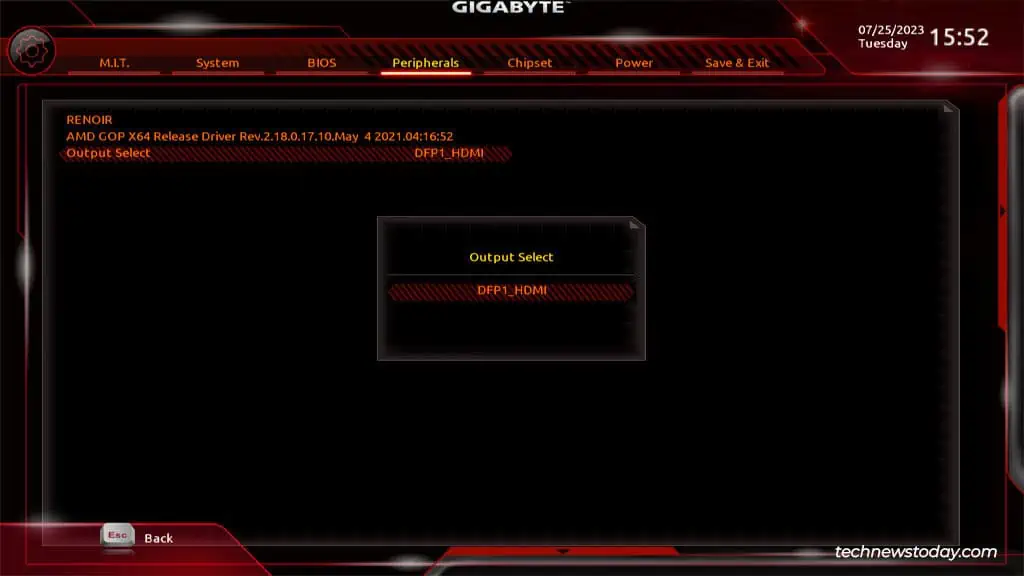
- When booting in UEFI mode with CSM disabled, you can also configure the Graphic Output Protocol (GOP) Policy. This lets you pick the exact output to use from your GPU.


