If you want to set up a RAID array on your system, the easiest way to get started is with onboard RAID technologies like AMD RAIDXpert2 or Intel RST. These use the onboard storage controller with RAID drivers to set up a FakeRAID array.
You’ll first need to enter the Gigabyte BIOS, select the desired RAID level, and create the array. After you install the RAID drivers, you’ll be able to boot with your RAID volume.
This sounds simple on paper, but there are a lot of variables to consider during the actual setup – which RAID level is best, what additional settings do you need to configure, how to manually load RAID drivers, and so on. So, I’ll cover the entire process in detail in this article.
Note: The disks you’ll use in your array will be formatted when creating the array. So, make sure to back up any important data on them beforehand.
Configuring Storage Controller
I’m assuming you’ve already installed all the SATA or NVMe drives onto your system. Use drives with the same specs (size/speed) for optimal performance. You’ll want to start by enabling RAID mode in the BIOS.
- Power on your PC and press F2/Del to enter the Gigabyte BIOS.
- Press F2 (if required) to switch to Advanced Mode.
- On AMD boards,

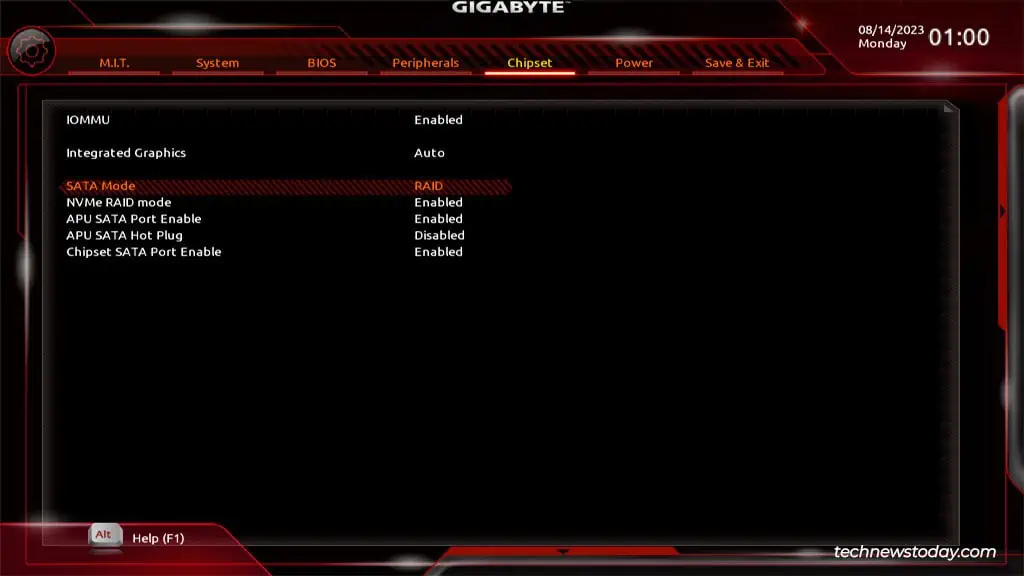
- For SATA RAID, go to the Chipset tab. Set SATA Mode to RAID and Chipset SATA Port Enable to Enabled.
- For NVMe RAID, set NVMe RAID mode to Enabled.
- On Intel boards,
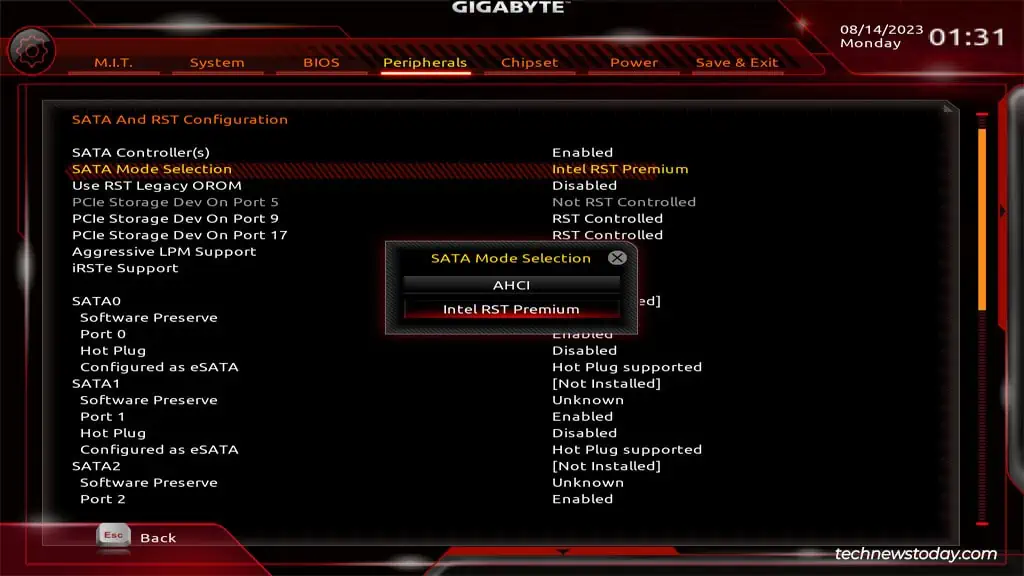
- Go to Peripherals > SATA and RST Configuration. Set the SATA Mode to Intel RST Premium.

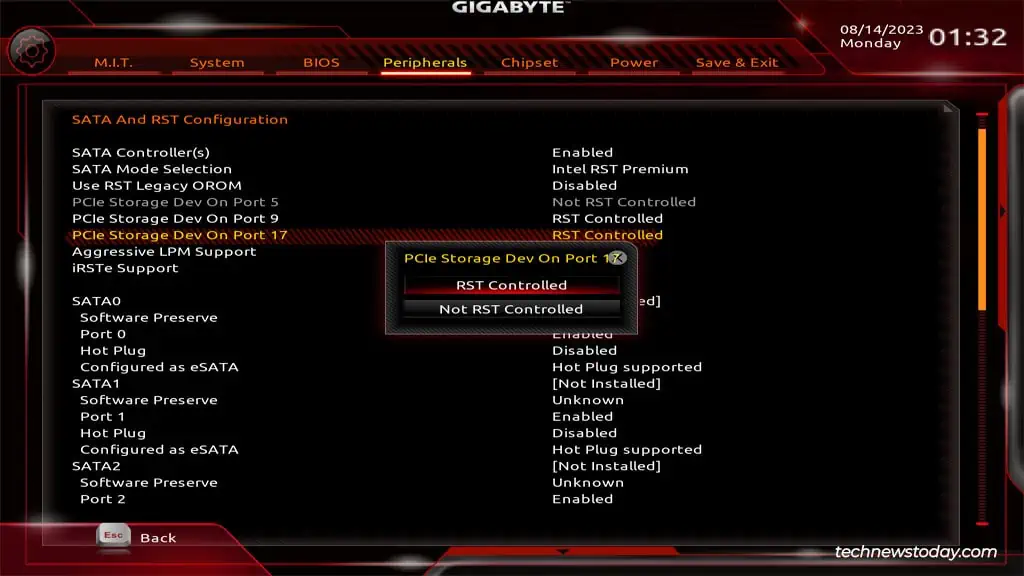
- For NVMe RAID, set NVMe Mode to Intel RST. If your BIOS doesn’t support this option, set PCIe Storage Devices to RST Controlled instead. The latter will let you create an NVMe RAID array through the PCIe Remapping feature.

- Go to Peripherals > SATA and RST Configuration. Set the SATA Mode to Intel RST Premium.
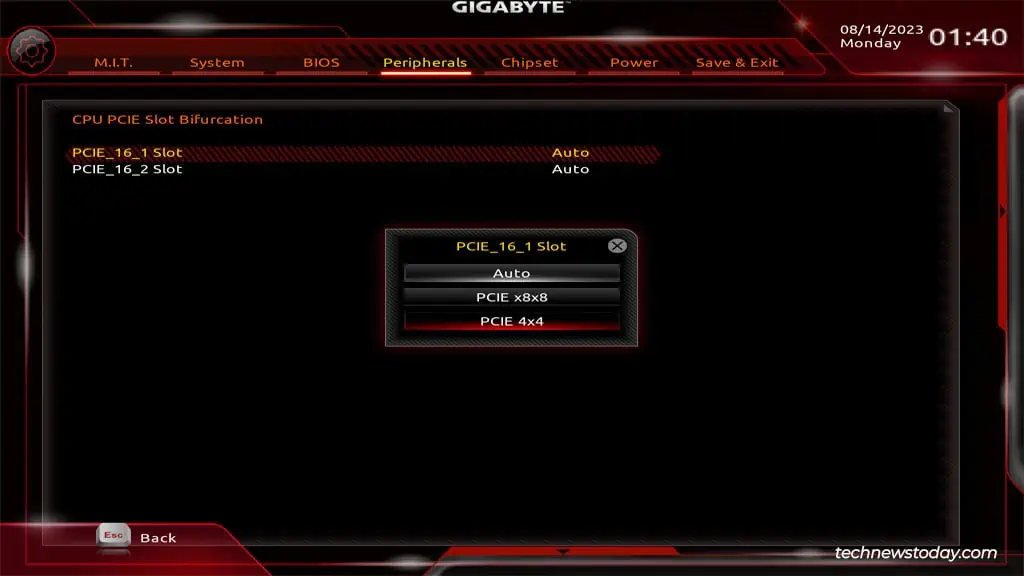
- (Situational) If you’re using a PCIe expansion card for NVMe RAID, make sure you’ve connected it to a PCIex16 slot. You’ll also need to enable PCIe Bifurcation to split the x16 lane to 8x4x4 or x4x4x4x4, depending on how many drives you’re using. The system won’t detect all of the drives until you do this.

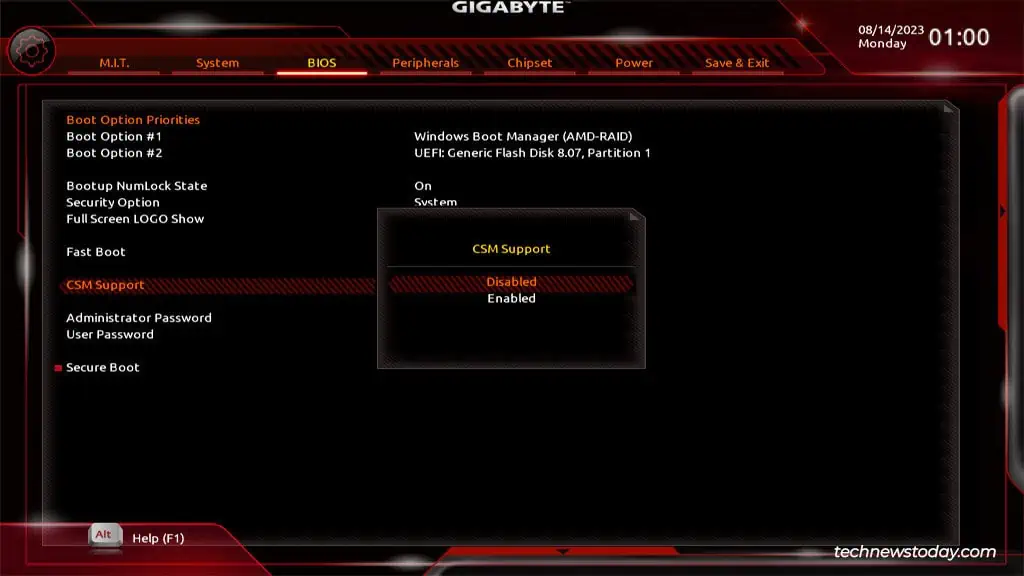
- Go to the BIOS tab and disable CSM for UEFI RAID.

- Press F10 to save the changes and exit the BIOS.
Creating a RAID Array
At this point, you’ve prepared your BIOS for setting up a RAID array. You can skip ahead to the appropriate section depending on whether you have an AMD or Intel processor.
On AMD Boards
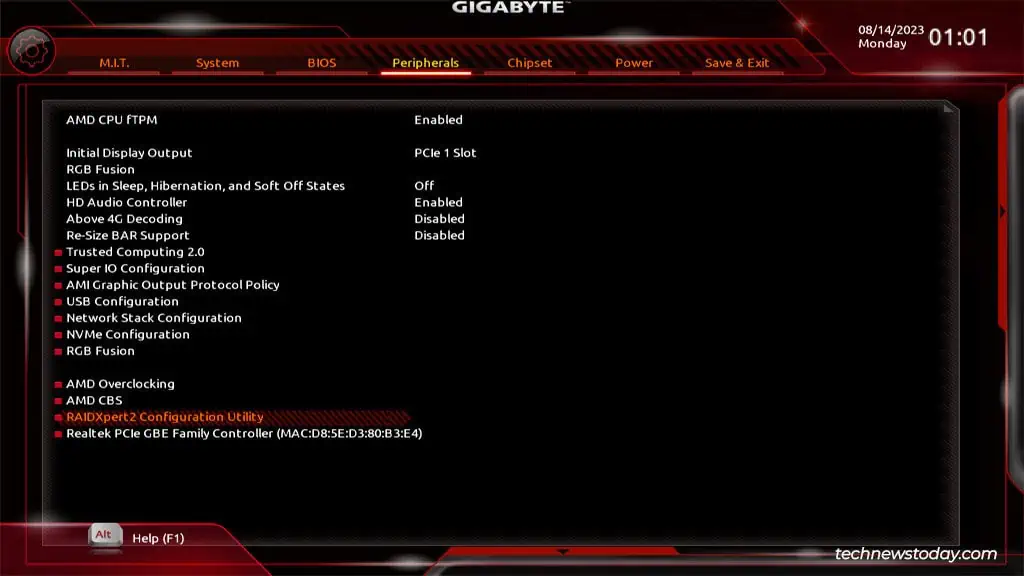
- In the Gigabyte BIOS, go to the Peripherals tab and select RAIDXpert2 Configuration Utility.

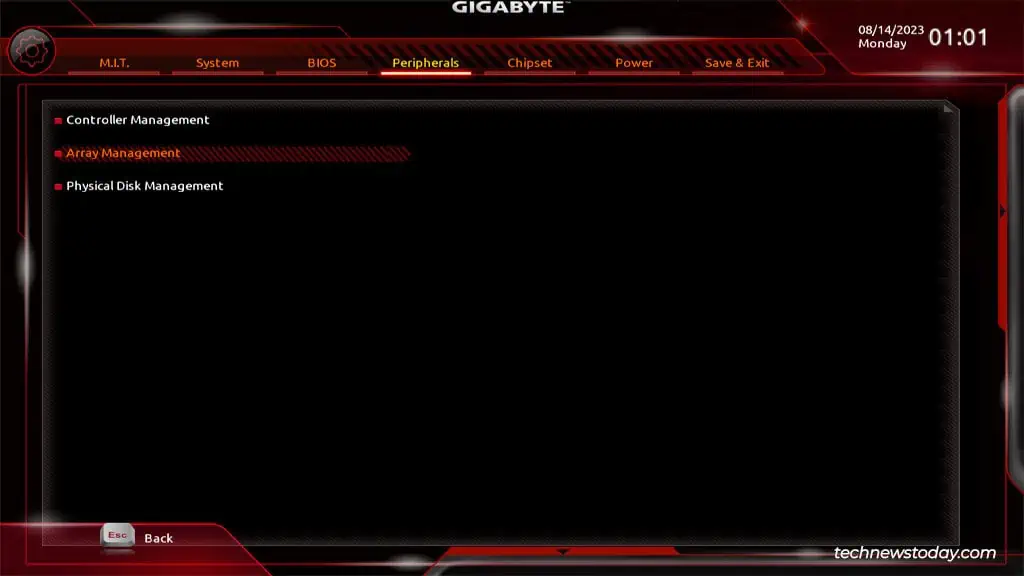
- Select Array Management.

- If any arrays exist, select Delete array > Check All > Delete Array(s) > YES to delete them.
- If there are no preexisting arrays, select Create Array.
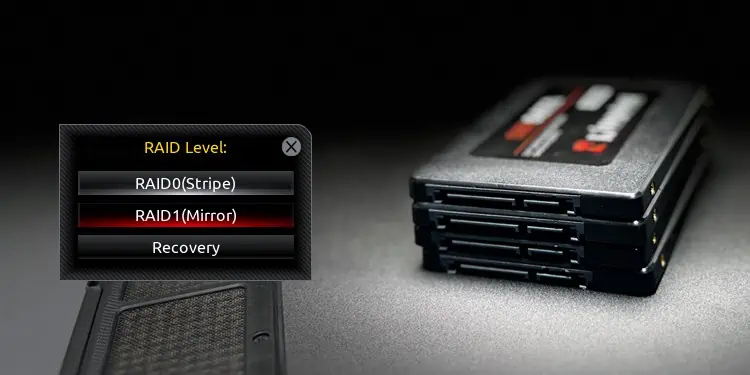
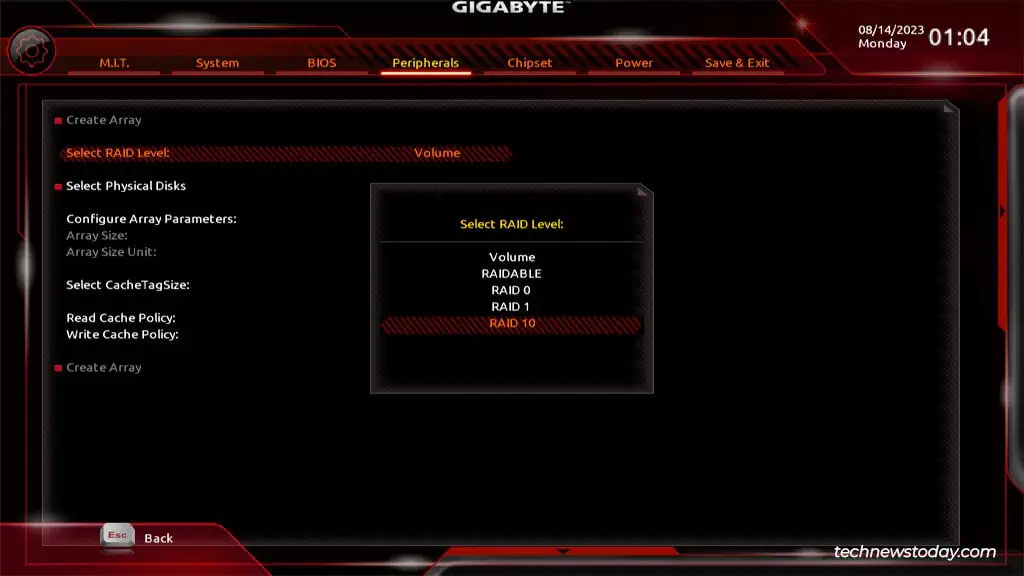
- Start by picking the RAID level. The options available will depend on which levels your board supports and how many drives you’re using.

- Volume – JBOD config that lets you combine several disks into a single large logical disk.
- RAIDABLE – Marks a disk as RAIDABLE, meaning it can be converted to a RAID 0 or RAID 1 array later.
- RAID 0 – Stripes data across at least 2 disks. Provides performance benefits but no redundancy. Good for non-critical files like page files or games where performance is key but redundancy is not.
- RAID 1 – Mirrors data of one disk onto another. Good for data redundancy but no performance improvements.
- RAID 5 – Stripes data and parity across the disks, meaning you get both performance and redundancy benefits. Can tolerate one disk failure.
- RAID 10 – Combines RAID 1 and 0 to provide both performance and redundancy benefits. Can tolerate one disk failure.
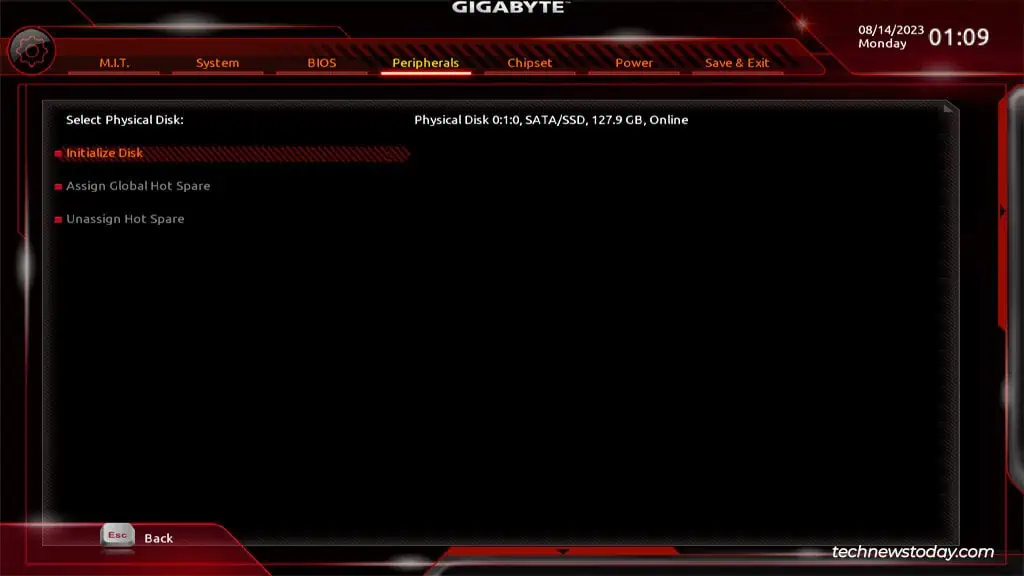
- Click on Select Physical Disks. Select the disks, use Check All to enable and initialize them, then apply the changes.

- You can leave the array parameters to default. Or, you can optionally configure the Array Size, CacheTagSize (amount of data per disk in a stripe), and Read/Write Cache Policies.
- Finally, click on Create Array to create the volume. Then, press F10 to save the changes and exit.
On Intel Boards
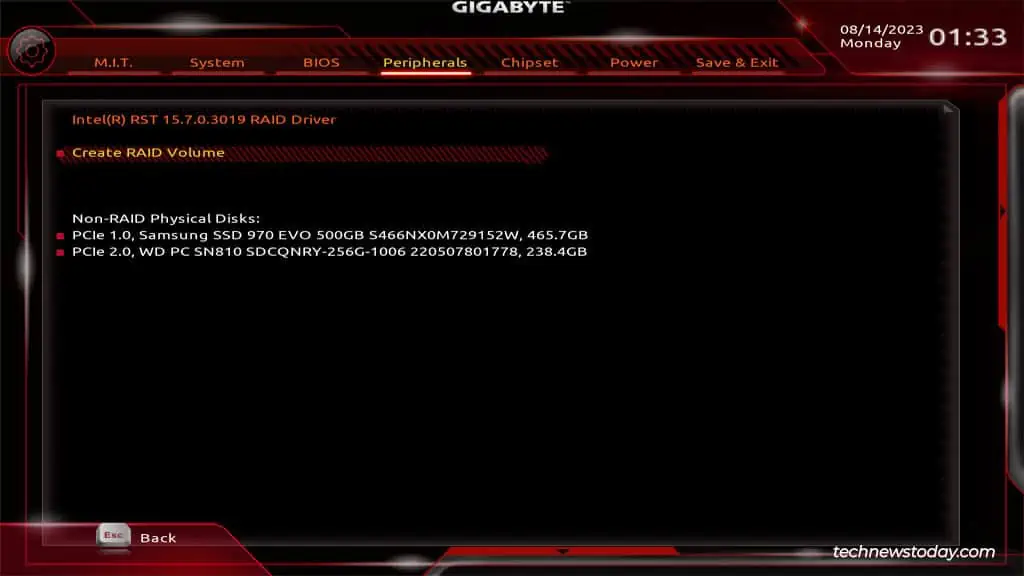
- In the Gigabyte BIOS, go to Peripherals > Intel(R) Rapid Storage Technology > Create RAID Volume.

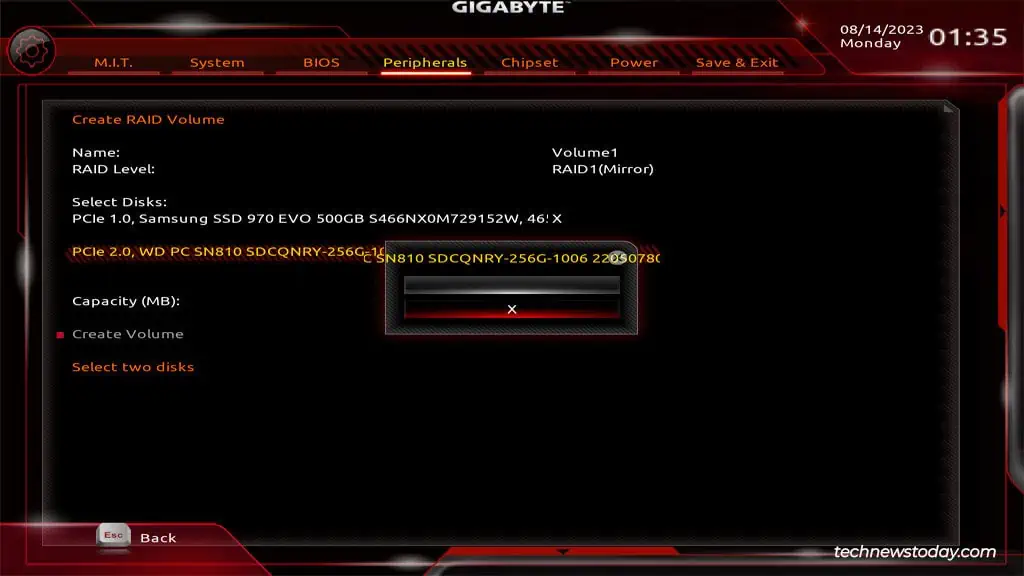
- You can name the RAID volume if you want. More importantly, select the RAID level. The options available will depend on which levels your board supports and how many drives you’re using.

- RAID 0 – Stripes data across at least 2 disks. Provides performance benefits but no redundancy. Good for non-critical files like page files or games where performance is key but redundancy is not.
- RAID 1 – Mirrors data of one disk onto another. Good for data redundancy but no performance improvements.
- RAID 5 – Stripes data and parity across the disks, meaning you get both performance and redundancy benefits. Can tolerate one disk failure.
- RAID 10 – Combines RAID 1 and 0 to provide both performance and redundancy benefits. Can tolerate one disk failure.
- Recovery – Uses Intel Rapid Recover Technology to create a recovery disk for data redundancy.
- Matrix RAID – Allows you to create two RAID volumes on a single array.
- RAID-ready – Lets you migrate one non-RAID SATA drive to a RAID array without data loss.
- Select the disks you want to use in the selected array and set their value to X.

- You can optionally configure the array parameters. When you’re done, select Create Volume to create the array.

- Finally, press F10 to save the changes and exit the BIOS.
Using EZ RAID
Some high-end Gigabyte boards support the EZ RAID feature that simplifies the process of setting up a RAID array. If your board provides this utility, you can use it to create your RAID array.
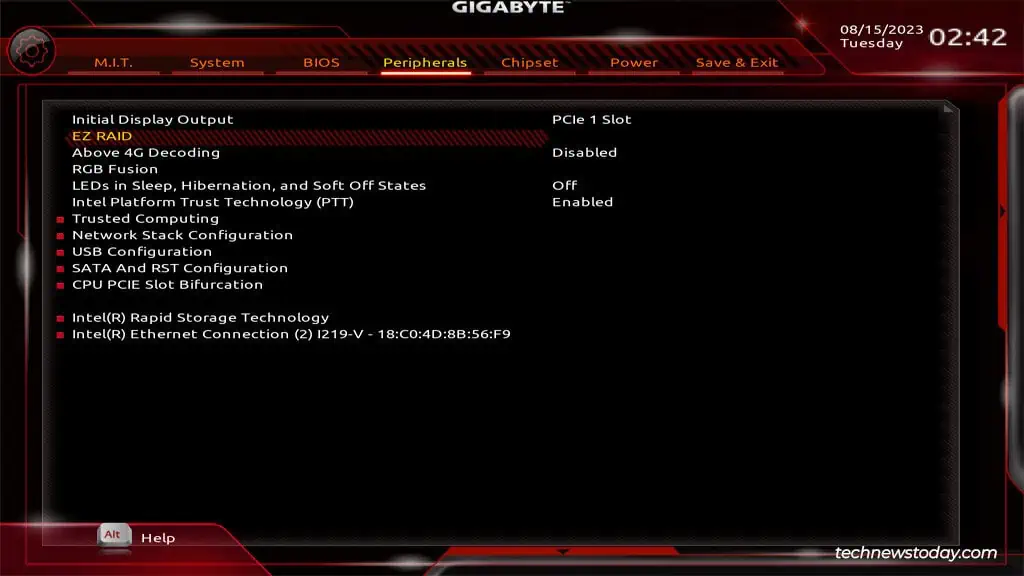
- In the Gigabyte BIOS, go to the Peripherals tab and select EZ RAID.

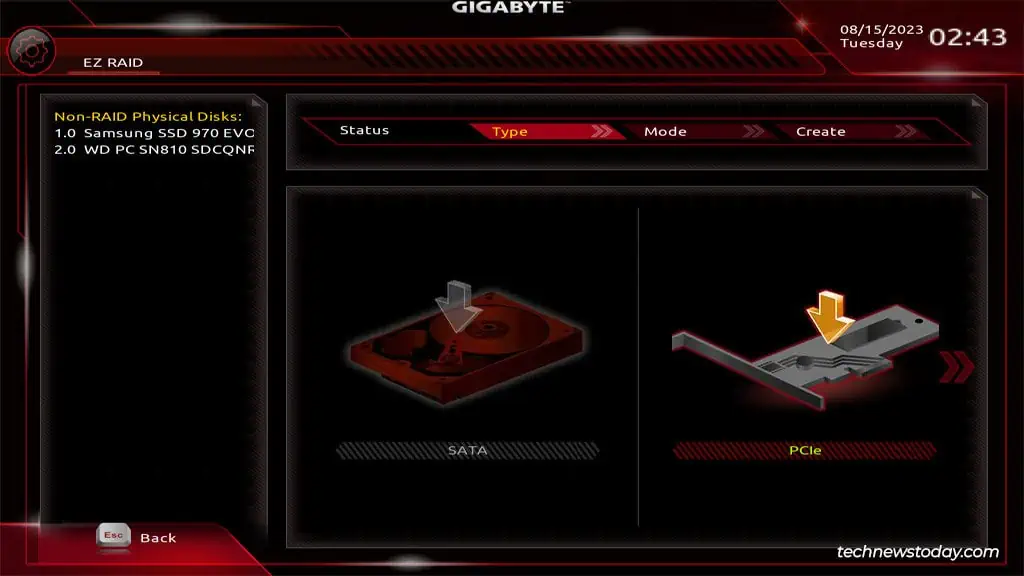
- Select the drive type and press Enter.

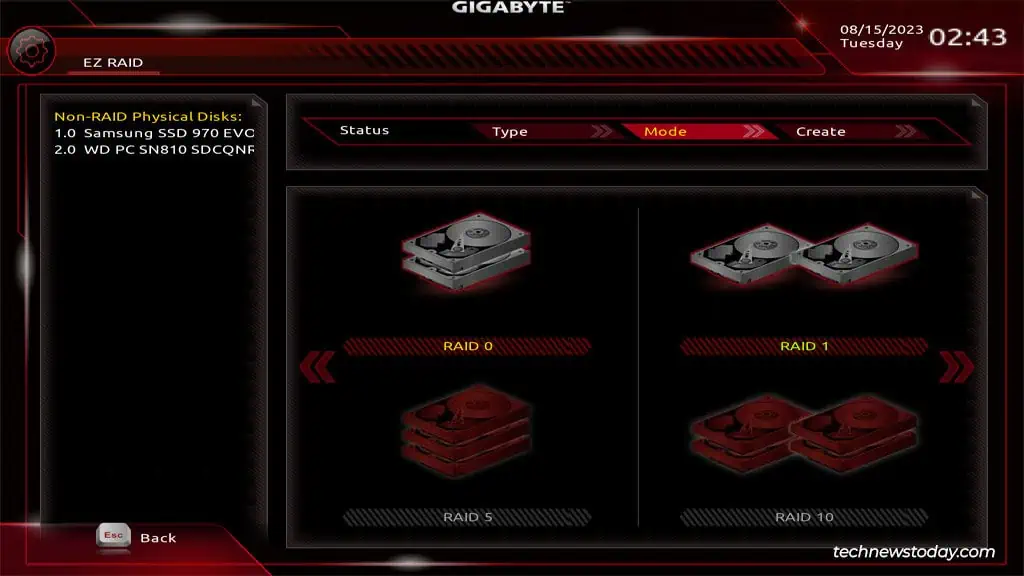
- In the Mode tab, select the RAID level and press Enter. Depending on how many drives you’re using, you can choose from RAID 0, 1, 5, and 10.

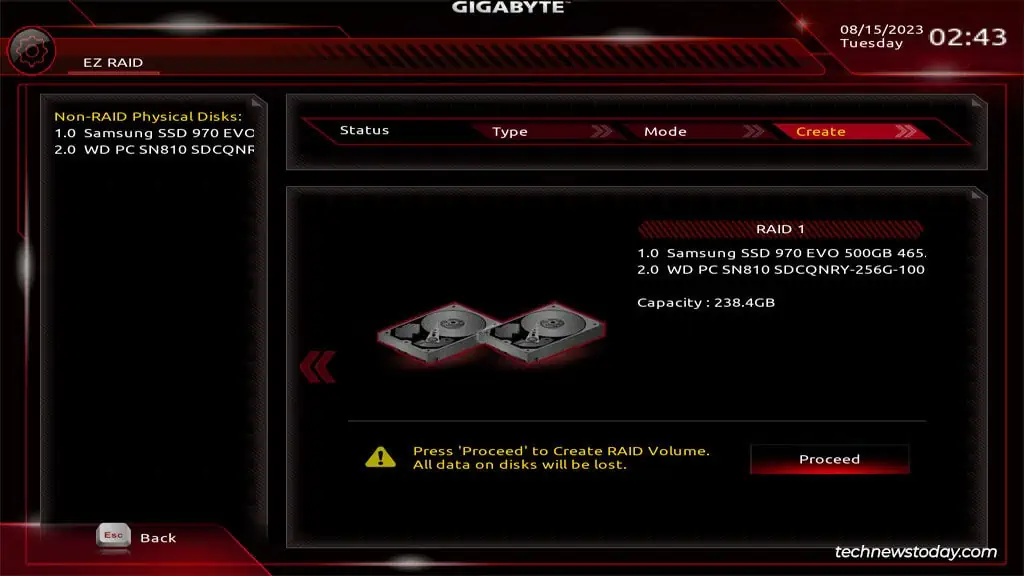
- Click on Proceed to create the RAID volume.

- Finally, press F10 to save the changes and exit the BIOS.
Loading RAID Drivers
After setting up the RAID array, you’ll want to install an OS on this volume. This is a three-step process.
- Create an installation media with your preferred tool.
- Download and move the RAID drivers (AMD or Intel) to this drive.
- Finally, load the drivers from the install wizard. This’ll make the RAID volume selectable when installing the OS.
Download AMD Drivers
The RAID drivers from AMD work well for most users. If needed, you can always download alternative drivers from your motherboard support page. But that likely won’t be necessary.
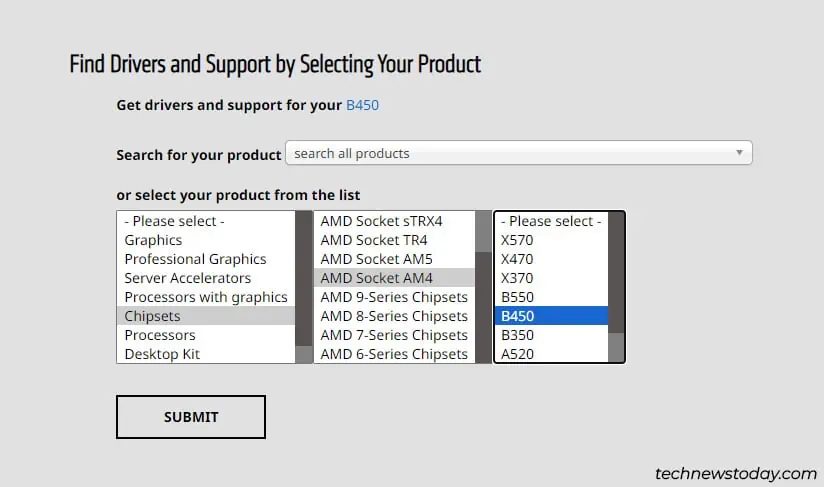
- Go to AMD’s support page, select your Chipset from the list, and click on Submit.

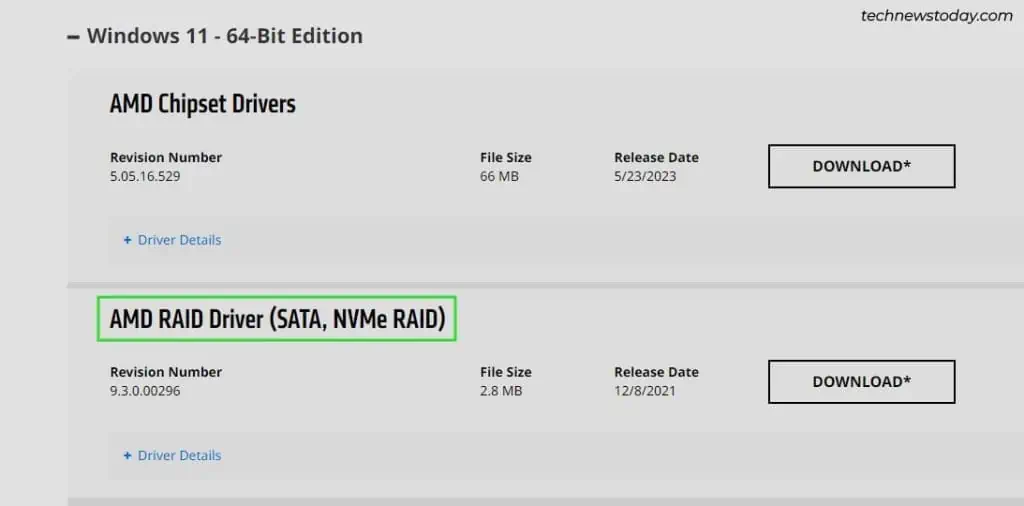
- Download the AMD RAID Driver for your Windows version.

- Extract this archive and copy the appropriate driver folder to the installation media you created earlier.

RAID_SATA– SATA RAID driver.NVMe_CC– NVMe RAID driver for 1st Gen Threadrippers, Ryzen 2000 and older processors, and desktop processors without iGPUs.NVMe_DID– NVMe RAID driver for remaining AMD processors.
Download Intel Drivers
Intel is a bit more divided. The Intel RAID drivers didn’t work for me on any of my Gigabyte systems. Even when our team was testing RAID on ASUS and other boards, the Intel drivers didn’t work. So, I recommend trying out the RAID drivers from Gigabyte first.
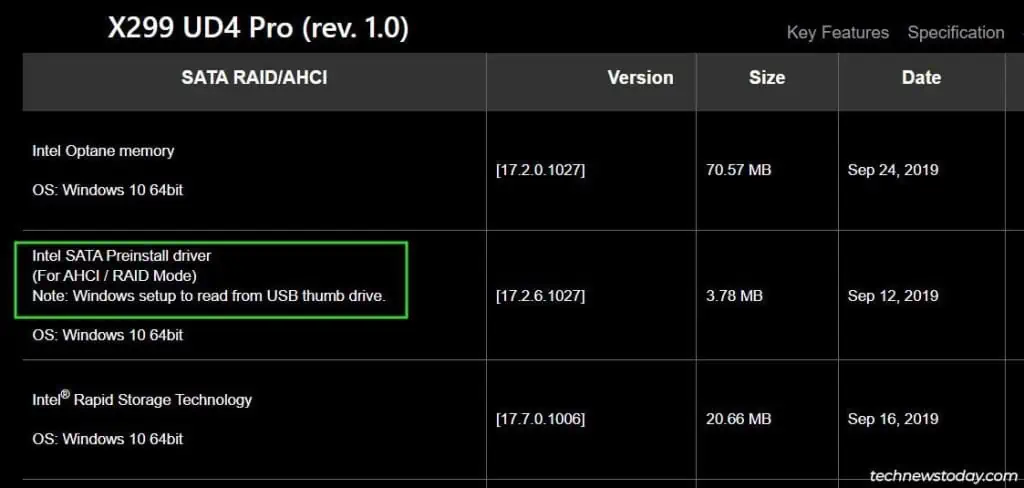
- Open your motherboard’s support page. In the Downloads tab, expand Driver > SATA RAID/AHCI.

- Download a recent Intel SATA Preinstall driver from here.
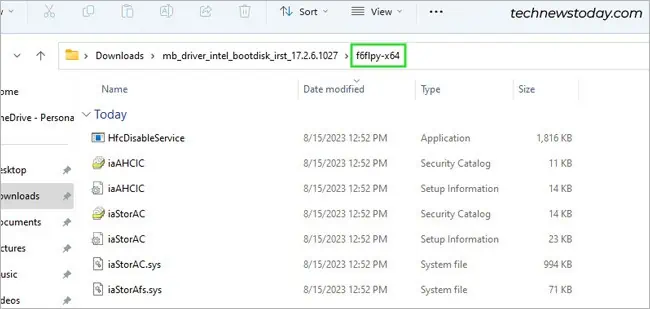
- Extract the downloaded archive and copy the extracted folder to the installation media.

On the off chance that Gigabyte’s drivers don’t work, you can use the drivers from Intel instead:
- Identify your CPU generation. The first or second number after the processor name is its generation. (e.g., i7-7900X – 7th generation, i9-12900HX – 12th generation).
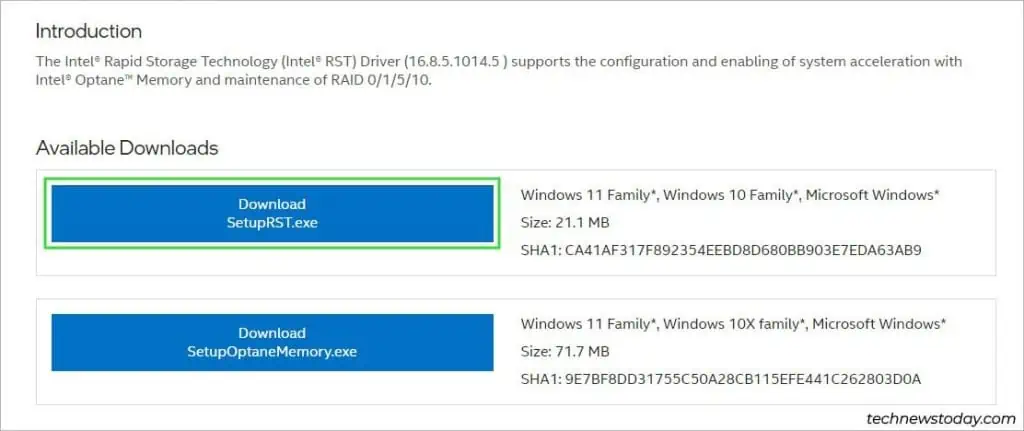
- Search for the IRST Driver for your processor generation as shown in the picture.

- Download the driver from the official Intel source.

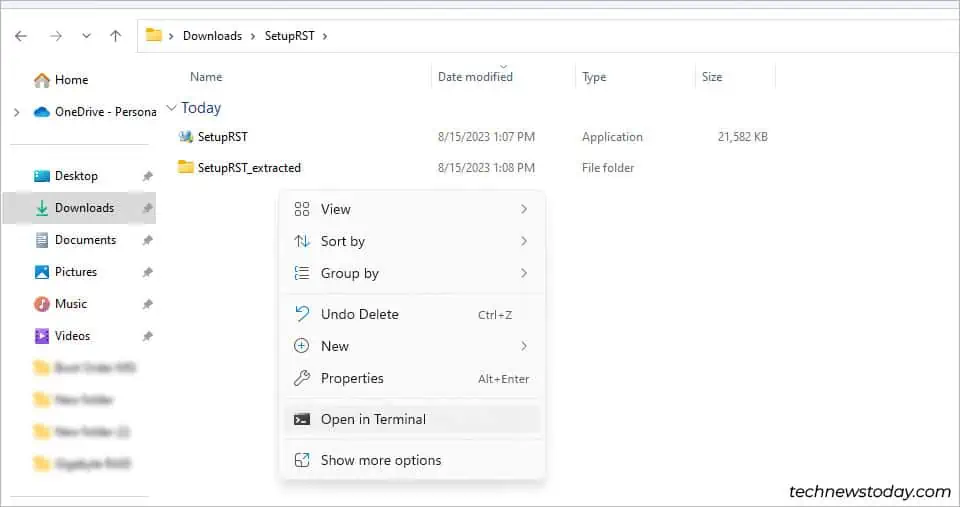
- Go to the folder where SetupRST got downloaded. Right-click and select Open in Terminal here.

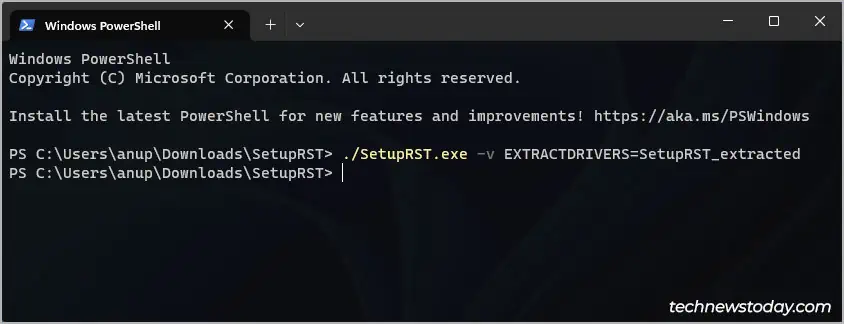
- Extract the contents of the archive with the
./SetupRST.exe -v EXTRACTDRIVERS=SetupRST_extractedcommand.
- Go inside the extracted folder and open your Windows version.

- Copy the
iaStorAC.inffolder from here to your installation media.
Load Drivers When Installing Windows
Now, that you’ve prepared the installation media with the RAID drivers, all that’s left is to load the drivers and install the OS.
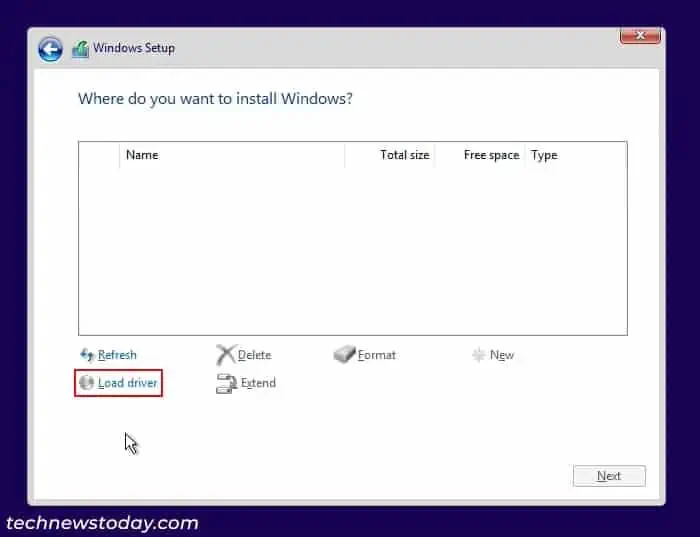
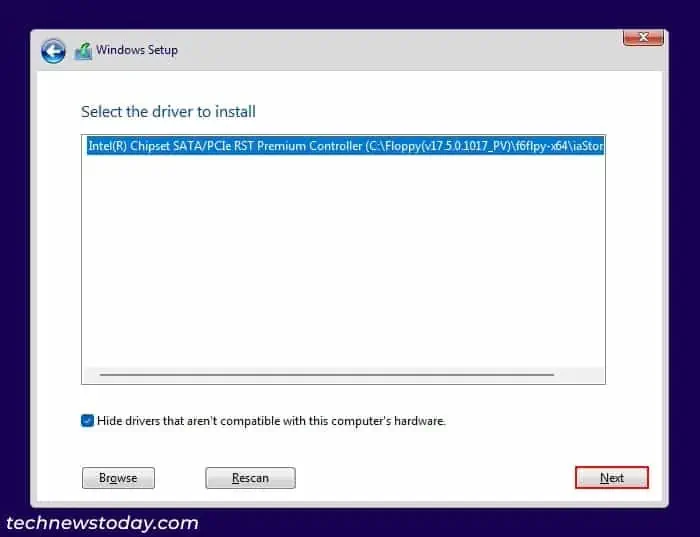
- Boot to the installation media and go through the install wizard. Once you get to the drive selection page, click on Load driver.

- Click on Browse, find the driver folder that you copied earlier in the
C:partition and press Ok. - This’ll load the available drivers.

- For Intel, simply select the one available driver and press Next.
- For AMD, select the first driver (
rcbottom.inf) and press Next. Repeat this process two more times to load the second (rcraif.inf) and third (rccfg.inf) drivers as well.
- After loading the drivers, you’ll be able to select the RAID volume and install Windows on it.
Final Words
RAID’s main purpose is uptime via protection against hardware failure. It should never be considered a replacement for backups. So, I strongly encourage you to keep a separate offsite backup of your important data.

