When installing a new OS like Windows or trying out a Linux distro, the usual approach is to create a bootable USB and boot from it. Gigabyte, like most other vendors, lets you do this from the Boot Device menu, or directly configure your Boot Option Priorities from the BIOS interface.
While this is generally an easy process, some users may not be able to boot from the USB, or the USB might not get detected at all.
So, we’ll cover multiple ways to perform a USB boot on Gigabyte boards, as well as troubleshooting steps in case you face any problems.
Select USB from Boot Device Menu
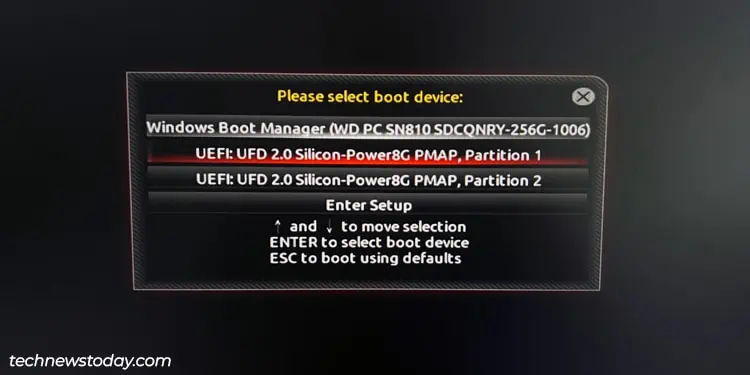
The Boot Device menu allows you to select the device to boot from for the current session. To access it on Gigabyte boards, perform the following steps:
- Connect the USB to your PC, power it on, and repeatedly press the F12 key.
- Select your USB drive from the list and press Enter to boot from it.

Change Boot Option Priorities
The Boot Option Priority determines the order of devices from which the BIOS tries to boot. If you set the USB to the highest priority, your PC will try to boot from the USB whenever it’s connected. To do this,
- Power on your PC and repeatedly press Del to access the BIOS Setup utility.
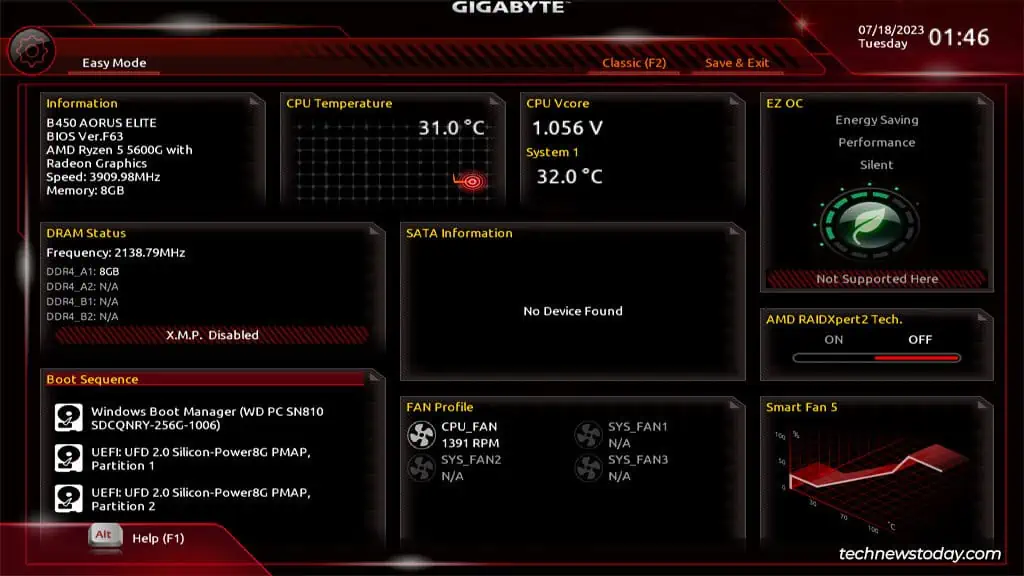
- In Easy Mode, click on the Boot Sequence.

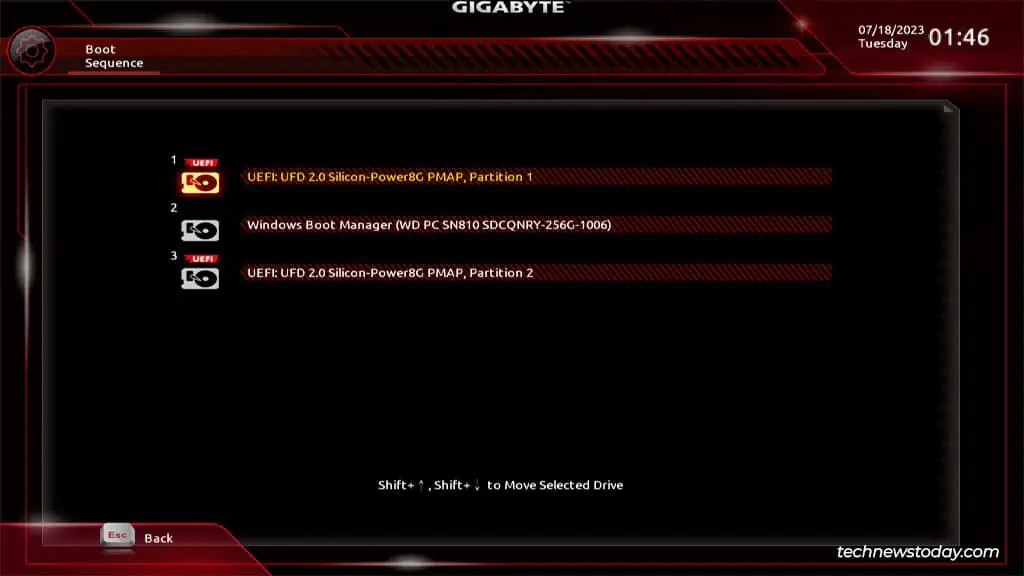
- Select the USB and press Shift + Up Arrow to move the selection to the top. Press Esc once you’re done.

- Alternatively, you can press F2 to switch to Advanced/Classic mode.
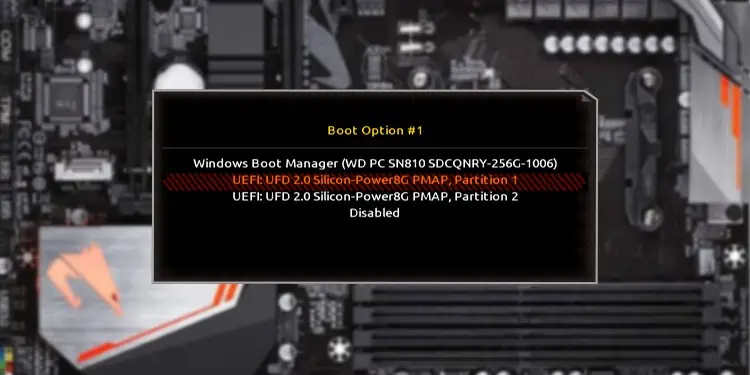
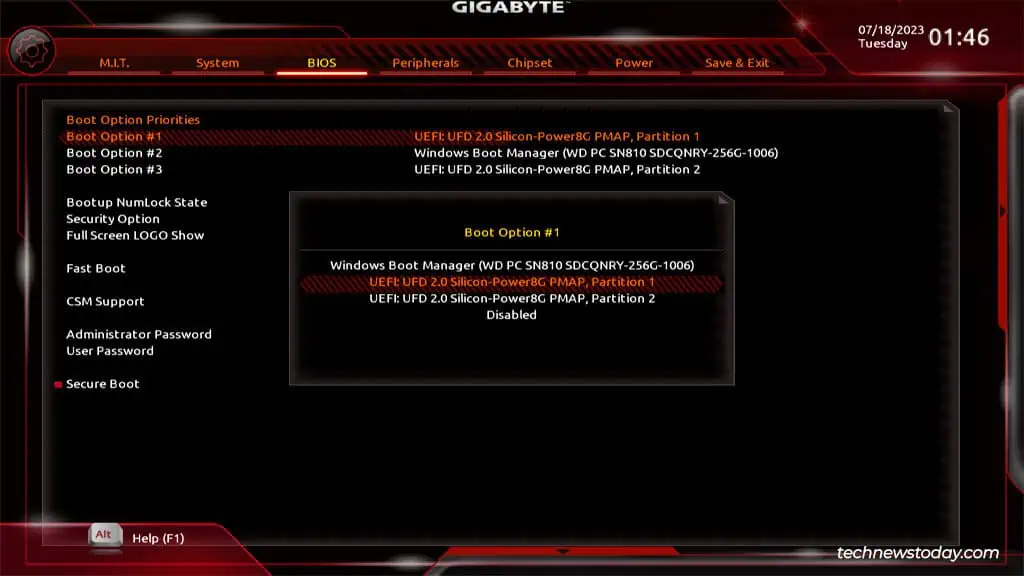
- Go to the BIOS tab and highlight Boot Option #1. Press Enter and select your USB here.

- Press F10 and accept the confirmation prompt to save the changes and exit. Your PC should boot from the USB now.
Use Boot Override
Sometimes, your USB may not be listed in the Boot Device menu. In such situations, if you want to boot from the USB without changing the boot order, you can use Boot Override. It also lets you select the device to boot from for the current session.
- Press Del when booting to enter BIOS Setup like earlier.
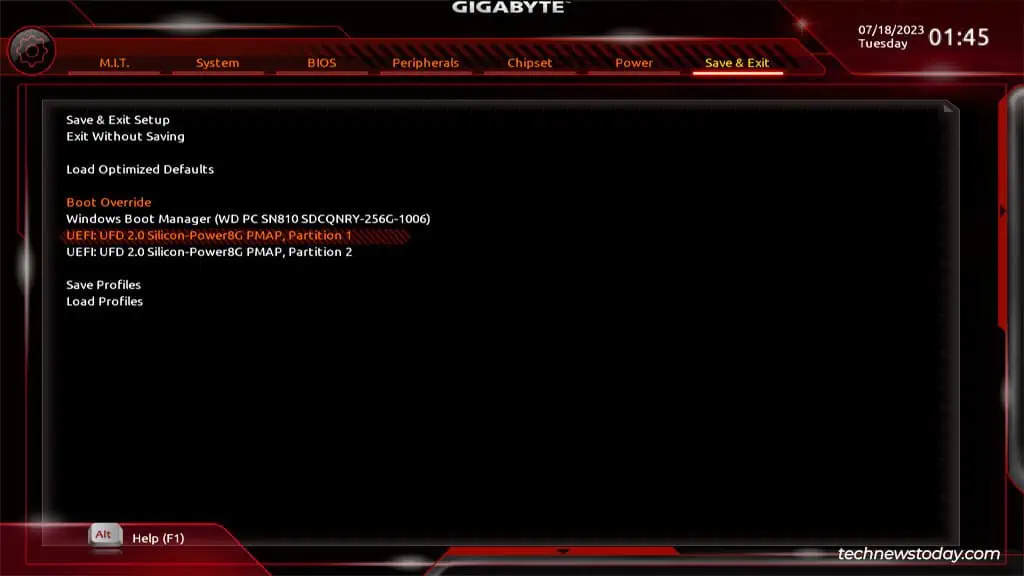
- Look for the Boot Override section in the BIOS or Save & Exit tabs.
- Select the USB, press Enter, and accept the confirmation prompt to boot from the USB.

Boot USB from WinRE
On modern systems running in UEFI or CSM mode, you can also boot to the Windows Recovery Environment (WinRE) and select the device to boot from.
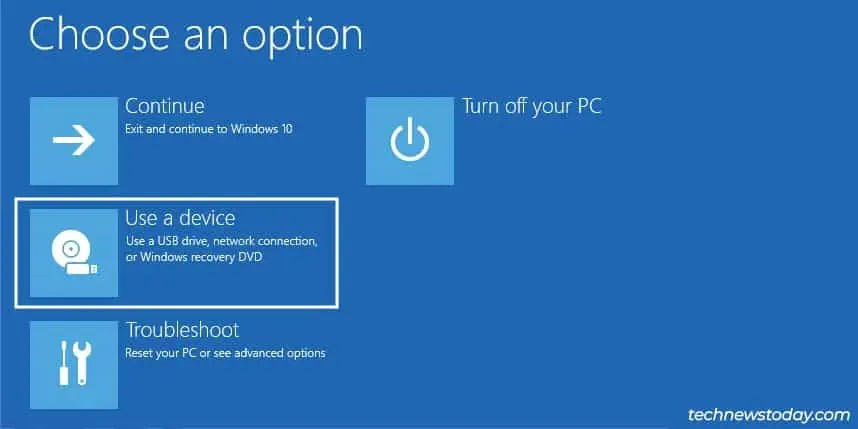
- Hold Shift when restarting or force-restart the PC 3 times in a row to boot to WinRE.
- Select the Use a device option and then select the USB drive to boot from it.

What If You Can’t Boot From the USB
When booting from a USB on Gigabyte boards, there are usually two problematic scenarios. First, the USB might not get detected at all. You can try the following troubleshooting process in this case:
- Various hardware end issues (damaged USB port, drive, version incompatibility) could be causing this. So, try different ports on the board. If the USB doesn’t get detected, test it on a different system to verify that it’s actually functional.
- Assuming the USB works on the other system, the problem is software-related. First, try all four methods from this guide to boot from the USB.
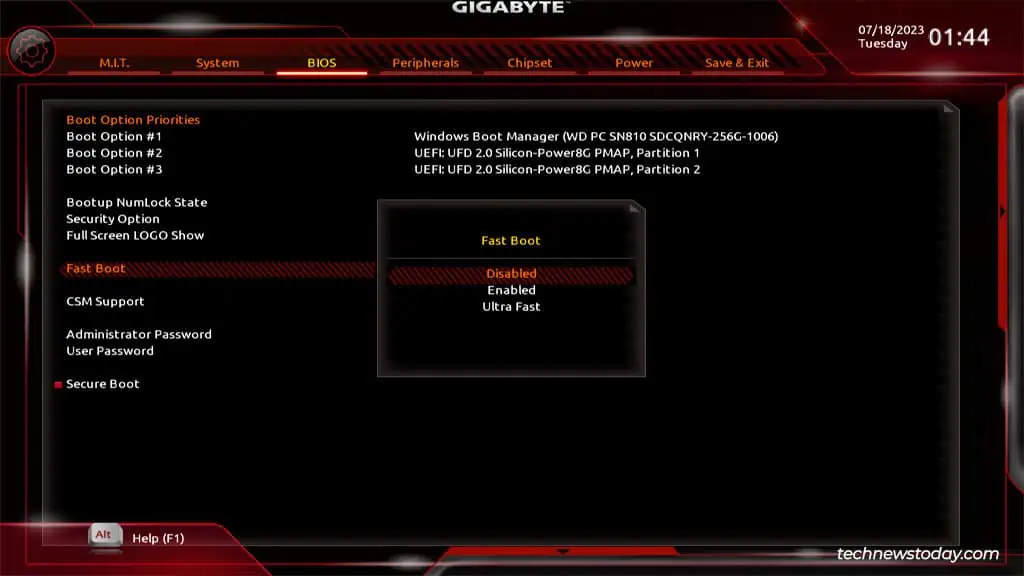
- If it’s not detected with any of the methods, check your BIOS settings. Fast Boot bypasses certain boot processes like the removable device check to improve boot time. So, disable Fast Boot and check if the USB gets detected.

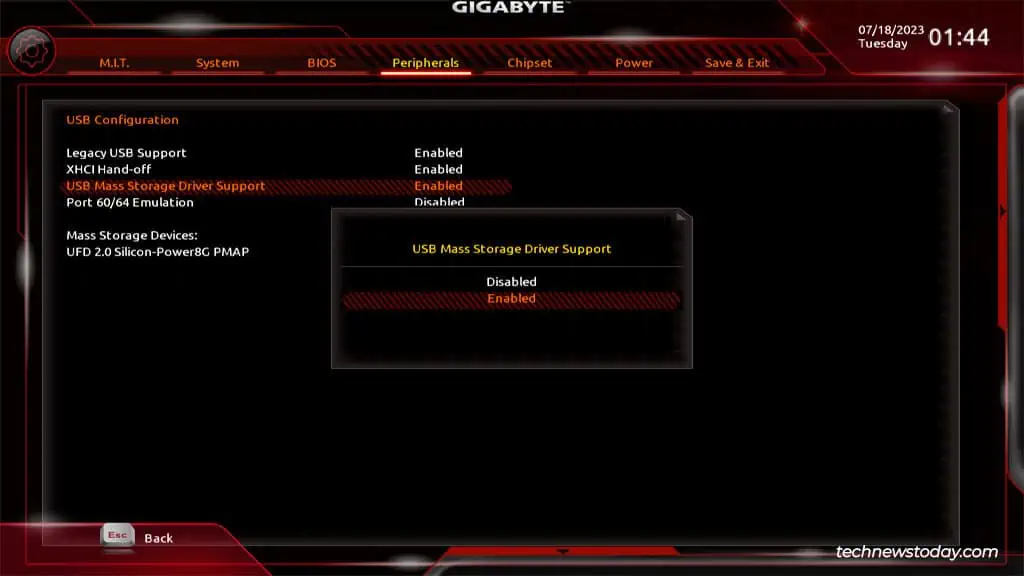
- Next, go to Peripherals > USB Configuration and ensure the USB Mass Storage Driver Support option is enabled.

If these steps didn’t help, or your problem was that the USB is detected but the system refuses to boot from it, try the following steps instead:
- When creating the bootable USB, most tools (e.g., Rufus) allow you to select the target system (UEFI/CSM/Legacy) and partition scheme (GPT/MBR). The values you select here must match your actual system configuration.
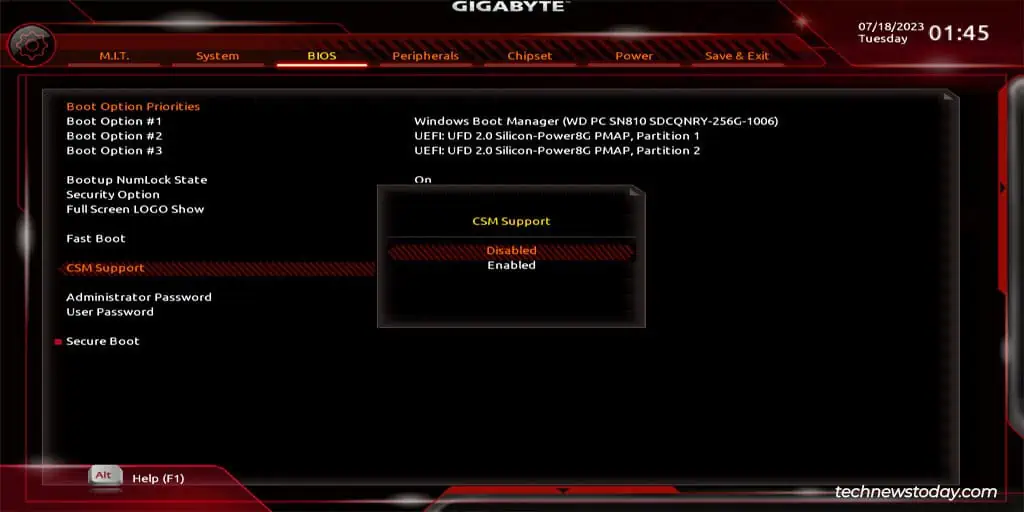
- If they don’t currently match, you have two options. You can enable/disable CSM through the BIOS to match the USB’s configuration. Or what we recommend is to recreate the USB with the correct configuration instead.

- Speaking of recreating the USB, it’s also worth using a different tool or system this time. Windows install drives created on macOS are known to be problematic. And even if you’re creating the drive on Windows, there are multiple tools for creating bootable drives, so why limit yourself to one?
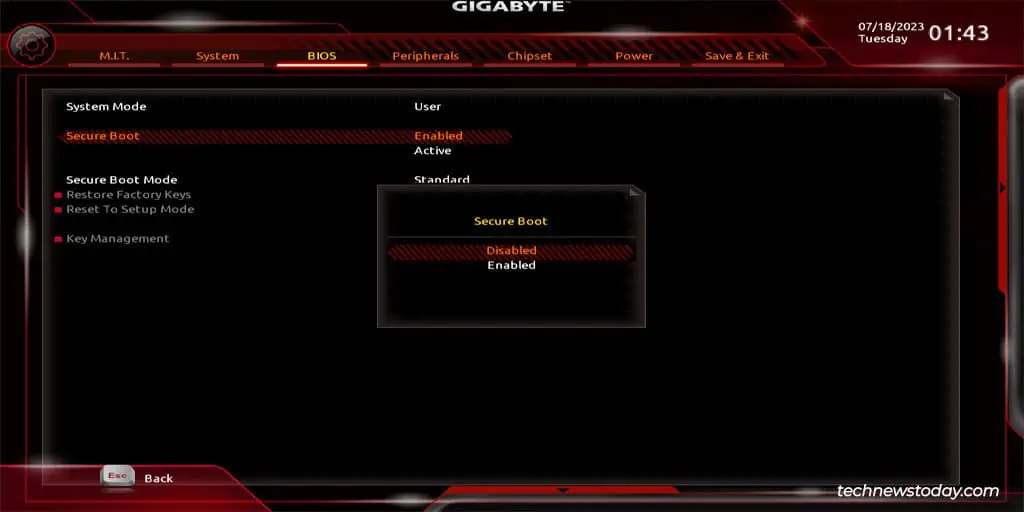
- On secure-boot-enabled systems, you won’t be able to boot from drives that don’t contain the necessary digital signature. So, you can also disable Secure Boot temporarily and check if the USB works.

- Finally, updating the BIOS has helped numerous users in the same situation. Doing so could potentially resolve hardware compatibility issues, so it’s worth a shot.

