If you see a green check mark on desktop icons, there is normally no reason to be alarmed. This is not a virus and your pc is not vulnerable. In fact, it’s the opposite of that.
The green checkmark on your desktop icon indicates that Microsoft’s OneDrive has successfully backed up your file to the cloud. This checkmark appears on Windows PCs where you have signed in to your OneDrive account.
All files and folders that you have chosen to backup in your cloud are marked with a green checkmark. If you ever lose access to your Windows PC, all of your desktop files are still available in OneDrive. When you switch PCs, you can use OneDrive to restore all your desktop icons.
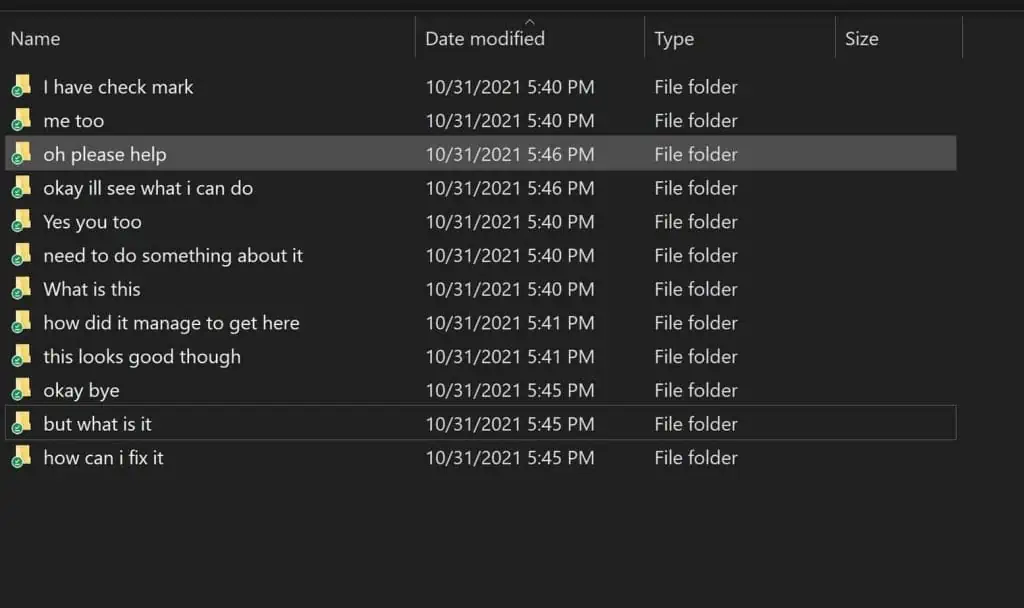
Types of Green Checkmark
Even though they might look the same, the Green check mark can be of two types.
- Green outlined checkmark
This means that the files on your desktop were available online only and are just downloaded. These files are also called locally available files.
- Solid green filled checkmark
For files with the green outlined checkmark, if the “always keep on this device” is enabled then this checkmark is displayed. These files are downloaded to your Windows and can take up drive space. But, they are available for use even without an active internet connection.
Other than Green Checkmarks
Aside from the green checkmarks,there are plenty of other marks associated with onedrive other than the green checkmarks. Some of the more frequent ones are as follows.
- Blue cloud
The file is available online only. These files aren’t available on your Windows and thus don’t take up space. You need internet access to open these files.
- Red Cross
The file is not able to sync. There could be a problem with the file itself or an unsupported format. These files aren’t available online but exist on your Windows PC.
How to Get Rid of Green Check Mark on Desktop Icons?
To get rid of the green checkmark on desktop icons, follow one of these methods. Some of these solutions involve having to pause OneDrive sync. If you ever lose access to your desktop, you lose access to the desktop files if the sync is turned off. So, make sure you understand the impact of each solution.
Pause syncing
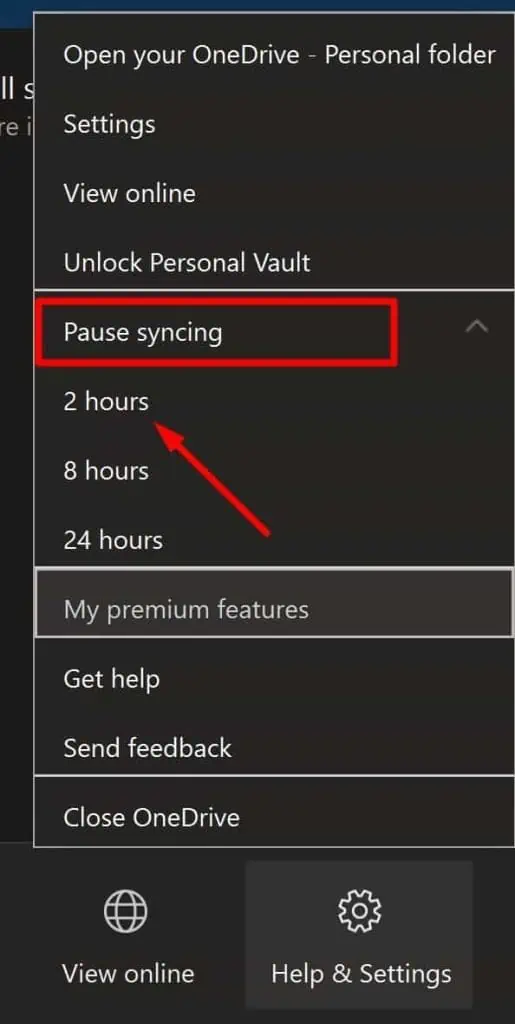
Pausing syncs is the easiest way to get rid of green checkmarks.
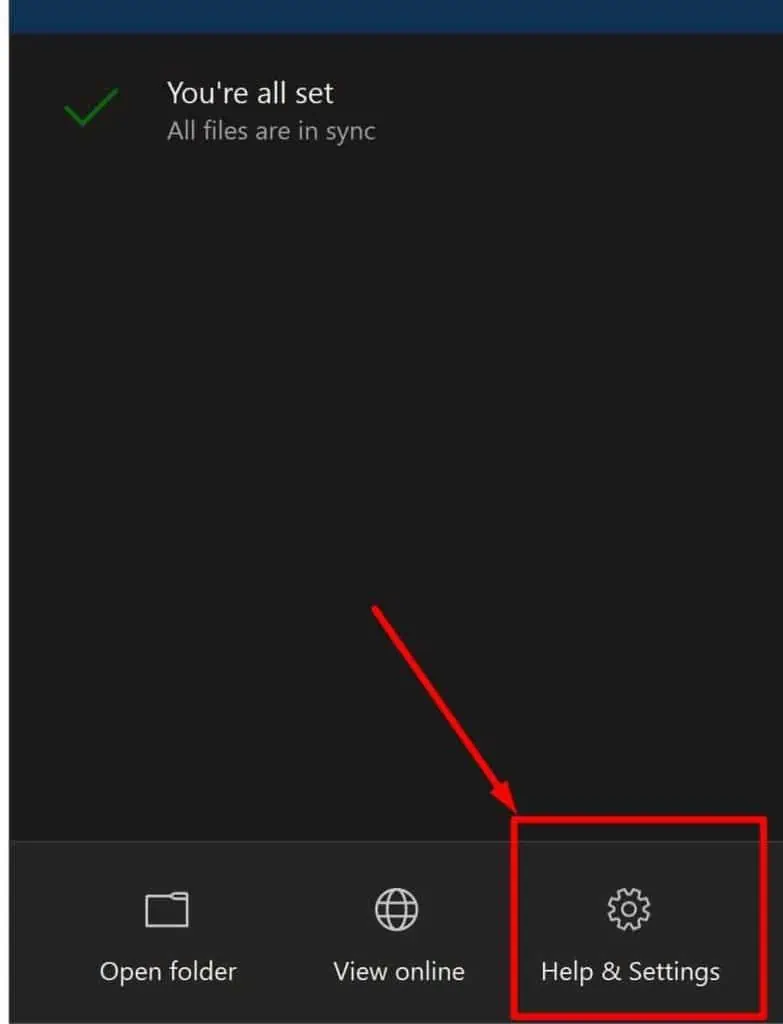
- Click on the OneDrive icon on the system tray.

- Select Help & Settings

- Select Pause syncing
- Choose a time, e.g. 2 hours.

Remove Desktop from backup locations
Your desktop is one of the folders that’s being backed up to OneDrive. If that is the case, you can choose to stop backing up the desktop folder. Note that your current desktop files are not affected by this. And it won’t delete any files in the OneDrive cloud location either. You would have to log in and delete them from the cloud yourself.
- Click on the OneDrive icon on the system tray and go to Help & Settings.
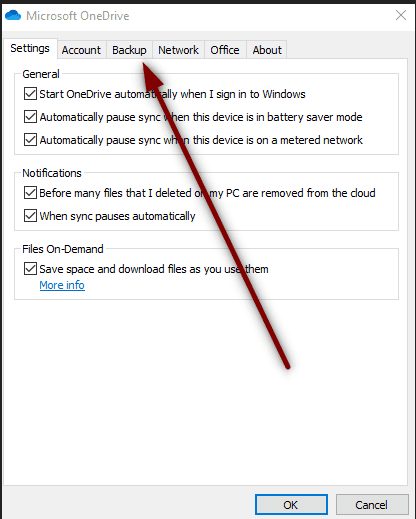
- Select Settings.
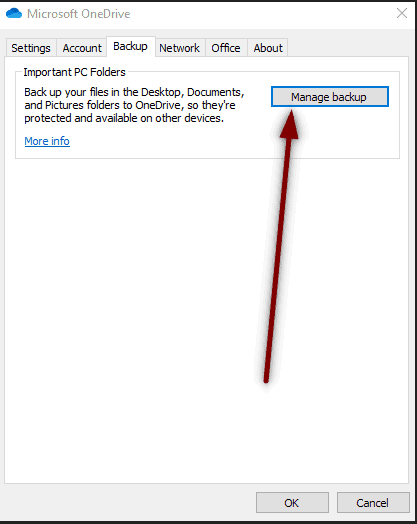
- Go to the Backup tab.

- Click on Manage backup.

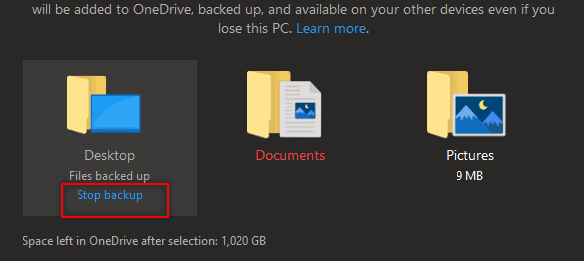
- Under the Desktop, select Stop backup.

- Confirm when prompted.
Turn off keep on this device
The “Keep on this device” setting allows any OneDrive-synced file to exist for offline access. Keep in mind that with this setting off, your files no longer always stay on the device. It means you need to have an active internet connection to open the files.
- Select the icon with the green mark.
- Do a right-click on it.
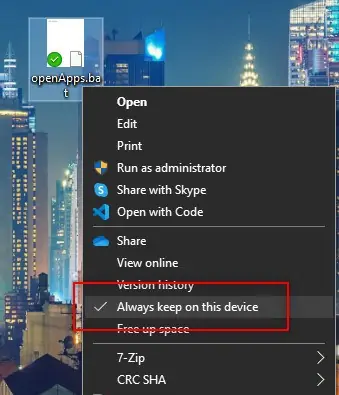
- Select Always keep on this device to turn it off.
- Repeat for each icon with the green mark.

Use Free up space
Free up space is another useful setting provided by OneDrive for synced files. Once synced, you can clean up the local copy of the file with this feature. Also, once you free up space the file icon should no longer show the green mark next to it.
- Select the icon with the green mark.
- Do a right-click on it.
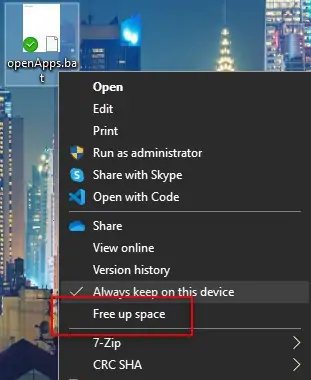
- Select Free up space.
- Repeat for each icon with the green mark.

Close or kill OneDrive
If nothing works, you may need to close or exit out of the onedrive. Onedrive runs in the background and syncs all backed-up files to the cloud. Once you close onedrive, Windows should no longer show the sync mark next to the file.
Rebuild icon cache
Finally, if the icon still exists, the icon cache may have become corrupt. There is an easy way to fix this using Powershell. Run the following commands to rebuild the icon cache. After the restart, the icon cache should be rebuilt and the checkmark is gone.Do a right-click on the Start Menu and select Windows Powershell(Admin).
- taskkill /IM explorer.exe /F
Uses taskkill command to find all explorer.exe processes and forcefully terminates them - del /a /q “%LOCALAPPDATA%\IconCache.db”
Deletes all files on the specified location in quiet mode without confirmation - Del /a /f /q “%LOCALAPPDATA%\Microsoft\Windows\Explorer\iconcache”
Deletes all files on the specified location in quiet mode without confirmation and forces deletion of read-only files
Once you finish with the command, please restart your PC.

