HDR is supposed to convey more details and color shades and give things a lifelike look and feel. But many users have had the opposite experience instead, where enabling HDR makes things look washed out.
This often happens due to misconfigured settings, but there are also many misconceptions around HDR, leading to false expectations.
So, in this article, we’ve attempted to clear away all confusion regarding HDR, as well as detailed how to fix the Windows HDR washed out issue.
HDR Requirements and Misconceptions
There are a bunch of display requirements for HDR, but the two main ones you should be concerned with are a good HDR monitor and HDR content.
Most content is SDR. This includes parts of the Windows interface, most games, videos, etc. When you enable HDR, all the content on the screen will appear darker. The HDR content will display better highlights and details, which make it look much better, but the SDR content will, by comparison, look dull.
This is why, if you were watching an HDR movie, for instance, the video would look amazing, but once you close or minimize the video, other parts of Windows would look washed out. Or why it’s better to stick to SDR on games that aren’t properly configured for HDR.
Second, there’s the matter of actual HDR-capable monitors. For a proper HDR experience, an OLED or Mini-LED display with the DisplayHDR 1000 certification (minimum 1000 nits) is recommended. The reality is that such displays are expensive and hard to come by.
Marketers often stick the HDR tag onto monitors and TVs that fall far below these specifications. So, when you attempt to play some HDR content on the lower-end displays, there’s barely any difference from SDR, and sometimes the content looks even worse.
Why Does HDR Make Things Look Washed Out?
As stated, the monitor and content could be possible reasons why HDR makes things look washed out. In those scenarios, you can either upgrade the display or only use HDR when playing HDR content.
But aside from these, another common reason for this issue is a misconfigured setting such as color bit depth. In such cases, you can troubleshoot and fix the issue without shelling out the big bucks to upgrade your display.
How to Fix the Windows HDR Washed Out Issue?
Most users have had success with enabling HDR via Windows, monitor, and in-app settings. But the other solutions, such as adjusting the color bit depth or installing a color profile, can also be helpful.
Enable HDR on Windows / Monitor / App
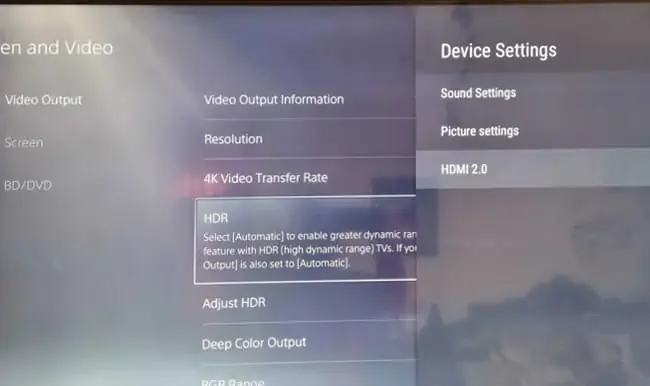
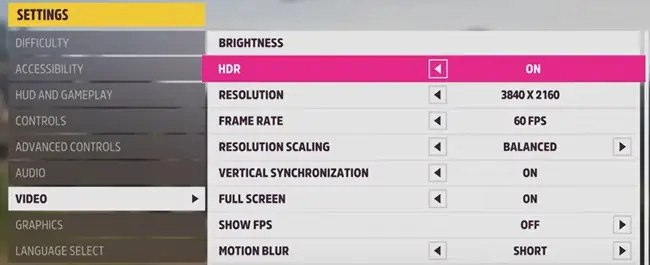
Generally, the HDR feature is automatically enabled wherever applicable. But in some cases, it may be enabled via Windows and Monitor settings, while it’s disabled in the In-App settings of the game you’re playing or something similar. In such cases, you can easily resolve the issue by manually enabling it everywhere with the following steps:
- Press the buttons on your monitor to go through the monitor settings.
- Locate the HDR settings and ensure it’s enabled.

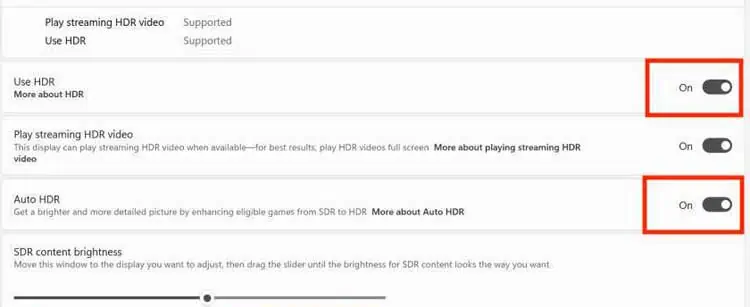
- Press Win + I, and navigate to System > Display.
- On Windows 11, toggle ON Use HDR. Additionally, you can enable Auto HDR as well.
On Windows 10, click on Windows HD Color Settings first, then enable Use HDR.
- While you’re here, it’s also worth adjusting the brightness slider to max, as that has helped a few users.
- Finally, go to the in-app settings and ensure the HDR option is enabled there as well.

Change Color Bit Depth
SDR typically uses 8 Bit Depth, whereas HDR uses 10 Bit Depth. A bit depth of 10 is capable of producing 64 times the colors compared to 8 Bit. Basically, if your system is currently configured to only use 8 Bit color depth, you’re missing out.
NVIDIA
Here are the steps to change the color depth for NVIDIA GPUs:
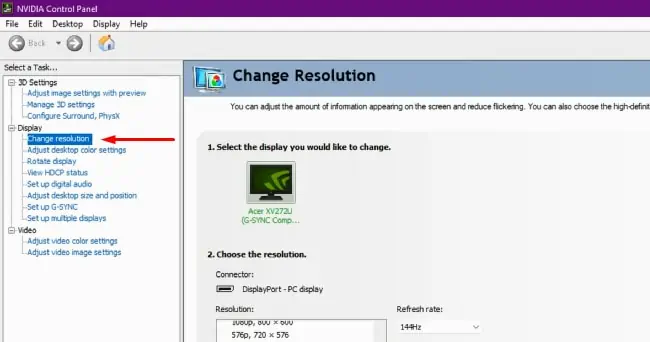
- Right-click on your desktop and select the NVIDIA Control Panel.
- Under Display in the left pane, click on Change Resolution.

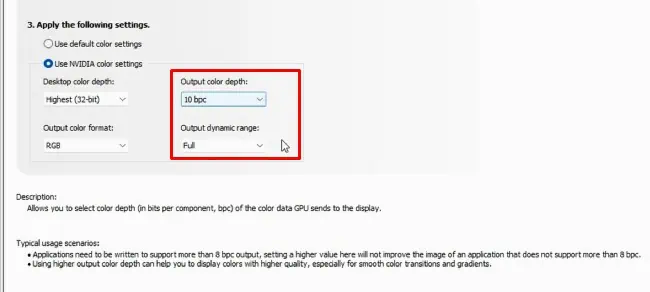
- Under Output color depth, select 10 bpc (bits per color) and press Apply. If the 10 bpc option is not available, change the frame rate first, then try again.

- Additionally, change the Output Dynamic Range to Full if it isn’t already so. If this blows out the colors and makes the content excessively bright, you can always change it back to Limited later.
AMD
Here are the steps to change the color depth for AMD GPUs:
- Right-click and launch AMD Radeon Settings.
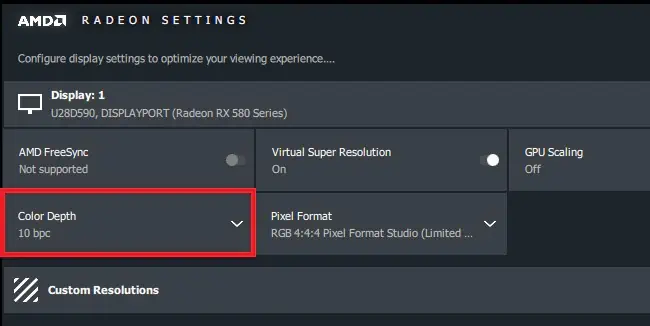
- In the display tab, change the color depth to 10 bpc.

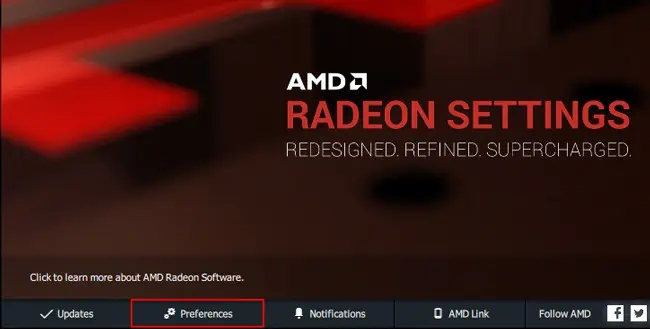
- Additionally, it’s also worth going to Preferences > Radeon Additional Settings and changing the Pixel Format to RGB 4:4:4 Pixel Format PC Standard (Full RGB).

- Close Radeon Settings and test out the new config.
Adjust Color Settings
A lot of users have had success with manually configuring the color settings according to their preferences. Alternatively, you can download a color profile from your display manufacturer’s site and use that as well. Here are the steps to do so:
- Press the buttons on your monitor and look for the COLOR or similar setting.
- Play around with it and see if you can find a configuration you’re satisfied with.
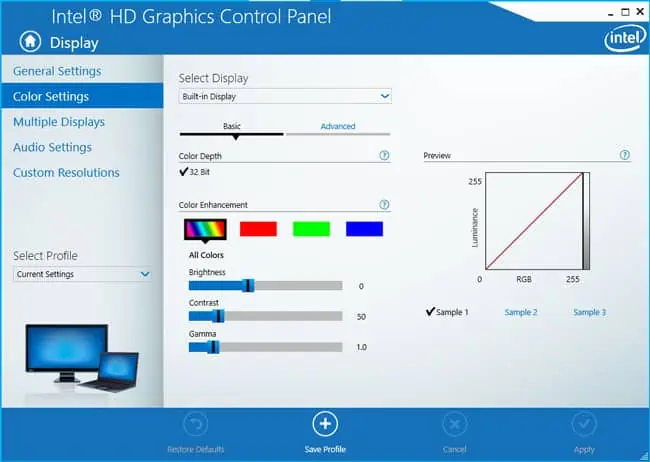
- Next, right-click on the desktop and select Intel Graphics Settings.
- Navigate to Display > Color Settings and adjust the Brightness, Contrast, Hue, Saturation, Temperature, and Gamma to your liking.

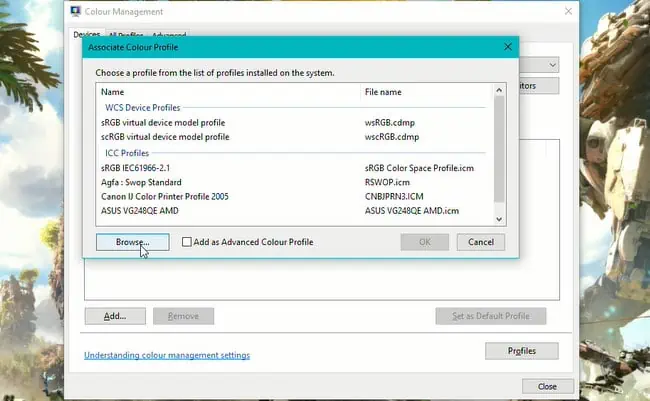
- Alternatively, if you’ve downloaded a color profile, use the Run command
colorcpl. - Select your display and press Add > Browse.

- Import the ICC file that you downloaded.
- Press Add again, select the imported color profile under ICC Profiles, and press OK. Now select it from the list and press Set as Default Profile.
- Close the Color Management utility and restart your PC.
Update Monitor Driver
Updating drivers is a generally good practice, and the same applies here as well. You can download the updated driver from the manufacturer’s site and install it directly or via Device Manager. Here are the steps to do so:
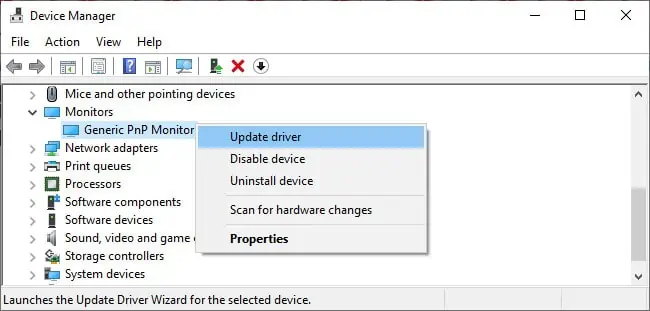
- Press Win + X and select Device Manager.
- Expand the monitors section, right-click the display, and select Update Driver.

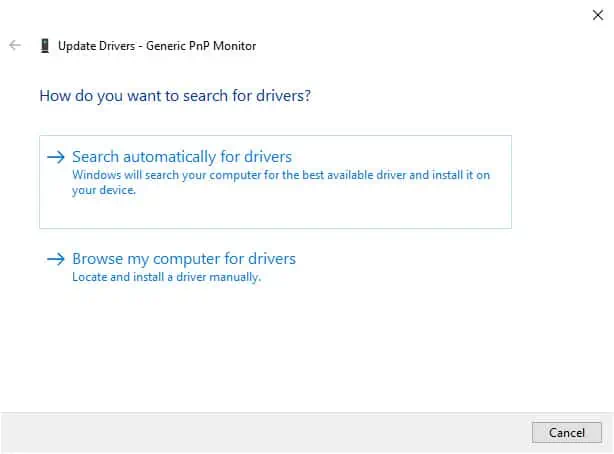
- Select Search automatically for drivers first and follow the on-screen instructions.
- If it doesn’t update with this method, select Browse my computer for drivers instead and use the driver file you downloaded from the manufacturer’s site for a manual installation.

- Additionally, it’s also a good idea to update your display drivers in the same manner.


