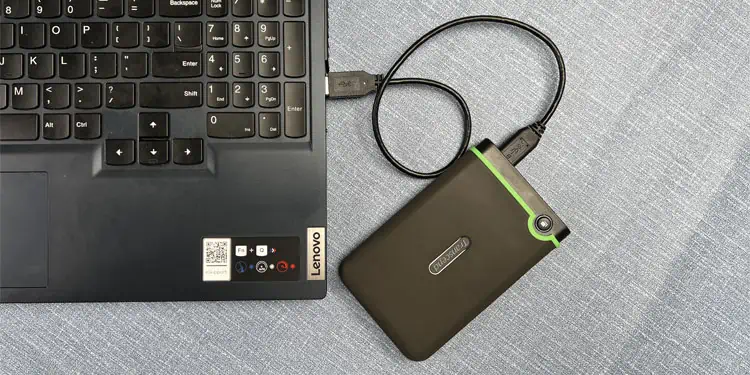
The external hard disk drive (HDD) usually shows up on File Explorer after you connect it to your computer. However, in some cases, your computer may not detect the device. Or it is also possible that your PC detects the HDD but can’t access it at all.
These scenarios usually occur if the device is not formatted or mounted properly. Connection problems, faulty drivers, and damaged hardware are some other potential causes.
So, here’s a step-by-step guide to properly access the hard drive while also troubleshooting such situations.
Access Hard Drive Through File Explorer
When there are no other issues with your system or the external hard drive, you can easily access it from your File Explorer.
- Press Win + E to open the File Explorer.
- Go to This PC from the Navigation Pane.
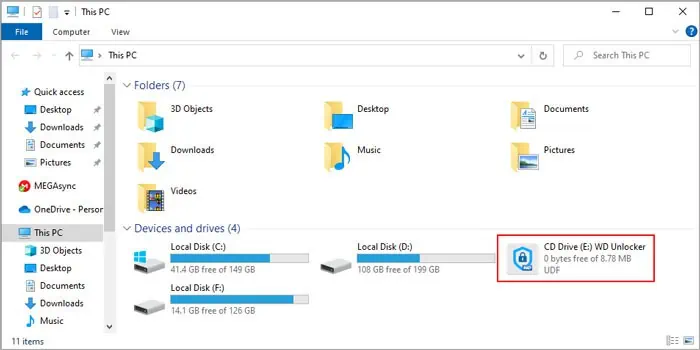
- You will find your external hard drive under Devices and drives. You can find it next to your usual local drives by checking its name and size.

If the drive is locked you will see its unlocker as a virtual drive instead. You need to unlock it first.
- Open the unlocker.

- Then, follow the on-screen instructions while entering the lock password when prompted.
Trouble Accessing External Hard Drive?
If you can access the drive, you don’t need to look further ahead and are good to go. Otherwise, go through the successive steps one by one.
Check if Drive is Properly Connected
If there are some connection issues or the hard drive does not get enough power, it won’t work and your system can’t detect it. To take care of such issues, reconnect the external hard drive to the PC while keeping the following things in mind:
- Some larger external hard drives require a separate power supply as the drives do not get enough power from the USB bus. Such drives also have dedicated ports for the power supply.
- The USB ports on the front panel may not provide enough power. So, try using the USB ports on the motherboard to connect the hard drive. We also don’t recommend using passive hubs to attach your hard drives for the same reason.
- If you connect your USB devices to neighboring USB ports, one or more devices may not get enough power. So, when you connect the hard drive, make sure that the adjacent ports are free.
- Also, if your current power configuration is in power-saving mode, your system may have suspended the USB ports. You can either disable the option or change to high performance to access the drive.
Check Disk Management
The external drive also won’t show up if it doesn’t have an assigned drive letter. Apart from that, you won’t be able to access it even if you see the drive on your File Explorer if it doesn’t contain any formatted partitions. You can troubleshoot both causes from the Disk Management tool.
- Press Win + R to open Run.
- Type
diskmgmt.mscand press Enter to open Disk Management. - Look for your external hard disk on the lower row.
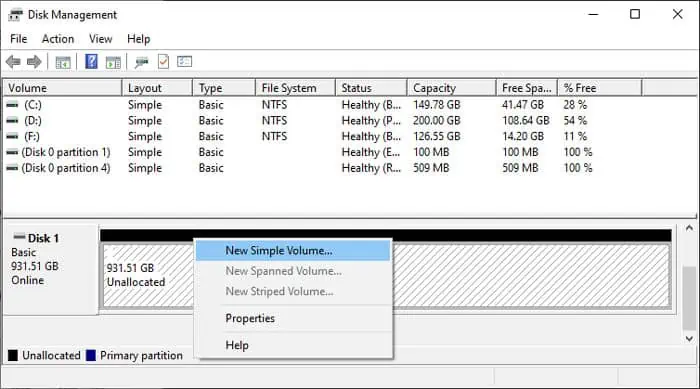
- If its volume shows Unallocated, you need to allocate the space to a new partition.
- Right-click on the Unallocated space and select New Simple Volume.

- Click Next three times.
- Set the File system and Volume label per your need and click Next.
- Hit Finish.
- Right-click on the Unallocated space and select New Simple Volume.
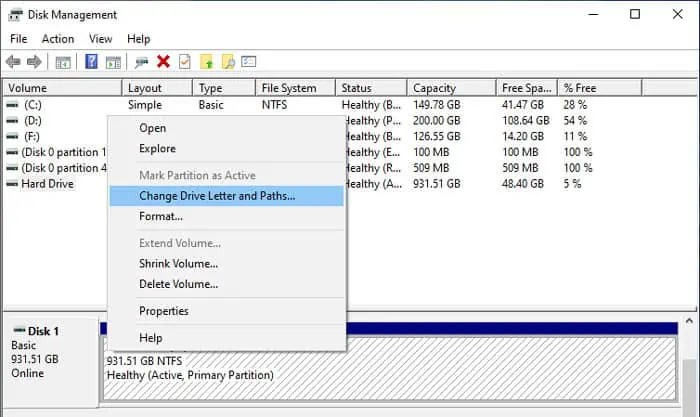
- If the volume does not have a drive letter (the name is blank or shows Disk # partition #),
- Right-click on it and select Change Drive Letter and Paths.

- Click Add, check Assign the following drive letter, and set the drive letter per your preference.
- Select OK.
- Right-click on it and select Change Drive Letter and Paths.
Then, you should be able to access it from File Explorer.
Check Device Manager
Corrupt USB hard drive drivers can also prevent you from accessing the devices. Additionally, the residual drivers of other HDDs can also conflict with these devices and cause similar problems. You need to delete the leftover driver software to prevent such conflicts.
You can update or reinstall your current hard drive’s driver to take care of any corruption. The easiest way to do both is through the Device Manager.
- Disconnect the external hard drive from your PC.
- Open Run. Type
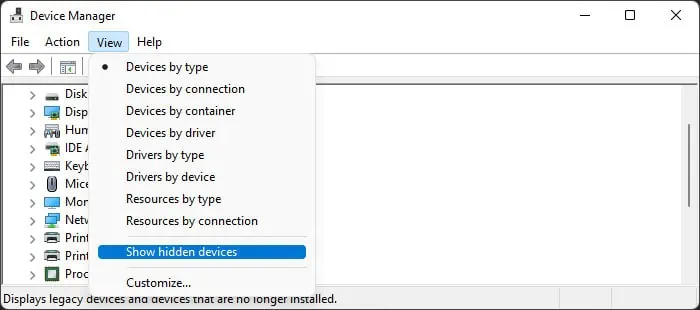
devmgmt.mscand press Enter to open the Device Manager. - On the menu bar, go to View and check Show hidden devices by selecting the option.

- Expand Disk drives and Other devices.
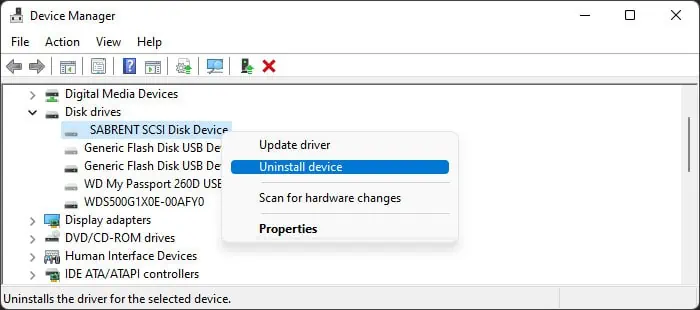
- Right-click on all grayed-out devices in these categories and select Uninstall device > Uninstall.

Then, connect the hard drive to your PC and see if you can access it from File Explorer. If not, you need to update its driver.
- Open the Device Manager and expand Disk drives.
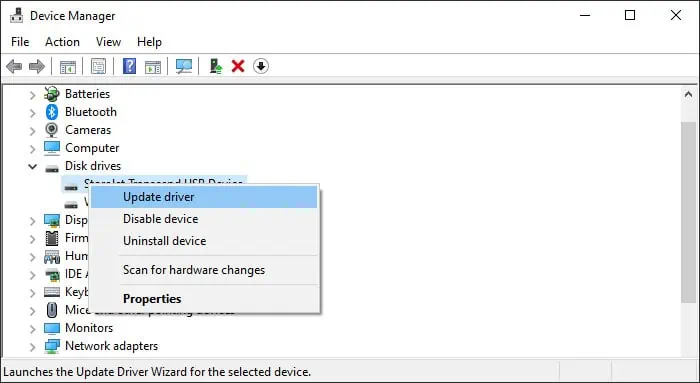
- Right-click on your external hard drive and select Update driver > Search automatically for drivers.

- Search for the device under Universal Serial Bus controllers and do the same if it is available.
If you already have the latest driver, you need to reinstall it.
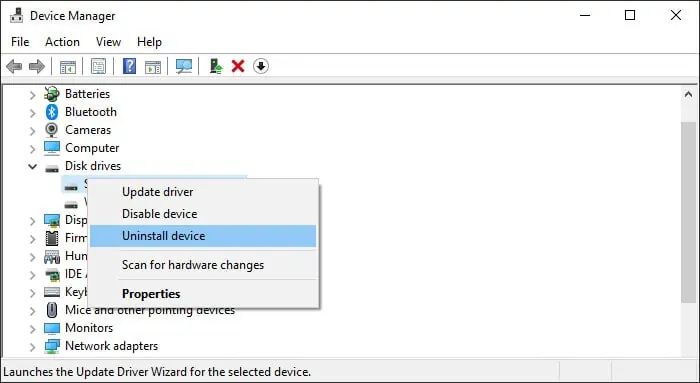
- Right-click on the device under Disk drives and select Uninstall.

- Restart your PC to automatically install the driver. You can also visit the manufacturer’s website, download the latest driver and run the installer to install it manually.
If the device keeps showing the yellow error icon, check the device properties to determine the error code. Then, you can visit Microsoft’s documentation on Device Manager error codes to find the exact solution.
If nothing works, the hard drive is dead and your only solution is to replace it. But first, try recovering any important data from within with the help of recovery software or data specialists.
