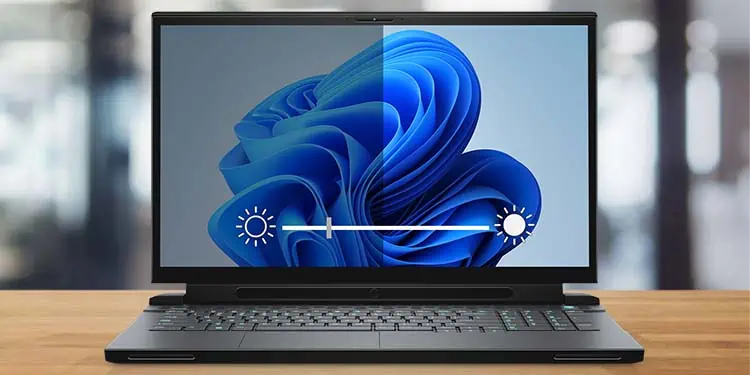
Depending on the ambient lighting condition, you will need to adjust the brightness on your laptop. If you’re using your laptop in natural sunlight, you won’t be able to see much on your display if you have low brightness.
On the other hand, using your laptop in a low-lit room will put too much strain on your eyes. So, you will need to constantly adjust its brightness when using it in your everyday life.
Nonetheless, adjusting the brightness on a laptop is pretty easy. You can either use dedicated brightness control keys on your keyboard or a variety of different methods to adjust the brightness.
Using Dedicated Keyboard Keys
The easiest way to adjust the brightness on a laptop is by using the dedicated brightness control keys. To locate the brightness control keys on your laptop keyboard, simply search for a sun icon printed on the key caps.
Depending on the model of your laptop, the brightness control key may be located at the top, in one of the function keys of your keyboard, or on the arrow keys.
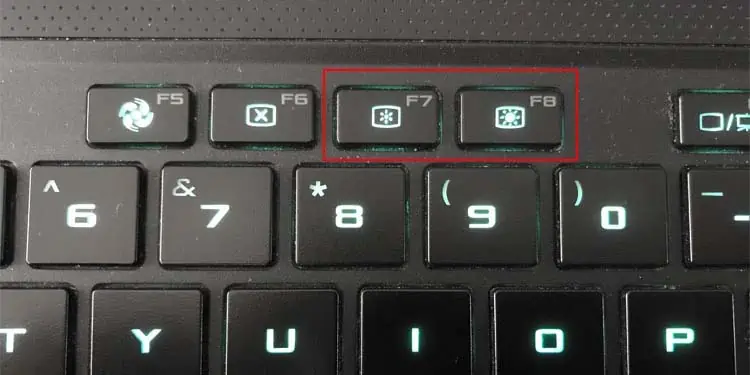
Click on the brighter sun icon to increase your brightness, and click on the dimmer sun icon to decrease your brightness. If doing so doesn’t change the brightness of your screen, you might need to hold the Fn key and press the brightness control keys.
Some laptops may also have a sun icon with plus or arrow up sign to increase brightness and a sun icon with a minus or arrow down sign to decrease brightness.
Additionally, if you want to adjust the brightness of an external monitor connected to your laptop, you will need to do so from the monitor itself.
From the Action Centre
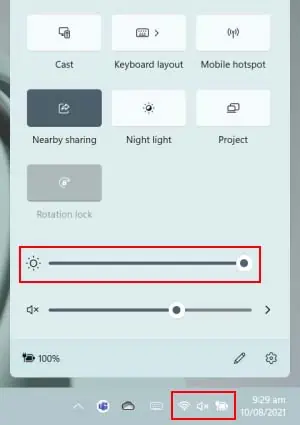
You can also adjust the brightness of your laptop from the Action Center in Windows. The Action Centre contains a few quick action settings like Wi-Fi, volume controls, and also brightness control.
- Click on the box containing Network, Volume, and Battery icon to launch Action Centre. Alternatively, you can open Action Centre by pressing Windows + A shortcut key.
- Locate the Brightness slider and drag it to the right to increase the brightness or the left to decrease brightness.

From Windows Settings
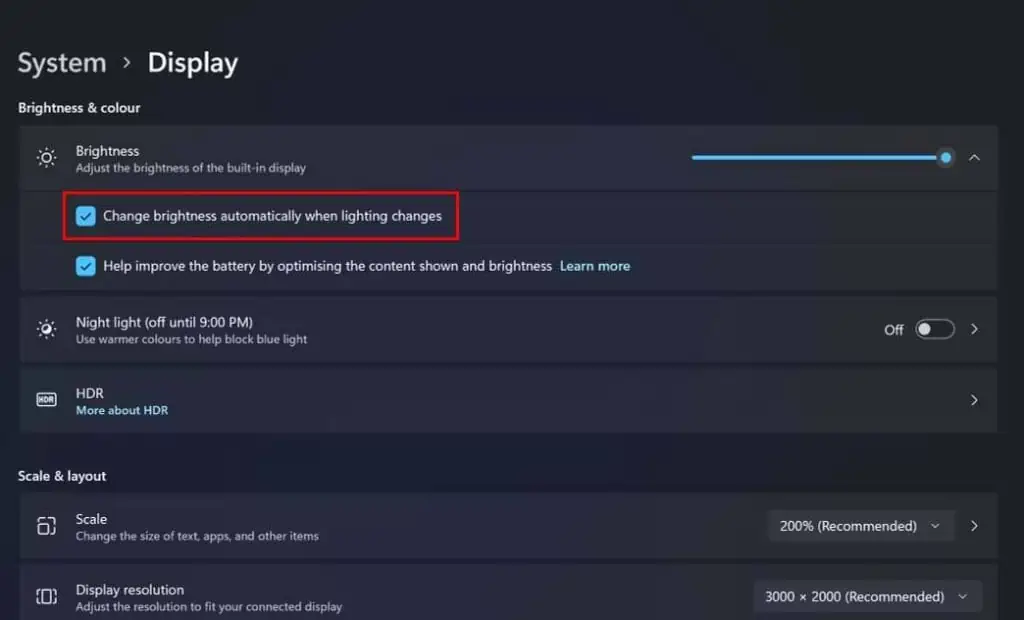
You can also adjust your laptop’s brightness from the Windows inbuilt Settings application. If your laptop has an ambient light sensor, you can also change your settings to let Windows automatically adjust the brightness appropriate to the environment.
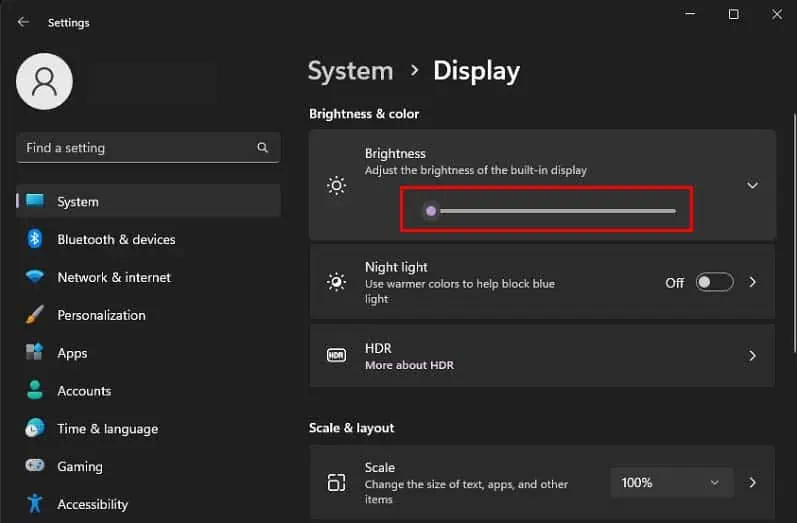
- Press Windows + I shortcut key to launch Settings.
- Navigate to System > Display.
- Locate the Brightness slider, and drag right to increase the brightness and left to decrease it.

- If you also want Windows to automatically adjust the brightness for you, click on the Brightness slider to reveal the hidden options.
- Check the Change brightness automatically when the lighting changes option. (If this option isn’t present, your laptop may not have ambient light sensors.)

Using Windows Mobility Center
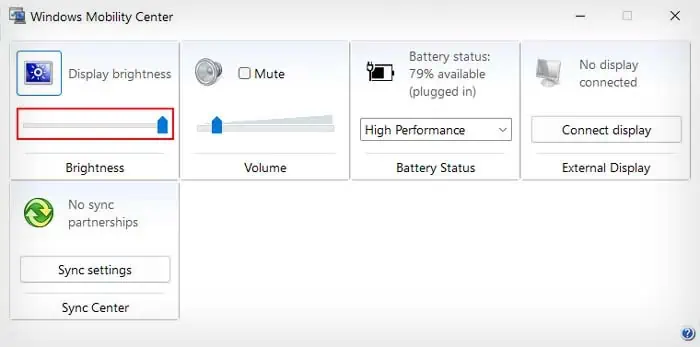
Another way you can adjust your laptop’s brightness is by using the Windows Mobility Center, which is only available for Windows laptops. Here’s how you can do so:
- Press Windows + R shortcut key to open Run box.
- Type
mblctrand press Enter to open Windows Mobility Center.
- Drag the Brightness Slider left or right to adjust your screen brightness.

Using GPU Control Panel
You can also change the brightness of your screen from the Control Panel dedicated to your graphics processing unit (GPU). Your laptop likely features a GPU from either one of three brands, Intel, NVIDIA, or AMD.
So, you can use the corresponding Control Panel of the three GPU manufacturers to adjust your laptop’s brightness.
On Intel Graphics Control Panel
- Right-click on your desktop, click on Show more options, and select Intel Graphics Control Panel.
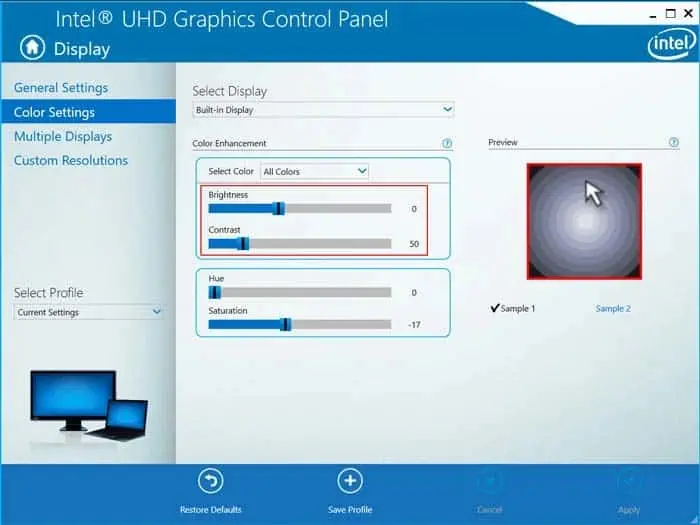
- Navigate to Display > Color Settings.
- Under Select Display, choose the display monitor you want to change the brightness for. (If you don’t have an external monitor connected to your laptop, leave it as Built-in display.)
- Drag the Brightness slider left or right to adjust the screen brightness. (You can also adjust the Contrast value if you like.)

- Click Apply and close the Intel Graphics Control Panel.
On Nvidia Control Panel
- Right-click on your desktop, click on Show more options, and select NVIDIA Control Panel.
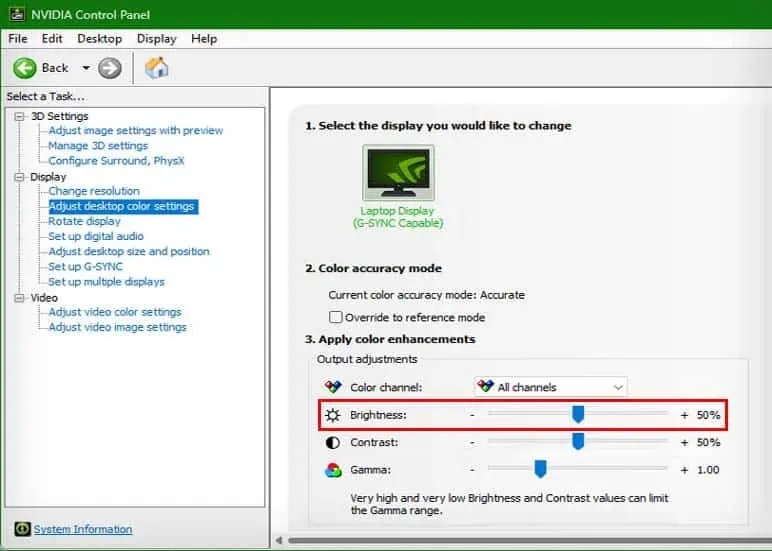
- Under the Display tab, select Adjust desktop color settings.
- Choose the display of which you want to adjust brightness from the right panel.
- Adjust the screen brightness using the Brightness slider.

On AMD Radeon Settings
- Right-click the desktop, click on Show more options, and select AMD Radeon Settings.
- Click on Display, and under Global Display, select the display monitor you want to change the brightness for.
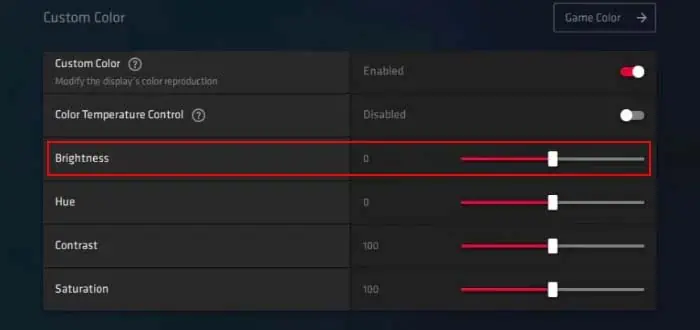
- Toggle on the Custom Color option.
- Adjust your screen brightness using the Brightness slider.

From Windows PowerShell
Windows PowerShell is a scripting language as well as a command line interface with which you can pretty easily perform simple tasks like adjusting brightness.
- Press Windows + R to open Run box.
- Type
powershelland press Enter to open it.
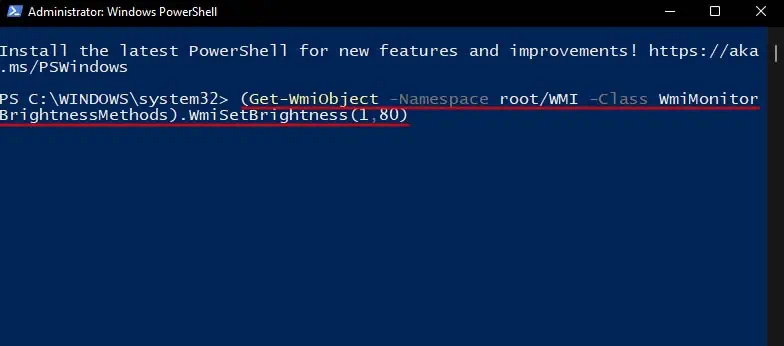
- In PowerShell, enter the following command and press Enter:
(Get-WmiObject -Namespace root/WMI -Class WmiMonitorBrightnessMethods).WmiSetBrightness(1,<brightness>).
Make sure to replace <brightness> to a value from 1 – 100. The higher the value, the brighter your screen will be.
For example,(Get-WmiObject -Namespace root/WMI -Class WmiMonitorBrightnessMethods).WmiSetBrightness(1,80)
Using Third-Party Applications
Lastly, you can also use third-party applications to easily adjust your screen brightness. Alongside normal brightness controls, most third-party applications also include customizable features like adjusting brightness depending on time, battery power, and ambient light.
Some great brightness control applications are Dimmer, F.lux, Display Tuner, and ClickMonitorDDC.

