Microsoft has done a fantastic job to ensure Xbox and Windows work together. Pairing controllers to your PC is often super easy, often a matter of plugging a USB cable or turning on the Bluetooth. However, sometimes, you may need to intervene for some manual changes.
Gamers know how important it is to maintain and care for their gear. Part of the job is making sure your controllers are in great condition. In particular, wrong settings can damage your aiming, precision, movement, and more.
Therefore, one of the most significant manual changes is calibrating Xbox One controllers. It fixes axis issues, drift movement, thumbstick sensitivity, and similar. In essence, recalibrating the controller will bring back the smooth feel of a factory condition controller.
Why Is My Xbox One Controller Not Calibrated?
You will know you need to calibrate Xbox One controller when you’re having trouble playing. Wrong calibration settings produce random movement during your playtime.
In particular, the issue may rely on the Axis, which is your X-Y-Z movement and perspective.
A non-calibrated controller is a common issue on these occasions:
- You’re using a new controller on your Windows PC
- You’re using a very old controller on your Windows PC
- You haven’t used the controller for a while on your PC
- Steam, Epic Games, or Windows automatically changed your controller’s settings after an update
- There’s physical damage like wear, tear, dust or rust in the controller.
For all causes, the steps are the same. Bear in mind that Xbox One calibration has nothing to do with your PC’s drivers or the controller’s firmware. Either way, keeping both up to date is best to avoid connectivity issues.
How to Calibrate Xbox One Controller?
Windows 10 and Windows 11 PCs have a built-in program for the job, the Calibration Tool.
This works with any controller you plug via a USB cable, including any PlayStation, Xbox One, Xbox Series, Nintendo Switch, or any generic controller. So, our instructions can help you calibrate any controller you have.
There’re three ways to calibrate Xbox One controller on Windows 10:
- Reset the settings to default
- Calibrate the controller manually
- Calibrate the controller via Steam
How to Reset the Xbox One Controller Calibration?
The first method is resetting the settings. It’s a good idea to test it before manually calibrating the peripheral, as it can be tough. Additionally, you can always engage the option if the manual calibration goes wrong.
- Plug your controller into the PC via a USB cable.
These steps don’t work wireless or via Bluetooth. Only by connecting a controller to the PC can Windows engage the Calibration tool. - Open the Control Panel
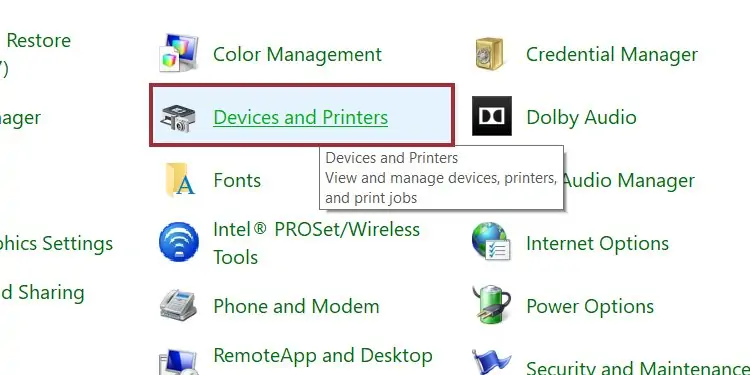
Type “Control Panel” on your Windows search bar and open “Control Panel.” - Go to “Devices and Printer.”

Click on “Devices and Printers” on the Control Panel menu. - Go to your Game Controller Settings

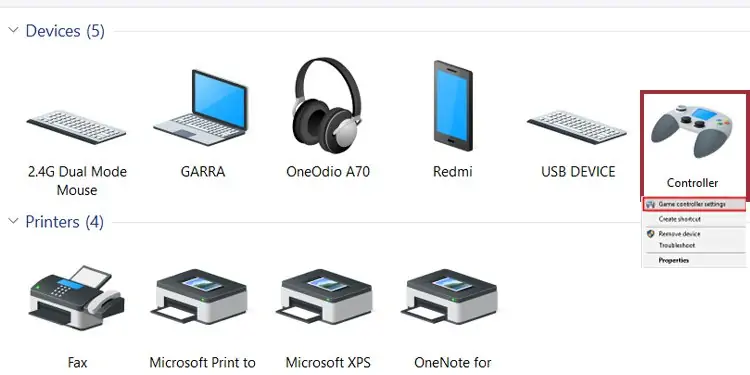
On the Devices and Printers menu, right-click on your controller’s icon and select Game Controller Settings. - Go to Properties
Inside the controller’s menu, click on Properties at the bottom right. - Go to Settings and Reset to Default
Click at the top left for the Settings menu. The menu has two options: Reset to Default and Calibrate. Click on Reset to Default.
- Close the tool
After selecting the Default option, press OK to close the tool and OK again. - Test the calibration
Finally, test your controller by playing on your PC. There’s no better way to see its performance than actually using it.
If it’s not working properly, please continue to the next method. Alternatively, you could start with a manual calibrate instead of resetting to default.
How to Calibrate Xbox One Controller Manually?
We’re going back to the same menu as before for a manual calibration:
- Go to Control Panel
- Select Devices and Printers
- Go to your controller’s Game Controller Settings
Remember to right-click on the peripheral at the Devices and Printers hardware menu. Then, click on the first option in the drop-down menu. - Choose to Calibrate on Settings

Back at the settings menu, we’re now to press the Calibrate option. - Follow the wizard

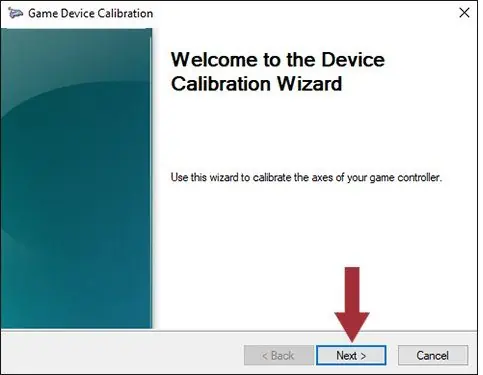
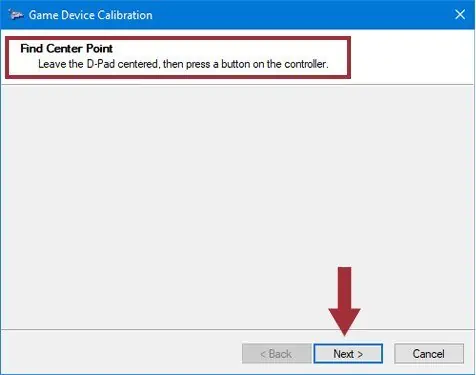
Your PC will launch a calibration wizard. Click next, and follow the instructions. - Center the D-Pad

The first instruction is leaving the D-Pad (or the left thumbstick) centered and then pressing a button on the controller. After you’re done, click Next. - Find the corners with the D-Pad

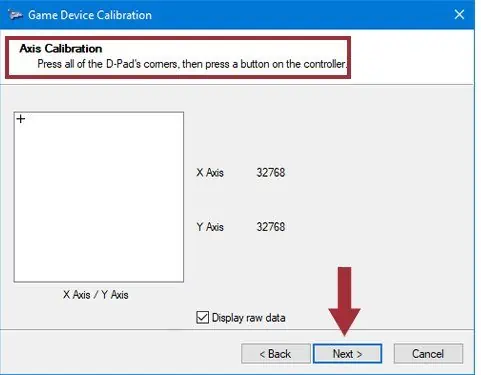
Next, you need to move the D-Pad (the left thumbstick) around the corners. Then, press a button on the controller and click next. Additionally, you can check the Display Raw data box below to see your progress. - Verify D-Pad center

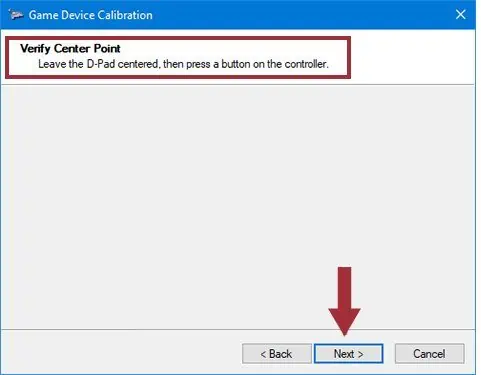
You need to repeat a previous step by leaving the left thumbstick at the center. - Calibrate the Z-Axis

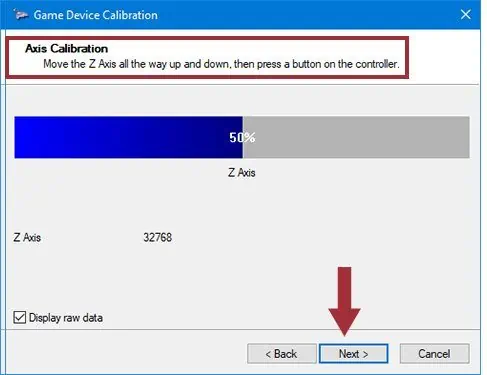
The next step is moving the Z-Axis up and down. That means moving the left and right sticks all the way and then down. After you finish, press a button on your controller, and click next. Once again, check the raw data box.
The wizard will display a percentage box, letting you know when you finish calibrating the Z-Axis movement settings. - Calibrate the X-Axis
Now, it’s time to set up the X Rotation. That means moving the right thumbstick left and right. After you finish, press a button on the controller, and click on next.
As before, the wizard showcases a percentage bar to let you know your completion. - Calibrate the Y-Axis

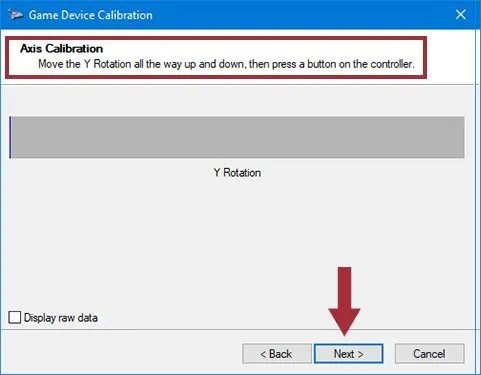
Now it’s time to fix the Y-Rotation. You can move the right thumbstick down and up. After you finish, press a controller button and then click on Next. - Finish the process

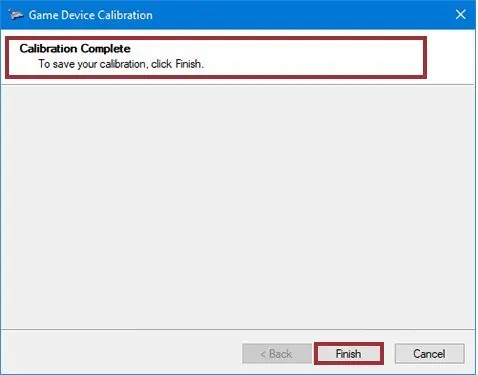
Lastly, click on Finish to close the wizard and save its settings. - Test the settings

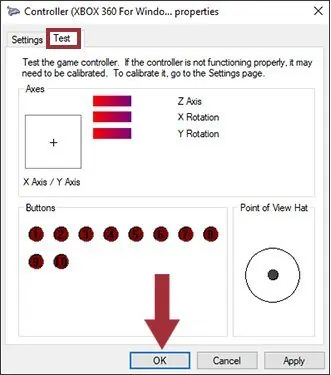
Now, go to the Test tab and test the calibration. You can press your buttons to try it out. When you finish, click on Apply and then on OK. - Test the controller on games
If everything goes your way, you could test the controller on your games. Often, after you calibrate Xbox One controller, it will be as good as new.
How to Calibrate Xbox One Controller on Steam?
There’re various third-party software calibration features, but we recommend using Stream to calibrate the Xbox One controller. Bear in mind that the Epic Games launcher doesn’t have calibration options.
So, we’re recommending Valve’s storefront, as most PC games already have a Steam account and use the app to buy and play games.
Moreover, Steam allows you to fine-tune the controller on a game-by-game basis, even if these games don’t support USB controllers. It’s a great all-around tool to use.
Here’re the steps:
- Open the Steam app

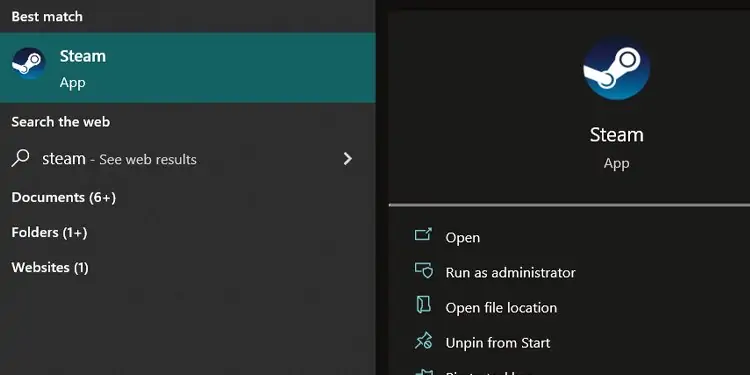
Type “Steam” on your Windows search bar, and open Steam. - Open Big Picture Mode

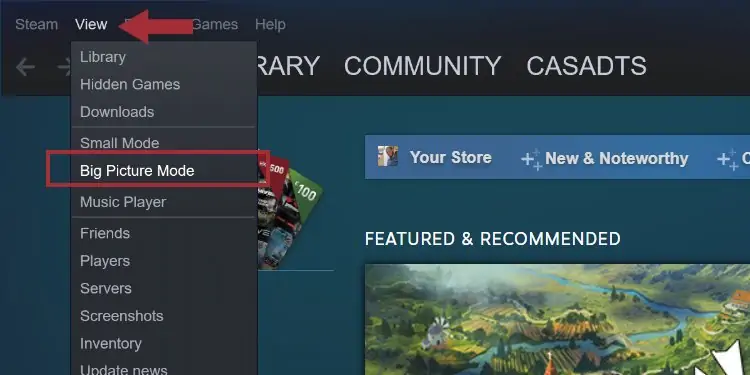
Click on View on the top menu and click on Big Picture Mode. It will open a windowless, full-screen Steam UI. - Go to Settings

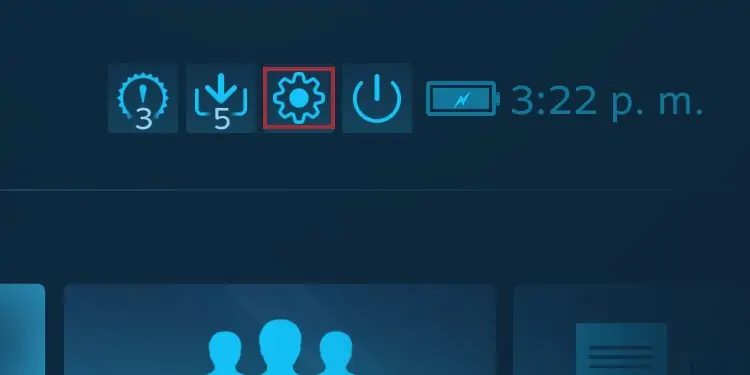
Click on the settings cog at the top right of the Big Picture Mode. - Go to Controller Settings

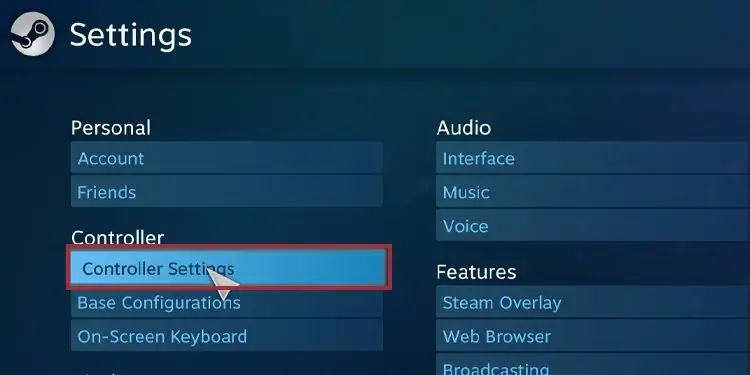
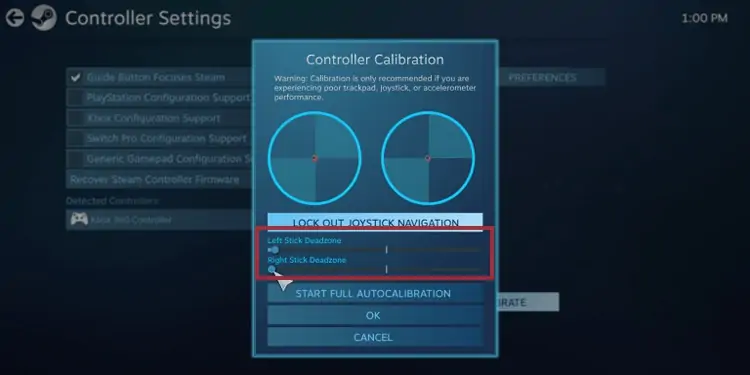
On the Settings menu, click on Controller Settings. - Open the calibration tool

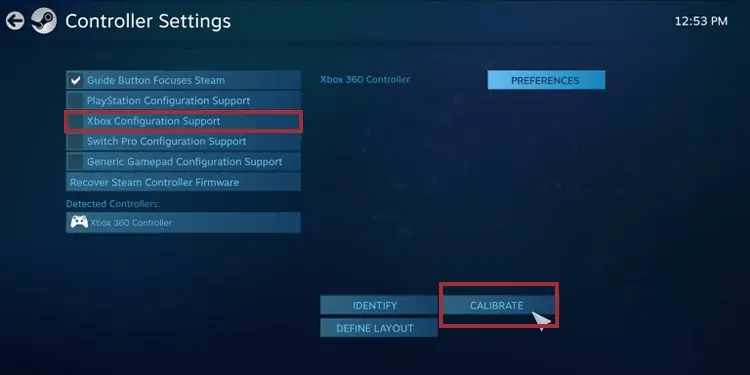
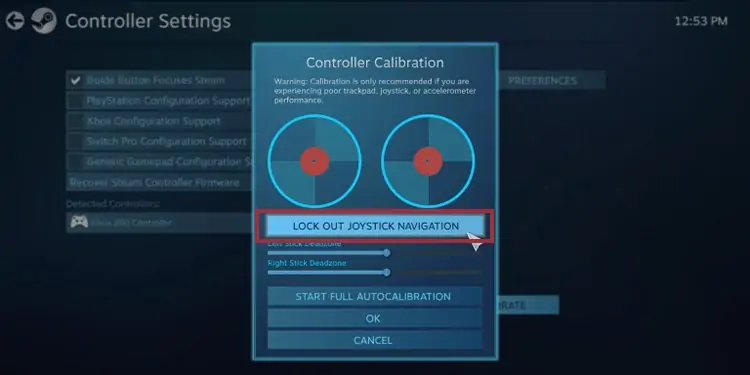
Check on the controller you want to activate (for example, Xbox), and click Calibrate.
Checking the Configuration box of a controller will make Steam install the drivers it needs. However, it will ask you to restart the app to apply the changes. - Enable “Lock Out Joystick Navigation.”

Start by clicking the Joystick Navigation option. It will allow Steam to complete the process automatically. - Enable the Full Auto Calibration

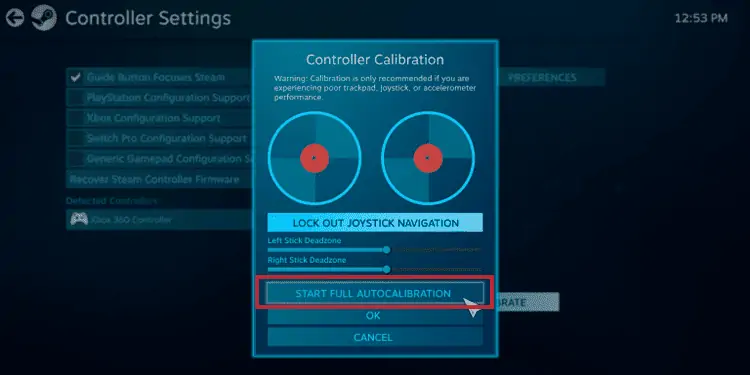
Press the Full Auto Calibration button next. - Follow the calibration wizard instructions

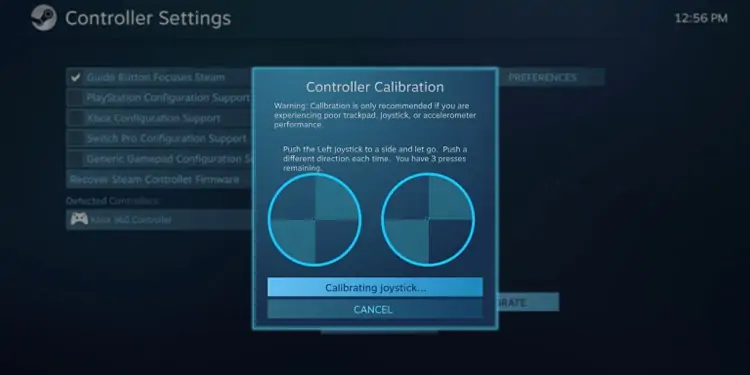
The first part of the wizard will ask you to move the analog sticks in different directions. It will complete the basic Xbox One controller calibration.
When the wizard finishes, Steam will close it automatically. - Select Calibrate again
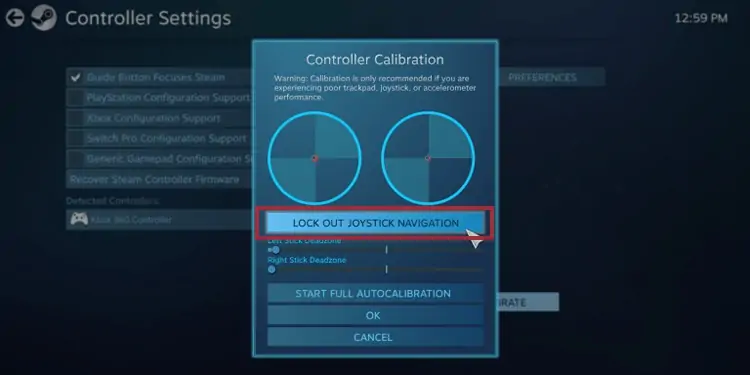
Now, we’re going through a more complex process. For that, you need to click on the Calibrate option again. - Lock Joystick Navigation

This time around, lock the Joystick Navigation option by clicking the box. - Adjust the sticks’ “deadzones”

Now, you can move the sliders to adjust the stick’s deadzones. These areas around your controller’s thumbstick don’t respond to movements.
It helps worn-out sticks to function if they can’t sit still. If your controller is fresh-new, you can leave the setting at zero or near zero. Better yet, adjust it until you feel comfortable. - Return to the Controller Settings menu
After adjusting the deadzones, go back to the Controller Settings menu. There’re, you’ll see the games you have in your library, and you can choose each one to adjust the exact settings you want.

