A monitor that you got straight out of a factory may not show the best image quality and color representations. This stands true even when the manufacturers try creating monitors with the best default settings.
If you want your monitor to display all the colors correctly, you will need to manually calibrate it. A calibration creates an ICC color profile that tells your computer how to translate the colors so that it looks accurate to your eyes.
You can either use a calibrator device for this purpose or use some software-only methods.
Using Hardware Calibration
The best way to calibrate your monitor is by using a monitor calibrator or a colorimeter. Software methods can get close but will never provide the best results as all monitors, even with the same manufacturer and specifications, are different. The devices do not come with exact specifications but with parameters that are within the tolerance range.
So, you need to create unique color profiles for individual monitors to calibrate them properly. Only a colorimeter or calibrator hardware can test the monitor colors against industry color standards to be able to determine the proper RGB variations.
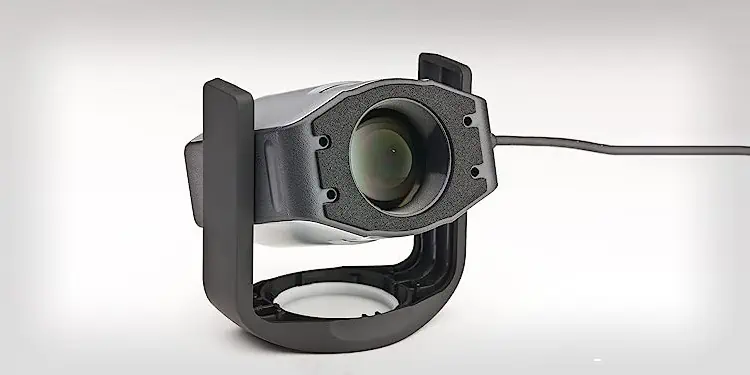
However, keep in mind that a calibrator is a costly device so you may want to try out just software calibration first. Software calibration should be enough for most users who are not graphics designers or do not need the best monitor colors.
Step 1: Make Necessary Preparations
A monitor calibrator, colorimeter, or spectrophotoometer is the only device you will need for this process. I personally recommend using a colorimeter that allows you to adjust to ambient lighting conditions. But it’s fine even if you go for other calibrators.
You will also need to prepare your monitor so that you can get the desired ICC profile.
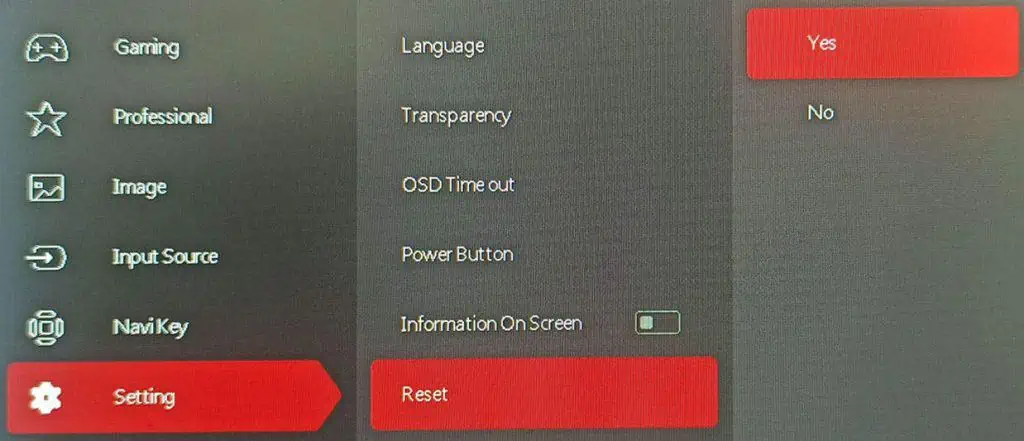
- First, reset your monitor settings to default. You should be able to use the monitor’s OSD (on-screen display) to select the relevant option.

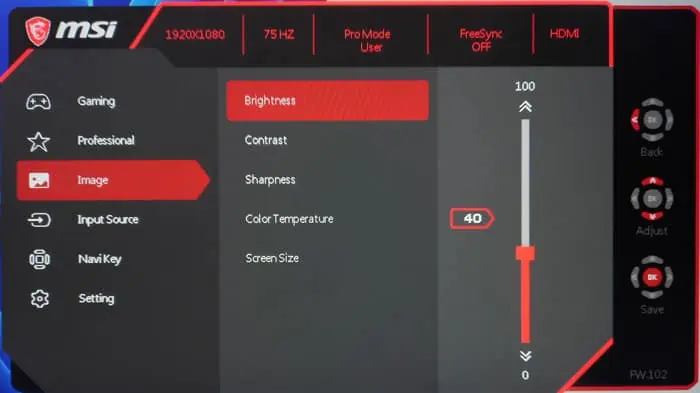
- If the default profile does not allow manually changing certain options like Brightness, make sure to set the monitor to any User or Non-gamer profile.
- Disable all enhancements or display modifications like Motion blur, Night light, black equalizers, and so on on the monitor settings. You also need to disable them from your system if necessary.
- Disable the power-saving mode so that you get the actual brightness on the monitor.
- Set the monitor brightness and contrast according to your preference.

- Turn on the display for at least one hour. Some monitors will get hotter and lower the display brightness as a result. So, it’s best to first get to stable brightness so that it doesn’t change while calibrating and may affect the process.
- Make sure to clean the monitor screen or at least the center as you’ll be placing the colorimeter there and you don’t want any dust to mess up the process.
Step 2: Use the Colorimeter with a Calibration Software
You need to use calibration software together with the calibrator device. The program displays patches with different colors, contrasts, and so on to test the results of the colorimeter. Then, it will create a suitable ICC profile according to this result.
It’s better to use a reliable application even if it is not free. Make sure to keep the following things in mind while performing the calibration.
- If you have a colorimeter that can check for ambient lighting, it’s best to adjust the colorimeter to the ambient lighting conditions first. This way, it can calibrate your screen lighting while considering the ambient light of your room. These devices contain a cap to cover the light sensor. If not, perform the calibration in a dark room without much ambient light.
- You need to place the colorimeter on the center of the monitor with its sensor facing the screen. It is because the calibration program will show the color patches in the center.
- Make sure to properly select your monitor and colorimeter model on the software. Also, I recommend setting an sRGB profile for the best colors.
- Check the instructions on the software properly so that you can set all other settings as necessary.
Then, start the calibration and follow the on-screen instructions until you get to the White point or White level adjustment.
Step 3: Adjust Monitor’s RGB Values
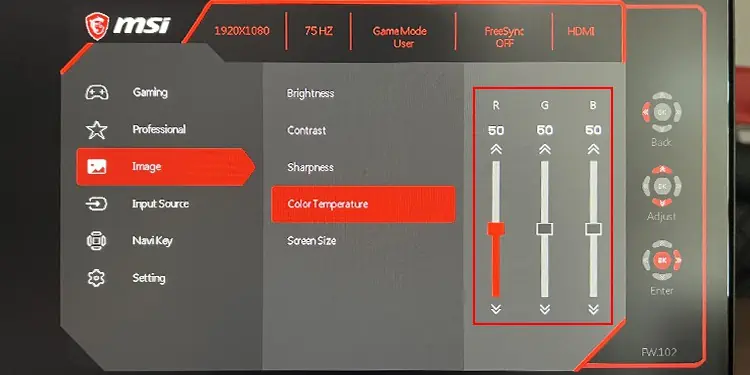
After you get to the White level or RGB gains measurement on the calibration software, you need to adjust the color temperature or RGB gains/values of your monitor. The software should show an indicator that tells you how far the current configuration is from the desired one.
Use the OSD setting of the monitor to change the RGB values in the Color Temperature or a similar setting until you get the best result. If you can’t get the best result, try getting as close as you can to such a result.
Step 4: Install Color Profile
Now, stop the measurement of the white level and continue with the rest of the calibration. The software and the colorimeter will perform the rest of the process, so you’ll only need to wait for it to complete.
After that, it should create a unique ICC profile for your system which you can install by following the on-screen instructions. Your system should automatically activate the profile whenever you start Windows.
Using Software-only Calibration
You can also use other methods that do not depend on any hardware to calibrate your monitor. While it may not account for the difference in tolerance values for individual products, it should be enough for most users.
Built-In Display Color Calibration
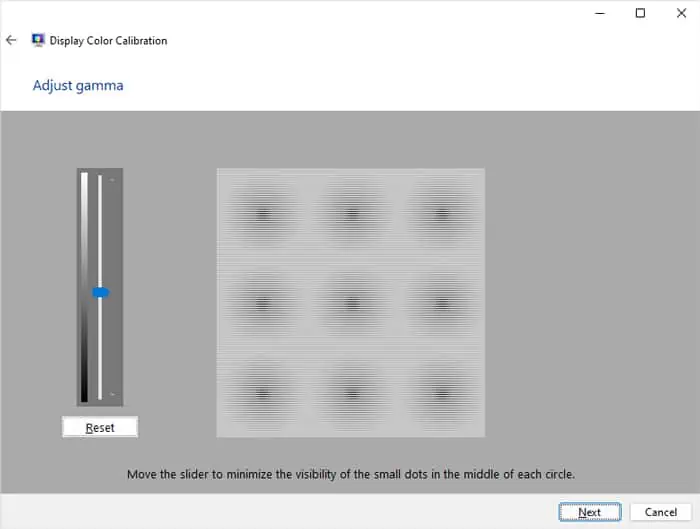
Windows comes with a built-in display calibration tool that allows you to configure the Gamma, brightness, contrast, and color balance of your display. However, since it doesn’t have a proper standard set of values to compare to, you need to set the settings that look best at the time of calibration.
Doing so won’t actually give the best result as human eyes are not great at recognizing accurate colors and shades at a glance. Our eyes can recognize the difference in shades only when comparing them next to one another. In fact, when you shift your vision from one color to the next, the color may even appear different from what it actually is.
For better results, I highly recommend using other methods. Regardless, here’s how you can run the built-in Display Color Calibration tool.
- Open Run by pressing Windows + R.
- Type
dccwand press Enter to open the Display Color Calibration tool. - Click on Next > Next.
- Take note of the Good gamma and select Next.
- Set the slider to match the Good gamma from the previous tab.

- Click Next > Next > Next.
- Change the brightness enough that you can tell the shirt apart from the suit while making sure that the X in the background is barely visible.
- Select Next > Next.
- Set the contrast to the value just below the point where the wrinkles and buttons on the shirt begin to vanish.

- Click Next > Next.
- Change the sliders until you can no longer observe any color on the grayscale. Click Next.
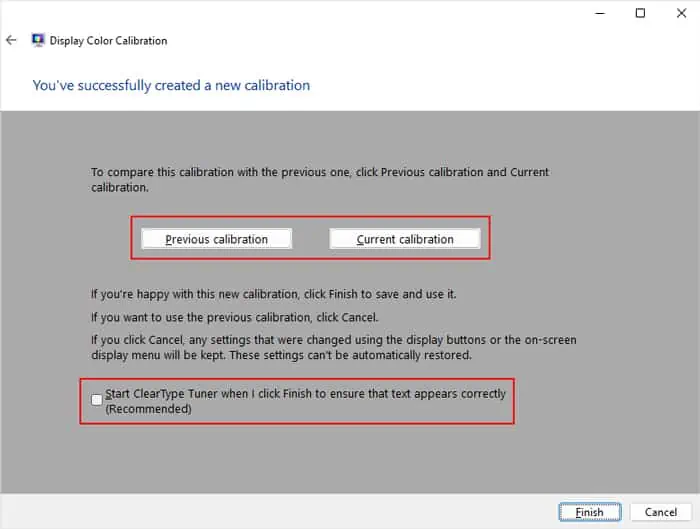
- Uncheck Start ClearType Tuner when I click Finish to ensure that the text appears correctly. (If you start experiencing any issues with the text, it’s best to run ClearType Tuner manually afterward.)
- Select Previous calibration and Current calibration to compare the display.

- If you like the current calibration over the previous one, hit Finish.
Online Color Monitor Test
You can also use online monitor display testing websites like Lagom LCD monitor test to calibrate different settings of your monitor. These websites contain multiple pages with individual tests for different settings like Contrast, Colors, Gamma, Sharpness, and so on.
You can go to each page and follow the instructions there to calibrate these options.
It will still not give you the best result as there’s still no standard set of values. You will still be eyeballing the difference in all the test images. However, it does give better calibration than the built-in calibrator as there are more and better tests.
Using a Premade ICC Color Profile
The best software-only way to calibrate your monitor is to download and use a premade ICC color profile for your monitor model. You can find such profiles on the internet, so you can try out many profiles and stick to the one that works best for you.
It still won’t give as good a result as properly calibrating your monitor using a colorimeter but it’s a good free alternative.
