The C:\Users\username folder contains the user profile of your account. When you create an account, your system makes a folder with your username on the C:\Users directory.
Even if you change your account name, the profile name remains unchanged. Directly changing this name is also impossible if you don’t have admin privileges.
We have created this guide to show you how to safely change the C:\Users\username folder in Windows.
How to Change C:\users\username in Windows
Here is the step-by-step process for changing your C:\Users\username folder in Windows:
Step 1: Log in With Another Admin Account
You can’t change your user profile name from the same account. You also need administrator privileges. So, log out of the account whose user profile you wish to change and sign in using another admin account.
If you don’t have any other accounts, you need to create a new admin or enable the hidden Administrator.
For the latter process,
- Open Run command box (Win + R).
- Enter
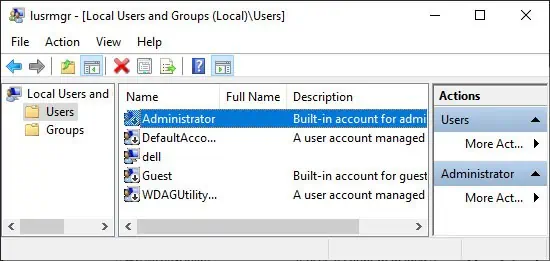
lusrmgr.msc. It will direct you to the Local Users and Groups Manager. - Click on Users from the left pane.
- Double-click on Administrator.

- In the General tab, uncheck the Account is disabled option.
- Click Apply and Ok.
You can also run Command Prompt as administrator and enter net user administrator /active:yes if you prefer using the CLI.
Then, log out of your current account and sign in using the Administrator account.
Step 2: Change User Profile Path in Registry
Changing the user profile name involves more than just altering the folder name. Your system keeps track of the user profiles and their paths in the registry. So, first, you need to change the path through the Registry Editor.
Here’s how you can change the User Profile path:
- Open the Run dialog box and enter regedit.
- Navigate to:
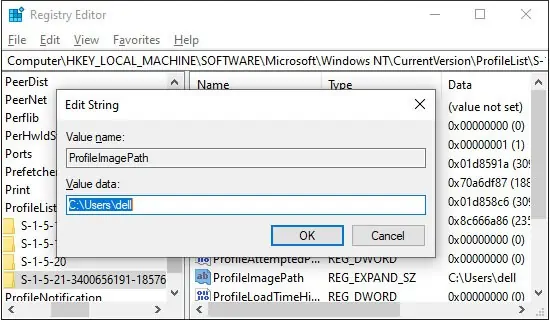
Computer\HKEY_LOCAL_MACHINE\SOFTWARE\Microsoft\Windows NT\CurrentVersion\ProfileList\ - It will contain a list of all SIDs. Individually click on the keys and check the value of ProfileImagePath to determine your profile.
- Alternately, you can enter
wmic useraccount get name,SIDon the Command Prompt to list all user profiles along with their corresponding SIDs. - Before making changes to your profile, right-click on ProfileList and select Export to create a backup.
- Go to the SID of your profile.
- Double-click on ProfileImagePath.
- Change your profile name in the Value data to your preference.

Close the Registry Editor and Restart your PC.
Step 3: Rename User Profile Folder
Now you can finally rename the C:\Users\username folder. Follow the instructions below to do so:
- Sign in with your account (the one where you want to change the profile name).
- Navigate to the
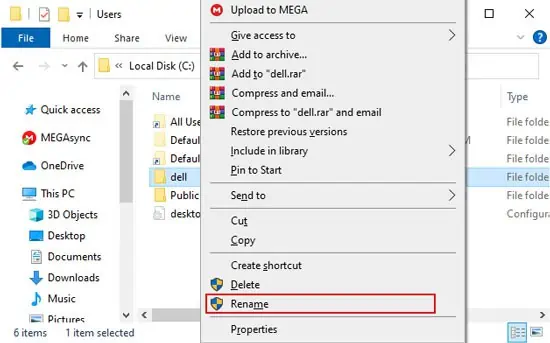
C:\Usersdirectory. - Right-click on the User Profile folder you wish to change.
- Select Rename.

- Enter the name you used for the registry entry.
- If you can’t rename the folder, boot into safe mode and try again.
Restart your PC and log in to your account.
Step 4: Replace Profile Path in All Possible Instances
There are some loose ends you need to tie up to complete the process. Many registry entries and settings still use the previous profile path.
Your application will run just fine. However, since you have changed the profile path and directory, the previous configurations and saved objects may not be accessible.
You must replace the previous path with the current one in all instances to avoid this issue. You can do so by manually changing the registry settings or creating a symbolic link.
Create a Symbolic Link
A symbolic link creates a reference to a file or folder in another location. You can make it so that opening a folder in one location opens up another. This method creates a logical replacement for the profile path. To create a symbolic link,
- Launch the Run command.
- Type
cmdand press Ctrl + Shift + Enter to load the elevated Command Prompt. - Enter the command:
mklink /d “full path of old user profile” “full path of new user profile”while replacing both of the full paths.
Manually Change Registry Entries
Creating a symbolic link does not actually replace the profile paths. If you don’t want your old username to pop up in any instance, you can try manually changing all the relevant registry entries. Here’s how you can change the entries:
- Open the Registry Editor.
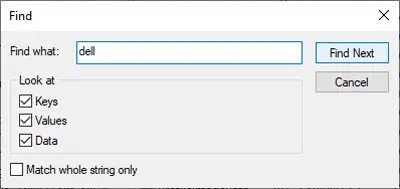
- Click Ctrl + F to load the Find feature.
- Make sure to tick all options.
- Type the previous username in Find What and click Find Next.

- Double-click on the selected registry entry and change the previous username to the new one in the Value data. Be careful while replacing the value.
- Press F3 to find the next instance of the username.
Change all the username values in the Registry Editor. Be advised that there are some entries you can’t change.
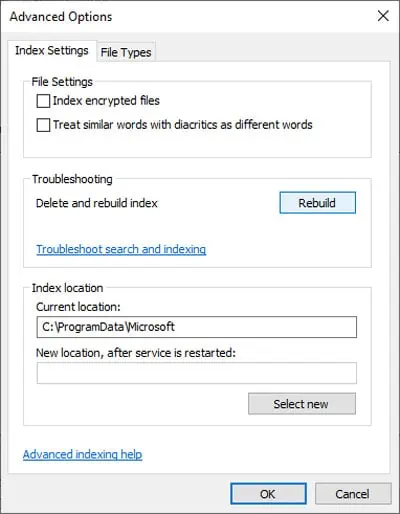
The next step is to rebuild search entries to refer to the new user profile. To do so,
- Launch the Run command.
- Enter
control srchadmin.dll. It will direct you to the Indexing Options. - Click on Advanced and select Rebuild.

- Hit Ok to confirm.
Restart your PC and check if you can use your system normally.
If the Microsoft Store apps show errors after changing the user profile name, you can open Windows PowerShell as administrator and enter: Get-AppxPackage | Foreach {Add-AppxPackage -register "$($_.InstallLocation)\appxmanifest.xml" -DisableDevelopmentMode}
Step 5: Disable Hidden Administrator Account
The hidden Administrator account is very useful in debugging many system issues. However, it is disabled by default to prevent any unauthorized changes to your system. Make sure to disable it after changing your user profile name.
For this, open the elevated Command Prompt and enter:net user administrator /active:no
How to Change User Account Name
If you changed the user profile name, you might also want to change your account name to maintain consistency. There are many ways to modify your User Account name.
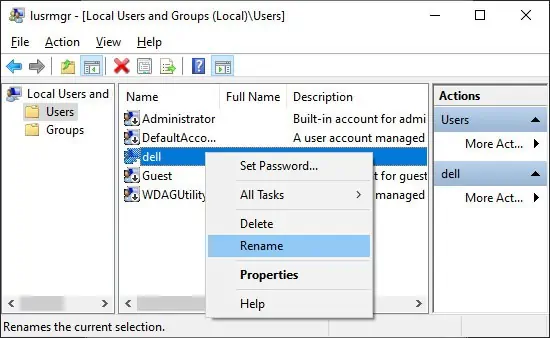
One of the easier methods is to use the Local Users and Groups Manager. To use this utility to change your account name,
- Enter
lusrmgr.mscin the Run command box. - Go inside Users.
- Right-click on the user account and choose Rename.

- Type the new account name and press Enter.
Restart your PC.

