There are a lot of things you can customize in Windows, and that holds true for the mouse cursor as well. You can change the color of your cursor, apply a different cursor scheme or even replace your cursor with a custom image.
If you want the option to natively change the way your cursor looks, you can do so from either the Settings app or the Control panel. You can also opt to use third-party applications to change the look of your mouse cursor.
From Settings
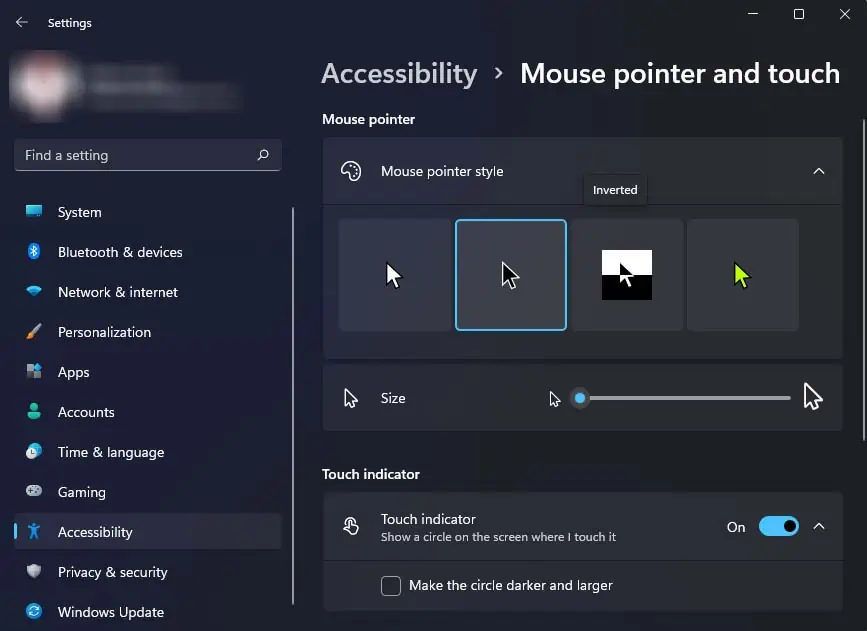
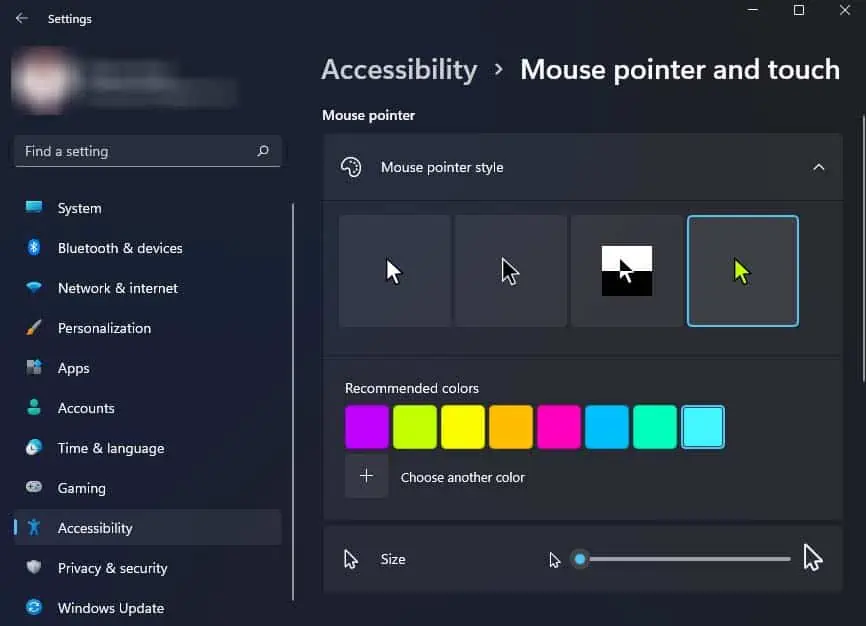
The simplest way to change your mouse cursor is through the settings. You can choose from three different preset mouse pointer schemes; black, white, and an inverted scheme. You can also set a custom color of your choice for your mouse cursor.
- Launch Settings by pressing the Windows + I keys.
- Go to Accessibility > Mouse pointer and touch.
- Expand the Mouse pointer style menu.
- Choose from the three default schemes or select the custom color one. (The changes will be immediate.)

- To change the custom color, choose from the Recommended colors or select Choose another color.

- If you selected Choose another color, pick a color from the color spectrum that pops up and click on Done.
From Control Panel
Another way you can change your mouse cursor from the Control Panel. It provides the same three system default cursor schemes.
- Press Windows + R to launch the Run box.
- Type
controland press Enter to open Control Panel.
- Make sure Category view is selected from the drop-down menu beside View by.
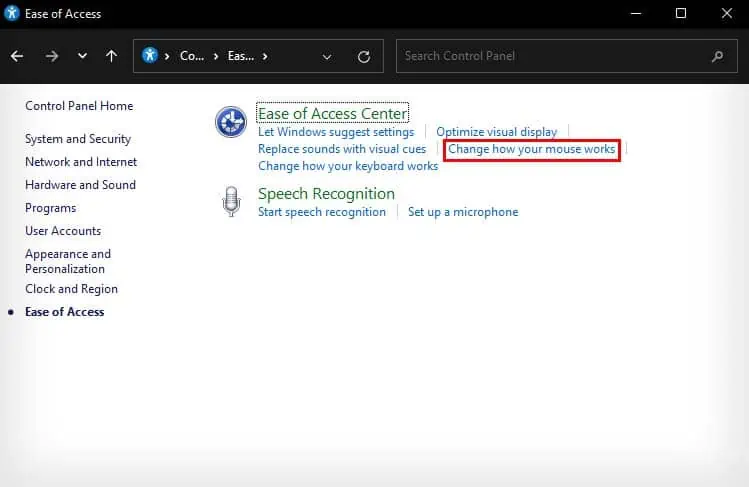
- Navigate to Ease of Access, and select Change how your mouse works.

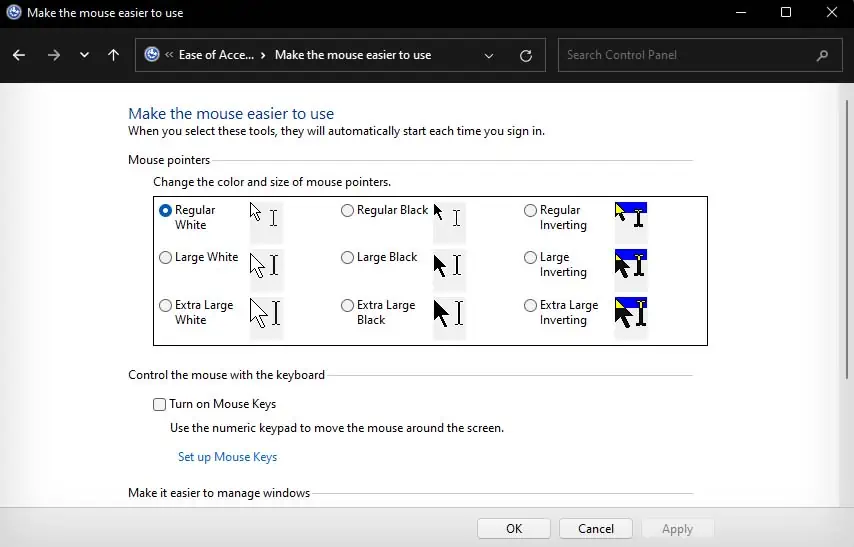
- Choose one of the three different schemes to apply to your mouse pointer. (You can also select the size of your mouse pointer here.)

- Click Apply to confirm the changes.
Additionally, you can also apply a custom-made scheme to your mouse pointer. The custom scheme is very versatile, as you can change the individual look of different types of mouse cursors inside a scheme.
- Open Control Panel.
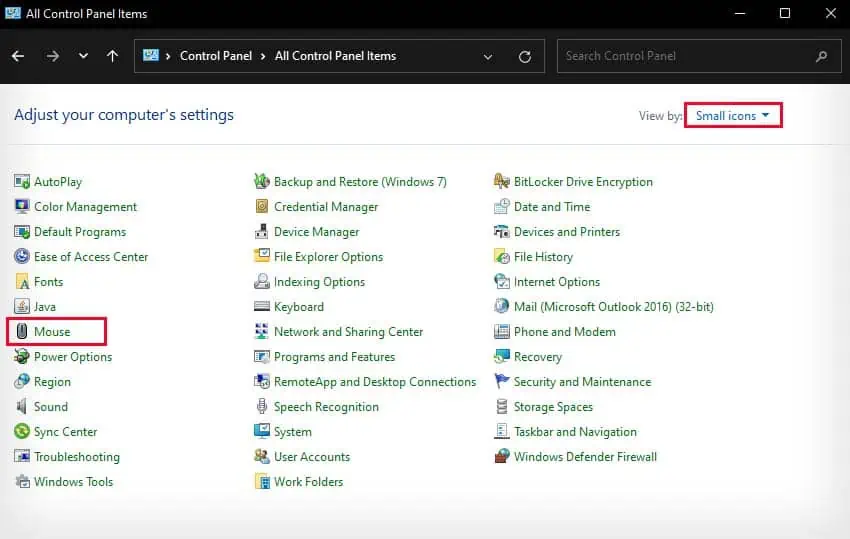
- Next to View by, select Small icons from the drop-down menu.
- Click on Mouse from the list of options.

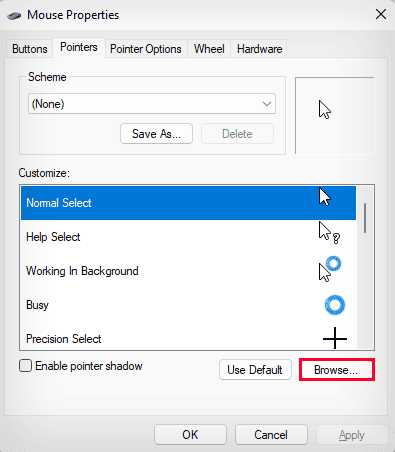
- In the newly opened window, go to the Pointers tab.
- Under Customize, choose any cursor and click on Browse.

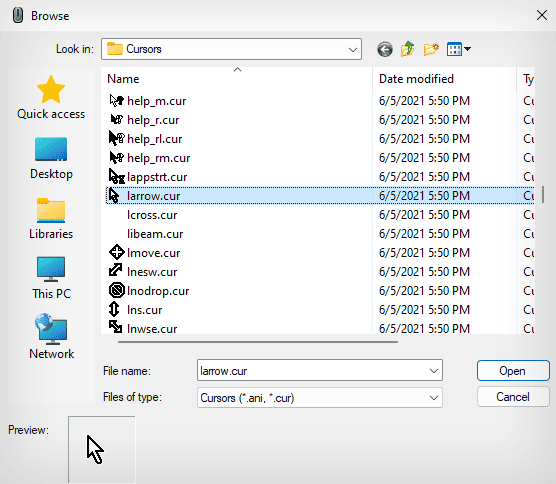
- You can choose from any of the system-provided cursors here, or click on the drop-down menu beside Look in to select a custom one.
- Double-click the corresponding cursor you want to change to. (Click Apply if you want to see the changes immediately.)

- Do the same for every type of cursor you want to customize. (You can also stitch together cursors from different cursor packs or leave some of them as system defaults to create your own unique cursor scheme.)
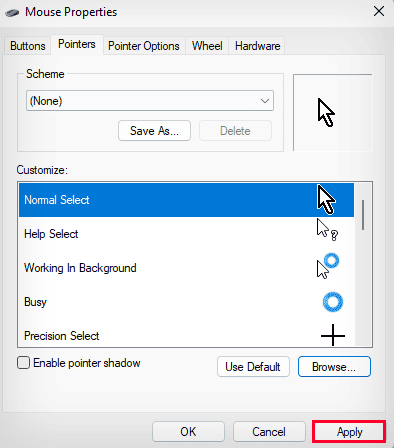
- Click Apply to save the changes.

- If you want to save your customized cursors as a custom scheme, click on the Save As option. (You will need to name it and press OK.)
- Under Scheme, you can choose any system default scheme or your own custom scheme to apply.
Using Third-party Applications
There are many third-party applications that you can use to directly apply some cool cursor schemes to your computer. Many of them also have tons of community-made cursor schemes that you can pick from.
Some of the great applications you can use to change your cursor are Custom Cursor For Windows, Cursor Manager, and DotMouse.
In case you need to change the cursor only when using browsers, you can do so using extensions. You can also download custom cursor packs and manually change your cursor using the method above.


