Whether you’re seeking precise movements when playing FPS games or simply want a smoother workflow, mouse sensitivity matters.
While this is usually based on personal preference, professional gamers aim for a lower DPI when starting a new game. Only after improving their pointer accuracy and the overall gameplay, do they gradually increase the sensitivity. Even graphic designers favor smooth and responsive mouse movements, which can be achieved after adjusting appropriate mouse DPIs.
Whatever the purpose, changing mouse sensitivity is relatively easy. In high-end input devices, you even get dedicated buttons for it. Other than that, it’s possible from Windows Settings, Control Panel, and the manufacturer’s recommended software.
Through Windows Settings
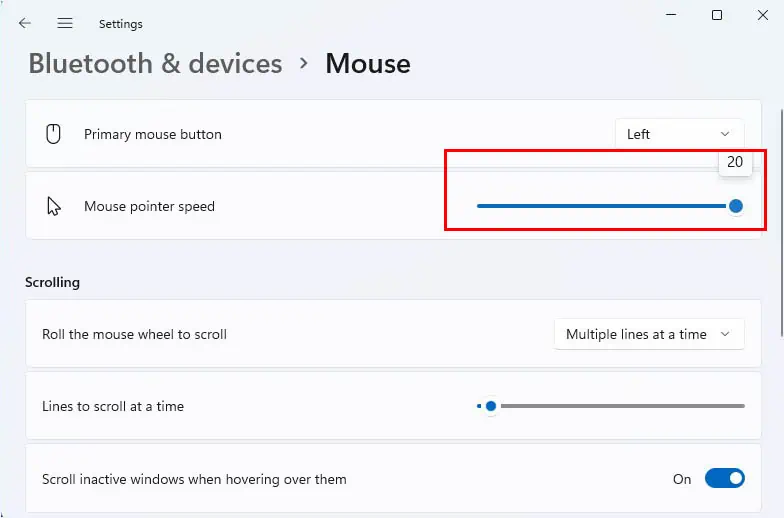
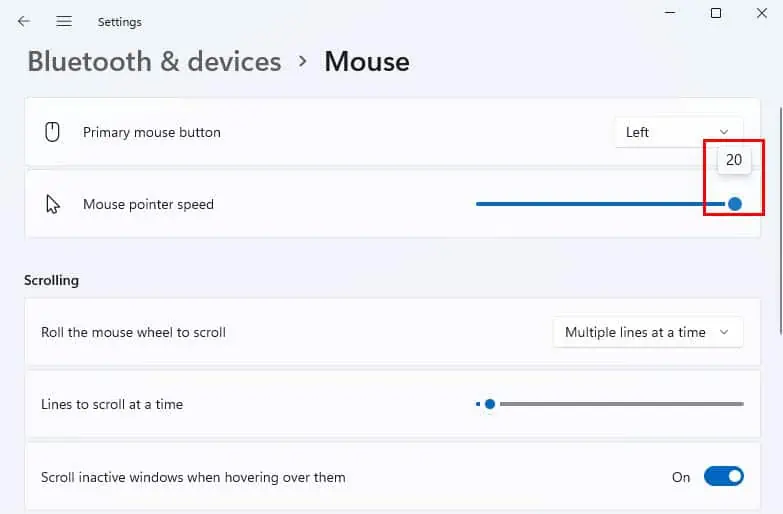
The built-in Windows Settings application allows direct and the easiest method to tweak the mouse sensitivity. However, you don’t get to check or set the DPI here. Instead, it has 21 (0 to 20) sensitivity values with individual pointer speeds. So, you require setting an appropriate one to increase/decrease the mouse sensitivity:
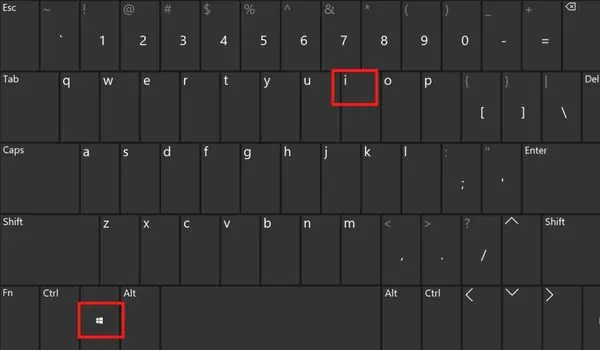
- Press Windows + I to directly launch the Settings tool on your computer.

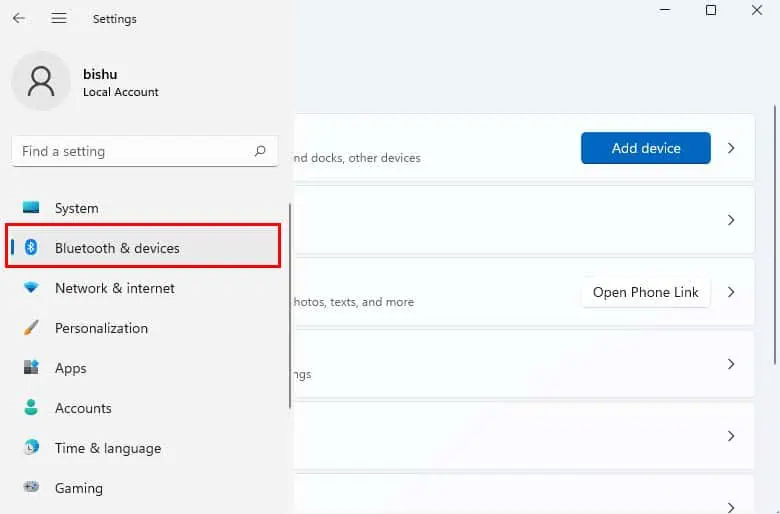
- From the left side of the application, select Bluetooth & devices.

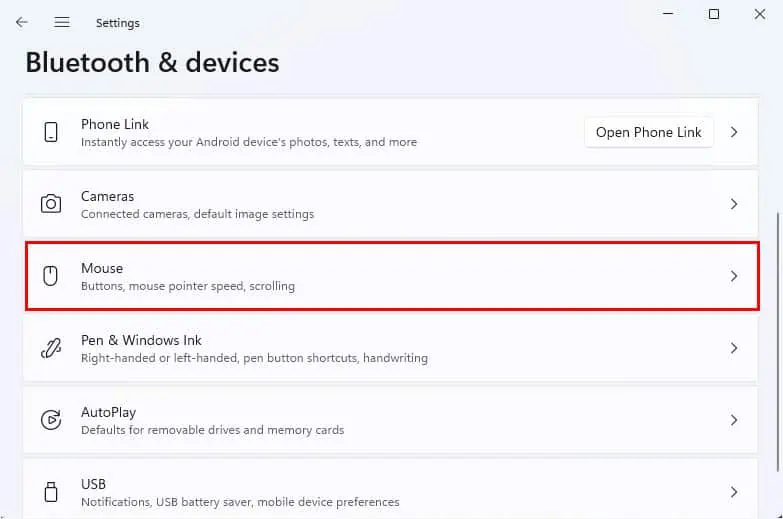
- Now, find and choose Mouse from the right pane.

Laptop users can navigate to either Mouse or Touchpad section to change the touchpad sensitivity. But if it’s an external peripheral, kindly pick the former option. - Next to the Mouse pointer speed, you should see a slider. Drag it to the left to decrease the sensitivity value and drag it to the right to increase it.

Through Mouse Properties in Control Panel
Control Panel is the gateway to all your available hardware and software features. Just like in the Settings app, Mouse Properties offers a dedicated slider to increase/decrease the pointer speed. Unfortunately, you cannot check the DPI along with the sensitivity value here.
Without further delay, let’s move on with the required steps to change the mouse sensitivity from Control Panel on Windows 11:
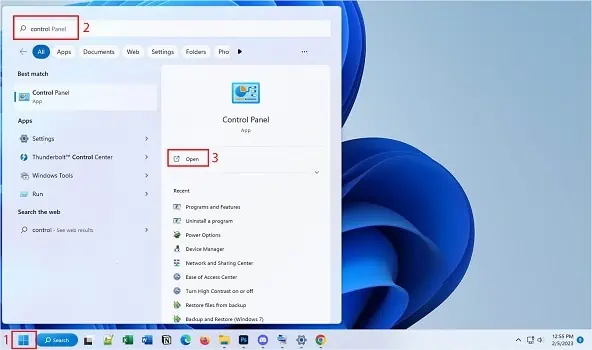
- Navigate to the Start Menu to search and launch Control Panel on your PC.

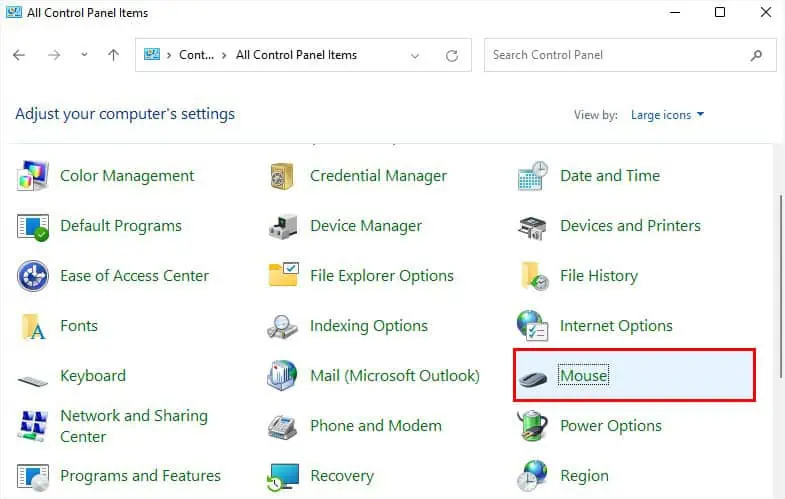
- Next, set the View by option to Large icons or Small icons.

- Click the Mouse option to launch Mouse Properties.

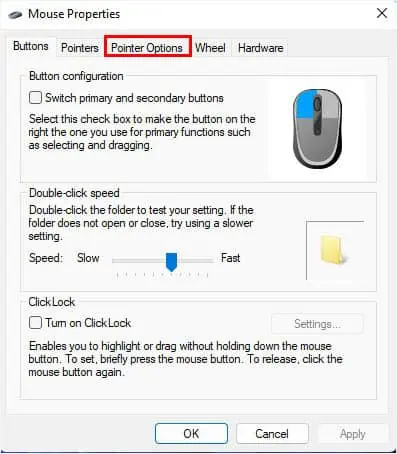
- Switch to the Pointer Options tab.

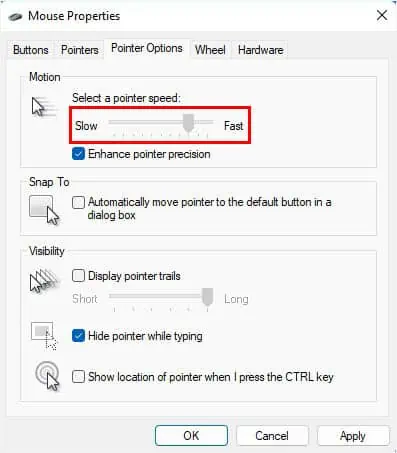
- Under Motion, you should notice a slider. Drag this to the left for slower pointer speed and to the right for making it fast.

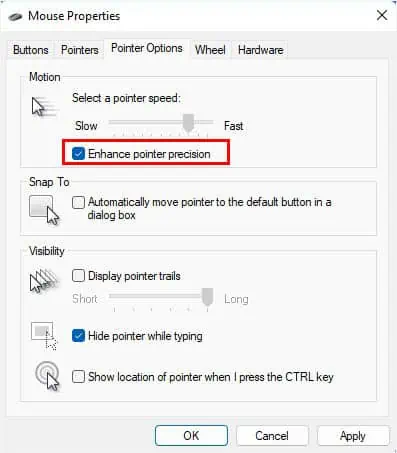
- Right below the slider, you should see Enhance pointer precision. Basically, this is an acceleration feature that adjusts the sensitivity based on how fast you move the mouse. To turn it on, simply check the option.

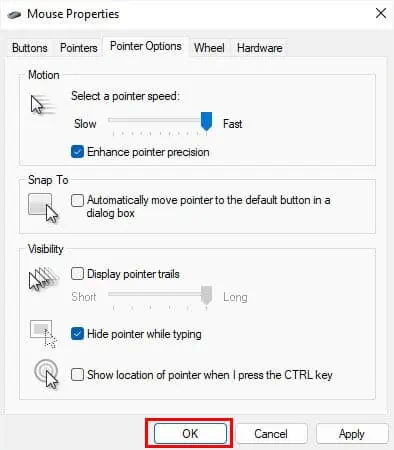
- Once you’ve made the necessary changes, hit the Ok or Apply button to save the settings.

Through Windows Registry Editor
You can also increase/decrease the sensitivity value by making changes in the registry. The higher the value, the faster will be the pointer speed. Since the highest-supported value is 20, inputting a greater number won’t increase the sensitivity further.
Caution: Incorrectly editing the registry values can cause serious operating system issues. Therefore, it’s best to back up the registry before moving forward with the below steps.
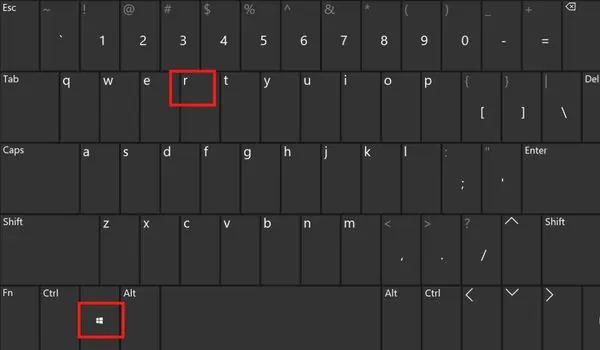
- First, open the Run utility using the Windows + R hotkey.

- Here, type the below command and hit Enter:
regedit.exe
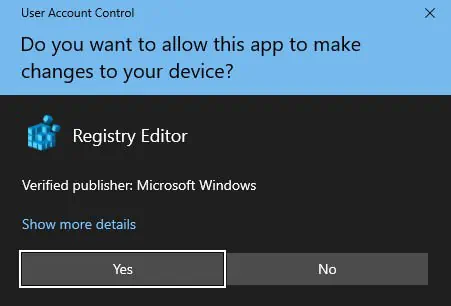
- Press the Yes button in the User Account Control prompt to accept and launch the Registry Editor utility.

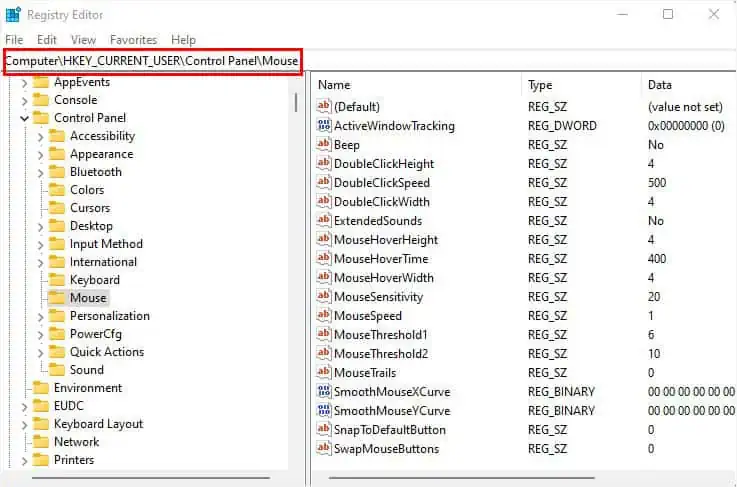
- Now, copy and paste the below path in the address bar:
Computer\HKEY_CURRENT_USER\Control Panel\Mouse
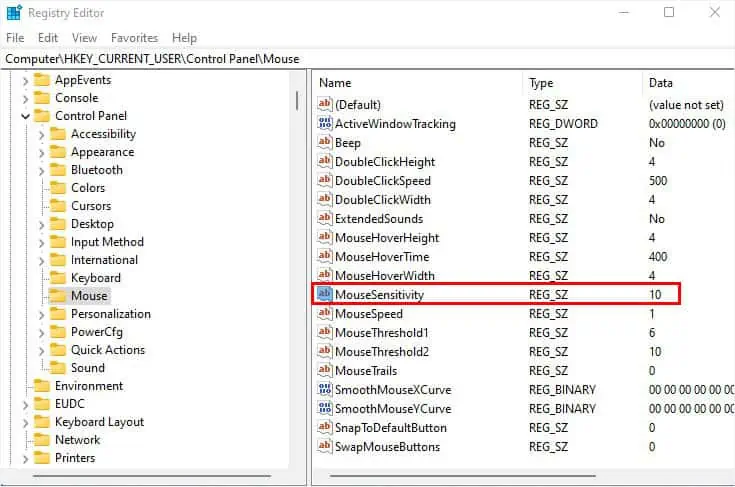
- Move to the right and double-click on MouseSensitivity.

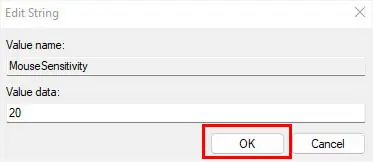
- Once the Edit String dialogue box pops up, set the Value data field anywhere from
0to20. - Now, hit the Ok button to save the changes.

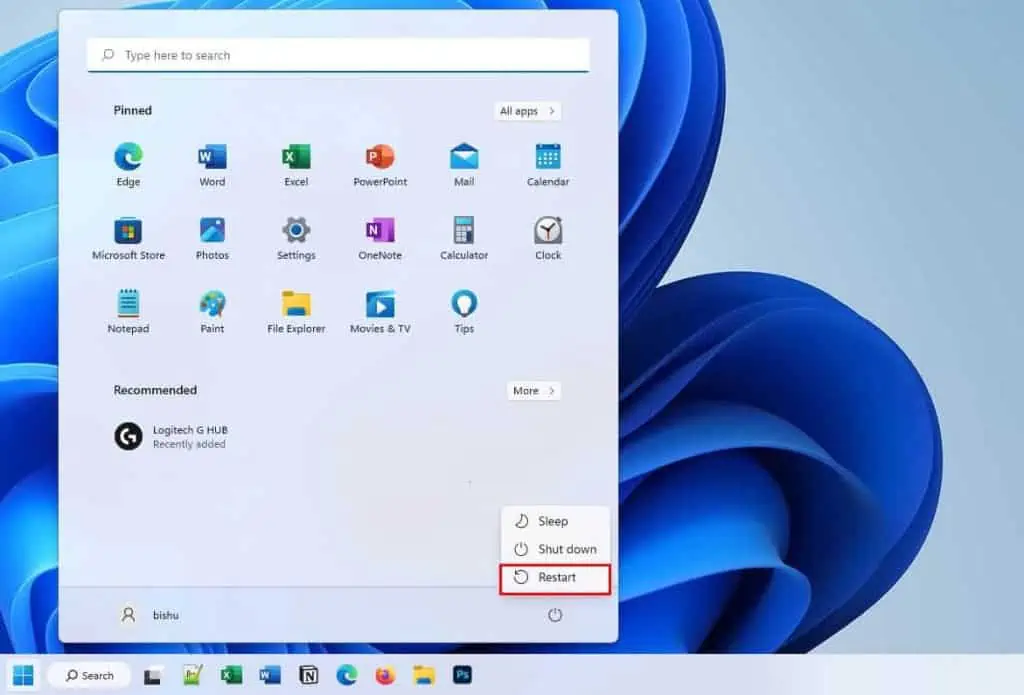
- Close all applications and restart your computer for the applied configurations to work.

- Once you log into Windows, the mouse sensitivity should change. You can even check this by navigating to Settings > Bluetooth & devices.
- Here, hover your pointer over the slider button. This should display the same value you had set in the Registry Editor earlier.

Using DPI On-the-fly Button
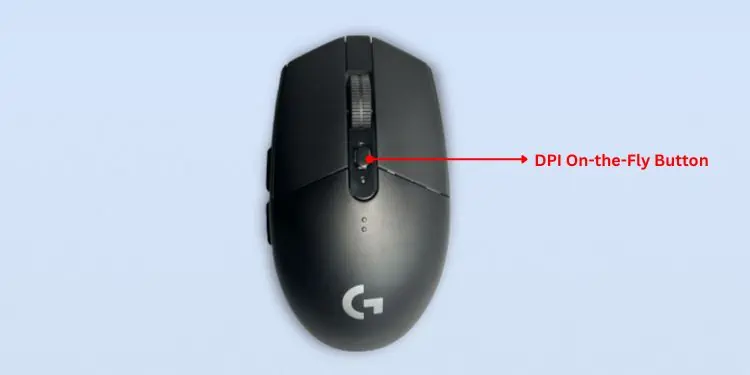
Most modern mice come with DPI On-the-fly buttons that let you tweak the on-screen pointer movements with just a simple click. This can come in handy in-between games where you frequently require changing the mouse sensitivity.
When you click the button each time, a different speed is set – low, standard, or high. For example, if the mouse sensitivity is standard by default, clicking on the button will increase the DPI by a certain number. The next time you click, the speed is reduced.
However, the number of DPIs differs based on mouse models. In some, you may even get variations in the low and high speeds. Also, you can add or remove the supported DPI values using dedicated software, which we will discuss below.
Using Manufacturer Software
Basically, mouse sensitivity is directly proportional to the number of DPIs. This means that the greater the number of DPI, the higher will be its sensitivity.
In case your mouse doesn’t have a DPI On-the-fly button, you can install the manufacturer’s software to tweak the pointer speed. Popular brands, like Logitech, Microsoft, Corsair, Razer, etc., all provide their users with one or many such utilities.
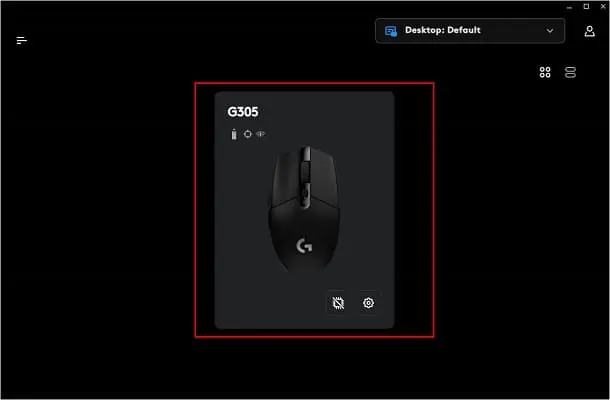
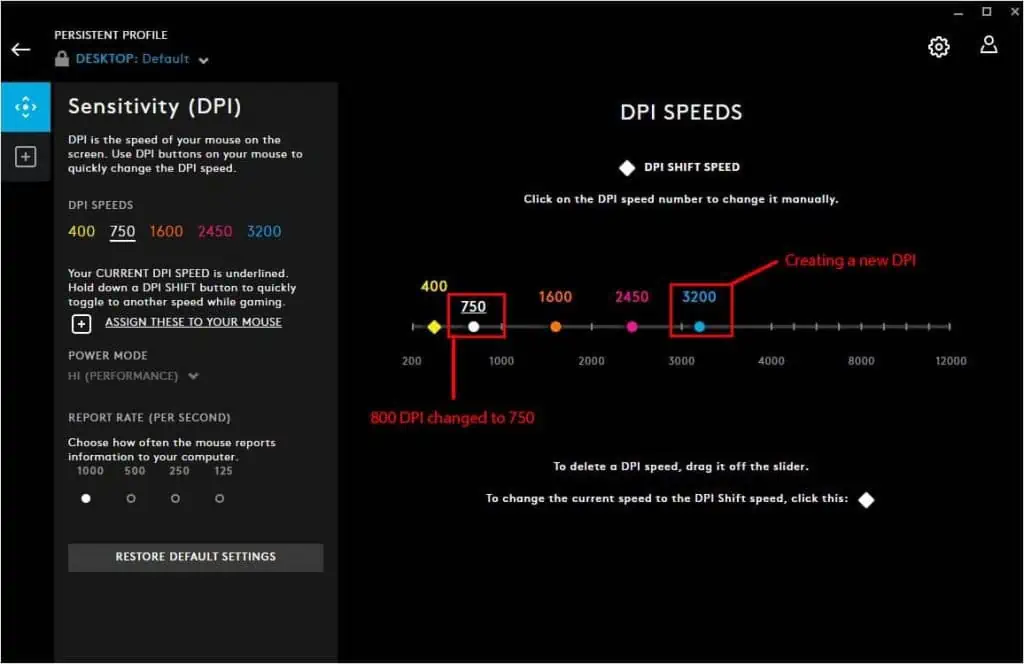
For demonstration, we have used the Logitech G Hub to control the mouse DPI settings for model G305. Before moving on with the steps below, ensure you have downloaded the software from Logitech’s official website.
- Open the application and select the connected mouse.

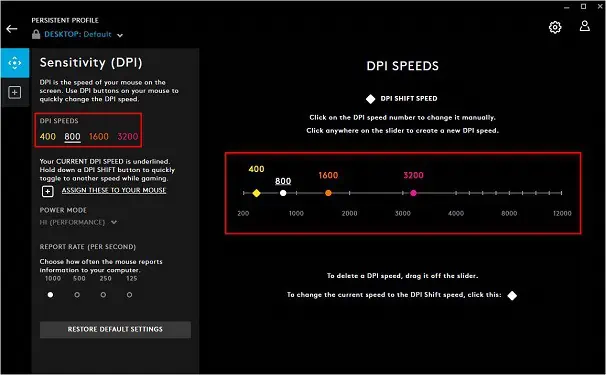
- Next, press the four-arrows icon to get to the Sensitivity (DPI section).

- From the left or right pane, click on any pre-defined DPI speed number to change the sensitivity.

Also, you can select anywhere on the slider to create a new DPI speed or simply glide the existing one to edit the value.
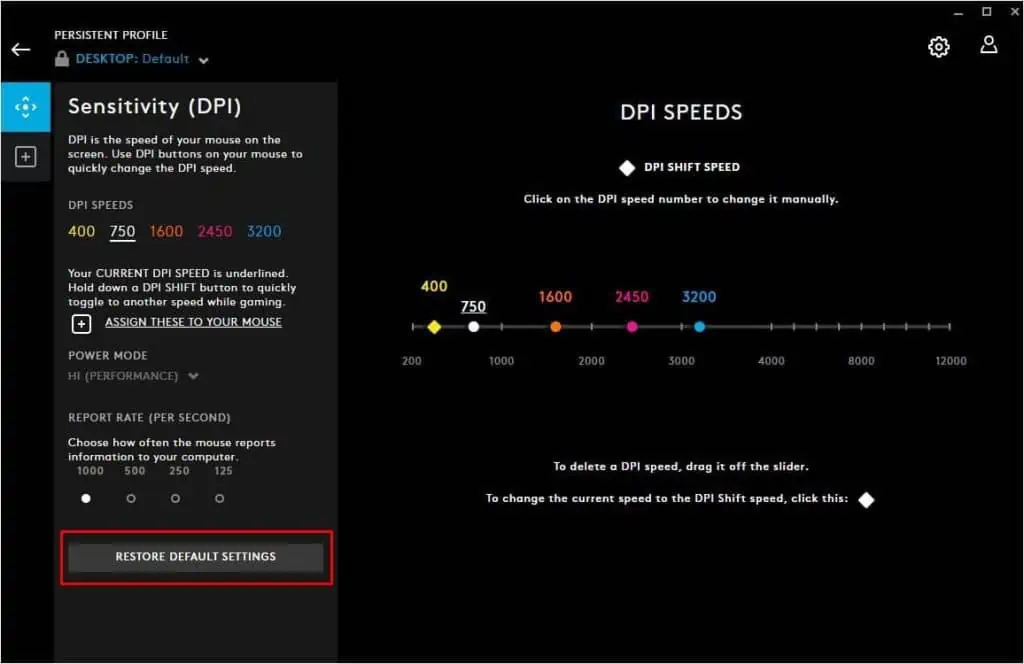
- If you’re not satisfied with the configuration, you may directly hit the Restore Default Settings button to revert the changes.

Additional Tip:
Some video games offer different in-game sensitivity settings. For example, the popular battle royale Fortnite allows you to tweak the X-Axis, Y-Axis, DPI, Targeting, and other sensitivity settings to improve your overall gameplay. This way, you do not have to adjust anything on Windows, and the alteration only applies within the video game.

