Windows stores an account name as two parameters, the User name, and the Full name. The Full name is the one that is displayed on the Login screen and the Start menu. On the other hand, the User name is often an abbreviation, and that is used by the user profile folder by default.
If you wish to rename your administrator account, changing the Full name will serve the purpose for most cases. But I actually recommend changing both the User name and the Full name to avoid any future issues.
This article only deals with changing the name of an administrator account. If you also wish to change the name of the C:\Users\“username” folder, I recommend checking out my article on changing the User Profile folder name.
How to Change Microsoft Account Name?
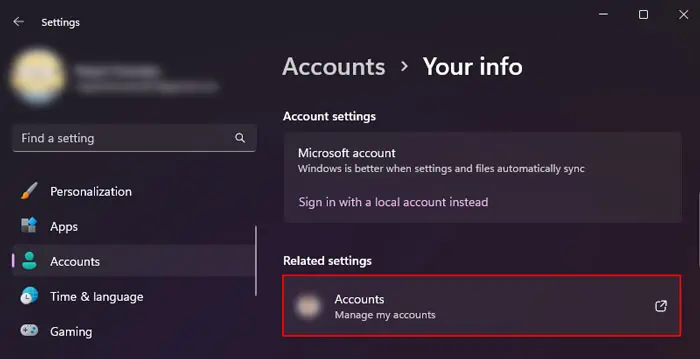
If you have a Microsoft account, you can only change the username from the online Microsoft account. You can either directly go to the Microsoft account on your web browser or use the link in your account settings to get to this place and make the necessary changes.
- Press Windows + I to open Windows Settings.
- Go to Accounts > Your info.
- Click on Manage my Microsoft Account or Manage my accounts.

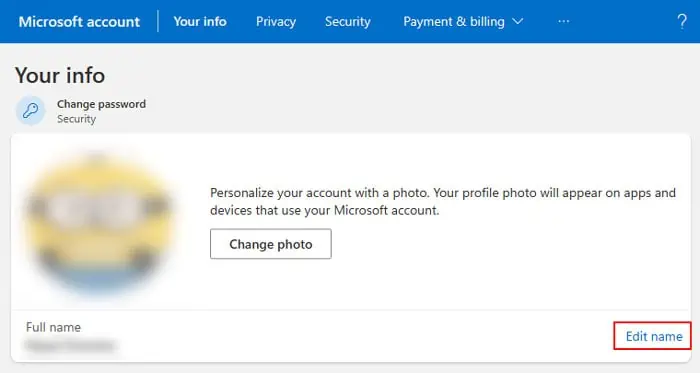
- Click on the account name.
- Select Edit name next to the Full name.

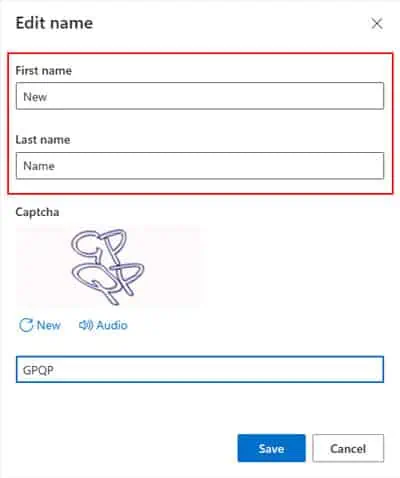
- Enter new names for both First name and Last name as well as the confirmation characters (captcha).
- Select Save.

- Sign out of your Microsoft account from the computer to apply the change.
How to Change Local Admin Account Name?
Changing the local admin account name is a relatively easy process, and you can use many programs, like the Local Users and Groups or the Control Panel for this purpose. You will also need to Sign in using an admin account (whether it is the same account or a different one) to make the changes.
If you have logged in using the admin account whose name you wish to change, you need to Sign out of the account after modifying the name to apply the change.
Using Local Users and Groups
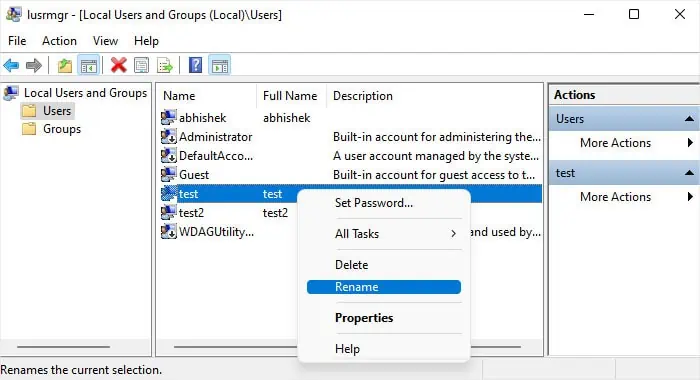
The Local Users and Groups MMC snap-in is the best utility to make any changes to your local user account. You can also use it to rename any admin account on your computer.
- Open Run by pressing Windows + R.
- Type
lusrmgr.mscand press Enter to open Local Users and Groups. - Go inside Users and search for your administrator account.
- Right-click on it and select Rename.

- Type the new name and press Enter.
- Double-click on the user account.
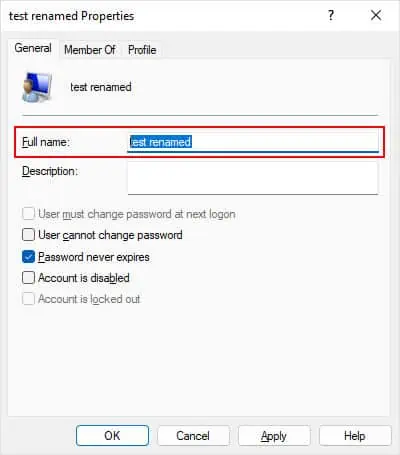
- Set the Full name to the new name and click OK.

Through Netplwiz
Another app that allows managing your user accounts is the netplwiz wizard. Using this app is actually the quickest way to change both the User name and the Full name since you can do so on the same window tab.
- Open Run.
- Type
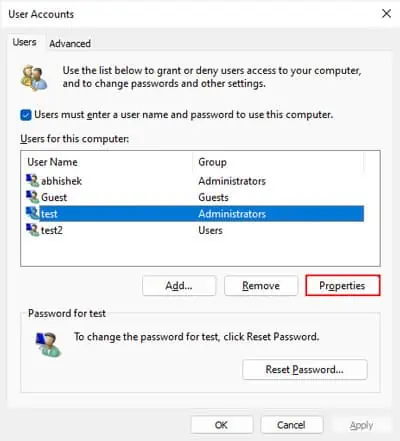
netplwizand press Enter to open the Netplwiz app. - Select the administrator account and click Properties.

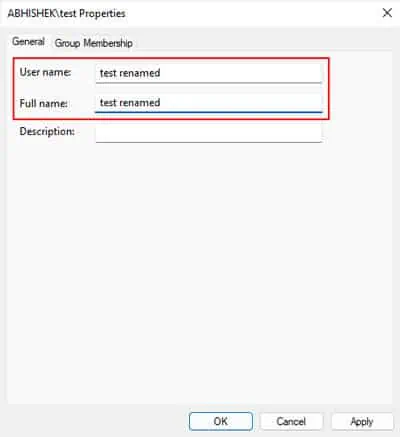
- Set the User name and Full name per your wish and click OK > OK.

- If you just changed the name of your currently signed-in account, you will get a prompt that asks if you wait to Sign out now. If you are not running any processes that you need to keep active, click Yes to Sign out.
From the Control Panel
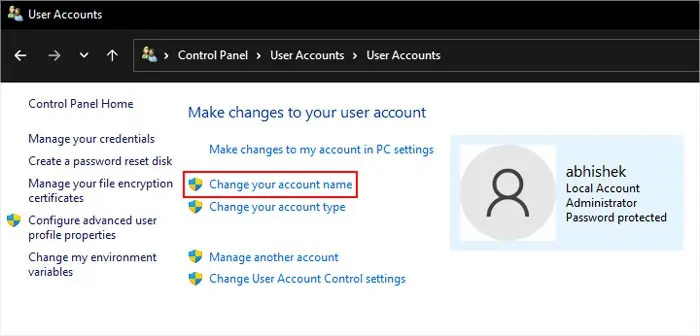
It is also possible to use the User Accounts program inside the Control Panel to change the account name. However, it will only change the Full name of the account, not the nominal User name.
- Open Run.
- Type
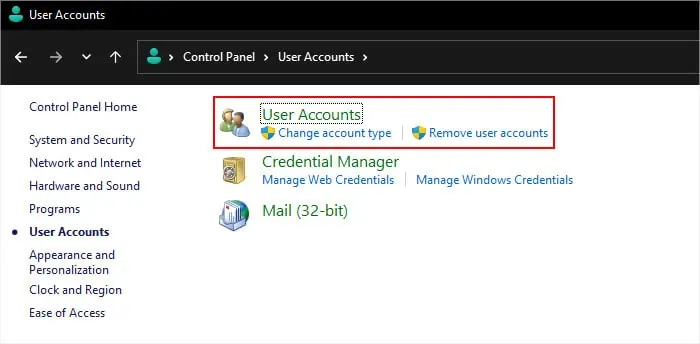
controland press Enter to open the Control Panel. - Go to User Accounts > User Accounts on Category view or simply User Accounts on Classic view.

- If you want to rename the currently signed in admin account,
- Click on Change your account name.

- Type the new username on the New account name textbox.
- Hit Change Name.
- Click on Change your account name.
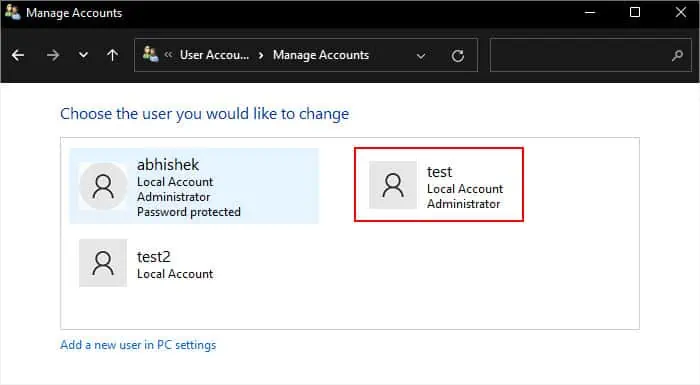
- If you wish to rename another admin account,
- Select Manage another account and then pick the account from the list.

- Choose Change the account name.
- Type the new username and click Change Name.
- Select Manage another account and then pick the account from the list.
With Command Prompt
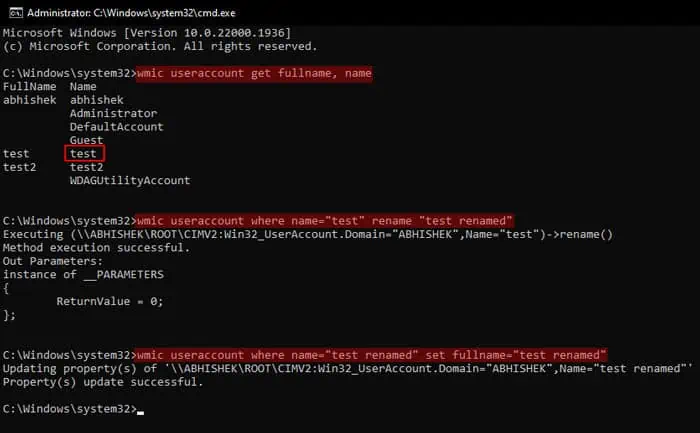
You can also use the Windows Management Instrumentation Command (wmic) on Command Prompt to change the parameters of your user account. You need to first change the User name and then the Full name.
- Open Run.
- Type
cmdand press Ctrl + Shift + Enter to open the Elevated Command Prompt. - Type the command
wmic useraccount get fullname, nameand press Enter. Look for the current name of the account. - Then, type the following commands while replacing “Current Username” and “New Username” appropriately and press Enter after each.
wmic useraccount where name="Current Username" rename "New Username"wmic useraccount where name="New Username" set fullname="New Username"
Using PowerShell
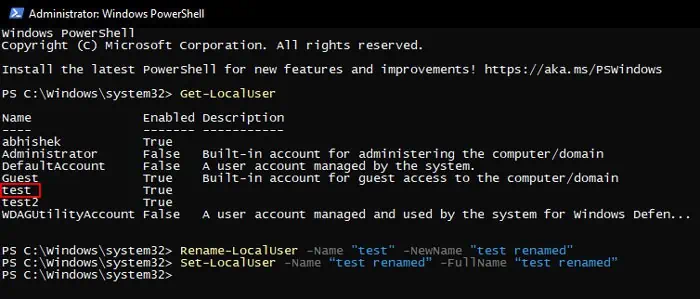
PowerShell Command-line Interface allows multiple options to rename a user account. The best way is to use the Rename-LocalUser cmdlet. However, since it can only rename the User name, you will also need to use the Set-LocalUser cmdlet to change the Full name.
- Open Run.
- Type
powershelland press Ctrl + Shift + Enter to open Windows PowerShell. - Type the cmdlet
Get-LocalUserand press Enter to get a list of all user accounts. Search for the admin account name that you wish to change. - Type the following cmdlets while replacing the two usernames appropriately and press Enter after each:
Rename-LocalUser -Name "Current Username" -NewName "New Username"Set-LocalUser -Name “New Username” -FullName “New Username”

