If you leave the computer name as default while setting up Windows, it usually shows DESKTOP or LAPTOP followed by some alphanumeric identifiers. However, you may want to change the name to better personalize it or for other reasons.
Windows allows many ways of altering this name, which is all very easy to perform. But keep in mind that it only changes the name of the computer, not your user account.
Rules and Conventions You Should Follow:
- You need administrator privileges to change the PC name. So, log in with an admin account beforehand.
- The Computer name shouldn’t contain any special characters like ` ~ @ # $ % ^ & ( ) _ = + [ ] { } | ; : , ‘ “ . < > / ? as well as spaces.
- It’s better to only use alphabets and numbers, especially if your computer is part of a domain. Make sure not to use periods (.) as you might experience issues with certain DNS servers.
- Don’t use only numbers for the computer name as well.
- It’s better to avoid certain reserved words to avoid any conflicts.
- A network computer can only have a maximum of 15 characters for the name.
Using Windows Settings
The most user-friendly way of changing the name of your computer is by using the Windows Settings app. You will find the necessary options under the System Settings.
- Open Windows Settings by pressing Win + I.
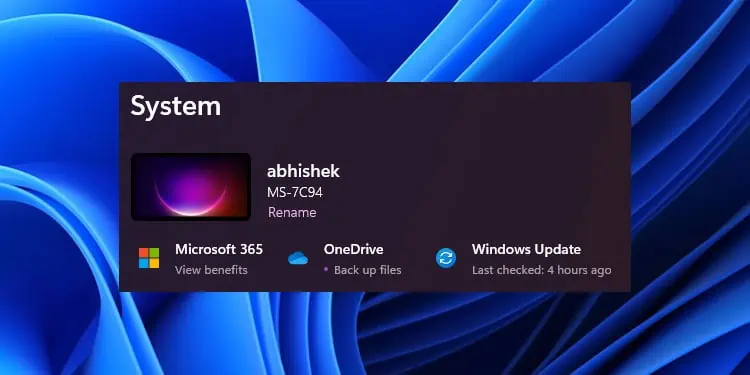
- On the System tab, click on Rename under your computer and model name.
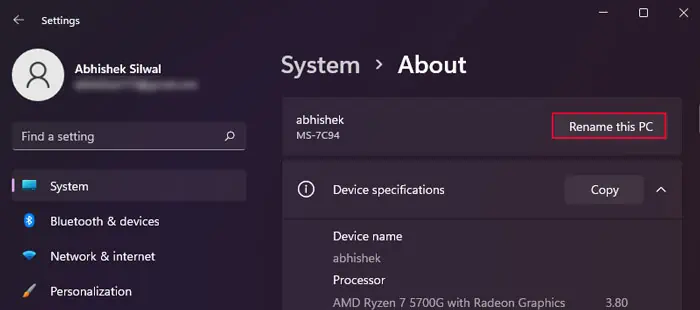
- Or you can go to System > About and then click Rename this PC.

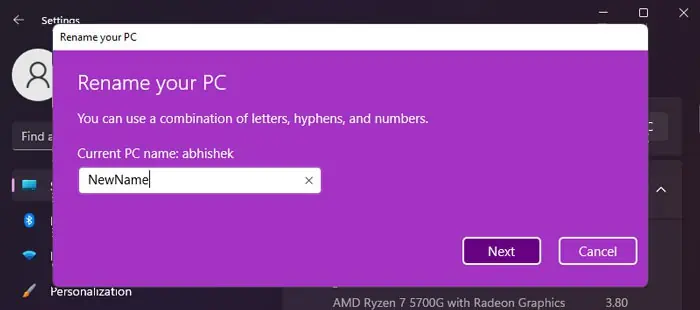
- Enter the new name and click Next.

- Select Restart now. Or, if you have some pending tasks, you can click Restart later. But the change won’t apply until you restart the computer.
Through System Properties
Before introducing Windows Settings, the usual method of changing the computer name was through the System Properties utility under the Control Panel. You can still use it even in later Windows versions.
- Open Run.
- Type
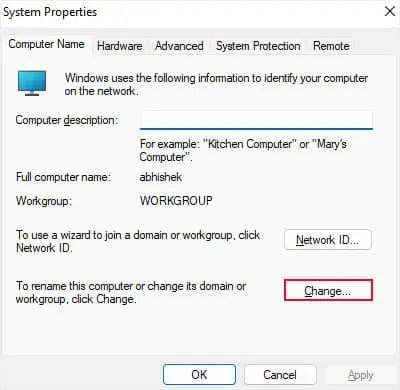
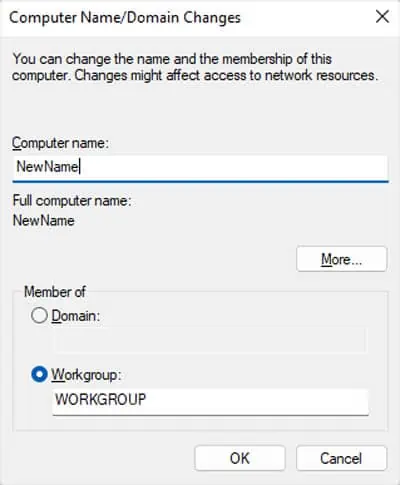
sysdm.cpland press Enter to open System Properties. - Click on Change on the Computer Name tab.

- Enter the new computer name and click OK > OK.

- Click Restart now. You can also select Restart later as well. The name will only change after the reboot.
Using Command-line Interface
You can also use command-line tools like Command Prompt and PowerShell to alter the computer name. In fact, it is the quickest method if you are familiar with coding or using such programs.
On Command Prompt
- Open Run.
- Type
cmdand press Ctrl + Shift + Enter to open the Elevated Command Prompt. - Enter the command below while replacing
“New-Computer-Name”with your preferred new name for the computer.wmic ComputerSystem where “name=‘%ComputerName%’” call rename “New-Computer-Name”
- Restart your computer to apply the new name.
On PowerShell
- Open Run.
- Type
powershelland press Ctrl + Shift + Enter to open the Elevated Windows PowerShell. You can also use thepwshcommand if you use PowerShell core. - Type
Rename-Computer -NewName “New-Computer-Name”while replacing“New-Computer-Name”with the new name you have. Then, press Enter.
- Close PowerShell and restart your PC to apply this change.
Using Registry Editor
It is also possible to modify your computer’s name through the Registry Editor. In fact, all other methods change the relevant registry entry from where your system actually gets the computer name.
- Open Run.
- Type
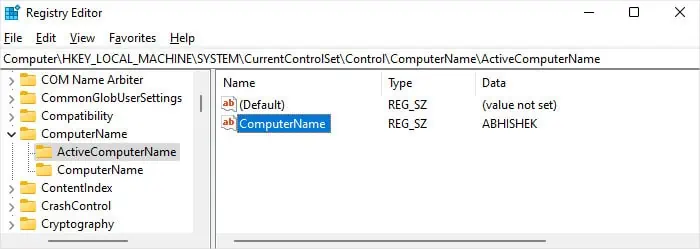
regeditand press Enter to open the Registry Editor. - Navigate to
Computer\HKEY_LOCAL_MACHINE\SYSTEM\CurrentControlSet\Control\ComputerName\ActiveComputerName - Double-click on ComputerName.

- Enter the new name on the Value data textbox while using block or capital letters. Click OK.
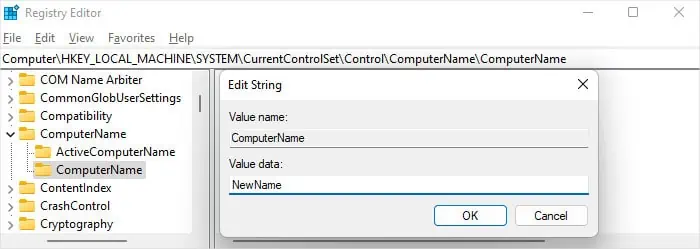
- Go to
Computer\HKEY_LOCAL_MACHINE\SYSTEM\CurrentControlSet\Control\ComputerName\ComputerName - Here, change the ComputerName entry in the same way.

- Close the Registry Editor and restart your computer to apply the change.
