Perhaps your IP got blacklisted, or maybe you’re just trying to bypass some geo-restrictions. Regardless of the exact reason, changing your IP is actually quite simple.
But before we dive into that, we’ve briefly explained IP address and it’s types to help you figure out how to change your IP in your specific case.
Types of IP Address
An Internet Protocol (IP) Address is basically a set of numbers assigned to, and used to identify and locate a device on a network. Let’s take your home network as an example.
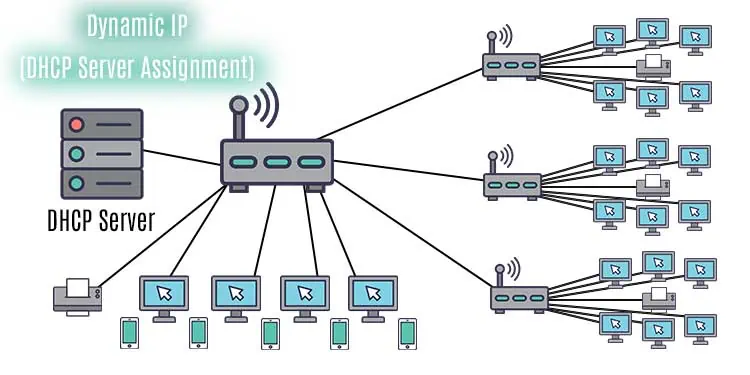
Every device on the network such as your phone, PC, or even printer has a unique IP Address. This is known as a Local IP Address. Local IPs are dynamically assigned by the DHCP Server, meaning after the DHCP lease (usually 24 hours) expires, your phone can be assigned a new IP from the available IP addresses pool.
Contrary to Local IP is your Public IP, which is also dynamically assigned by your ISP to your modem. When any device on your network connects to a website, the website sees the Public IP of your network rather than the Local IP of the device, thus the names.
Contrary to Dynamic IP addresses is Static IP, where the IP is fixed and doesn’t change.
There are also other IP types such as IPv4, which defines an IP Address as a 32-bit number and IPv6 which defines it as a 128-bit number. But it’s not necessary to delve deep into these as IPv4 is still the widely used IP version.
How to Change Your IP?
The easiest way to change your IP is by switching to a different network. As convenient as this method is, it’s not always practical. As such, we’ve detailed better ways to change your IP both manually and automatically in the sections below.
Change IP via System Settings
You can change your Local IP via the system settings. The exact steps will differ for each platform, but we’ve listed the common ones below. If you’re looking to change your public IP, you should check out the rest of the methods in this article.
Let’s say your current IP is 192.168.17.1. The first 3 numbers are the network ID, and the last number is the host ID. When setting your new IP, you can only change the host ID, and the network ID must remain the same. For instance, your new IP could be 192.168.17.23. Additionally, the Subnet Mask, Default Gateway, and DNS must be the same as well.
You should also make sure that the IP isn’t already in use. For instance, in the example above, you could ping 192.168.17.23. If the output states that the “Destination Host is Unreachable”, it generally means the IP isn’t in use.
Sometimes, the firewall may block the connection and incorrectly cause this output though. So, to make sure, you can use the
arp -a command to display the ARP cache table. As long as the IP is not on this list, you can use it.On Windows
Here are the steps to change the Local IP on Windows:
- Press Win + R, type
ncpa.cpl, and press Enter. - Right-click your network connection and select Properties.
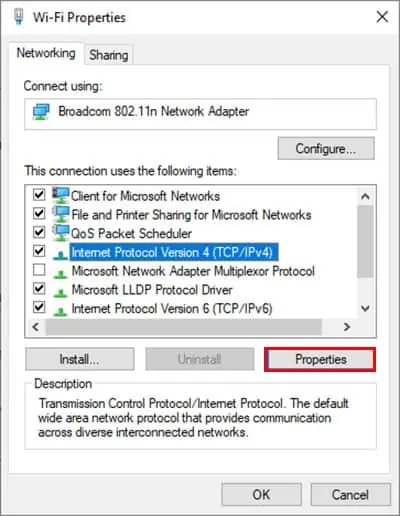
- Select Internet Protocol Version 4 (TCP/IPv4) and click on Properties.

- By default, the Obtain an IP address automatically option will be selected here. In this case, execute the following commands in a command prompt window to change your IP:
ipconfig /release
ipconfig /renew
- Alternatively, you can also select the Use the following IP Address option and assign the IP manually.
On Mac
Here’s how you can change your Local IP on Mac:
- Click on the Apple logo and select System Preferences > Network.
- Select your network from the left pane and click on Advanced.
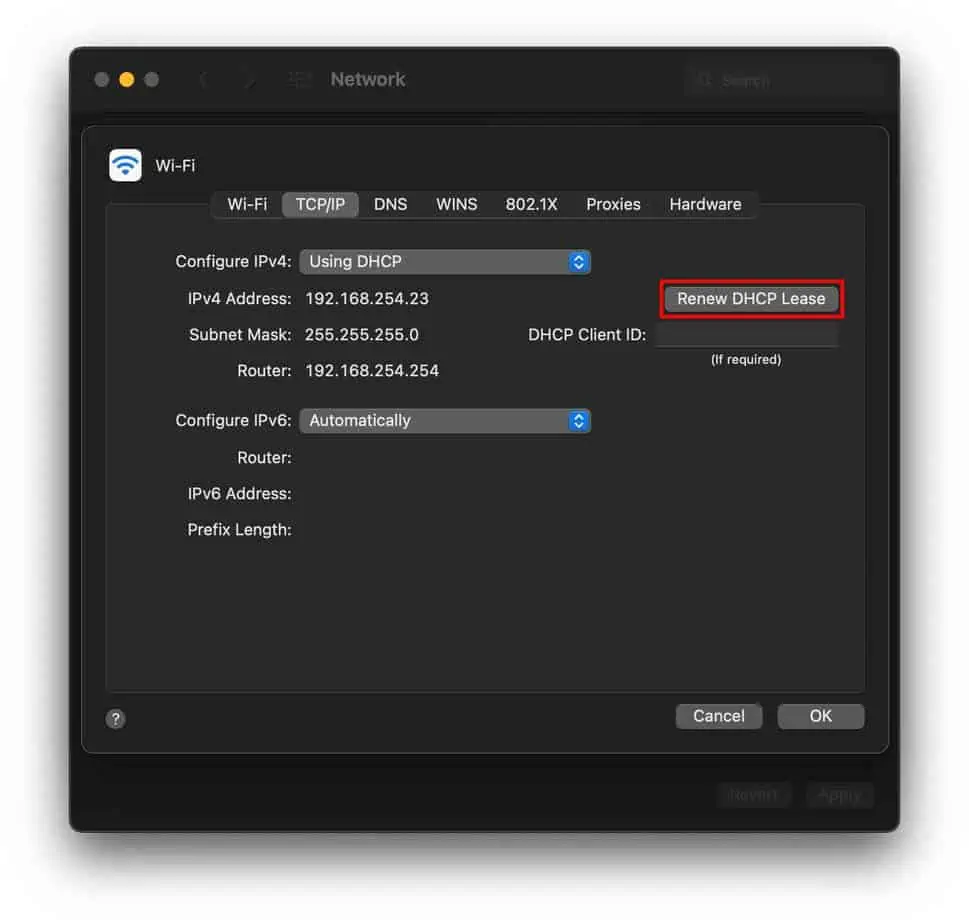
- In the TCP/IP tab, click on Renew DHCP Lease to change the IP automatically.

- Select Configure IPv4 Manually to assign your IP address manually.
- Press OK to save the changes.
On Android
Here are the steps to change your Local IP on Android:
- Open the Settings app and select Connections > Wi-Fi.
- Tap the settings cog next to your Wi-Fi connection.
- Click on Forget network. When you reconnect to the Wi-Fi, a new IP will be assigned to your device.
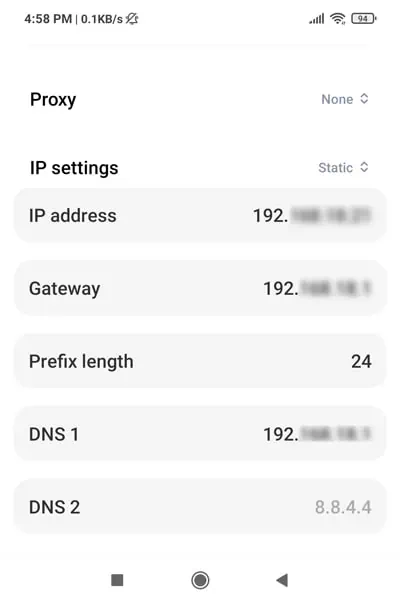
- Alternatively, select Static under IP Settings, manually assign the IP address and save the changes.

On iOS
Here’s how you can change your Local IP on iOS:
- Launch the Settings app and select Wi-Fi.
- Select your Wi-Fi Network and set Configure IP to Manual.
- Assign the IP address and save the changes.
On Ubuntu
Here are the steps to change your Local IP on Ubuntu:
- Press CTRL + Alt + T and execute the following commands in the terminal:
sudo dhclient – r
sudo dhclient
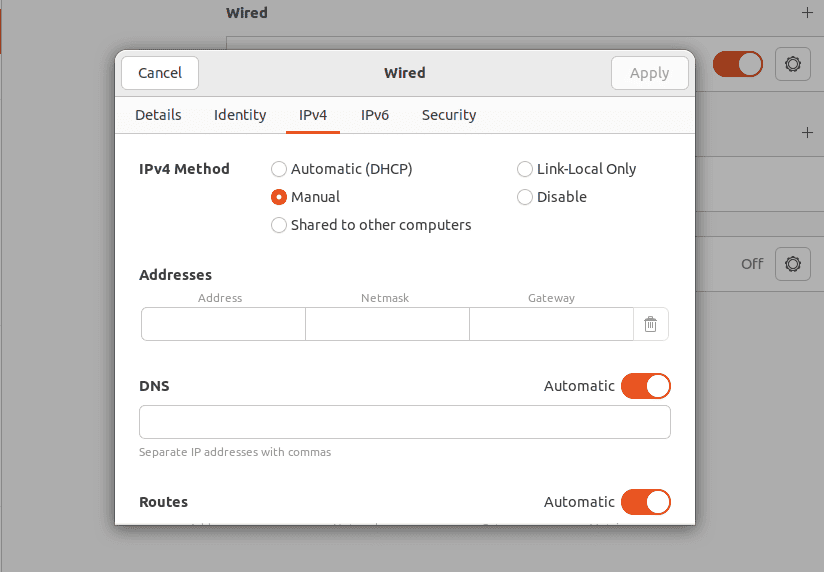
- To manually assign a Static IP instead, right-click the network icon from the top-right.
- Select your WiFi / Ethernet connection and click on the Settings cog.
- Switch to the IPv4 tab and change the method to Manual.

- Input the IP Address, Netmask, Gateway, and DNS and click on Apply.
Use A Proxy / VPN
Normally, your web requests go from your device to your router to your ISP to the server you’re trying to access. A proxy basically acts as an intermediary, rerouting your traffic through its own servers. This makes your traffic seem as if it’s originating from the proxy servers, which has a lot of applications.
For instance, you could be living in Europe and still access sites and content exclusive to the US by using a US-based proxy server. The downside to using proxies is that they aren’t secure. Your ISP can still see all the sites you’re accessing.
VPNs work in a similar way to proxies, except they’re actually secure. When using a VPN client, the data packets are first encrypted on the OS level. Your ISP can only see that the packets are headed to the VPN’s network, and the volume of traffic. They can’t see the actual contents due to the encryption.
If you’re interested, we have an in-depth article on setting up VPNs on Windows 11 for your further reading. Instead of setting up VPNs manually, you can also easily enable the VPN from the client program.
Use Tor Browser
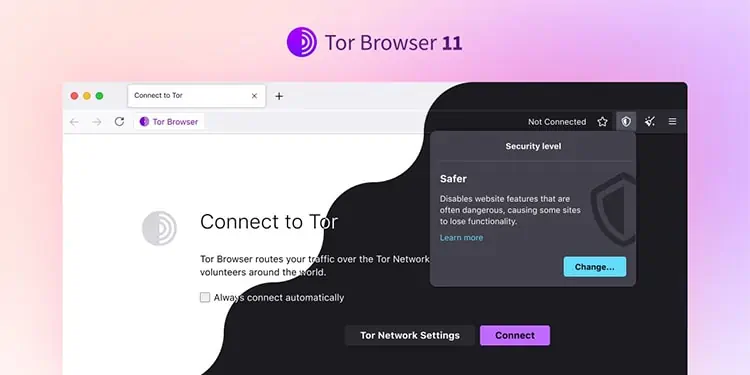
As the name suggests, The Onion Router (Tor) is an implementation of onion routing. The Tor Browser is a free and open-source browser that bounces your traffic through multiple nodes in a worldwide volunteer network. Websites can only see the IP of the final Exit Node.
Tor encrypts the data packets as well, meaning your ISP can only see that you’re connected to Tor nodes, they can’t see the actual sites you’re visiting.
Tor is an excellent option for privacy and anonymity, but it has its fair share of downsides as well. As the data packets bounce across multiple relays, and each node varies in bandwidth, Tor is noticeably slow. And while Tor itself is legal, it has a stigma of being used for illegal activities due to the anonymity it offers.
Unplug Modem / Contact ISP
Your ISP dynamically assigns your IP address from a pool of available addresses. Your current IP Address, both Public and Local have DHCP lease times that typically last 8 to 24 hours. Let’s say you kept your modem unplugged overnight and the lease ended during that time.
The next time your modem connects to the DHCP Server, the lease will renew and the modem will be assigned a new Public IP. The same principle applies to your router and local devices as well. If your phone is disconnected when the lease ends, the lease will renew the next time it reconnects to the router and it’ll be assigned a new Local IP.
Waiting for the lease time to end isn’t exactly an ideal way to change the IP. If you aren’t satisfied with the IP Addresses assigned this way or you’re looking to set up server operations, you can consult with your ISP regarding Static IP Addresses.
How to Find Your IP Address?
You can find your Local IP via network properties or by using command-line tools such as ipconfig. The exact steps vary according to the platform you’re on. For Public IP, check the section at the end.
Windows
Here are the steps to find your Local IP on Windows:
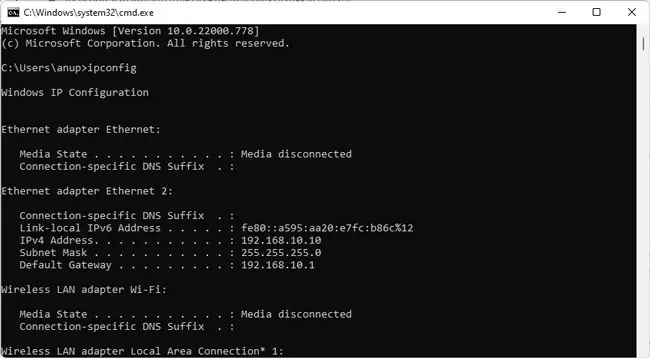
- Press Win + R, type
cmd, and press Enter. - Type
ipconfigand press Enter.
- The IPv4 address is your Local IP. You may also want to note down the Default Gateway if you want to access router settings later.
Mac
Here’s how you can find your Local IP on Mac:
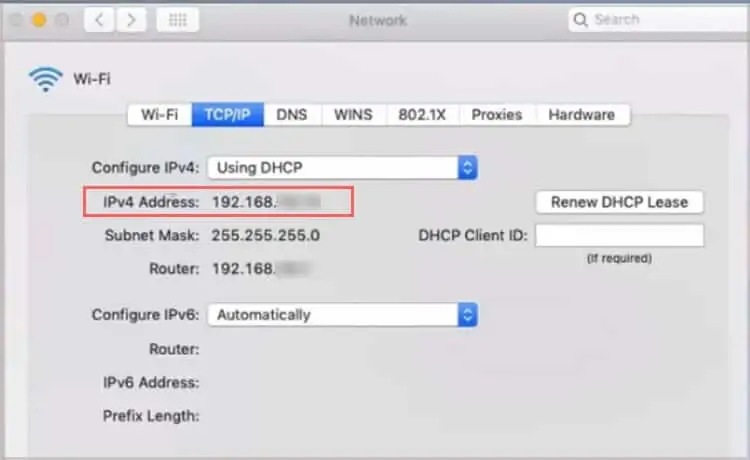
- Press the Apple icon and select System Preferences > Network.
- Select your Wi-Fi from the left pane and click on Advanced.
- In the TCP/IP tab, you’ll find the Local IP (IPv4) and Router IP.

Android
Here are the steps to find your Local IP on Android:
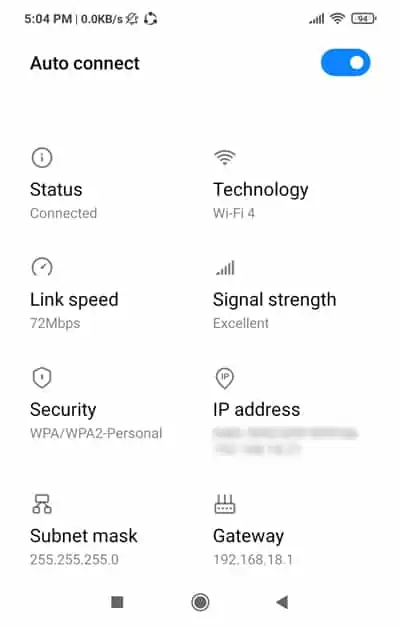
- Launch the Settings app and select Connections > Wi-Fi.
- Tap the Settings cog next to the Wi-Fi.
- You’ll find the Local IP (IP Address) and Router IP (Gateway) here.

iOS
Here’s how you can find your Local IP on iOS:
- Launch the Settings app and open Wi-Fi.
- Tap on your Wi-Fi and note the Local IP (IP Address) and Router IP.
Ubuntu
Here are the steps to find your Local IP on Ubuntu:
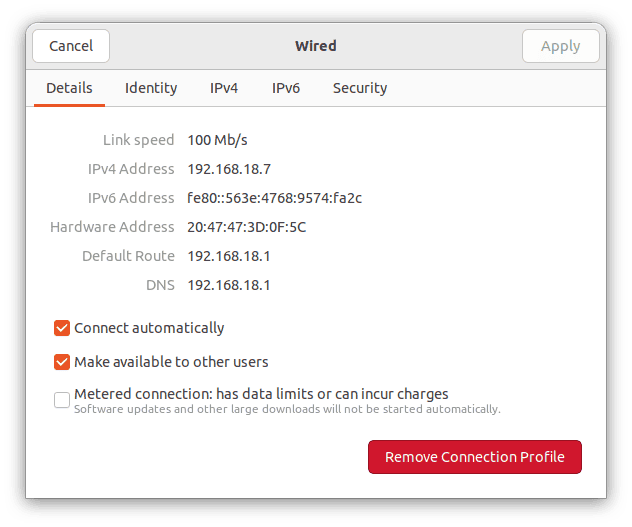
- Go to Settings > Network and click on the Settings cog beside the connection name. Your Local IP, Router IP, and other details will be displayed here.

- In case of WiFi, go to Settings > WiFi instead and click on the Settings cog.
Public IP Address
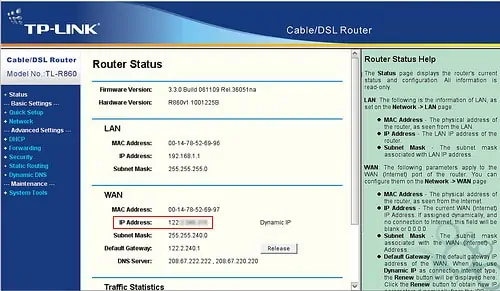
Unlike Local IP, the way to find your public IP is the same on any platform. The easiest method is by visiting sites like WhatIsMyIPAddress. Alternatively, you can also find your public IP from the router setup page. Here are the steps to do so:
- Open a web browser and input the router’s IP Address into the URL bar.
- Enter your router’s login credentials.
- Navigate to the Router or Wireless Status tab and check the IP Address.


