BIOS is the motherboard’s firmware, and like any other software, it can very well be updated. But before swinging into action, you need to inspect the current version.
To check the BIOS version on any system, navigate to UEFI/Legacy Utility. Here, find BIOS/System Information and look for Version. Some manufacturers even embed the version number in the BIOS sticker or barcode.
But if you’re already able to boot into the OS, you may utilize a preferred Windows utility, OEM application, or a third-party program. Once you’ve identified this, compare the current version with all the available ones offered by the manufacturer.
As per our testing on multiple systems, the process is pretty much the same for all. The only difference we noticed was in the BIOS version format, which shouldn’t be that of an issue. So, without further delay, let’s jump right into it.
From UEFI/BIOS Utility
The most straightforward way to check the BIOS version is from the firmware interface itself. To get here, just press the dedicated key when the splash screen appears on startup.
Usually, it’s Del or F2. But if the BIOS screen doesn’t show up, use another preferred method or you’re probably using a different key.
Once you have entered the BIOS/UEFI utility, you’re either going to end up on EZ or Advanced mode. Well, you do not need to switch as both lets you view the BIOS Information.
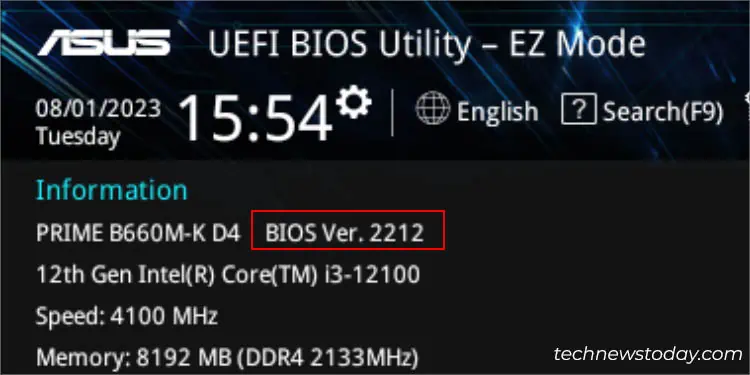
In EZ mode, locate the Information section, which could be in the top-left or top-right corners. And if you’re in Advanced mode, look for BIOS/System Information under the Main/System tab.
Inspect Motherboard Sticker
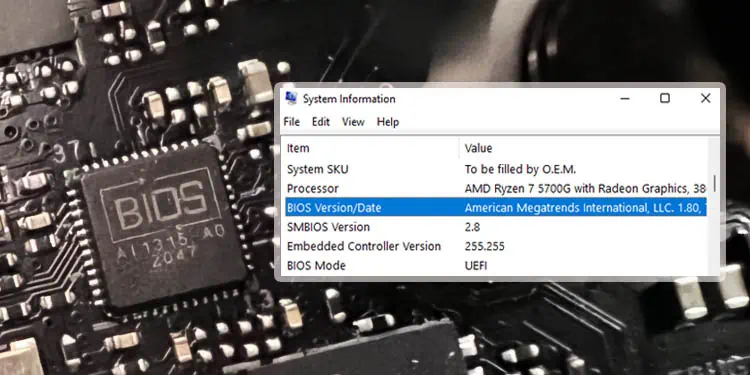
If you’re trying to identify the version of a new motherboard, you do not need to enter the BIOS Setup page at all. Some manufacturers attach a sticker on the BIOS chip itself.
In fact, this can also come in handy when your PC is refusing to boot up. But do note that this will only work if you have never updated this motherboard’s firmware before.
On the other hand, few brands even provide a barcode and usually, the last four digits indicate the original version. The location can vary depending on the motherboard you have. So, you need to scrounge around a bit.
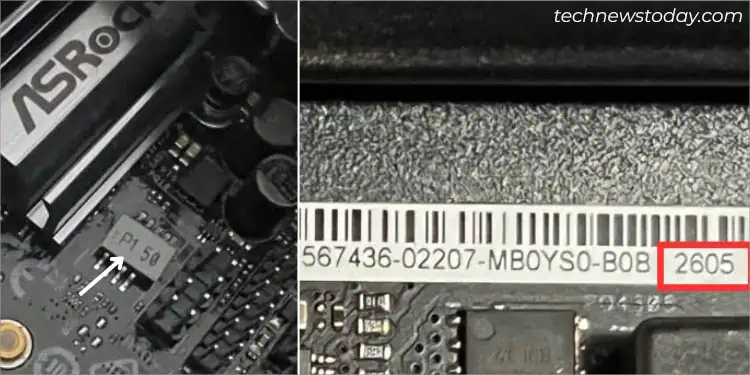
Even here at our office, we found it above the DIMM slots on our Prime B450 Plus and ROG STRIX B450-F GAMING motherboards. But when we checked on ASRock Z370, it included a sticker on the chip (labeled1.50, where 1.50 indicates the BIOS version).
Via Windows Utilities
For users who are able to boot into their operating system, you do not require accessing BIOS or inspecting the motherboard sticker. Just open up any one of the Windows utilities I have mentioned below, and you should be good to go:
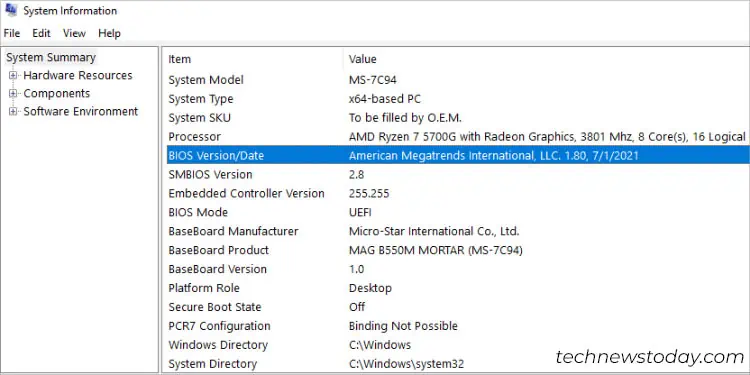
- System Information: In the System Summary, look for BIOS Version/Date. The field is showcased in the
<manufacturer><version>,<date>format.
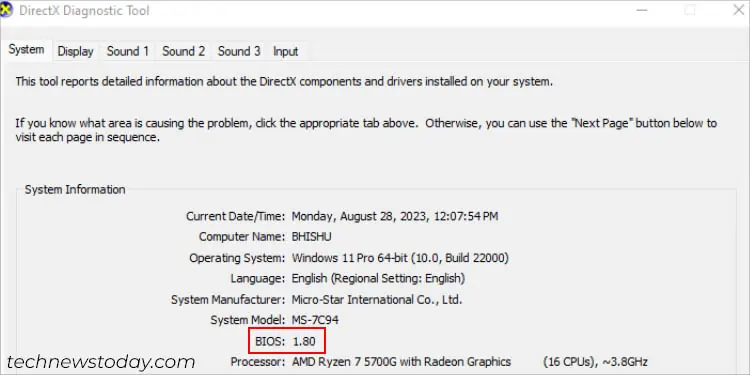
- DirectX Diagnostic Tool: Open Run and execute
dxdiagto launch this utility. Now, look for BIOS under the System Information section to find out the current version.
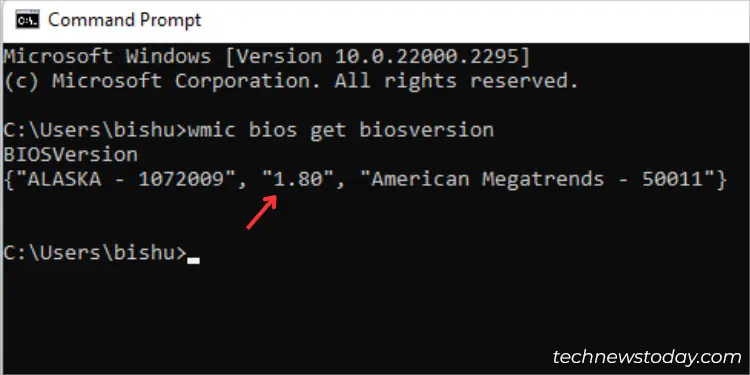
- Command Prompt: In the Windows CLI, run the
wmic bios get biosversioncommand. The one displayed in the middle is your BIOS version.
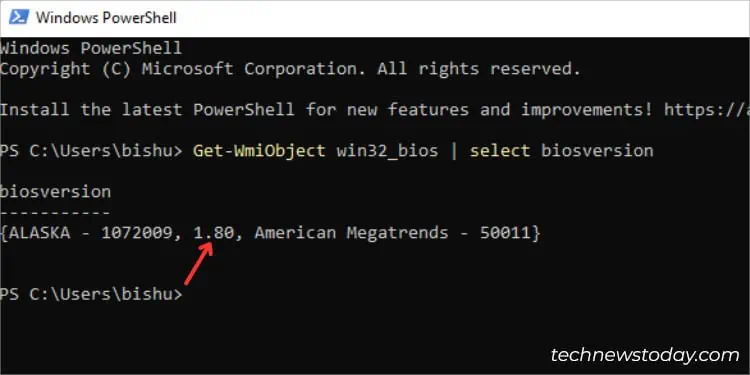
- Windows Powershell: If you prefer Powershell over CMD, execute the
Get-WmiObject win32_bios | select biosversioncmdlet. This should display the BIOS version in the same format as earlier.
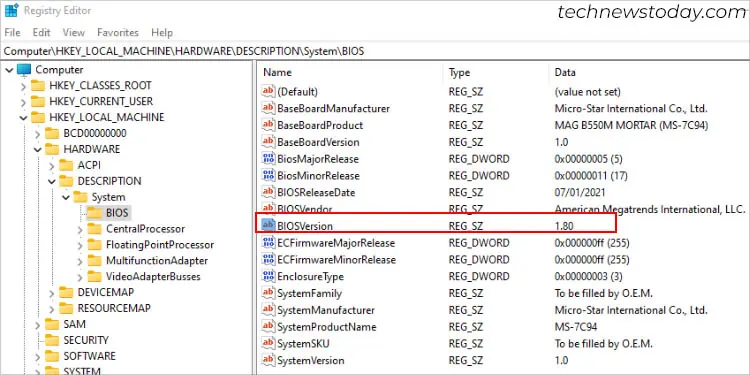
- Registry Editor: Here, navigate to
Computer > HKEY_LOCAL_MACHINE > HARDWARE > DESCRIPTION > System\BIOS. Then, look for BIOSVersion in the right pane.
Use OEM Software
Most motherboard manufacturers offer specialized applications that contain BIOS information, including the current version. In fact, you can quickly examine this and update your BIOS from here itself.
This is not at all different from the earlier methods. All you have to do is open the app and get to the dedicated section to view the BIOS version. But if you haven’t downloaded the utility yet, the aforementioned Windows methods should suffice.
I have listed down the dedicated applications offered by the most popular motherboards in the table below. You may navigate to the related link to directly jump on how to check the BIOS version on each of them:
| Motherboard | Application |
| MSI | MSI Center / MSI Dragon Center / MSI Help Desk / CPU-Z MSI |
| ASUS | MyASUS / Armoury Crate |
| Gigabyte | System Information Viewer / @BIOS |
| ASRock | ASRock Motherboard Utility |
Try Trusted Third Party Platforms
While motherboard’s utilities do offer to check the BIOS version, these are slim chances for every user. All those apps I mentioned earlier must be supported by your model. You can identify this by checking whether the support page includes the utility or not.
Also, considering the fact that most users aren’t satisfied with OEM software, you may opt for a trusted third-party program instead.
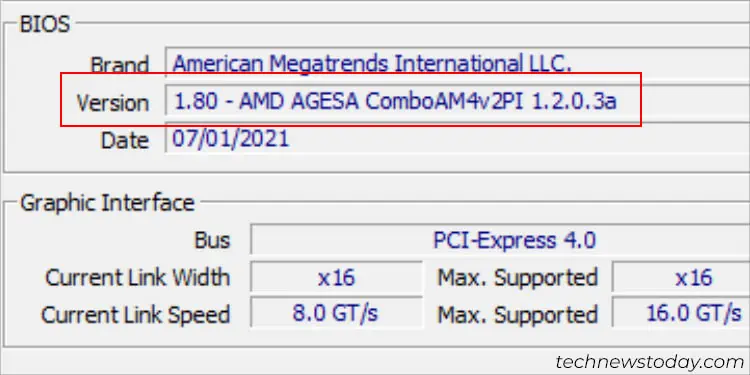
If you’re a PC enthusiast like me, you might already be running a few of these applications- CPU-Z, HWMonitor, Astra32, etc. These should include the BIOS version in one of their sections.
For instance, CPU-Z has a Version field (in the BIOS section) under the Mainboard tab. Check the attached screenshot above to understand this even better.
Finding the Right BIOS Version Online
The gist of checking the current version is to ensure you’re using the latest one. If you’re planning to move ahead with the firmware update, it’s best to go for the most recent version.
However, that’s not a compulsion! You may simply opt for the one that integrates the compatibility or bug fix, whatever might be your reason to update BIOS.
Before that, you need to know how to compare the current one with all those available on your motherboard’s support page. While it’s usually simple, some manufacturers have provided a different format on their sites, which can be perplexing.
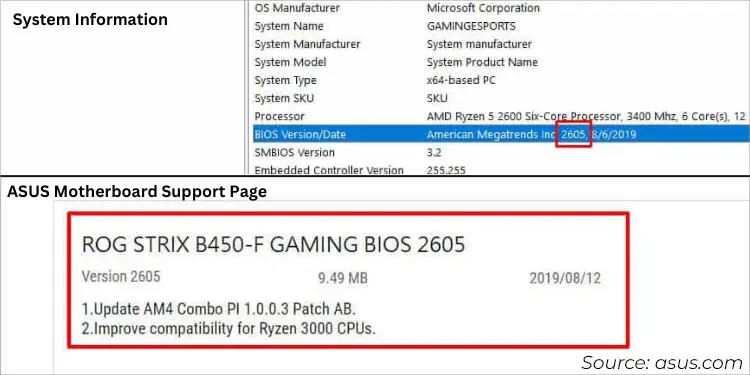
For instance, I am using the factory version 2605on my ASUS ROG STRIX B450-F GAMING. When comparing this on the official support page, I just need to search for a version higher than 2605 and ensure that it meets my demands.
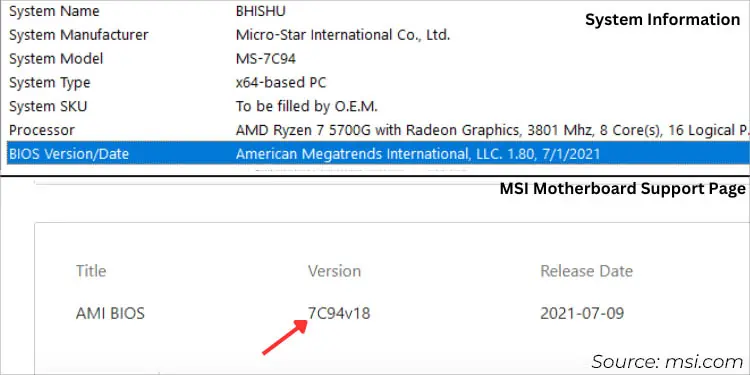
On the other hand, our team also sports an MSI MAG B550M MORTAR motherboard, and its current BIOS version in Windows utilities is shown as 1.80 / E7C94AMS.180. However, when comparing the version online, it’s in a different format (7C94v18). We were able to crack this with a simple logic (1.80 = 180 = v18).
So, you definitely need to look out for such exceptions!

