Before you jump to getting a new hard drive for your system, you first need to know whether it is compatible.
Although a SATA port is all that is needed to connect the HDD to a system, the hard disk’s physical size also needs to be taken into consideration, especially if you are getting one for your laptop.
As for the desktop, you first need to check the PC case specification for the total number of drive bays available and the number of free SATA ports to connect the HDD.
So, let’s further discuss about hard drive compatibility, starting with its size.
Check Size Compatibility
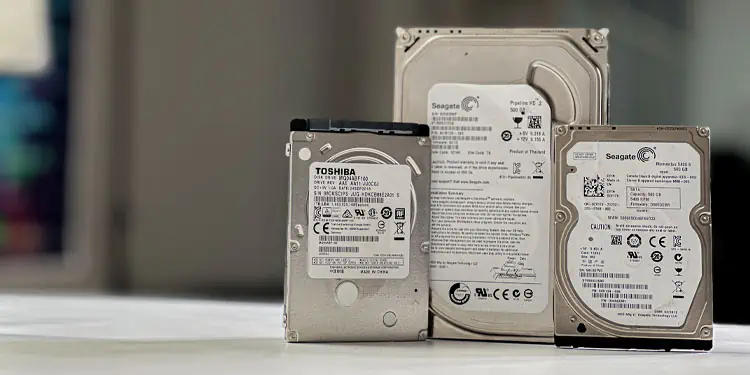
Hard disk drives mainly come in two different form factors—2.5” and 3.5”. Below we have discussed its size compatibility on PC and Laptops.
If you are on a desktop, size is usually not a concern. Most CPU case has a separate drive bay for your storage devices. This drive bay can easily store multiple 3.5” hard drives.
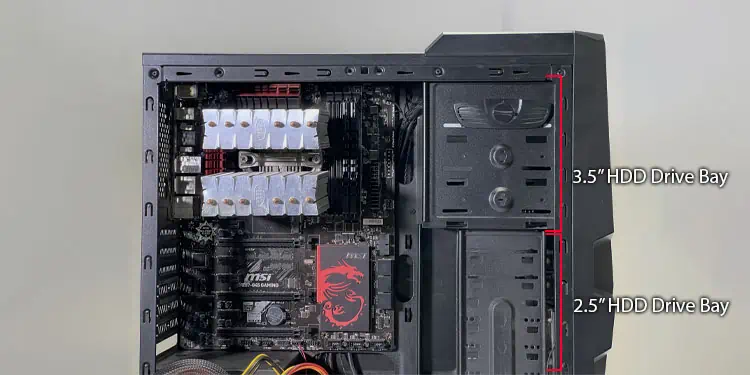
But the drive bay is only designed to fit 3.5” hard drives. However, you can also store a 2.5” hard drive using a 3.5” retention bracket. The 2.5” HDD stays on the retention bracket, and the bracket sits on the 3.5” drive bay on the CPU case.
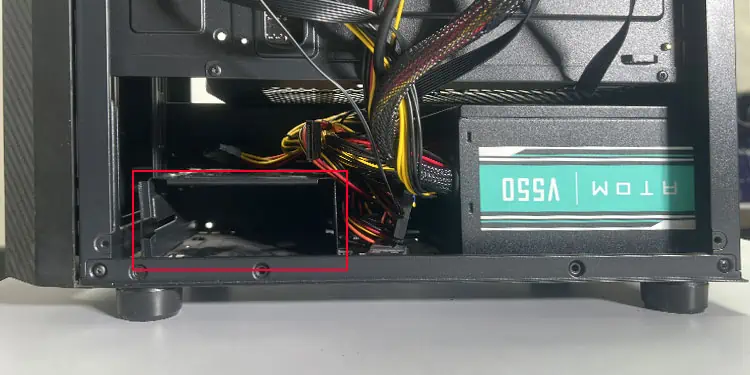
Some motherboards may have the drive bay hidden on the base of the CPU case, especially ATX cases. If you cannot find the drive bay, you can check its user manual to see where HDDs fit on the PC case.
Hard disk placement might also be an issue if you are on a mini-ITX desktop setup. In such cases, the hard drive may not fit in your PC.
In the case of a laptop, whether a hard disk is compatible with your device entirely depends on the disk’s physical size.
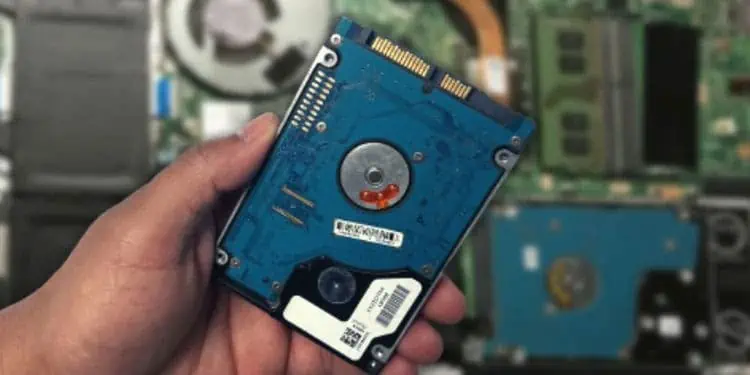
Most laptops only support 2.5” hard drives, so you cannot connect 3.5” hard drives. And if you have an ultra-thin/ultra-portable laptop, it might not support a 2.5” hard drive. In such cases, you will need an M.2 Solid State Drive.
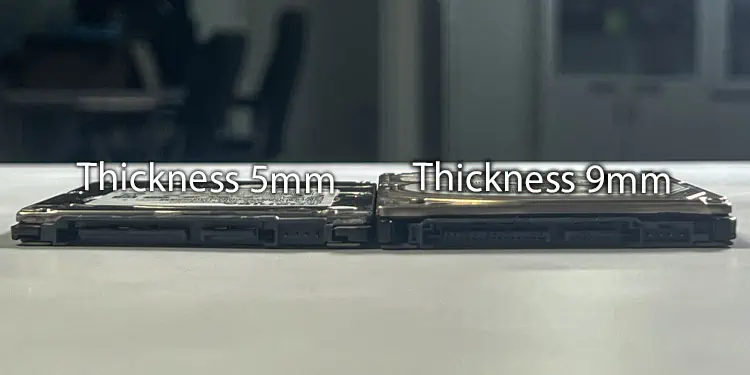
Furthermore, all 2.5” HDDs do not have the same thickness. Most commonly used HDD for laptops have a size of 9mm or 7mm. Most laptops use HDD with a thickness of 9mm. A thickness of 5mm is usually designed for ultra-book.
The only situation where you can insert an HDD into a laptop is if your laptop has a spare HDD slot, which is rarely the case if you are using newer laptops. However, if you are replacing your existing HDD, you can use another HDD without worrying about any compatibility issues.
If you do not know whether the laptop has a dedicated slot, you either need to contact the laptop manufacturer’s customer support or open the laptop.
- Turn off the laptop
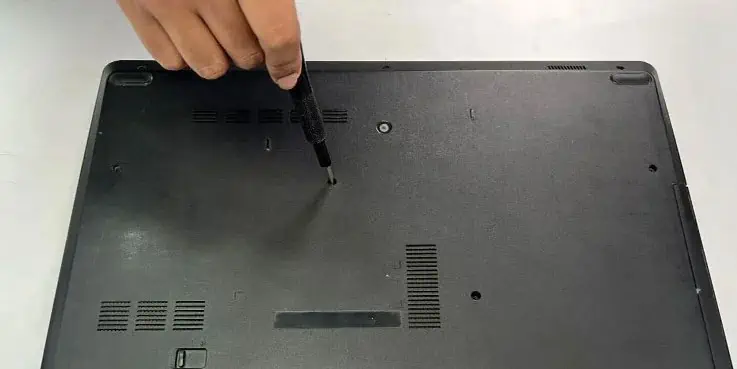
- Remove the laptop’s back panel by removing all the screws holding it.

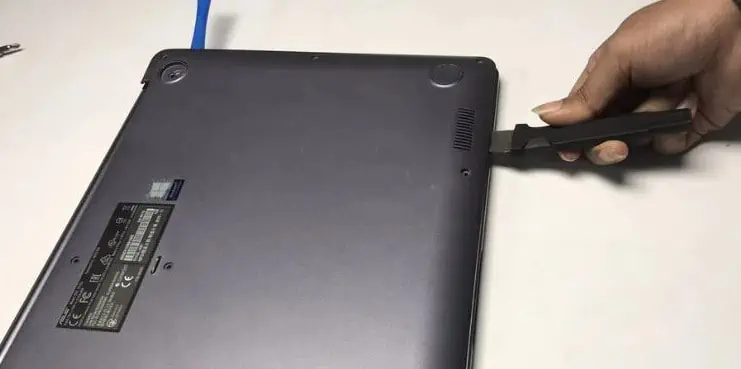
- Take a Pry tool or any plastic material with a flat surface and insert it between the laptop and the back panel.

- Turn the pry tool at an angle. You should hear the back panel unclip.
- Repeat this all around the laptop.
- Gently take the back plate out of the laptop.
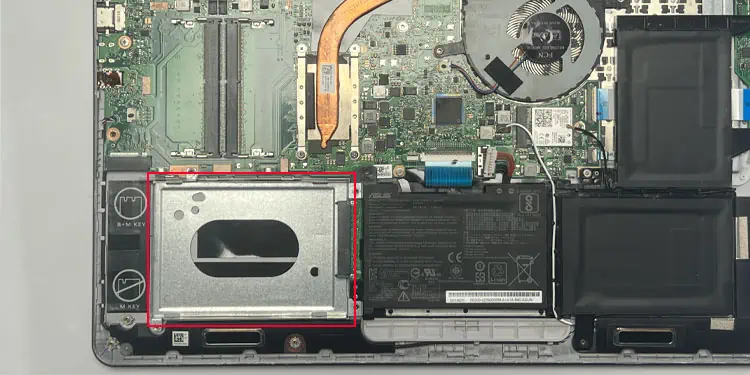
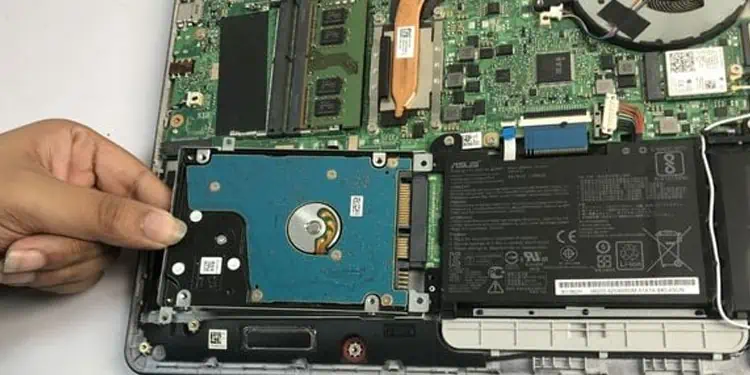
- Here, check if the laptop has any compartments as shown in the figure.

- If it does, you can insert a 2.5” HDD into this compartment.
- Reassemble the laptop
Another case where you can insert an HDD into the laptop is if the laptop has a CD/DVD drive. You can remove this drive and replace it with a 2.5” HDD. However, this will require a separate caddy to hold the HDD.
Check Interface Compatibility
SATA hard drives connect using SATA data and a SATA power cable. The SATA data port transfers data, and the SATA power cable supplies power to the HDD.
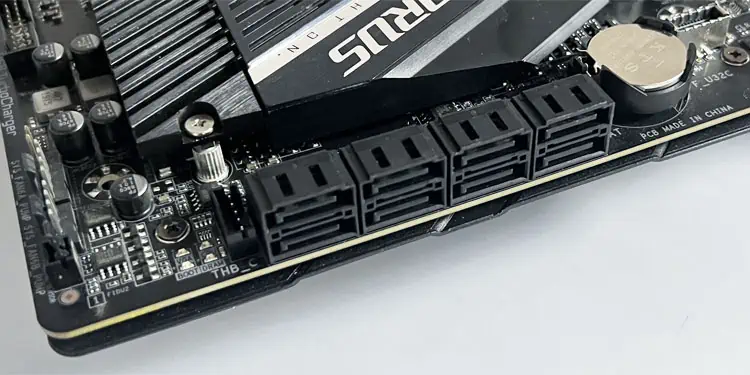
To connect an HDD to a motherboard, the motherboard needs to have a spare SATA port. Most motherboards have 2 to 6 SATA ports or even more. So, you can easily connect the motherboard and the HDD using a SATA data cable.
Motherboard companies include a few SATA cables in the box. If you do not have this cable, you need to get one from a local electronic shop.
If you do not have an extra SATA port available, you can use a PCIe-to-SATA card to connect the HDD to the motherboard.
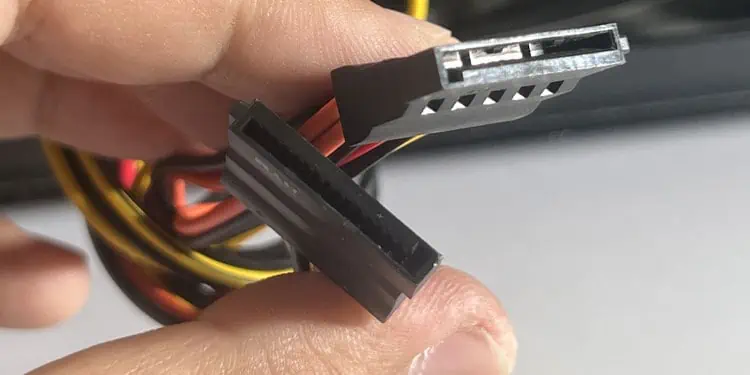
Another cable you require is the SATA power or a Molex cable. Depending on your HDD, you will need to use either one of these.
If HDD has a SATA power port, you need to connect the PSU to the HDD using SATA power cable. You will find both Molex or SATA power cable included with the PSU.
To inspect the interface compatibility, we recommend that you check,
- The motherboard specification list for SATA I, II, or III ports. All three ports support backward compatibility but differ in speed.
- The PSU specification list for SATA or Molex Connectors.
If both devices are new, you do not need to worry about compatibility issues and can easily connect SATA hard drives to the motherboard.
Similar to HDD size compatibility issues in a mini desktop setup, the number of SATA ports on smaller motherboards may be limited. So, make sure that you have free SATA ports to connect the hard drive.
If your laptop has a 2.5” slot for your storage device, you do not need to worry about interface compatibility issues. This slot will have a dedicated SATA data and SATA power port. You can simply slide the HDD into this slot.
If you are looking to replace a DVD drive with an HDD, you will need a hard drive caddy. This is an HDD/SSD compartment that is in the shape of the DVD drive of your laptop and sits on the DVD drive.

