If you are making a purchase for a new device, it is important that you consider checking the specifications of the processor, especially the chipset’s generation. The latest generation processors usually offer better performance and software optimization.
For most of the processors, its generation can be determined through the model name. This information can be checked on the laptop’s palm rest from the brand indicator stickers. If you are building a new PC, you can check the packaging or even the IHS of the processor.
Determine Generation of Intel and AMD processor
Intel and AMD are the two most prominent chipset manufacturers. The naming schemes for the processors from these manufacturers are not identical. However, despite different names, they do offer similar information regarding the processor, such as the generation, series, and even the power requirement.
Let’s quickly look at how you can decode the processor information from the Intel processors. The Intel processors are named following this sequence.
For instance, for a processor labeled Intel Core i7 10870H, the naming scheme gives a detailed overview of the chipset. 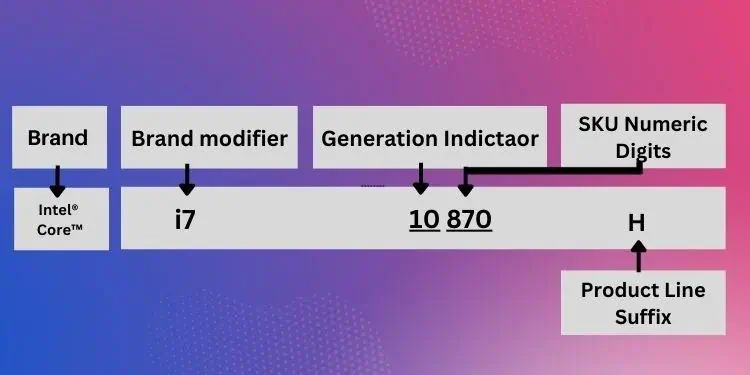
- Intel core is the brand name that specifies the chipset manufactured by Intel, with the core indicating a successor to the traditional Celeron and Pentium models.
- i7 in the label gives the idea that it is the Intel processor associated with the i7 product line. The Intel Core series currently has five variants; i3, i5, i7, i9, and the X-series processors.
- Next in the sequence, we have a number which is a combination of the Processor generation and the SKU Numeric digits.
The last three digits of the number after the Brand modifier denotes the SKU of the processor, while the number preceding the SKU digits is the processor generation.
For instance, The initial digit “10” in the 10870 indicates that the processor is a10th gen chipset, and the digits succeeding it (i.e., 870) represent its SKU. On single-digit generational processors like Intel Core i7-9750H, the generational indicator hints that it’s a 9th gen chipset while its SKU is 750.
- At the end, the product line suffix shows the processor’s capabilities. For example, the H after the SKU number is an indicator that it is designed with high-performance capabilities. Similarly, the U indicates an Ultra-low power processor.
Now, let’s move on to how you can decode the labels and identify processor generation on the AMD chipsets. A general naming scheme of the AMD CPUs looks like this.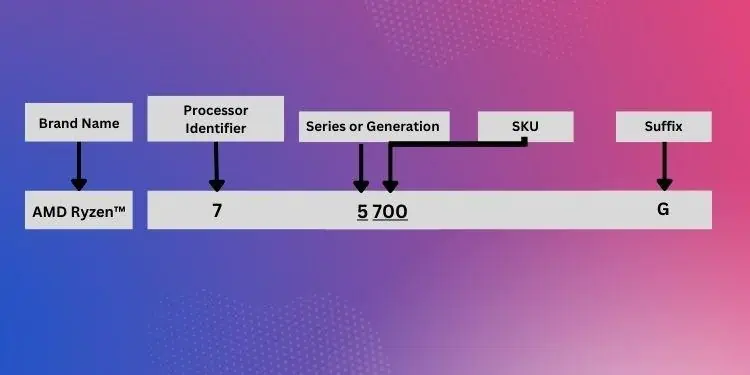
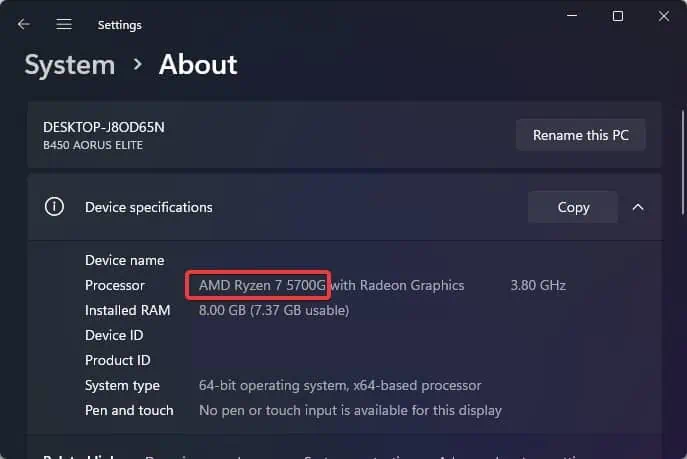
On the AMD processor named Ryzen 7 5700G, the specifications can be broken down as follows.
- The AMD Ryzen is the brand name of the processor, with the chipset belonging to the Ryzen family of processors.
- The number 7 following the brand name is the processor identifier. There are five product lines under the Ryzen series currently; the 3, 5, 7,9, and the Threadripper.
- Next in the line, we can get information about the processor generation. The initial digit “5” in the number 5700 shows that it is a fifth-generation AMD processor. AMD has released up to seven generation Ryzen CPUs. The last three digits after the generation indicator are the SKU of the processor.
- Lastly, the suffix at the end indicates the architecture and power of the processor. For instance, the G suffix suggests that Chipset has integrated graphics.
Ways to Check the Processor Generation
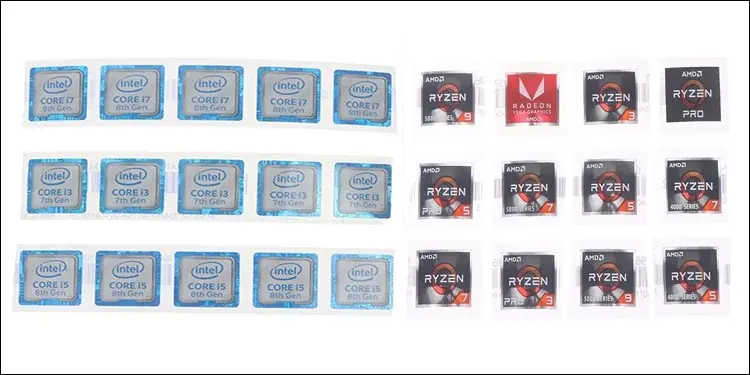
Check the Brand Sticker
You can see the brand Sticker on the palm rest of your laptop to check the processor generation. On devices with both Intel and AMD-based processors, these stickers give information like processor series, generation, and cores.
Using the System Properties
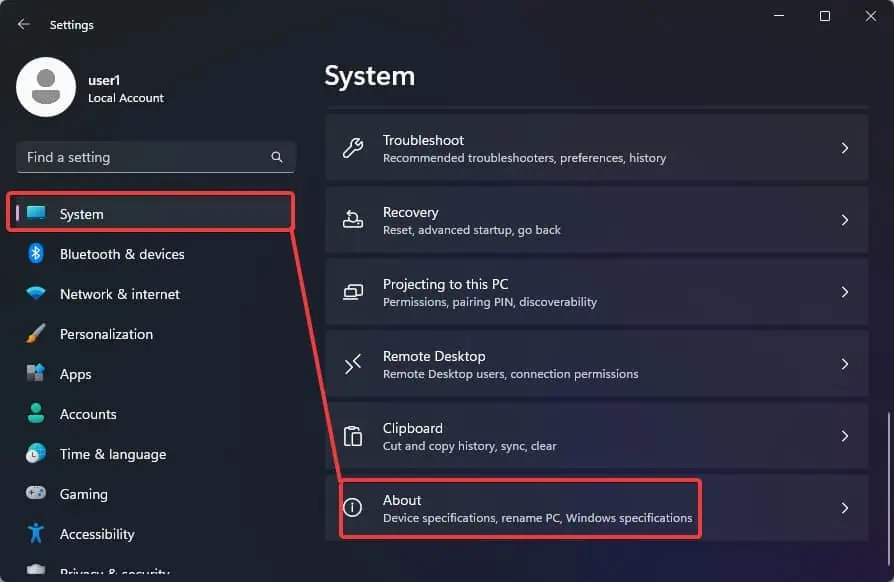
System properties is a commonly used Windows menu for viewing the specifications of the computer and the Windows. You can get the basic idea about the processor, like its generation, clock speed, etc., from this section.
- Press Windows Key + I to open the Windows settings.
- Go to System > About.

- Under the Device Specifications, check the Processor info along with its generation.

Using the Task Manager
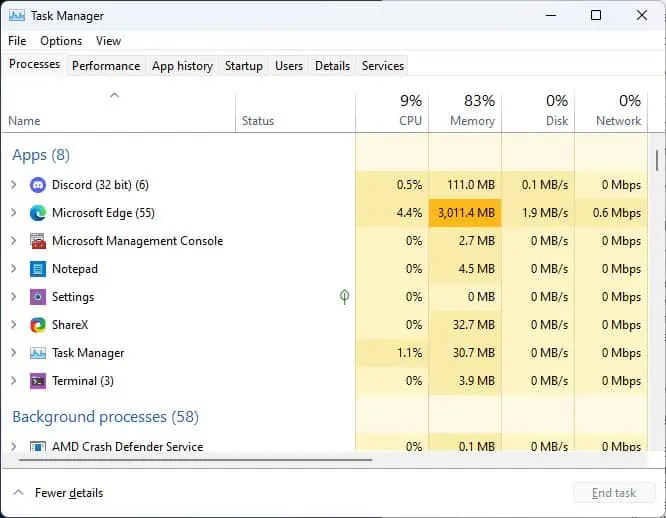
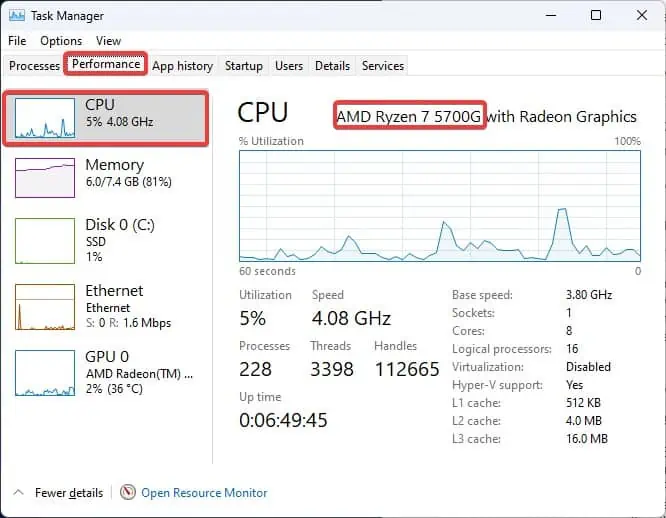
From the task manager, you not only can see the background processes of the applications on your device but also get information regarding the CPU, like specifications and utilization.
- Press Ctrl + Shift + Esc to open the Task Manager.

- Go to the Performance Section.
- Select the CPU from the left side.

- On the right side of the Window, check the CPU information to identify the CPU generation, threads, clock speeds, etc.
From the Microsoft System Information Utility
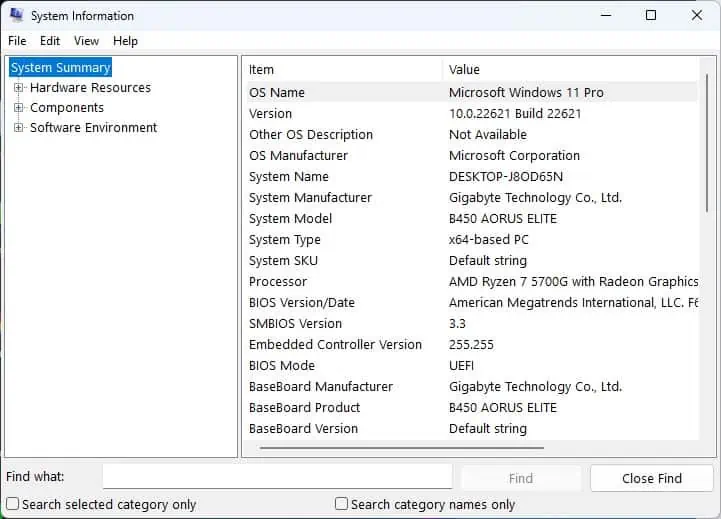
System information utility is the way to go if you want details of the Hardware resources, components, and Software Environment your device is equipped with.
- Press Windows Key + R, type
msinfo32, and hit enter to open the System information.
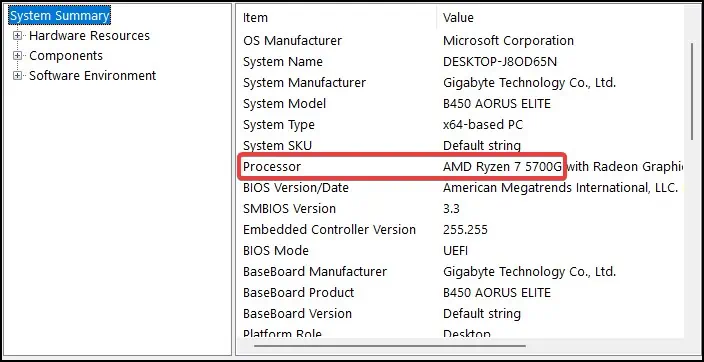
- In the System Summary, find the item named Processor.

- Finally, check the processor model and generation. You will get extra information, such as CPU cores.
From the DirectX Diagnostic Tool
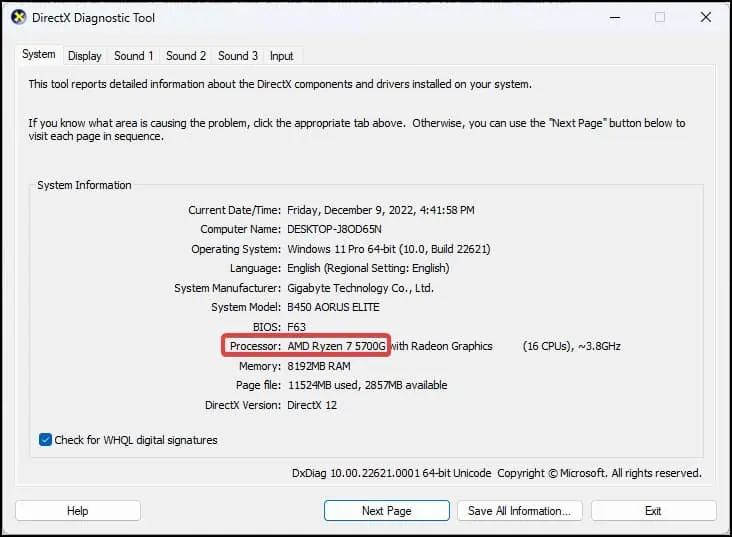
The Direct X diagnostic tool provides a brief summary of the device and also assists in troubleshooting the problems with the display, sound, and inputs.
Although the information in this utility regarding the processor is limited when compared to the System information utility, it can give you an idea regarding your processor’s generation.
- Press the Windows key + R, type
dxdiag, and hit enter to open the DirectX utility.
- Go to the System tab.
- Under the System information, check the Processor.
From the Command Prompt
There is also a Command line utility that can be used to get the summary of the processor’s specifications.
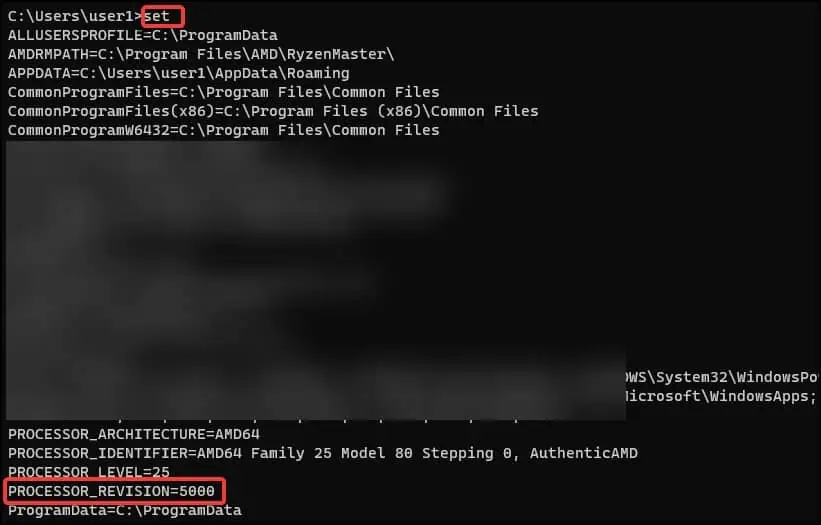
- Press Windows Key + X and open Terminal.
- Type
Setand hit enter.
- You will now see the detailed system information.
- Find the
PROCESSOR_REVISIONand check its value. This value gives the idea about the generation and the SKU of the processor.
From the PowerShell
If you want a quick summary of the processor, you can use PowerShell too.
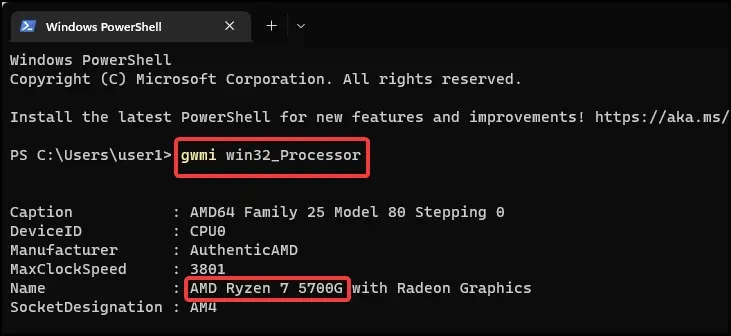
- Press Windows Key + R, type
powershell, and hit enter. - Now, execute this cmdlet. |
gwmi win32_Processor
- Check the Processor details on the Name field
Using Overclocking Software
Overclocking software isn’t an ideal way to get information about the processor. However, you do get the basic information about the CPU on these software that can be useful for you.
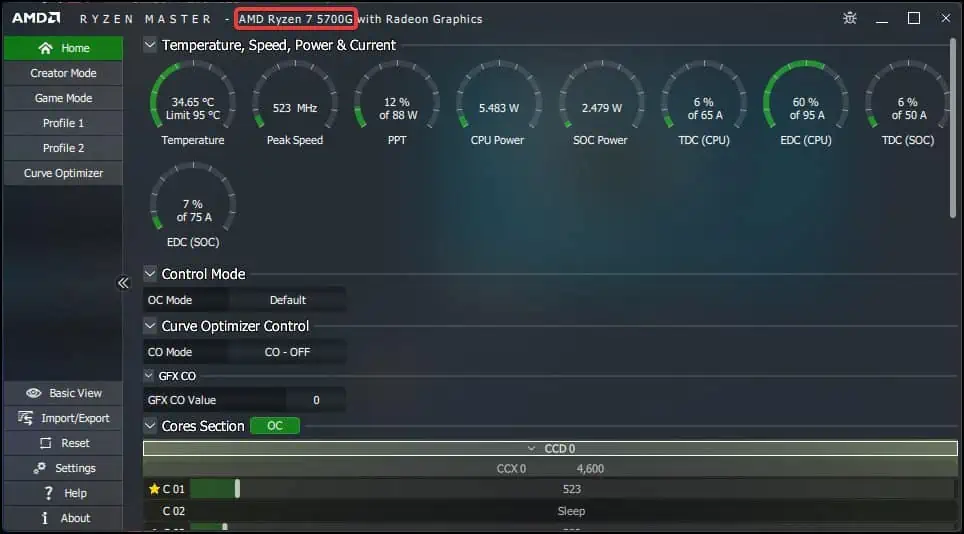
- Download and install the preferred Overclocking software. It is recommended to use the native overclocking software from the CPU manufacturer.
- Open the software.
- Check the Title bar of the Application Window. You will see the details of the processor there with the CPU generation.


