You recently upgraded your internet but do not seem to notice much difference in its speed. Also, you’ve run different tests online and the results are not what you expected. Did your ISP fool you or is it something else that could be the issue?
Well, different factors can fluctuate the network bandwidth. If your laptop is connected via ethernet, you’re already a step ahead. But if you’re a Wi-Fi user, its speed further depends on signal strength, distance from the router, number of devices in the network, interferences, and more.
In simpler words, a slow Wi-Fi speed means slow internet. Nonetheless, you can adopt different optimization techniques that can help reduce interferences and improve signal strength. But before that, you need to know the proper ways to check your Wi-Fi speed, and that’s exactly what we are going to cover here.
Before You Begin:
Wi-Fi speed and internet speed are entirely different terms. While the first determines the connection between your laptop and router, the latter indicates the data exchange between the ISP and your router/modem.
In this article, we are going to focus entirely on how to check your laptop’s Wi-Fi speed. However, if you’re willing to know your internet speed, visit any reliable web service dedicated to analyzing internet metrics. Popular ones include Fast, Speedtest by Ookla, Speakeasy, etc.
Likewise, you can also utilize Windows Task Manager and go to Performance > Wi-Fi to get the laptop’s real-time send/receive bandwidth activities.
Through Control Panel
The Network Connections window is the gateway to all your network adapters. You can navigate here to check and troubleshoot different network components. So, this is definitely one of the easiest ways to inspect your Wi-Fi speed.
Along with that, you can also monitor the signal quality and live network activity here. Without further delay, let’s jump into the necessary steps to do so:
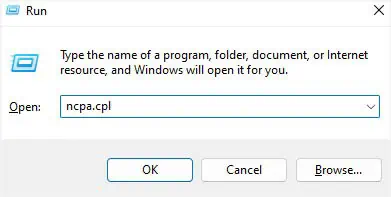
- Use the Windows + R shortcut to open Run Interface.
- Here, execute the
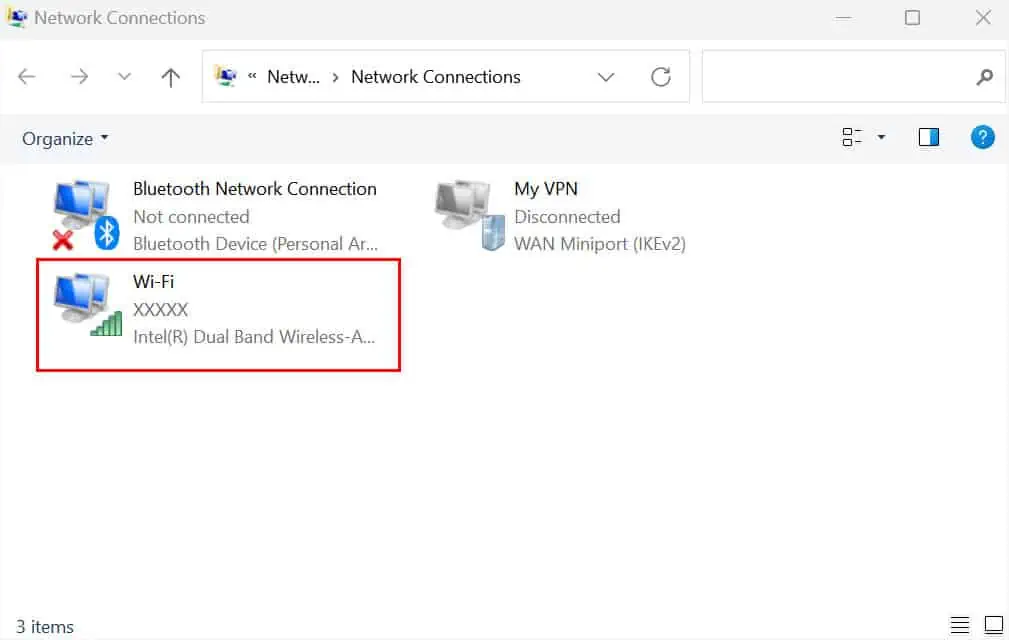
ncpa.cplcommand. This should directly take you to Control Panel > Network and Internet > Network Connections.
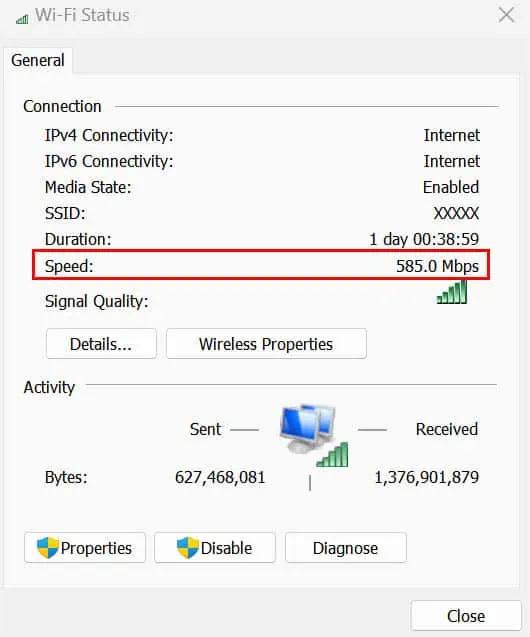
- Now, double-click on the Wi-Fi adapter to open its Properties dialogue box.

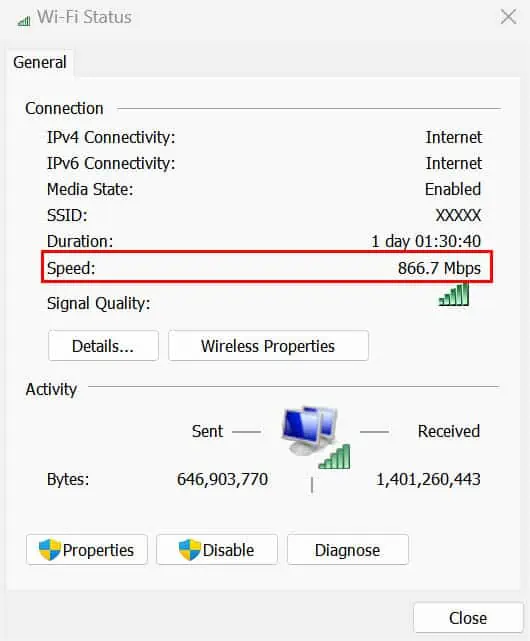
- Under the Connection section, check the Speed field. This determines the live Wi-Fi speed and hence can fluctuate over time.

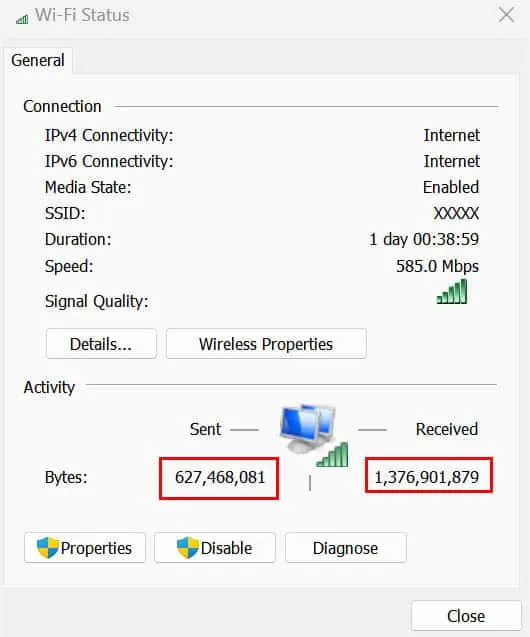
- To learn in-depth about the sent and received bandwidths, check the Activity field. However, the values are represented in bits per second. Check the Additional Tip below to convert it to Kbps, Mbps, or Gbps.

- Now, try moving closer to the router and recheck the Speed field. You’ll notice a sudden rise in the bandwidth. This is because you’ve cut through some of the interferences in the process and improved the signal too.

- You can even check the internet speed with different Wi-Fi speeds. After this, you’ll confirm that the higher the Wi-Fi speed, the faster will be the internet.
Additional Tip:
You can manually convert bits/s into Kbps, Mbps, or Gbps using the data measurement units:
1000 bits/s = 1 Kilobit/s (Kbps)
1000 Kbps = 1 Megabit/s (Mbps)
1000 Mbps = 1 Gigabit/s (Gbps)
For example, if the sent data is 629,815,856 bits/s as illustrated above, here’s how you can convert it:
646,903, 770 bits/s = 646903.77 Kbps
646903.77 Kbps = 646.9 Mbps
646.9 Mbps = 0.64 Gbps
Similarly, the received data (1,401,260,443 bits/s) when converted becomes 1401260.44 Kbps, 1401.26 Mbps, and 1.4 Gbps respectively.
Via Wi-Fi Properties
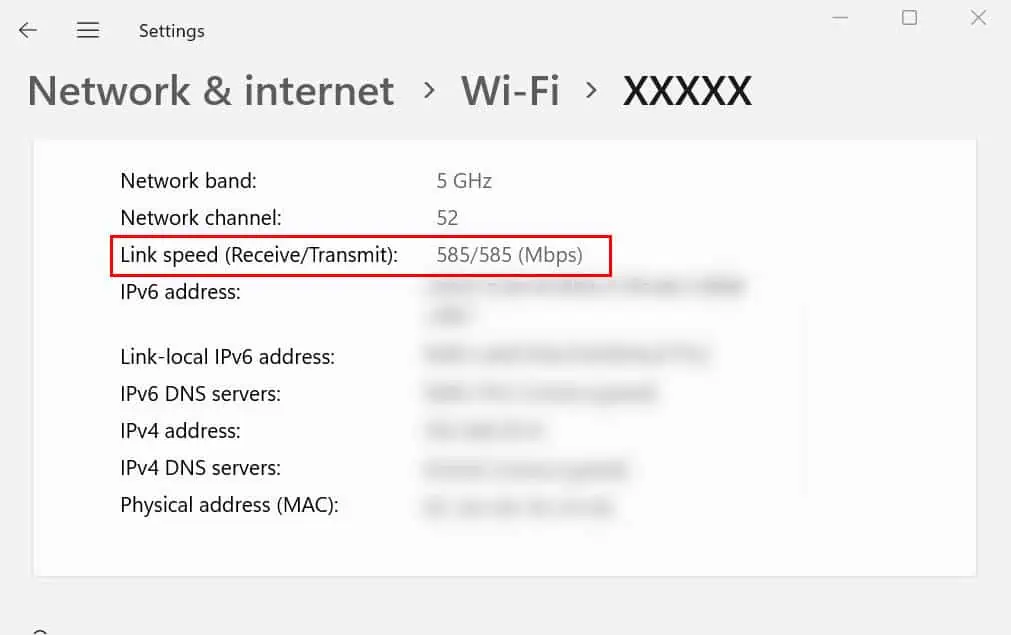
Another way to check Wi-Fi speed is from the Windows Settings app. Here, you can inspect the Link speed, which is the maximum theoretical speed between your router and laptop. It’s broken into two values—Receive and Transmit.
Usually, they have the same number and hence this is also your Wi-Fi speed. Clearly, you can figure out that it’s not as accurate as the above method. Follow the below guide on how to check Wi-Fi speed using this technique:
- Navigate to the system tray located at the bottom-right corner of your taskbar.
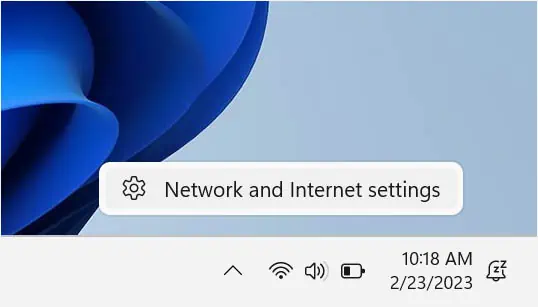
- Right-click on the network icon, and select Network and Internet settings.

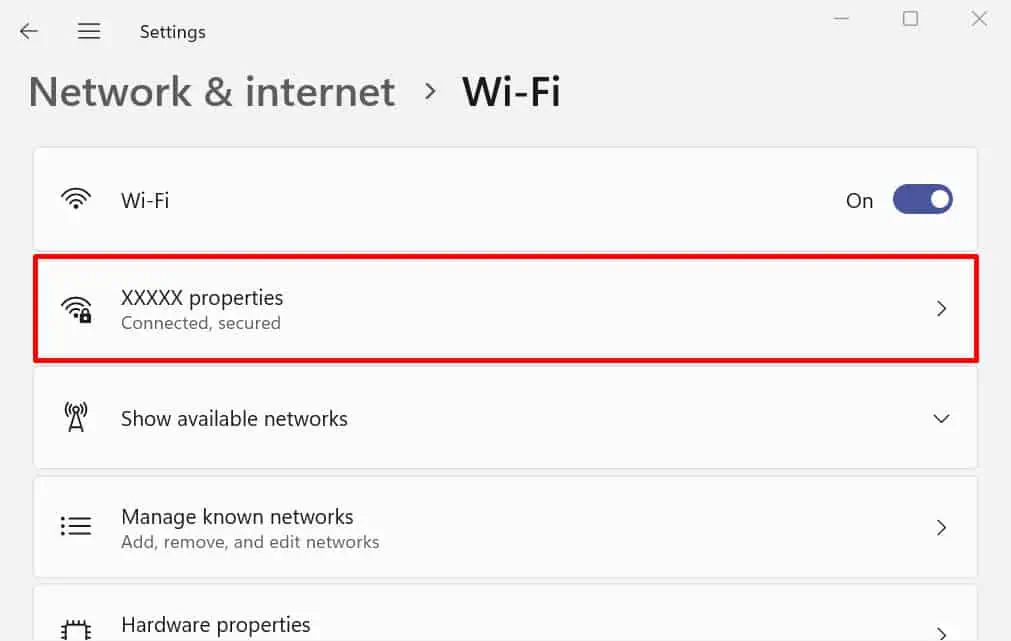
- Once you’re in the Settings app, choose Wi-Fi.

- Then, get to the Properties section.

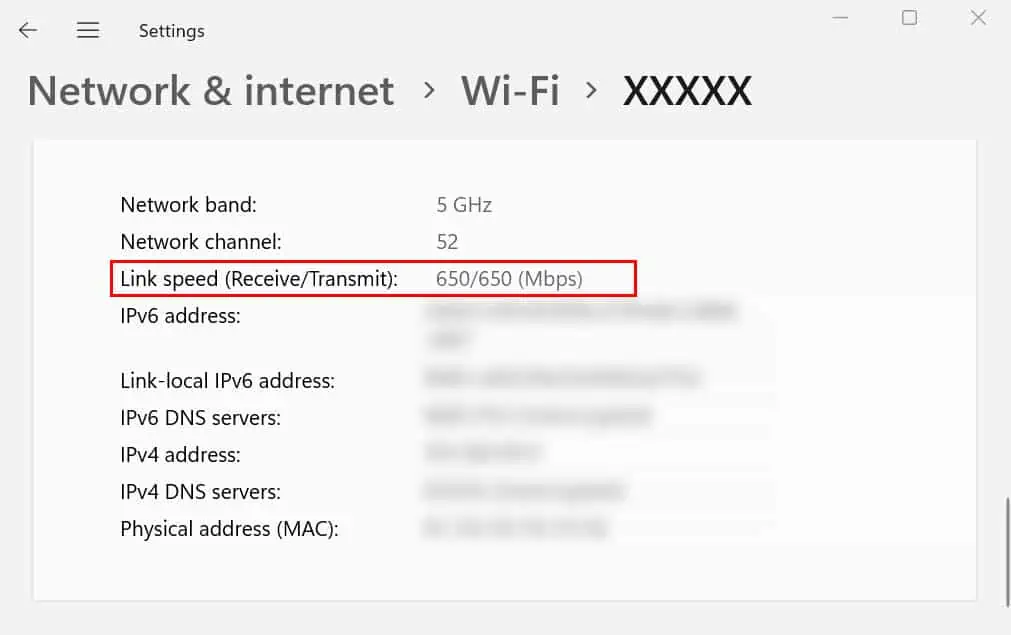
- Scroll down and find the Link speed (Receive/Transmit) field.

- Check the values and you’ll notice this in the
X/Yformat, where X = Receive rate and Y = Transmit rate. As demonstrated above, both the values are 650 and 650. So, the Wi-Fi speed is 650 Mbps. - Now, distance yourself from the router and you’ll notice a significant decrease in the Wi-Fi speed. Indeed, this can further impact your internet connection, as discussed earlier.

Note: Unlike the Network Adapter Status, you can’t check the live data transfer rates. Instead, you’ll need to manually get back and reenter the Properties Window to see the changes.
Using Command-line Interface
Instead of navigating to different Windows sections, you can easily check your laptop’s Wi-Fi speed using a single command line. This is possible from built-in command-line interfaces, CMD and Powershell.
In this section, we are going to demonstrate using separate commands for each of the interfaces. Nonetheless, you can run the same CMD command in the Powershell window. Also, it’s possible to execute the latter’s cmdlet on Command Prompt, but you’ll need to use the powershell command to enter Windows Powershell first.
On Command Prompt
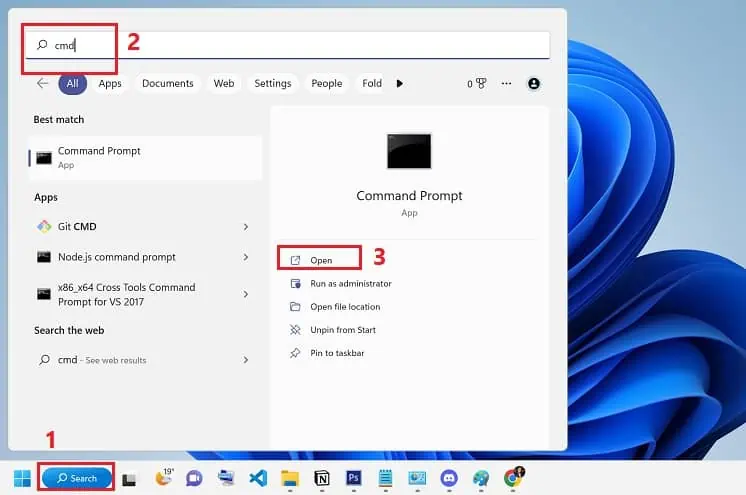
- First, launch the utility from the Instant Search menu.

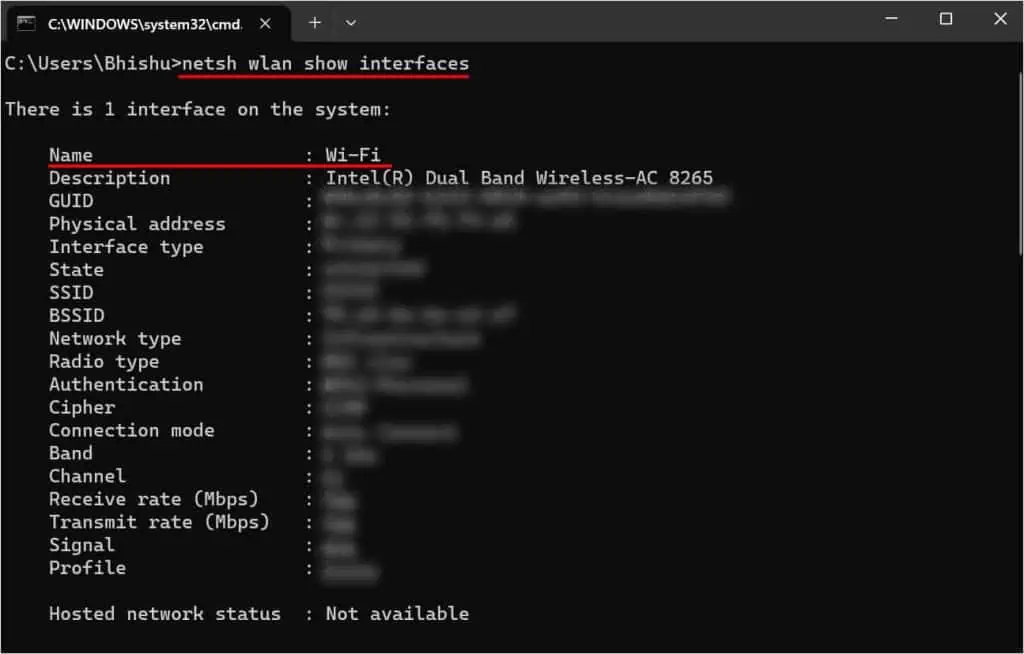
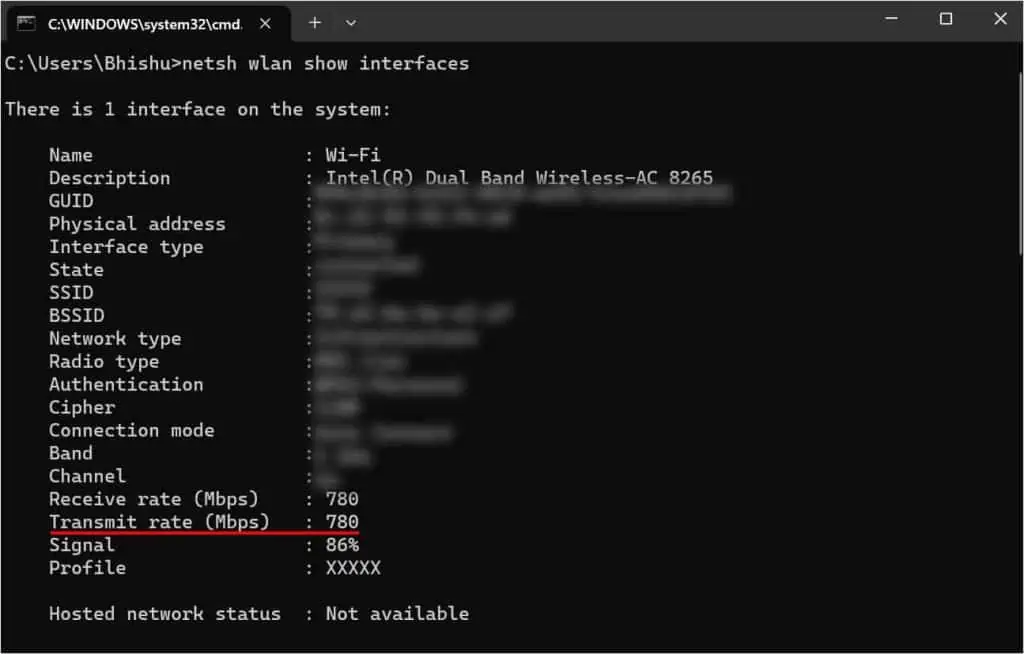
- Here, copy and paste the following command:
netsh wlan show interfaces - Hit Enter and you’ll likely get the list of interfaces on your system.
- Check the Wi-Fi value in the Name field. Since we only have one interface, we are only shown the Wi-Fi details.

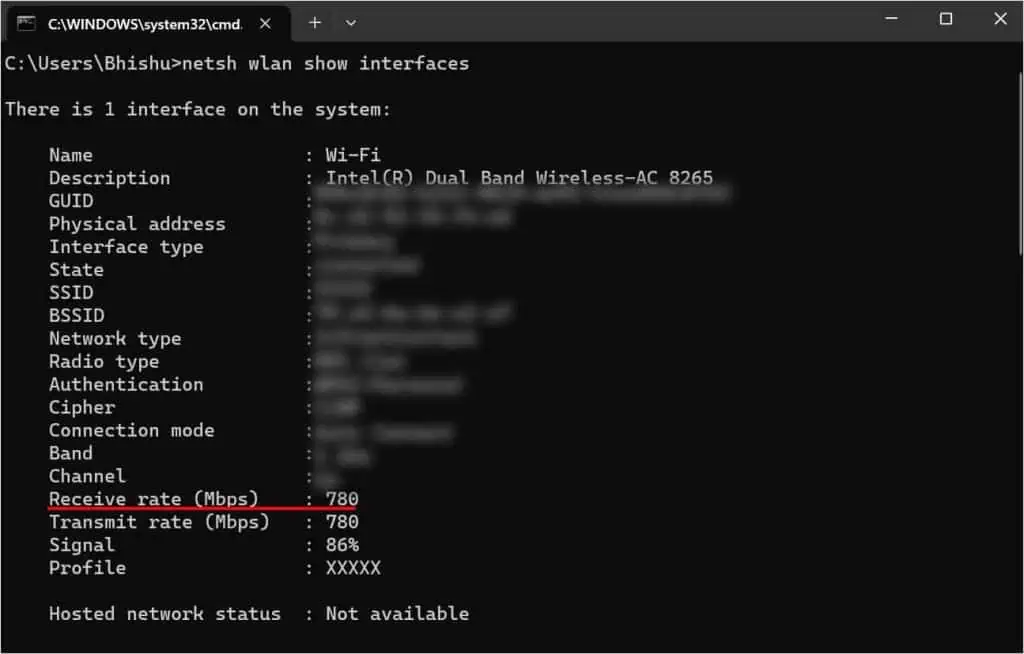
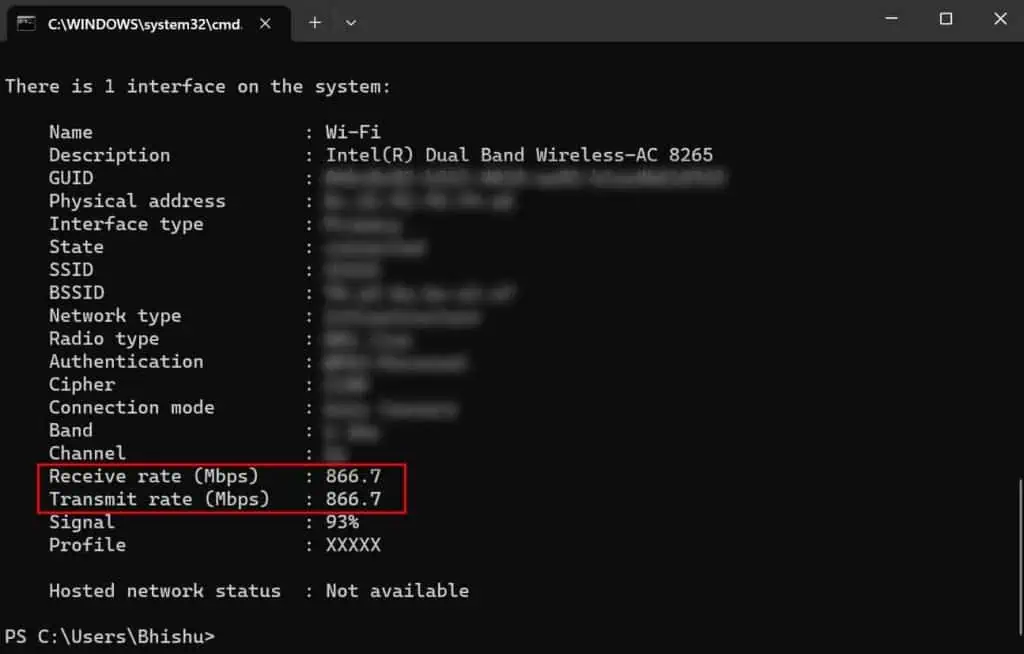
- Now, inspect the Receive rate (Mbps) field to determine your current download speed.

- Likewise, the Transmit rate (Mbps) field indicates your laptop’s upload speed.

- To recheck, execute the command again. You’ll likely notice that the value fluctuates.

On Powershell
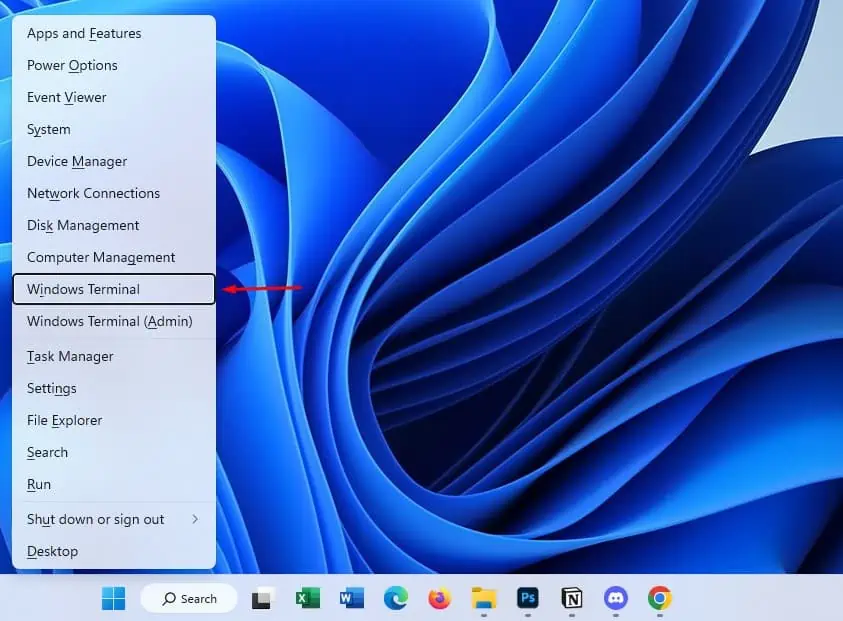
- Press the Windows + X shortcut to open the Quick Link menu.
- Click on Windows Terminal. This should launch the Powershell window.

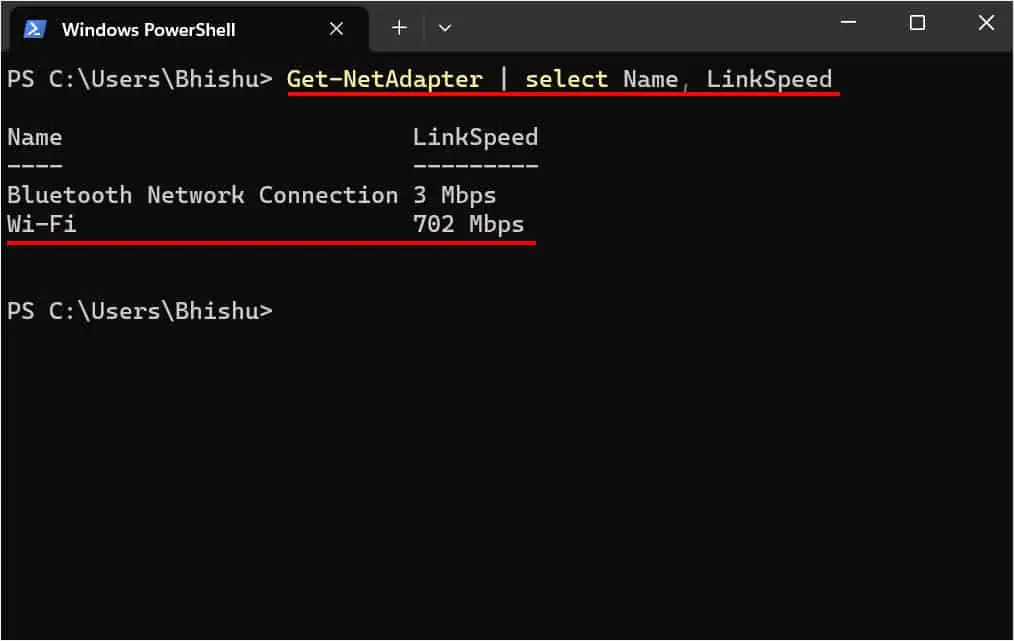
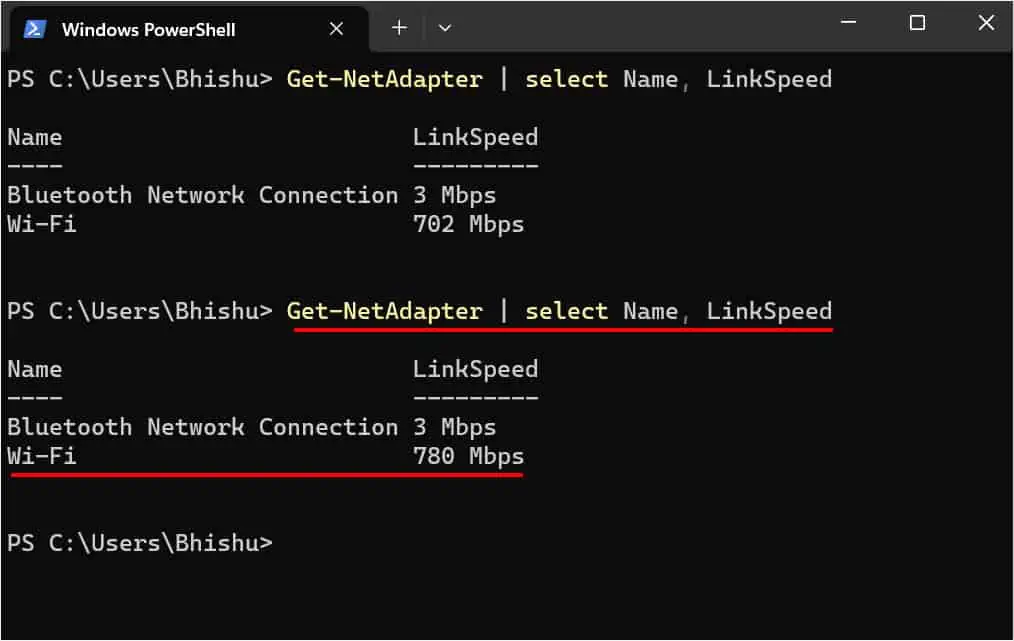
- Now, execute the following cmdlet:
Get-NetAdapter | select Name, LinkSpeed
- You should see all your network adapters along with their Link speed. The value underneath it is your laptop’s Wi-Fi speed.
- You can rerun the cmdlet to view the new Wi-Fi speed.


