Domain Name System (DNS) works as a phone book in the network where it translates the hostname into the IP addresses. For instance, if we enter a domain name (For example, www.google.com) in our web browser, the DNS server receives the request and changes it into a machine-readable IP address format.
The DNS server that your devices use is, by default, established by your ISP. However, you can also change the DNS server to your desired one (Google, Cloudfare, or others) on your devices.
If you want to check what DNS your Windows device uses, there are multiple Command-line and GUI-based utilities to help you with this.
Using IP Config
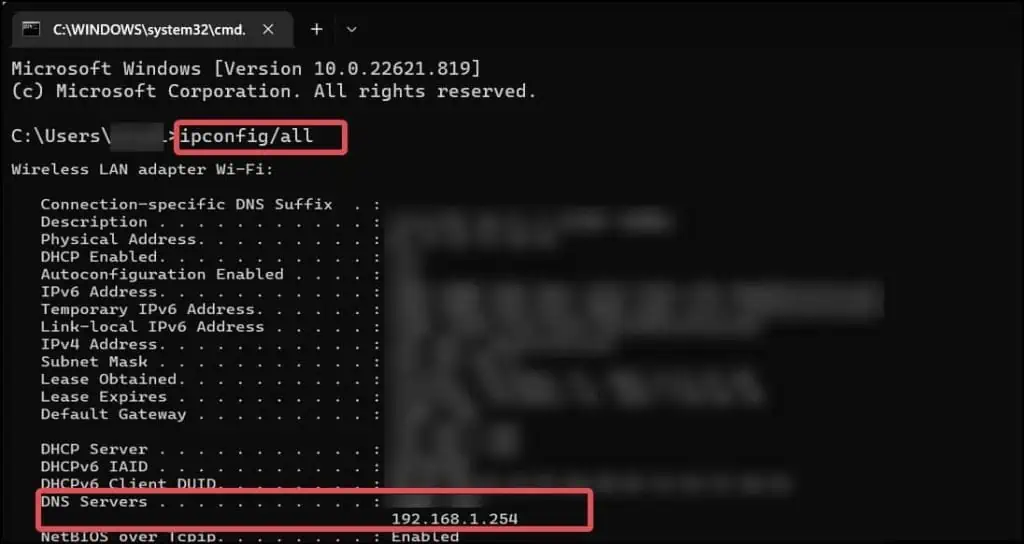
IPconfig is a great command line tool if you want to inquire about the network configurations on your device. It can give you detailed information on the network adapters, Device IP address, subnet mask, gateway, and even the DNS.
- Press Windows Key + X and open the Terminal.
- Type
ipconfig/all, and hit enter.
- Check the IP given in the DNS server field.
From the Network Settings
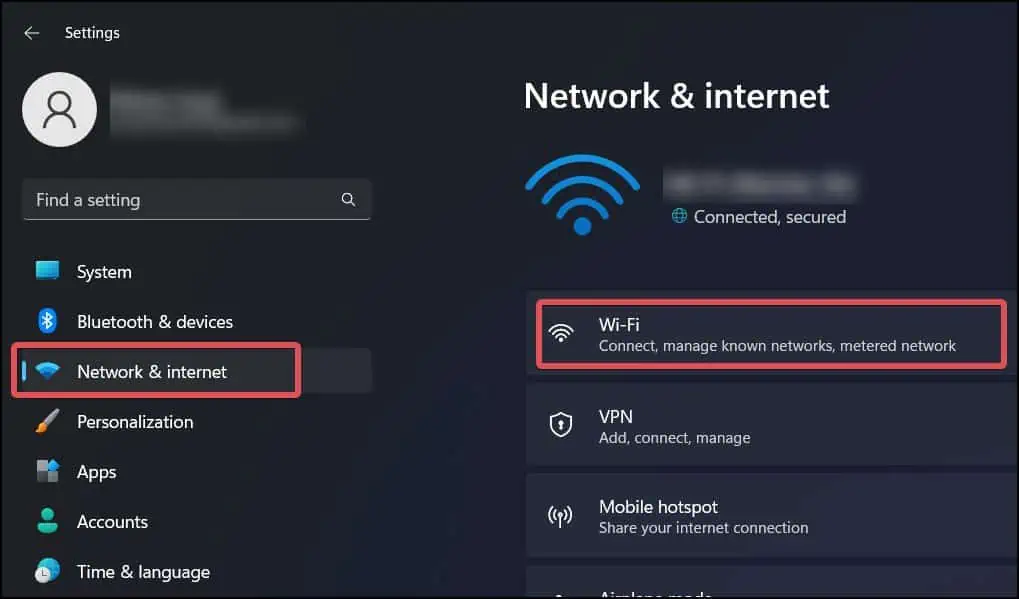
The Network settings on Windows is an ideal GUI for configuring the network connections on your device. This Settings section can also be used to gather information about the network.
- Press Windows Key + I to open Settings.
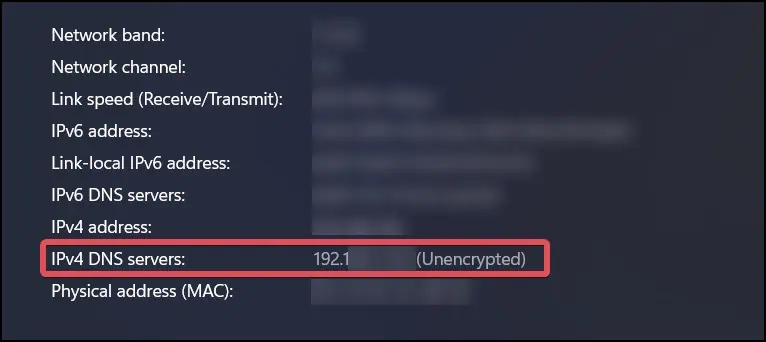
- Go to Network & Internet > Ethernet.

- Find the DNS under the section IPv4 DNS servers.

From the Control Panel
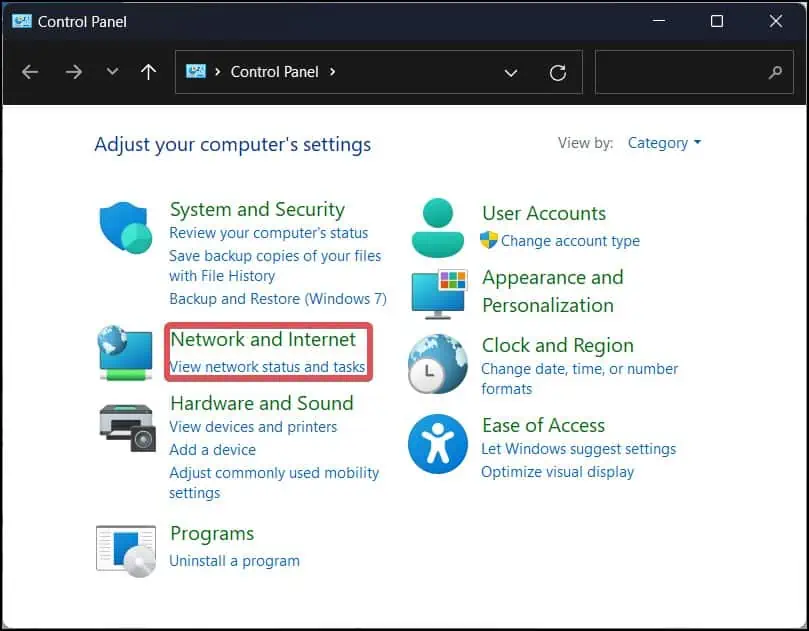
- Press Windows Key + R, type
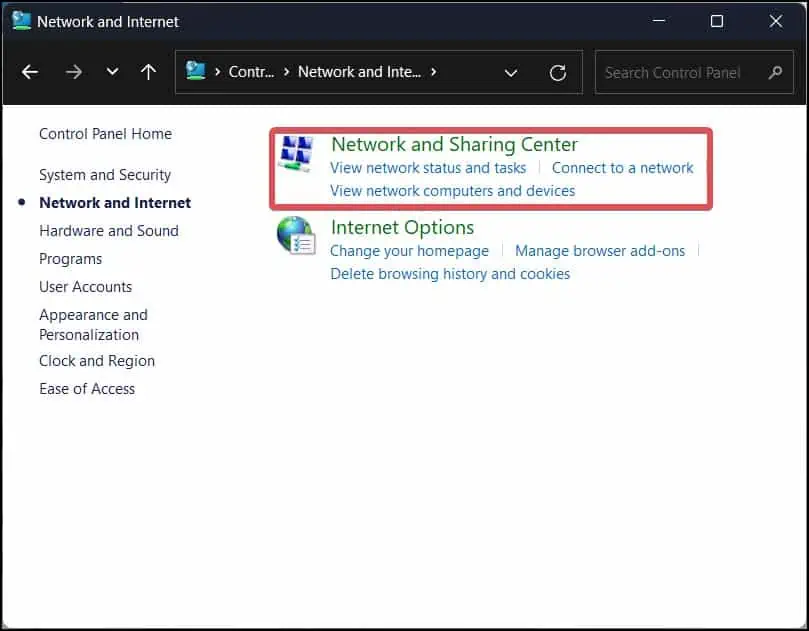
control, and hit enter to open the Control Panel.
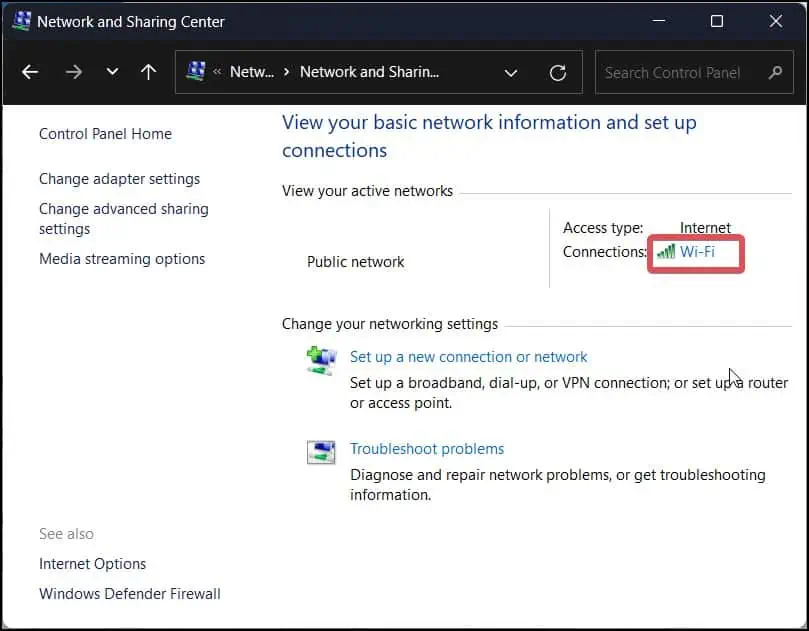
- Go to Network and internet > Network and sharing center.

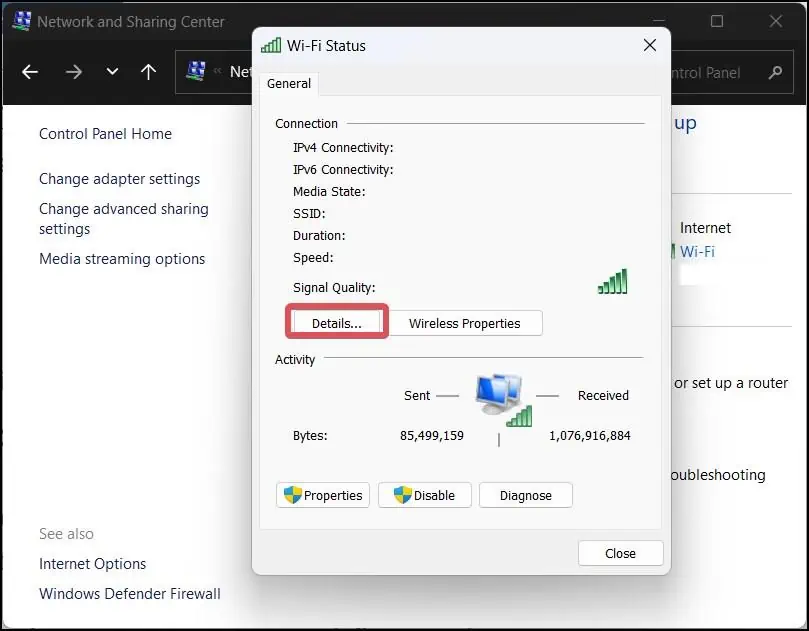
- Choose the Connection of whose you want to find the DNS.

- Go to the Details tab.

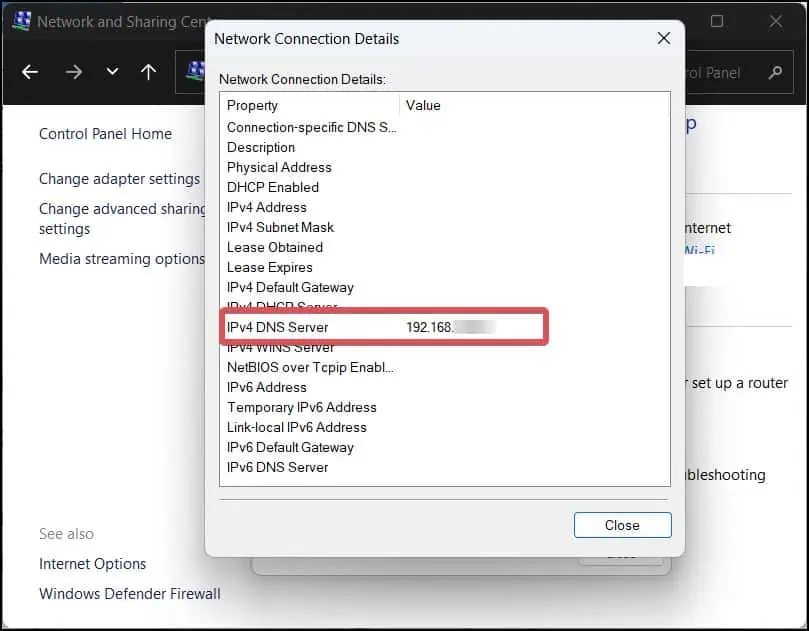
- Find the IPv4 DNS server under the Network connection details.

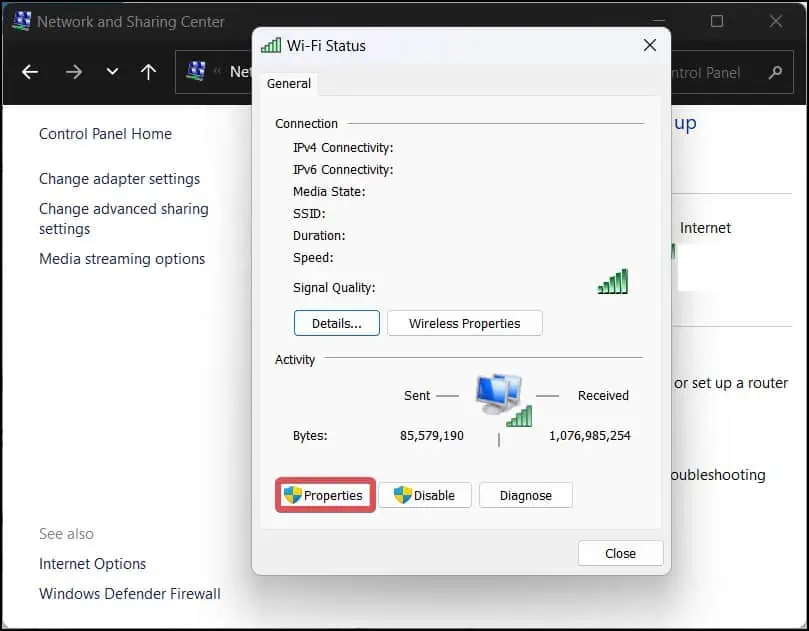
If you want to change the DNS to your preferred choice, you can do it from the Ethernet or Wi-fi Status section as well.
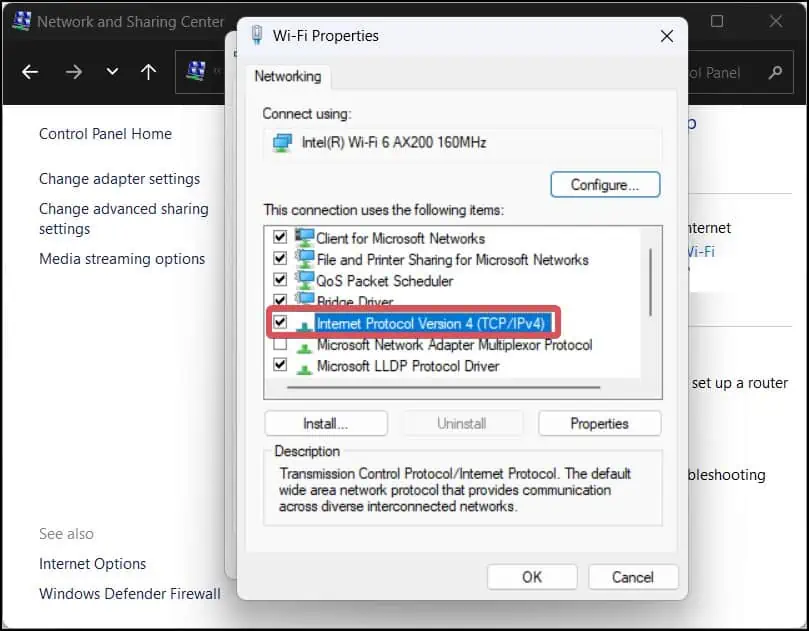
- Click the Properties button. Ethernet or Wi-fi Properties will open.

- Under the connection items, search for Internet Protocol Version 4 (TCP/IPv4).

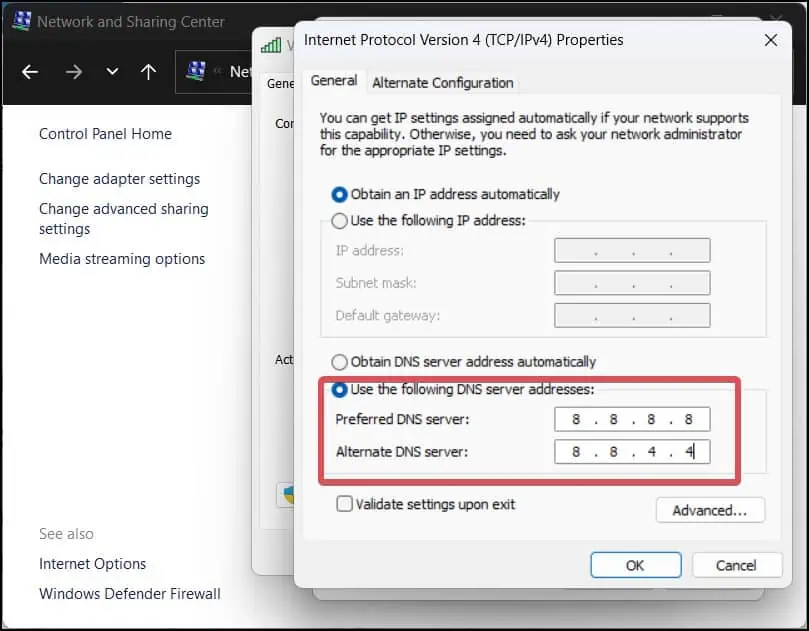
- Click on Use the following DNS server address.
- Add the DNS server address in the Preferred DNS server and Alternate DNS server field.

- Click on OK to save the changes.
Using PowerShell
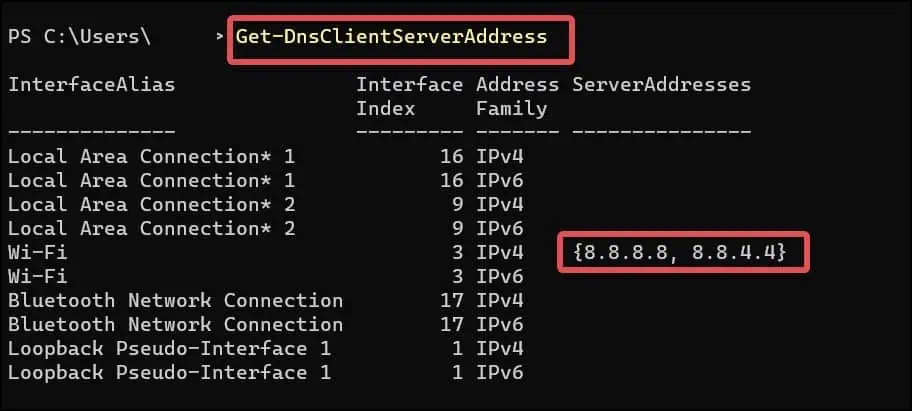
If you prefer using PowerShell, it is possible to find the DNS server using a cmdlet as well.
- Press Windows Key + R, type
powershell, and hit enter. - Now, you can use this cmdlet to check the DNS the device is using.
Get-DnsClientServerAddress
- Check the Server Address field for the connected Interface Alias.
You can also use the nslookup command for this purpose. This will only also give you the details of the DNS and its IP.
Check the DNS on your Router
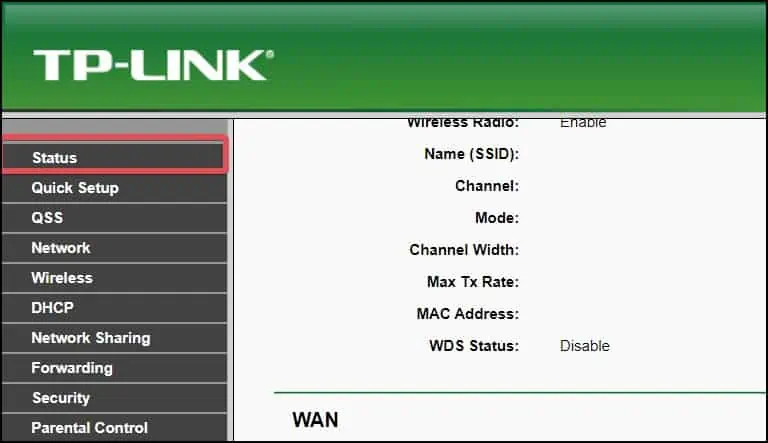
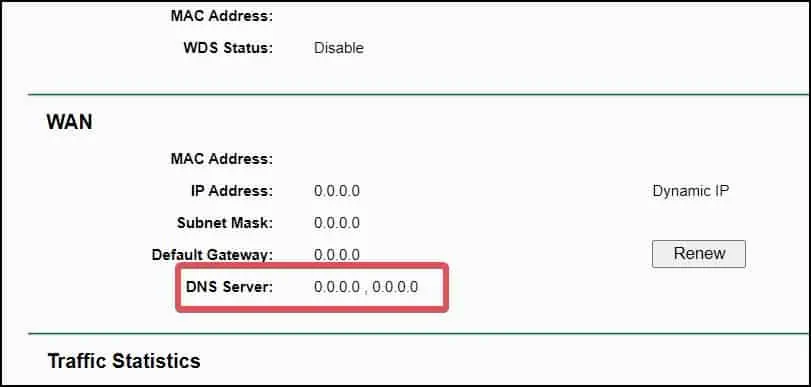
You can check the Primary and Secondary DNS from the Router’s settings as well. The routers use the ISP-assigned DNS server by default. However, you could also change it and make all the devices connected to the router work under the configured DNS.
- Open your Web browser and log in to the Router’s dashboard.
- Go to the Status Menu.

- Under the WAN section, check the DNS.


