The computer applications store their loading configuration and settings in the RAM. As the memory type used in RAM is much faster, it takes less time to load the program the next time after its configuration is stored in the physical memory.
So, using higher capacity RAM allows us to use more applications at the same time without any lag. But, when a significant amount of the cache files of these programs are loaded to the RAM, the available space for other important system processes may decrease. It will eventually cause the computer to become sluggish.
Thus, clearing the cache at regular intervals can free up the physical memory and improve your system performance, especially if you multitask. In this guide, we have prepared most of the possible ways to free up your RAM.
Clear Ram Cache on Windows
RAM does not have its own cache memory. Even if it does, it is only a few Kilobytes in size. The RAM cache is actually the cached files created by the applications and programs in your system that are loaded to the memory to load them faster.
When a number of applications run on the system, their cache file increases. As a result, the RAM is highly cached. However, the RAM being a volatile memory, does not store them permanently. As soon as the RAM loses power, its contents, including the cached files, are lost.
Thus, the most effective way to clear the RAM cache is restarting the system. Your RAM will be cleared automatically when you restart the computer.
However, the temporary files and another cache may be injected into the RAM as soon as the system boots up. And the RAM reaches the same cache state. On top of that, you may not always want to reboot the computer to just clear the RAM cache.
Clear Temporary Files
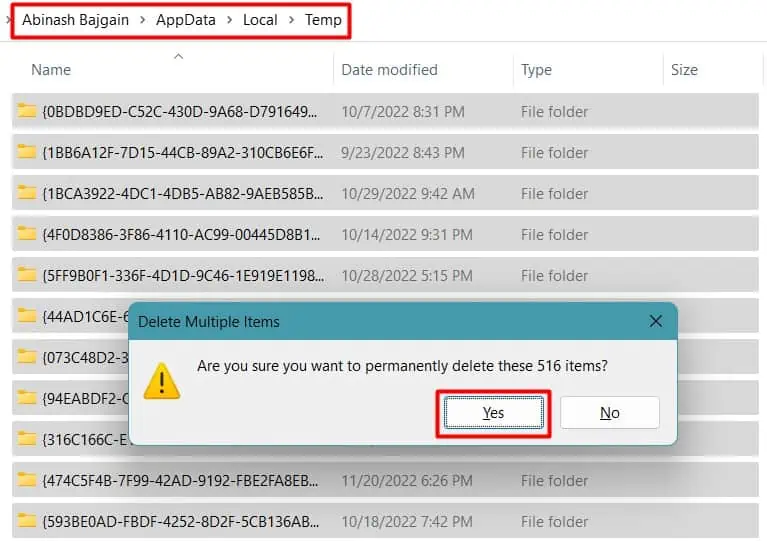
As mentioned earlier, whenever we run programs and applications on our PC, it stores its configurations and cache as temporary files in the drive. These files are loaded to the RAM as soon as the program is loaded after the system starts. These temporary files can cause the RAM cache to increase. Thus, you will have to remove them all.
- Open Run by pressing Windows + ‘R’ and type
temp. - Press Ctrl + ‘A’ to select all files and press the delete button.

- Similarly, type
%tmp%in the run dialog box and delete all its contents as well. - Do the same for the Prefetch folder by entering
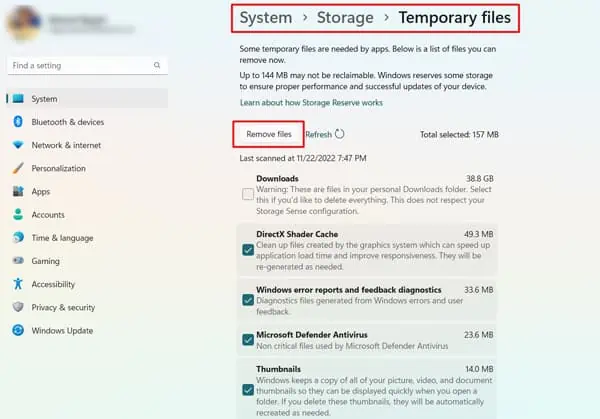
prefetchin the Run dialog box. - Press Windows + ‘I’ to open Settings.
- Navigate to System>Storage.
- Select Temporary files.

- Click on Remove files.

Restart your system to find the RAM cache cleared.
Use RAMMap
Windows has a separate application called RAMMap to monitor all the details of the physical memory. In addition to monitoring the RAM usage, cached memory, and other information, you can also clear the cached data from the RAM.
- Download RAMMap from Microsoft and extract the compressed file.
- Run the RAMMap application.
- Click on the Empty menu and select Empty Standby List. This will clear all the superfetch cache in the blocks of the memory module.

The RAM cache should be cleared after this.
Clear Page File
The pagefile is the space allotted in your hard drive that acts as virtual RAM when your physical memory starts filling up. All the cache and program configurations get stored in a file named pagefile.sys when the RAM space decreases.
But unlike RAM, its content may not get removed automatically. They can be loaded to the RAM for fasting working of the system. As a result, the RAM cache increases.
So, you will have to set it to clear the pagefile upon every restart.
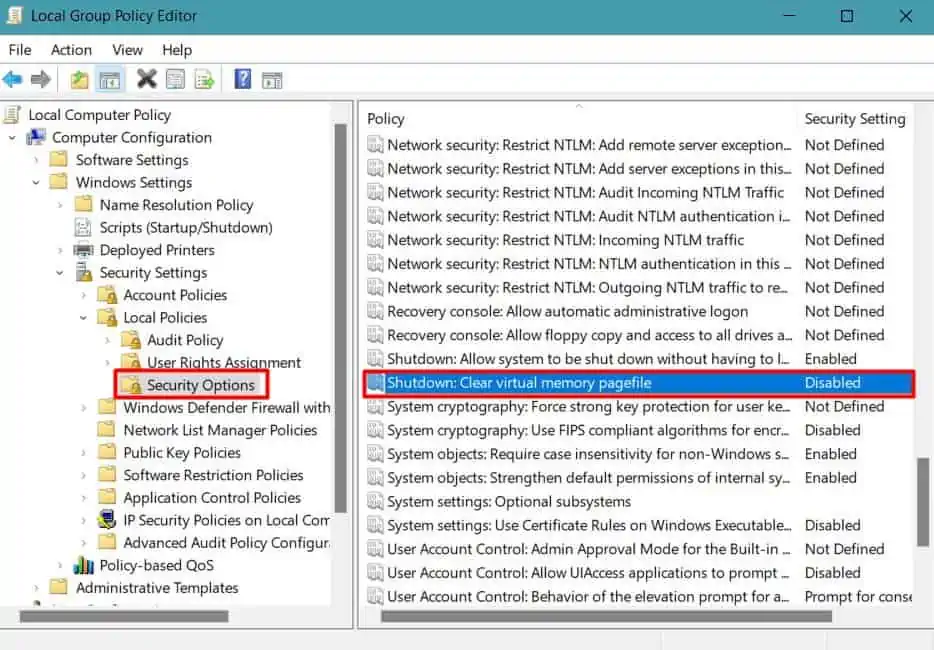
- Press Windows + ‘R’ and enter
gpedit.mscin Run to open Local Group Policy Editor. - Go to
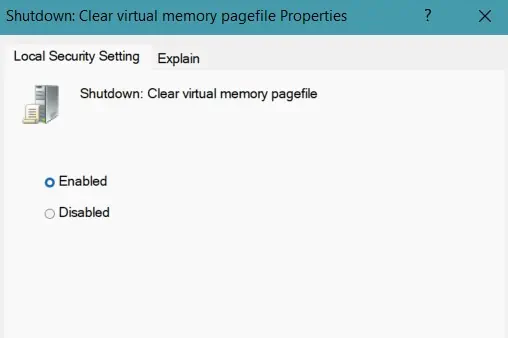
Computer Configuration/Windows Settings/Security Settings/Local Policies/Security Options. - Look for Shutdown: Clear virtual memory pagefile.

- Double-click on it and set it to Enabled.

Restart your PC to clear the page file.
Run a VBS Script
It can be quite difficult to identify individual programs that have stored their temporary files on the RAM. So, you can run a script in a .vbs format that clears the cached RAM when you run it.
Since the script requires you to enter the amount of cache to be cleared manually, you first need to see the value of cached RAM. Let’s move on to the whole process.
- Open Task Manager by pressing Ctrl + Shift + Esc.
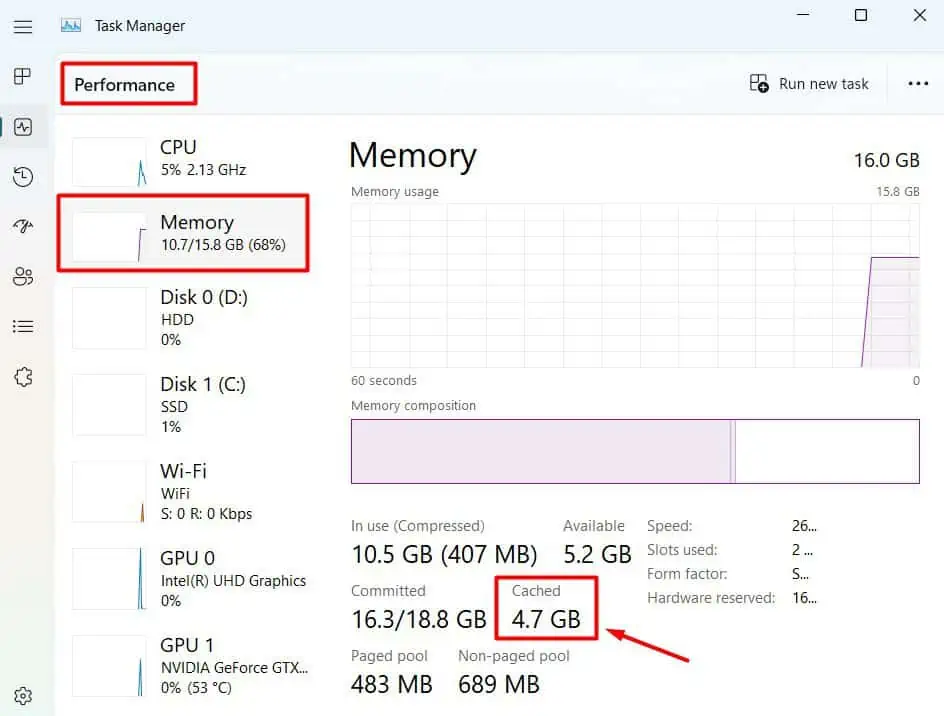
- Go to the Performance tab and select Memory.
- At the bottom, find the value under Cached and note it.

- Open Run by pressing Windows + ‘R’ and type
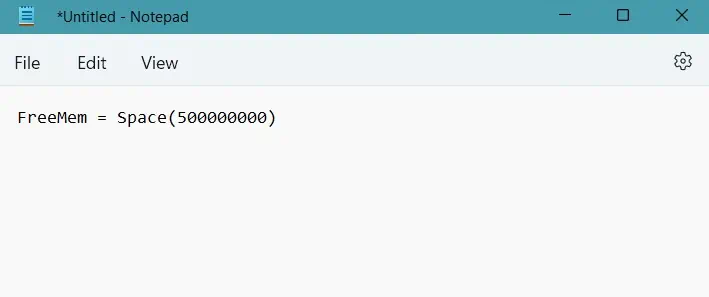
notepadto start a Notepad window. - Type the code
FreeMem = Space(500000000). This will clear 500 MB of RAM cache. If the value is different for you, change it accordingly by replacing 6 with the respective number.
- Press Ctrl + ‘S’ and save it with any name and
.vbsextension. - Open notepad again.
- Type the code
Mystring = (80000000)and save it with.vbsextension as well. - Run the first file followed by the second by double-clicking on them.
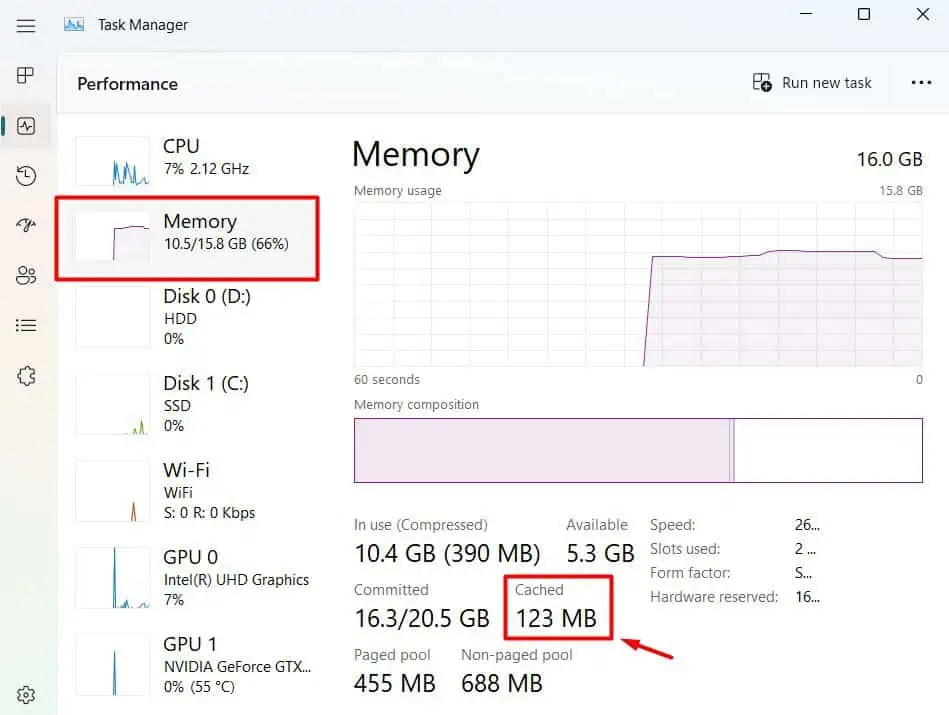
- Check the Cached RAM value in Task Manager.

You should find the cache cleared. However, the RAM cache will start increasing shortly, and hence the RAM usage, as the programs are continuously operating in the background.
So, before running this script, you should close any heavy programs from the task manager and also disable the startup applications.
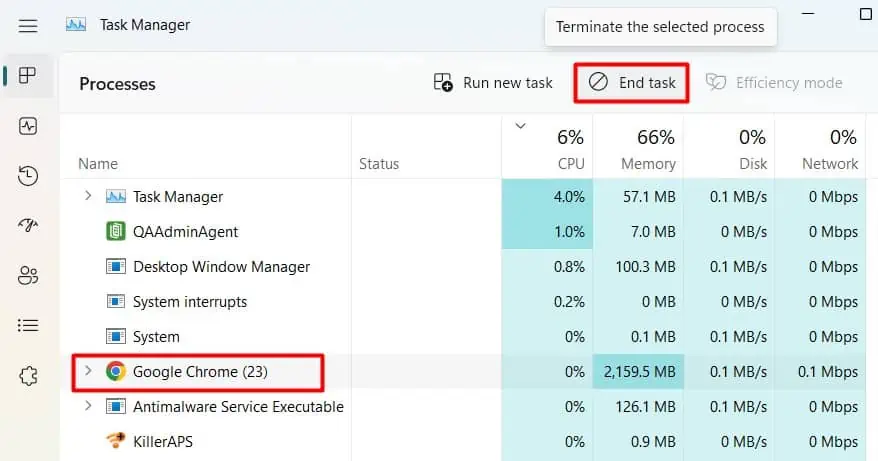
- Open Task Manager.
- Select the programs and click End Task.

- Similarly, go to Startup Apps.
- Select each program and click Disable.

Then, repeat the script mentioned earlier, and you should find it runs effectively to clear the cache.
Delete Cache of Most Used Programs
Some amount of RAM caching also occurs when the applications in the system create their individual cache files. So, deleting the cache in those individual programs can also clear the RAM cache.
For instance, you can clear your browser cache by going to browser history and deleting all the cache. You can do this for all those programs that you use frequently and have the option to clear the cache.
If you are looking to clear your RAM cache due to low memory availability and system lag, you can optimize your Windows PC. You can increase the pagefile size, perform a clean boot, disable startup applications, etc. We have prepared a dedicated guide to help you fix the lagging PC.

