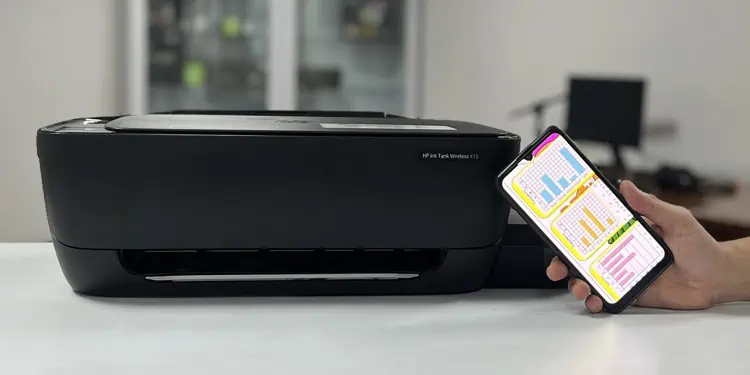
Both Android smartphones and iPhones have built-in wireless technology that allows printing without the need to install additional printer drivers. Android phones utilize the Print Service plugin, while iPhones use AirPrint. Furthermore, Android phone users have the option to connect their phone to a printer using an OTG cable.
Additionally, for both platforms, you can also use the printer app from your manufacturer for more systematic and personalized printing.
Connect Android SmartPhone to Printer
In order to connect your Android Smartphone to a printer, you should first connect both of them to the same Wi-Fi network.
Depending on the printer’s compatibility, you may opt to use a 2.4GHz or 5GHz network. I suggest you use the 2.4GHz one for better signal reception.
Once the wireless connection is set up, here’s how to connect and start printing from your smartphone.
Using the Default Wi-Fi Printing Service
Android smartphones come with a dedicated printer plugin to manage and carry out printing tasks efficiently. The built-in printer plugin supports a wide range of printer models and enables you to print wirelessly without the need for any additional softwares.
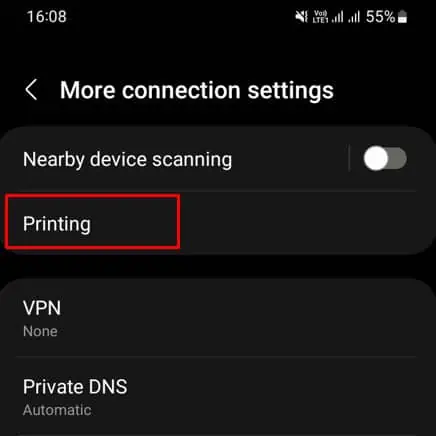
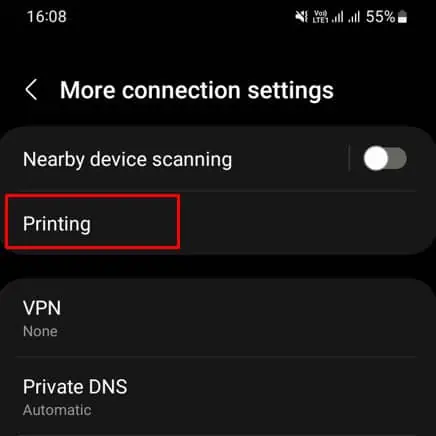
- Go to the Printing settings on your smartphone. It generally lies under the More connection settings.

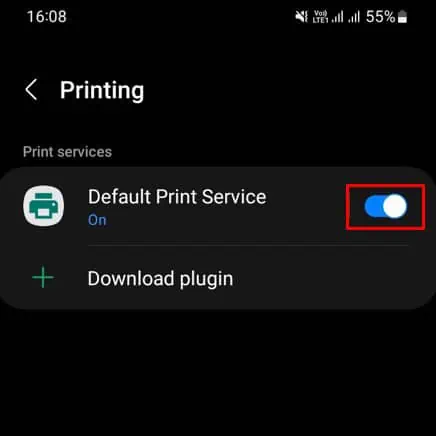
- Toggle on this service.

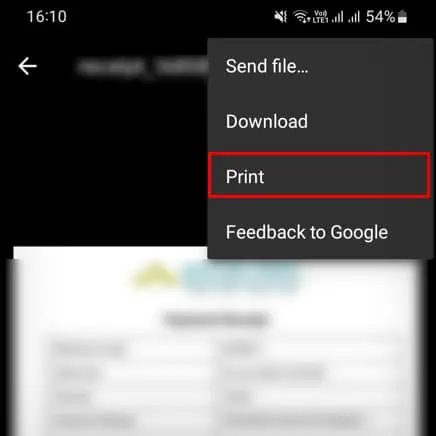
- Now open the document/image and select Print.

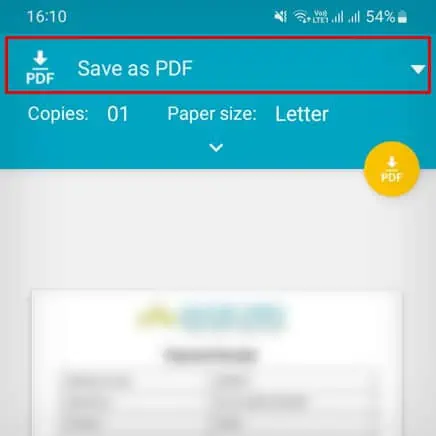
- Tap this area to select your printer.

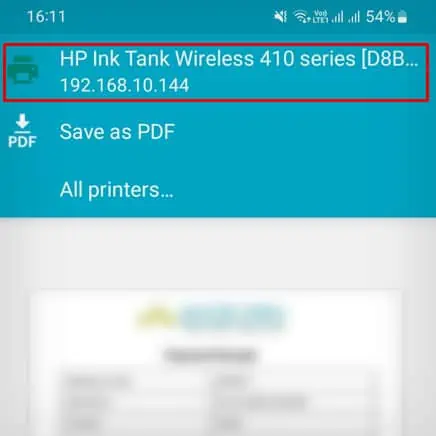
- Choose your wireless printer.

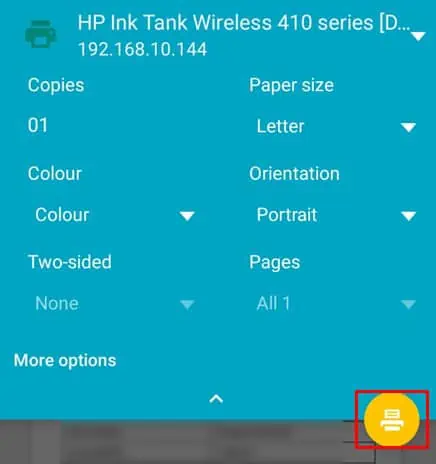
- Personalize your printout.
- Once you finalize the print settings, tap the Print icon.

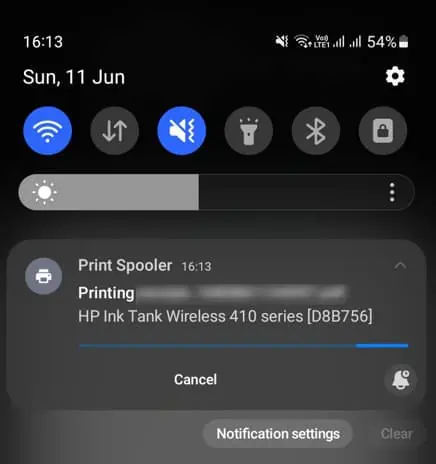
- You will see the ongoing printing process in the notification panel. You may tap Cancel to cancel printing.

Using an OTG Cable
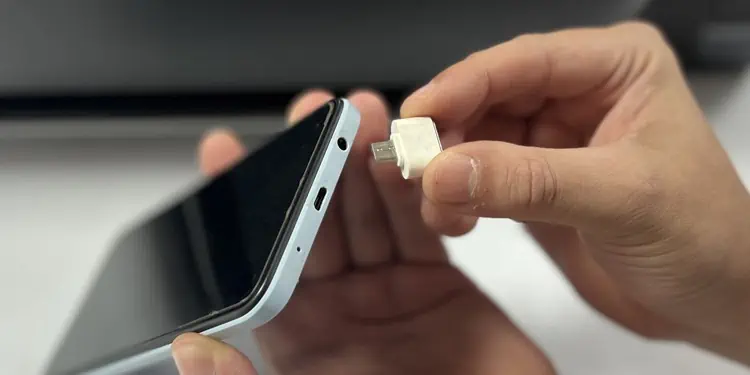
If your printer does not have wireless features, you can still connect it to your smartphone using an OTG (On-The-Go) cable. Depending upon whether your phone has a type B or type C port, you should first get a compatible OTG cable, then set up the connection and start printing.
You will also need to install a separate print service plugin from your manufacturer to use this method.
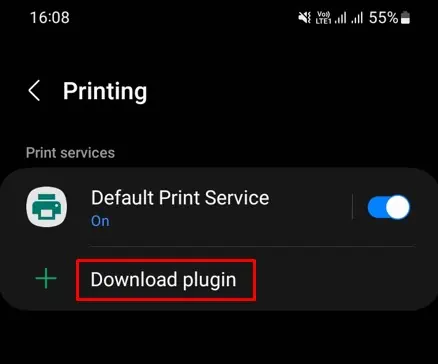
- Open Printing settings on your smartphone.

- Tap the Download plugin option.

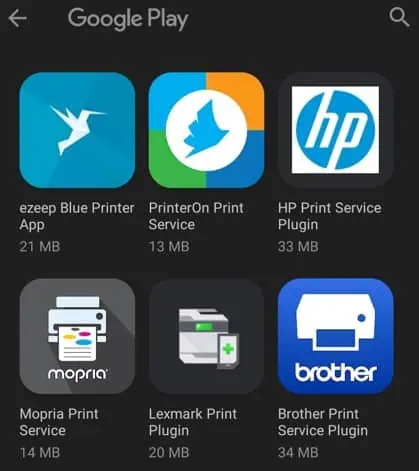
- Choose the plugin for your printer.

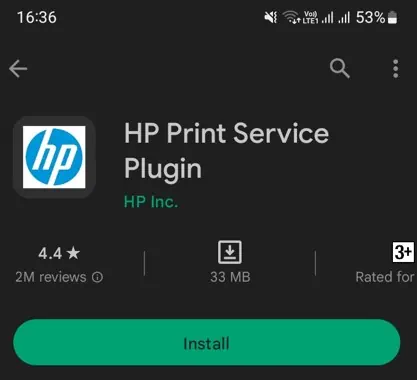
- Install the plugin.

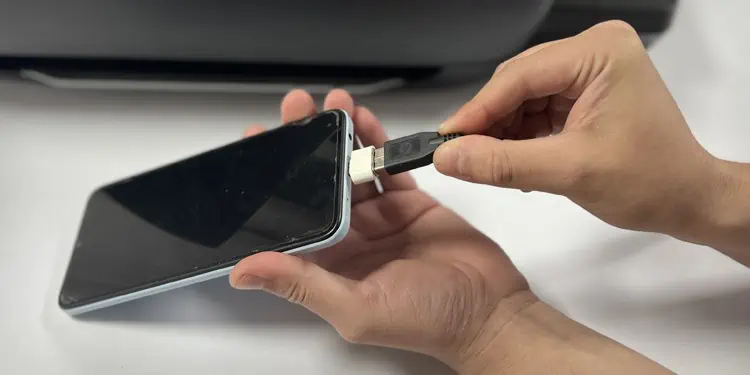
- Now connect the OTG cable to your phone.

- Then use the USB A-B cable of your printer to connect the OTG cable and printer.

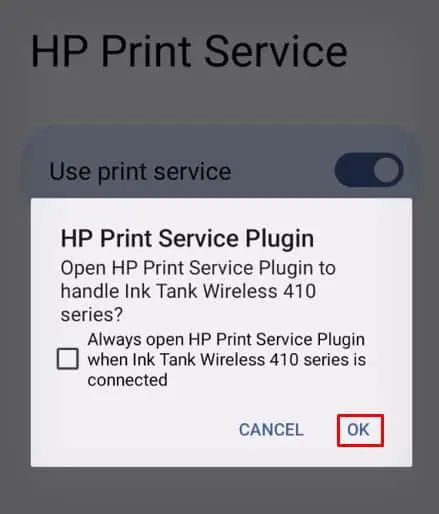
- Confirm the use of the plugin in the prompt that appears on your phone.

- Once installed, open the printable (image, document) and tap the Print option.
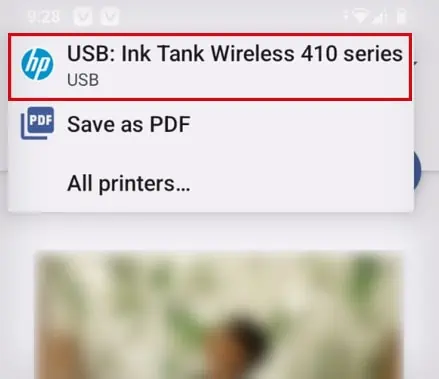
- Choose the USB printer.

- Make necessary changes to the print settings and tap the Print icon to get the printout.
Connect iPhone to Printer
Connecting your iPhone to the printer is pretty straightforward. Connect both iPhone and printer to a 2.4GHz Wi-Fi network first. Then either use AirPrint or a manufacturer-specific app to start printing.
Using AirPrint
Similar to the built-in printer plugin on Android smartphones, iPhones have an AirPrint feature. However, some printer model lacks this feature.
You can easily know if your printer has an AirPrint feature at the time of printing.
- Open the image/document you wish to print.
- Tap the Share icon.

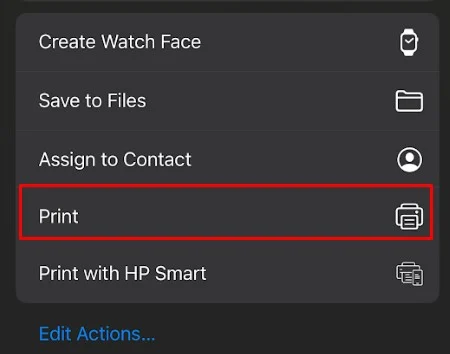
- Tap Print.

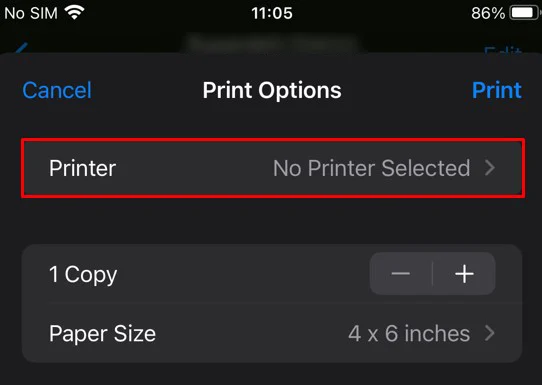
- Tap Printer.

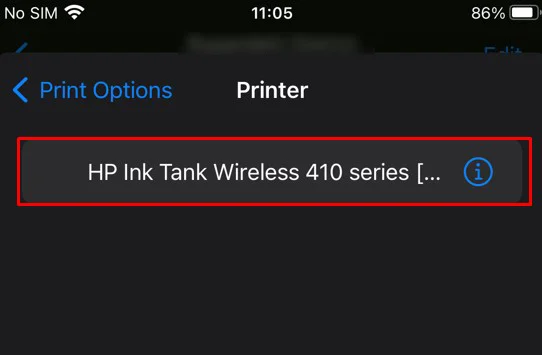
- Choose your printer. Your printer will only show up here if it has an AirPrint function.

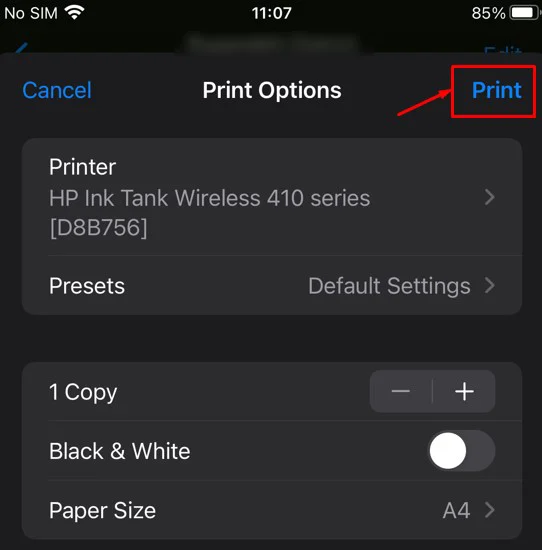
- Make necessary print adjustments.
- Tap Print.

Using Manufacturer’s App
If you are looking for more organized and personalized printing, you can also use the printer manufacturer’s app.
For instance, you have HP Smart for HP printers, Canon PRINT Inkjet/SELPHY for Canon printers, Brother iPrint&Scan for Brother printers, and Epson iPrint for Epson printers.

