The mouse is an external input device that controls the mouse pointer for easy navigation of your computer’s user interface. While laptops feature an inbuilt trackpad for controlling the mouse pointer, it isn’t as convenient to use as an actual mouse.
Nonetheless, you can connect just about any type of mouse to your laptop instead of using the trackpad. You can either use a wired or wireless mouse according to your liking, and there are different methods to connect them to your laptop.
Connecting Wired Mouse
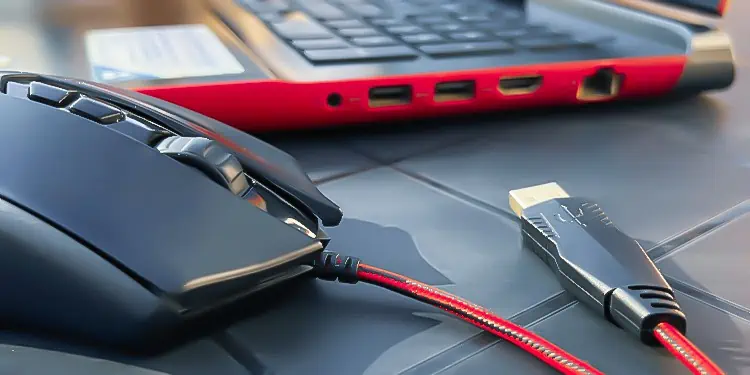
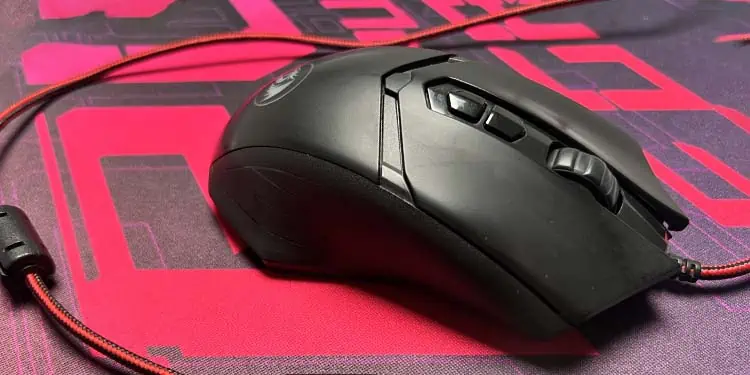
The wired mouse can be easily connected to your laptop by just plugging in the USB head to your laptop port. As soon as your system detects the new device, it will install the corresponding drivers for it. This means your mouse will start working right off the box after connecting.
You can also connect an older mouse that uses a PS/2 connector to your laptop. However, most laptops these days do not have PS/2 ports, so you might need to buy a USB to PS/2 adapter to support the connection.
Connecting RF Mouse With a Dongle
The RF mouse works wirelessly communicating with the computer via radio frequency. Most of the available RF mice use 2.4GHz radio frequency, but some more powerful and unique mice use 5 GHz frequency.
Nonetheless, all types of RF mice have a USB dongle with which to connect to your computer. To do so, you first need to make sure your wireless mouse has enough power supply. You should install a fresh set of batteries in it, or fully charge the battery if it is a rechargeable one.
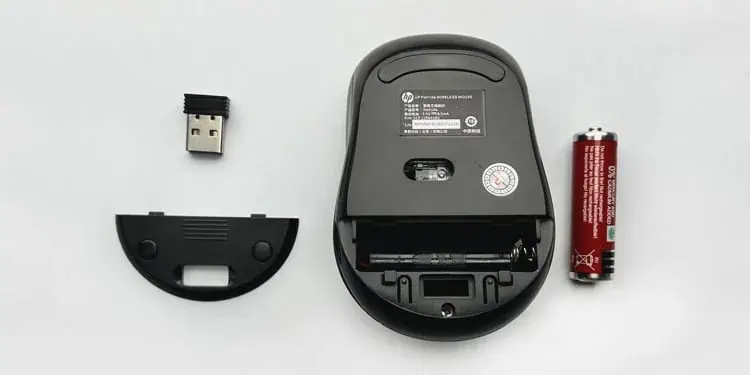
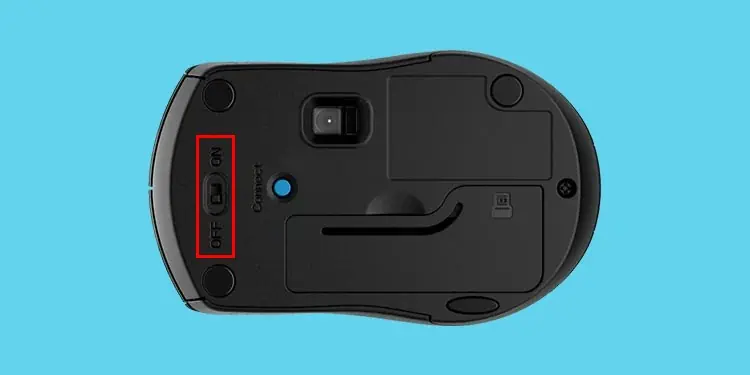
You can then plug the USB dongle into your laptop, and turn on your mouse by flicking a switch or button in it. (If you can’t find the turn-on switch in your mouse, you can look it up in the user instruction manual.)
Your mouse should start working as soon as you plug the dongle in and turn it on.
Connecting Bluetooth Mouse
The Bluetooth mouse, as the name suggests, uses Bluetooth technology to connect to your computer. Unlike the RF mouse, it has no USB dongle or such. However, your laptop does need to have Bluetooth to be able to connect with it.
While all modern laptops have Bluetooth built into them, if you have an older laptop with no Bluetooth, you will need to use a Bluetooth adapter.
After meeting the Bluetooth requirement, you should make sure your mouse has enough power. Then, you can connect your Bluetooth mouse to your laptop by pairing them.
- Turn on your Bluetooth mouse by flicking a switch or button in it. (Check with the instructions manual if you can’t find it.)

- Put the mouse in pairing mode. Depending on the Bluetooth mouse, you might need to do one of the following to put it in pairing mode.
- Hold a dedicated pairing button in the mouse for two seconds.
- Flick a switch in the mouse to enable pairing mode.
- Simultaneously hold the right, left, and middle mouse buttons for five seconds.
- If none of these enable pairing mode for you, check with your user instructions manual or manufacturer’s website.
- Press Windows + I on your laptop to open Settings.
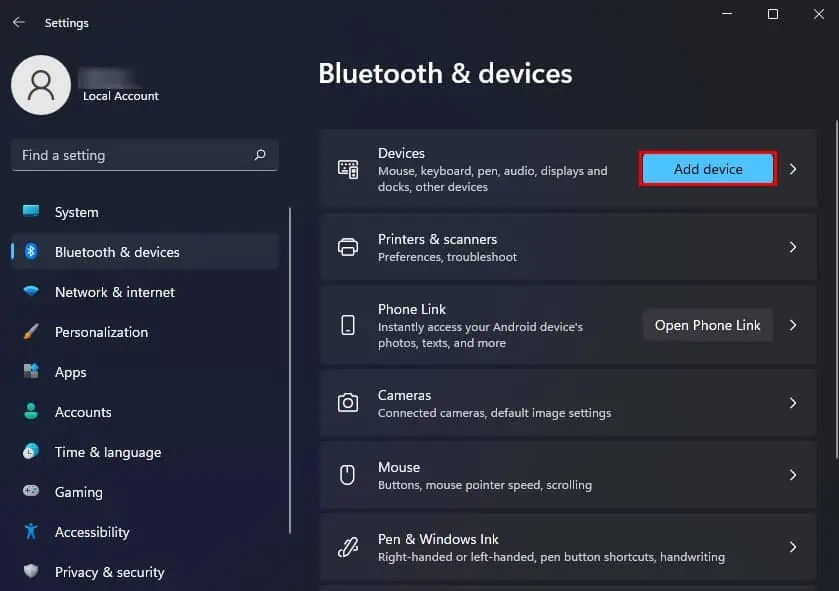
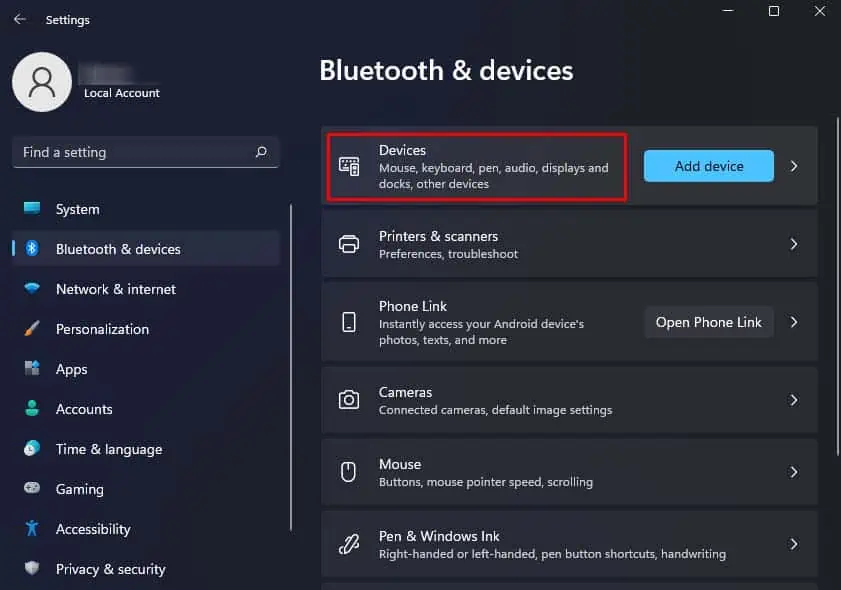
- Select Bluetooth & devices from the left sidebar and click on Add device.

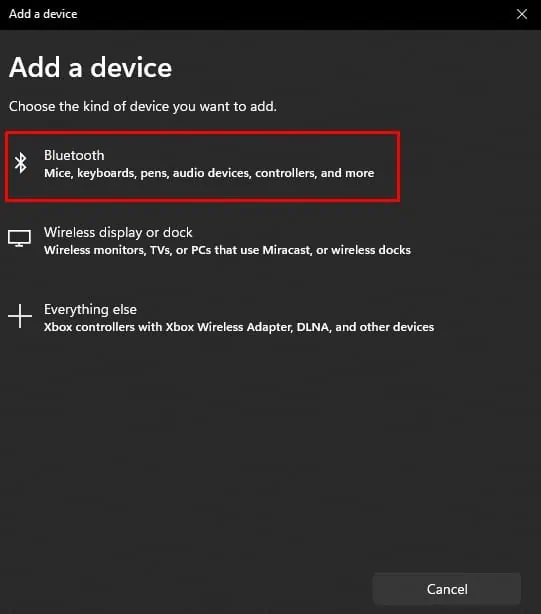
- In the Add a device window, choose Bluetooth.

- Click on your Bluetooth mouse that pops up, and it should start pairing.
- After the pairing completes, your Bluetooth mouse should start working.
Trouble Connecting Mouse to Laptop?
If the mouse doesn’t start working after connecting to your laptop, you should first check if it has any hardware issues. You can inspect the mouse to see if it has any physical damage and connect it to other computers to check if it works. If your mouse doesn’t work on any computer, then it is most likely malfunctioning due to a hardware issue.
In the case of a wired or RF mouse, you can also try some simple troubleshooting methods like replugging the mouse, using alternative ports or restarting the laptop with the mouse connected. You should also check your wired mouse’s cables for wear and tear.
If none of these methods work, you can try out the more advanced troubleshooting tips below.
Run Hardware and Devices Troubleshooter
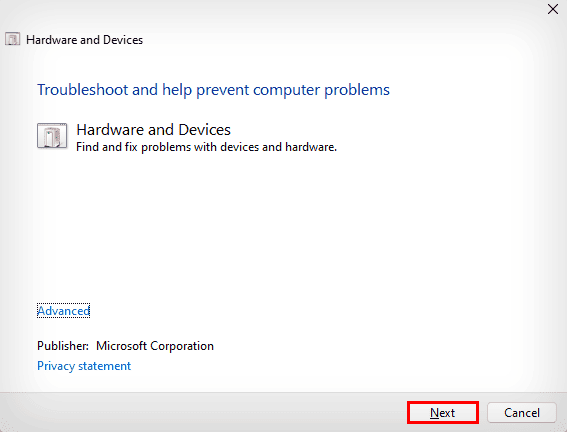
The Hardware and devices troubleshooter checks for and fixes any problems in your hardware and externally connected devices like the mouse. You can try running it to see if it helps fix your issue.
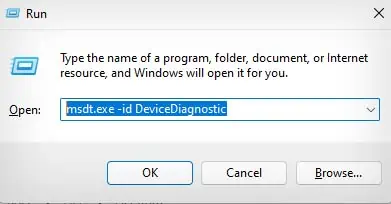
- Press the Windows key + R key to open the Run Dialog box.
- Type
msdt.exe -id DeviceDiagnosticand press Enter to open Hardware and Devices Troubleshooter.
- Select Next to run the troubleshooter.

- Follow the on-screen instructions to complete the troubleshooting process.
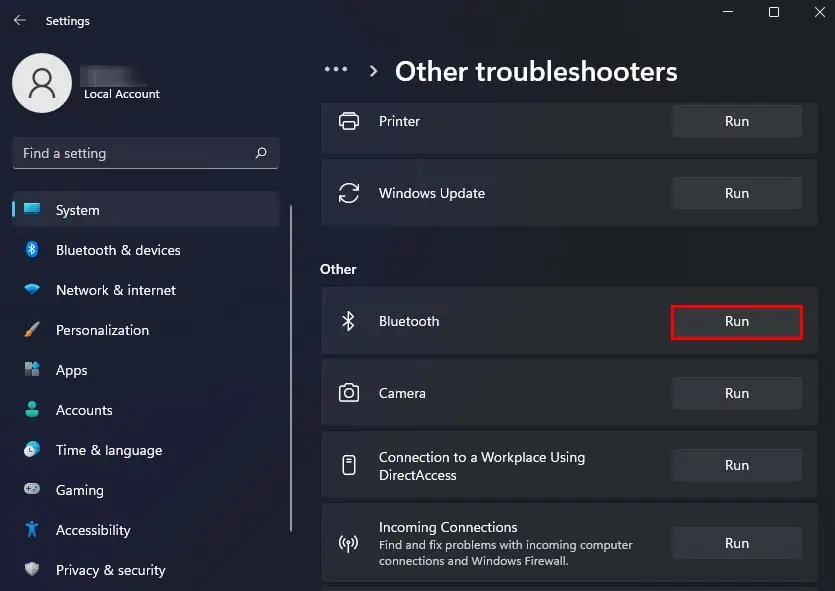
Additionally, if it is your Bluetooth mouse that is not working, you can also try running the Bluetooth troubleshooter.
- Press Windows + I hotkey to open Settings.
- Go to System > Troubleshoot > Other troubleshooters.

- Locate the Bluetooth troubleshooter and click on Run.
- Follow the on-screen instructions to troubleshoot your Bluetooth.
Reinstall Mouse Driver
The mouse driver acts as the bridge of communication between your mouse and the system. If your mouse driver was incorrectly installed when connecting to your laptop, your mouse can stop working.
- Launch the Run box by pressing Windows + R.
- Type
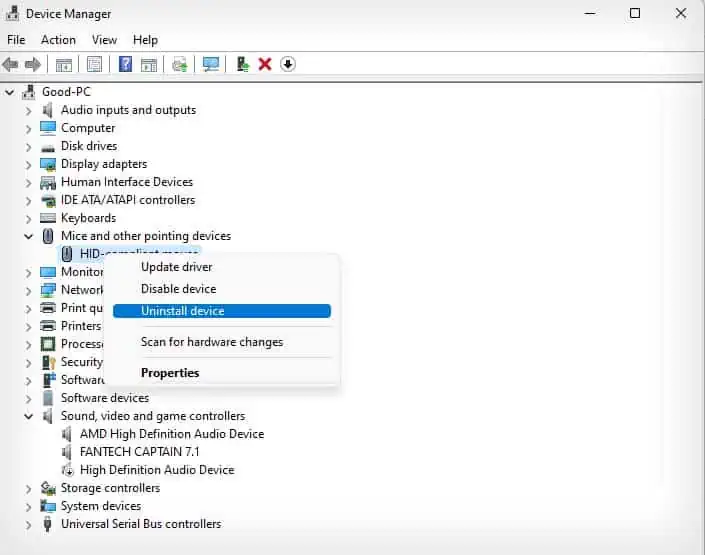
devmgmt.mscand press Enter to open Device Manager. - Double-click on the Mice and other pointing devices tab, and right-click your mouse driver. (If the mouse driver is disabled, you can click on Enable device to enable it.)

- Select Uninstall device and click on Uninstall again.
- Restart your PC to automatically reinstall the mouse driver.
Re-pair Your Bluetooth Mouse
In the case of a Bluetooth mouse, you cannot really replug the mouse or use alternate ports. However, you can try to pair your mouse and laptop again to see if it helps fix your mouse issues.
- Launch Settings by pressing Windows + I.
- Go to Bluetooth & devices and click on Devices.

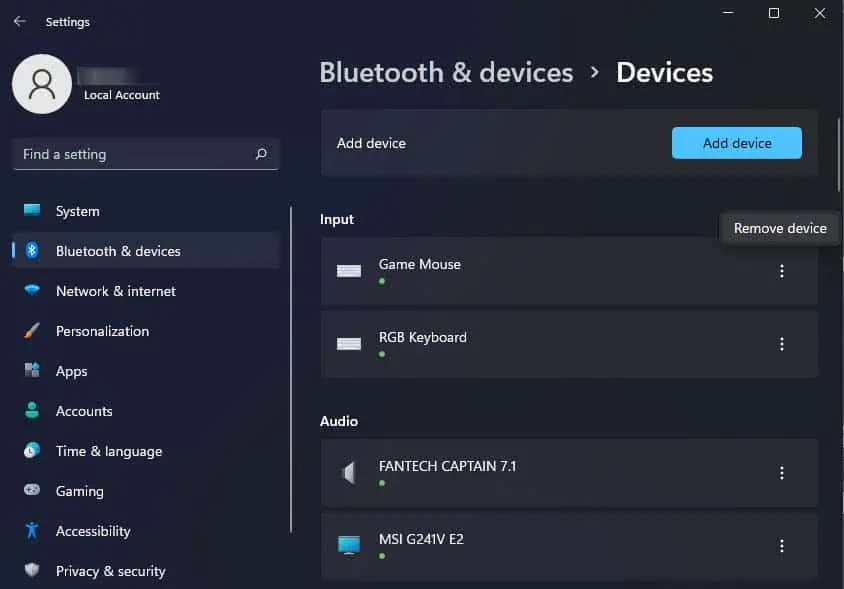
- Locate your Bluetooth mouse, and click on the vertical ellipses beside it.

- Select Remove device and click on Yes.
- Pair your Bluetooth mouse with your laptop again.

