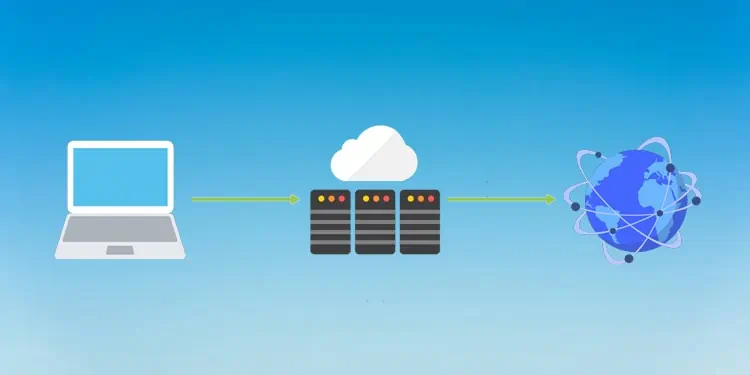
A proxy server can serve various purposes, from disguising traffic origin and caching to acting as a firewall. While they’re generally not the best for security, they’re handy for other purposes like bypassing geo-restrictions and speeding up your connection.
Assuming you have the necessary credentials (Proxy Server Address and IP Address), or the address to a Proxy Configuration Script, the steps we’ve listed in this article will guide you to connect to a proxy server easily on various platforms.
How to Set Up A Proxy On Windows
Here are the ways to connect to a proxy server on Windows:
Automatic Proxy Setup
With Web Proxy Auto-Discovery (WPAD), the system tries to locate a proxy configuration script through the WebProxy class in the following order:
WinINet function (InternetQueryOption) > DHCP Server > DNS
If a script is found, it’s downloaded, compiled, and run, and an appropriate proxy server is used to send requests on behalf of the system. Assuming the scripts are available, this is the easiest way to set up a proxy, as you can see. Here’s how you can enable automatic proxy detection:
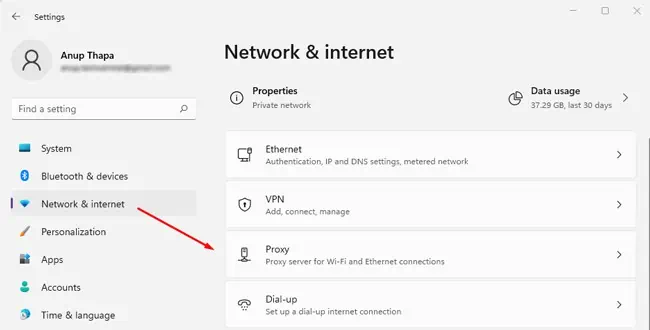
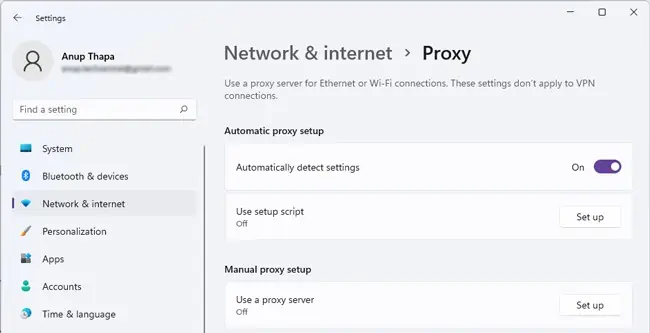
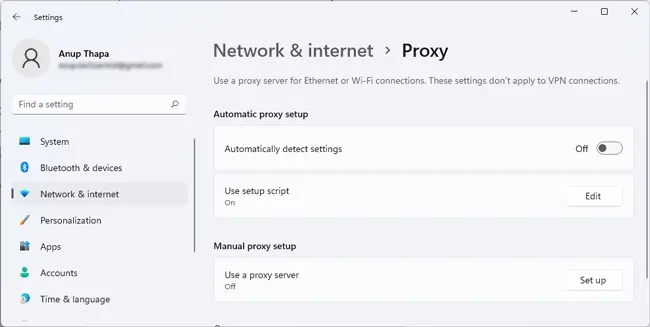
- Press Win + I and select Network & Internet > Proxy.

- Enable the Automatically detect settings option.

Proxy Setup With Script
If you know the address of the proxy configuration scripts we discussed earlier, you can also use it to set up the proxy directly. This will be useful if automatic detection doesn’t work. Here’s how to connect to a proxy server with this method:
- Press Win + I and navigate to Network & Internet > Proxy.
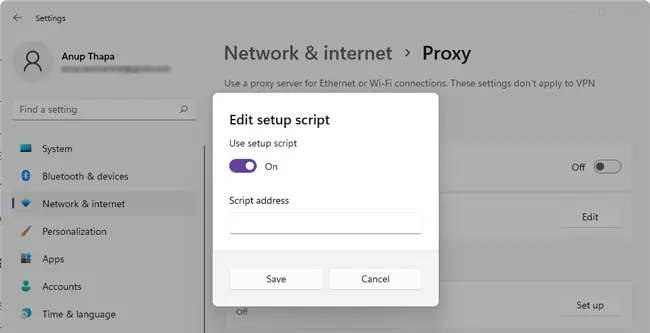
- In the Use setup script section, click on Set up.

- Toggle the button on, enter the script address, and press Save.
Manual Setup With Server IP
The most common proxy setup method is directly using a proxy server IP address and port for manual setup. Here’s how to connect to a proxy server using this method:
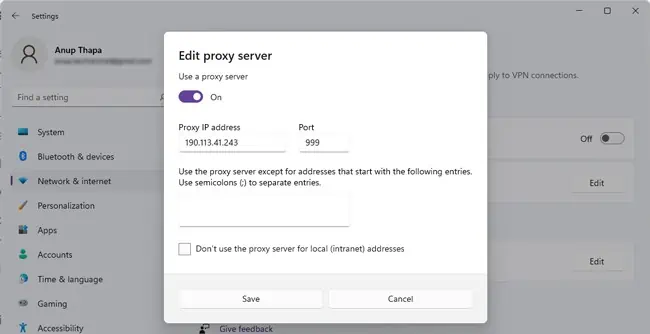
- Press Win + I and navigate to Network & Internet > Proxy.
- Under Manual proxy setup, click on Set up.

- Toggle on the button and enter the Proxy IP address and port.
- If you want to specify addresses to not use the proxy for, you can enter them in the box and separate the entries with semicolons.

- Additionally, you can enable the Don’t use proxy server for local addresses option if necessary.
- Review the configurations and press Save.
Set Up Proxy For VPN
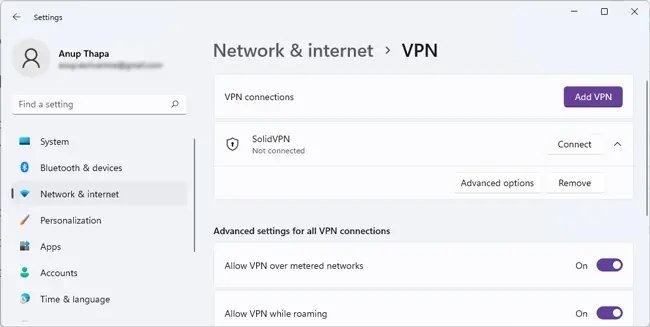
Windows Proxy settings don’t directly apply in the case of VPN connections. You must go to the VPN’s settings page and configure the proxy again separately. Here’s how you can do so:
- Press Win + I and select Network & Internet > VPN.
- Select the VPN connection and click on Advanced options.

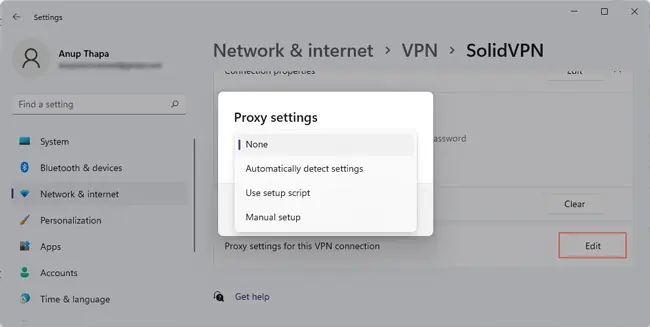
- In the proxy settings for this VPN connection section, click on Edit.

- Set up the proxy using your preferred method. The steps are the same as above.
Connect To A Proxy On Mac
Similar to Windows, Mac offers options for both automatic and manual proxy server setup. Here’s how to connect to a proxy server on macOS:
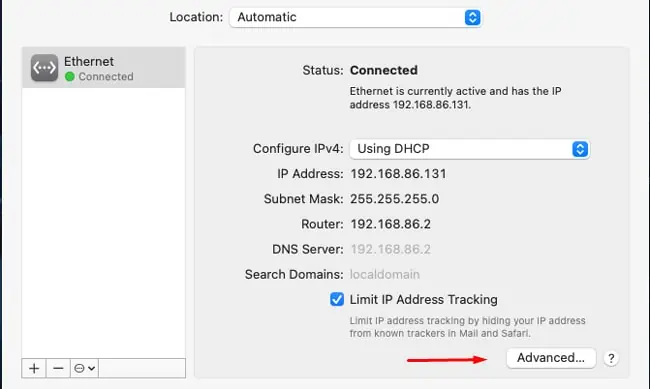
- Click on the Apple Menu and select System Preferences > Network.
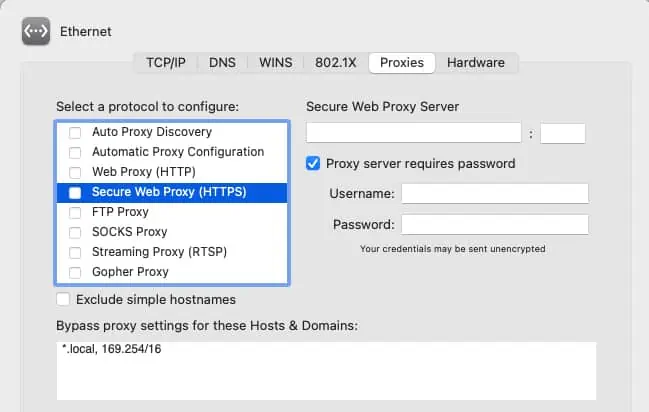
- Select Ethernet or Wi-Fi and go to Advanced > Proxies.

- Select a protocol to configure:
- Select Auto Proxy Discovery for automatic configuration.
- Select Automatic Proxy Configuration to use a .pac file and enter its URL.
- Select Secure Web Proxy (HTTPS), SOCKS Proxy, or any of the remaining options to manually set up the proxy server’s IP address and port.
- If the proxy server requires authentication, enable the Proxy server requires password option and enter the username and password.

- If you don’t want to use the proxy for certain addresses, you can enter them in the Bypass proxy settings box.
- Review the configurations and press OK.
Connect To A Proxy On Linux
On Ubuntu, you can go to Settings > Network > Network Proxy and easily set up the proxy via the GUI. However, a more universal method across most distros is to set up persistent proxies by setting environment variables.
1. First, use sudo nano /etc/environment to open the environment file. Add the appropriate lines (both lower and upper case versions) for the proxy type you’re trying to set up. For instance, we’ve set up an HTTPS proxy, as an example in the picture shown below.
http_proxy="http://<proxyserver>:<portno>/"
https_proxy="http://<proxyserver>:<portno>/"
ftp_proxy="http://<proxyserver>:<portno>/"
no_proxy="localhost,127.0.0.1,localaddress,.localdomain.com"
HTTP_PROXY="http://<proxyserver>:<portno>/"
HTTPS_PROXY="http://<proxyserver>:<portno>/"
FTP_PROXY="http://<proxyserver>:<portno>/"
NO_PROXY="localhost,127.0.0.1,localaddress,.localdomain.com"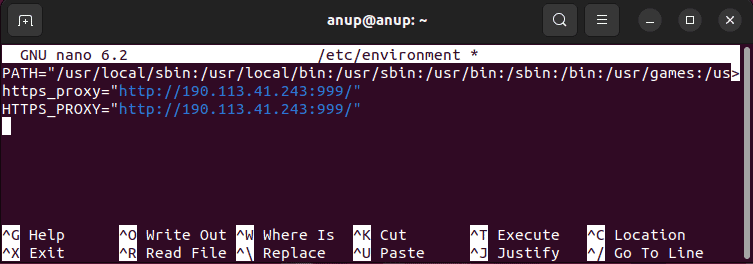
2. Additionally, you should also create a file in /etc/apt/apt.conf.d/ called 95proxies with the following contents so that the proxy will be applicable for apt commands as well:
Acquire::http::proxy "http://<proxyserver>:<portno>/";
Acquire::ftp::proxy "ftp://<proxyserver>:<portno>/";
Acquire::https::proxy "https://<proxyserver>:<portno>/";
3. Restart your system and check if the proxy is working.
Connect To A Proxy On Android
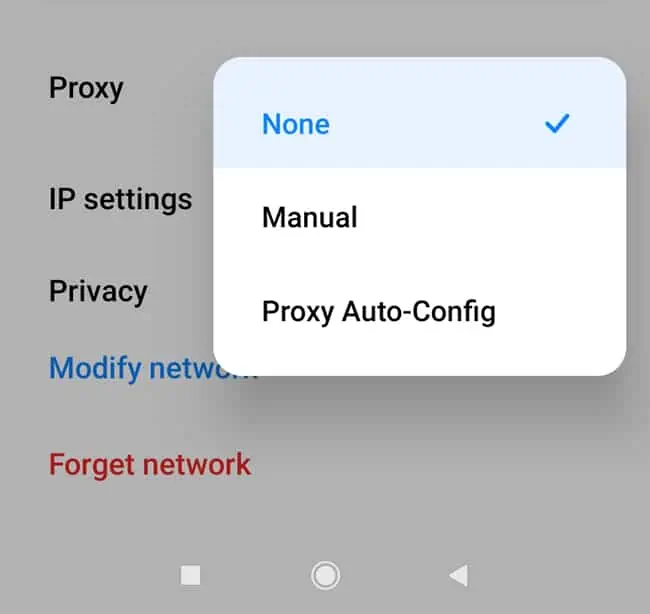
Android requires you to configure proxy settings for individual networks. And as on other platforms, you can use a PAC file for automatic configuration or set up the proxy manually. Here’s how to connect to a proxy server with either of these methods:
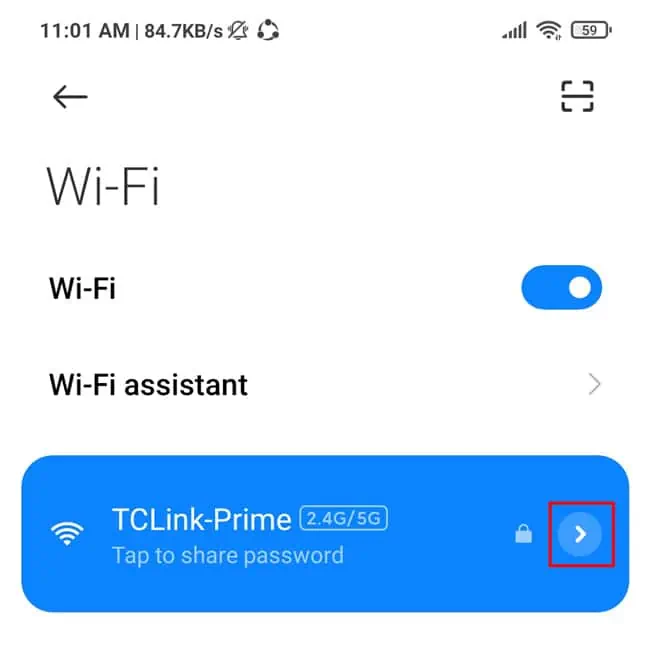
- Go to Settings > WiFi.

- Tap the Network Details arrow next to the network you want to set up the proxy for.
- Scroll down to Proxy and select Manual or Proxy Auto-Config as you prefer.

Connect To A Proxy On iOS
Here’s how to connect to a proxy server on iOS:
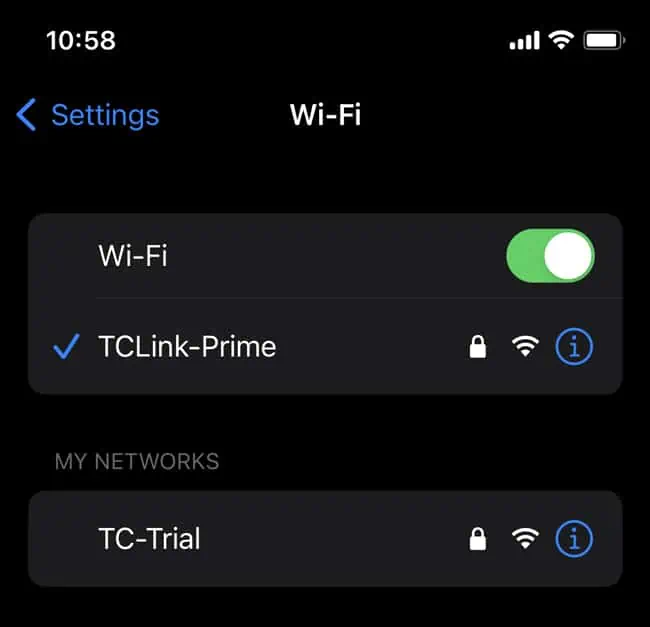
- Go to Settings > Wi-Fi.

- Tap the network you want to set up the proxy for.
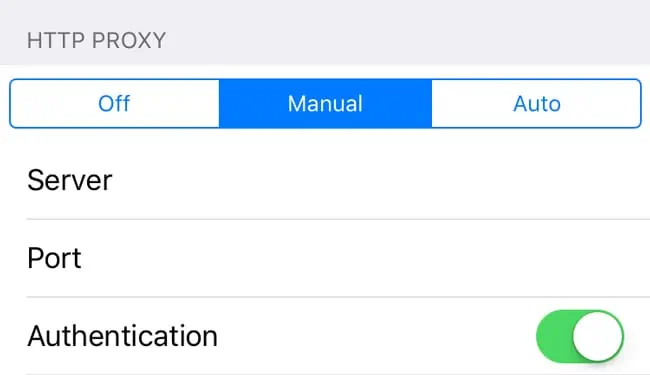
- Select Manual or Automatic as you prefer.

Set Up A Proxy Through A Browser
You can also access the proxy setup page from a browser’s settings, as browsers generally just redirect you to the system proxy settings. But some browsers like Firefox allow manual proxy configuration just for the browser traffic. Here are the steps for this method:
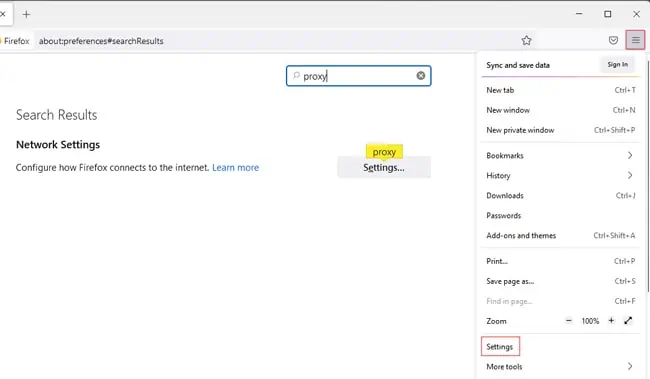
- Launch the browser and open Settings.

- Enter proxy in the search bar or scroll down to the Network Settings section and click on Settings.
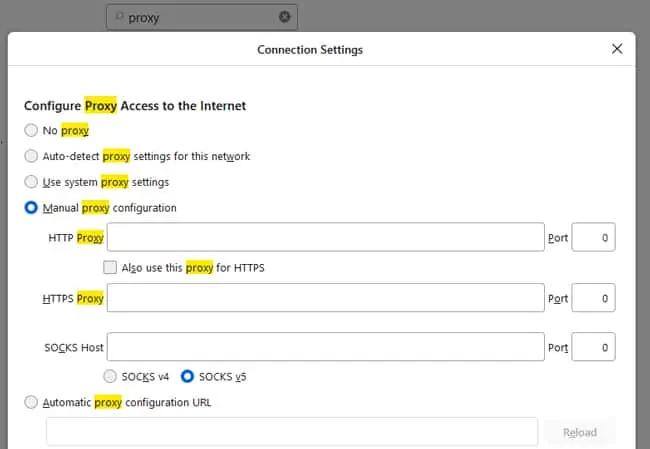
- You can choose to use system proxy settings, auto-detect proxy settings, auto-configure with a URL, or enter the values to configure manually.

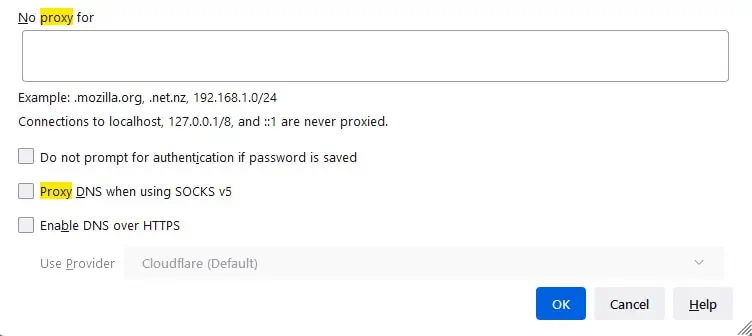
- You can also specify which connections are not proxied and configure additional options like DNS over HTTPS.

- Review the configurations and press OK.
How To Connect To A Proxy Server on PS4
First, set up the proxy server on your Windows or Mac system. Once that’s done, note the computer’s IP address and port number of the proxy and follow the steps listed below to configure your PS4 to use the proxy server on the computer:
- Go to Settings > Network > Connect to the Internet.
- Select the connection method (wired or wireless) and select Custom.
- If you selected WiFi, select your WiFi network and enter its password.
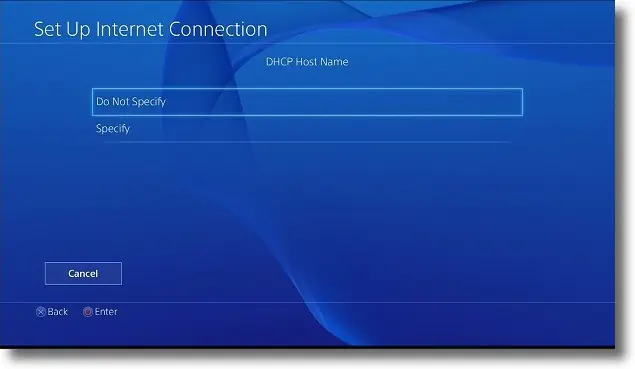
- In the DHCP Host Name screen, select Do not specify.

- Leave DNS Settings and MTU Settings to Automatic.
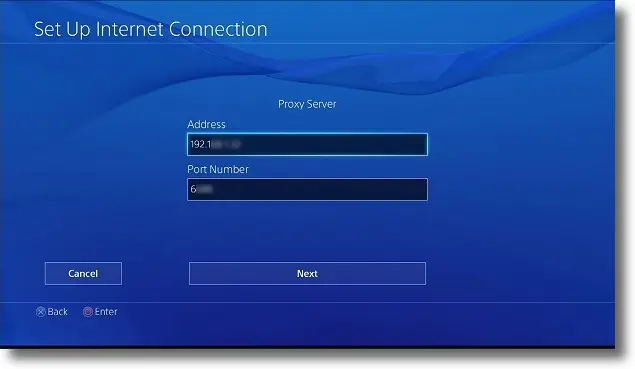
- Enter the Proxy Server Address and Port No and press Next.

- Scroll to the right and save the settings.
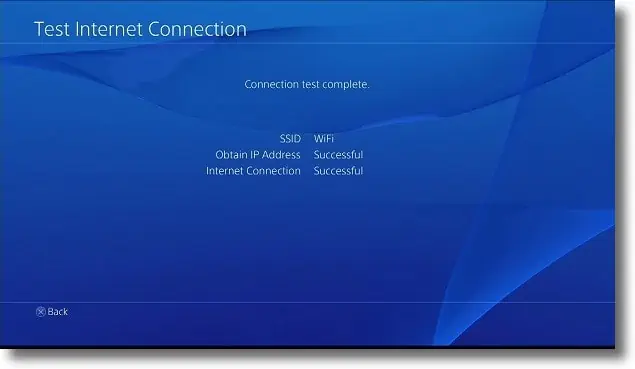
- You should test the proxy connection now. Assuming the computer is powered on, and the proxy server is online, things should proceed smoothly.


