Most of us have connected a single monitor to a laptop for extending our working space. Just like that, attaching dual, triple, or multiple screens is also extremely easy!
But before moving forward, you need to check the compatible ports and adjust the screen positions. Also, it’s important to configure the projection settings once you’ve successfully established the connection. Without further delay, let’s jump into the step-by-step guide on how to connect two monitors to a laptop.
Check Compatibility
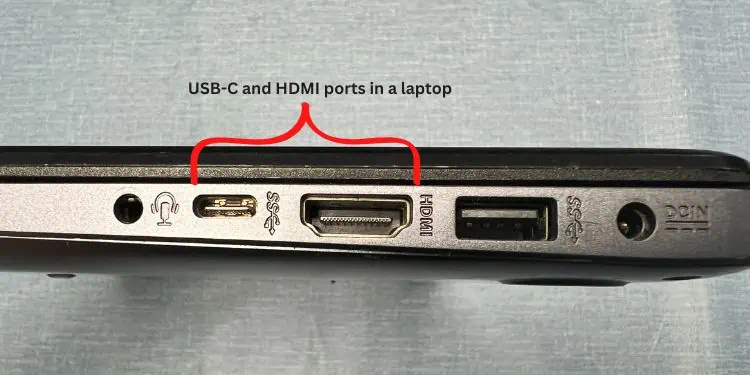
Firstly, it’s essential to know how you will connect the two monitors to your laptop. You may directly connect to the graphics ports, daisy chain the displays, or use a docking station/adapter.
Most laptops come with just one or two output monitor ports. Among them, HDMI and USB-C are the most common interfaces. However, if you have installed a discrete graphics card, you’ll get a few more options.
If your laptop supports two or more monitor connections, you can directly attach them using the right cables and adapters. But before that, kindly check whether the monitor is compatible with the output ports on your GPU.
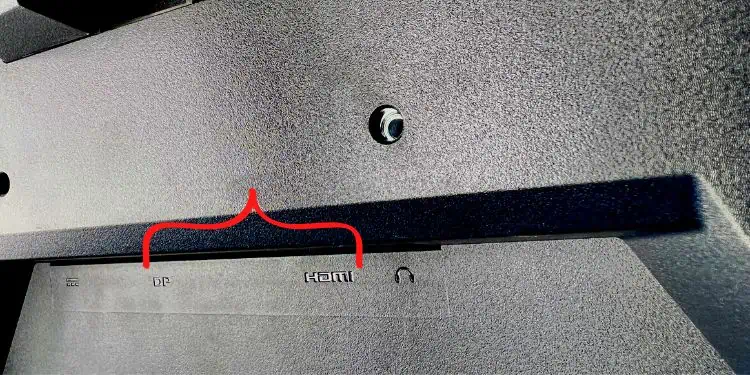
For daisy chaining, ensure the laptop and primary display supports DisplayPort 1.2 or Thunderbolt output ports (with MST). For a docking station, the system requires a DisplayPort over USB-C (3.1) interface.
Lastly, HDMI splitters are just for duplicating screens. Thus, if you’re opting to extend the display, it’s best to get an appropriate adapter or docking station. For example, you can use a USB-to-HDMI adapter to attach one monitor and directly join another through HDMI if your output device only supports HDMI.
Note: Since Miracast only lets you connect one additional monitor, it isn’t feasible for joining multiple screens. Instead, you need to join one display wirelessly and another using a compatible cable. Otherwise, you may pick a desirable third-party application for mirroring your notebook computer.
Adjust Position
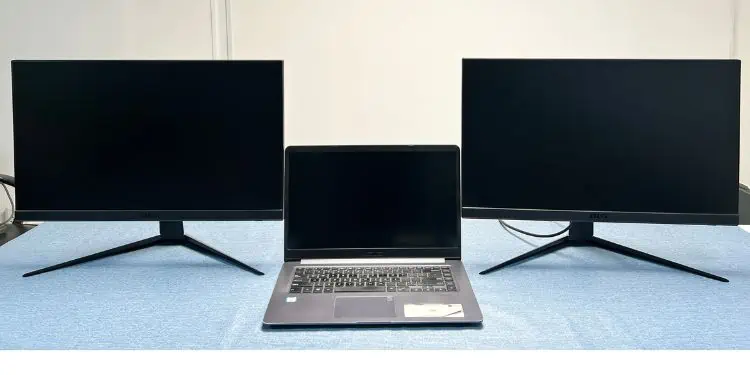
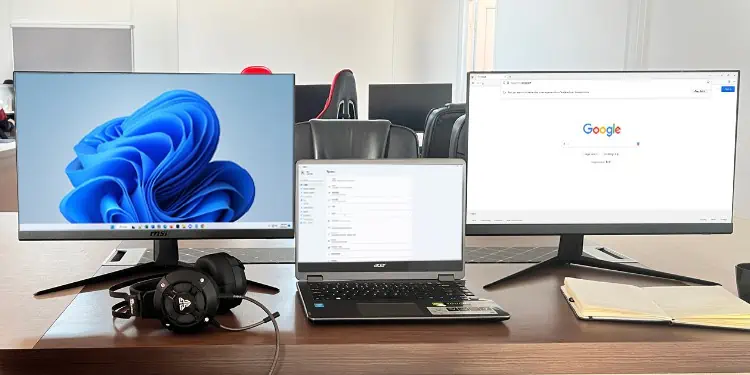
The second step is to position your laptop and monitors. While this is entirely based on your preference, we recommend keeping the primary screen (laptop) in the middle for better viewing and ergonomics.
You may even opt for keeping the laptop on the left-most side followed by the two external displays. This can come in handy when you want to close the lid and continue working on the dual monitor setup.
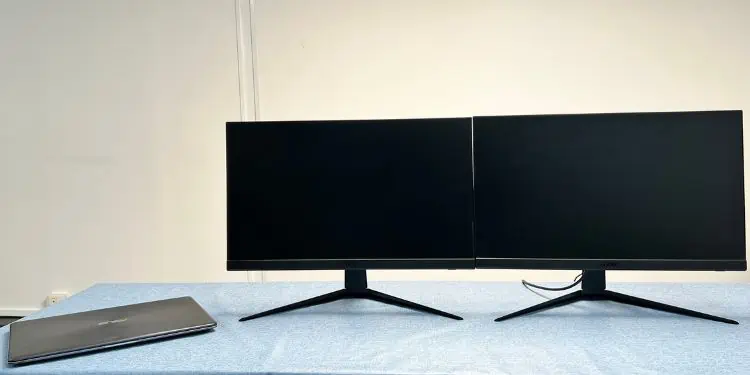
When talking about ergonomics, we even recommend using a laptop stand and monitor arms. This helps save your desk space and even adds aesthetics to the setup.
Connect Primary Monitor
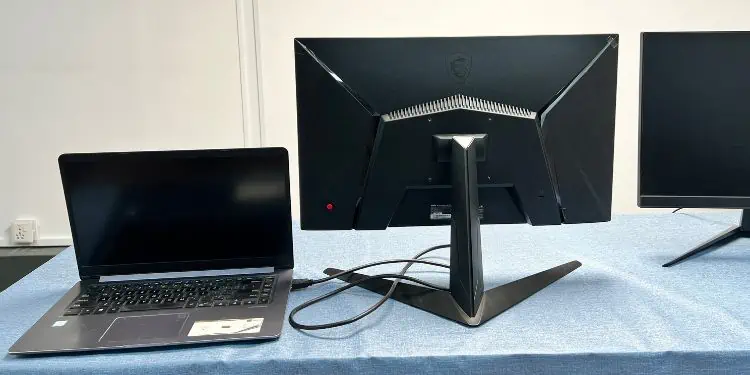
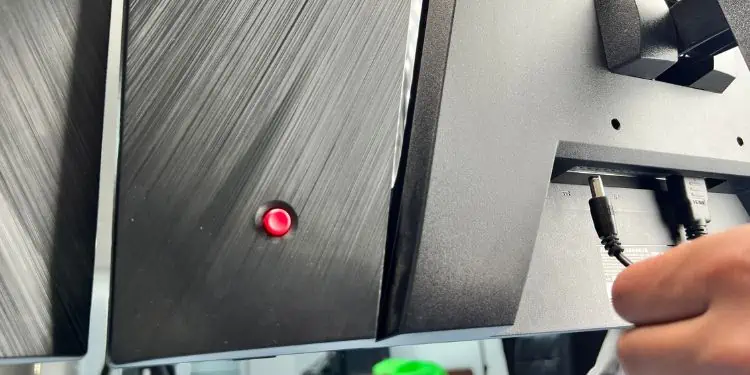
Once you’re done adjusting the devices, it’s time to connect the primary monitor to the laptop. You may first extend your ports using a docking station or directly plug the cable into the notebook computer’s interface. For demonstration, we have used an HDMI cable to connect the laptop to the primary screen:
- Get ready with an HDMI cable and ensure the ports are clean.
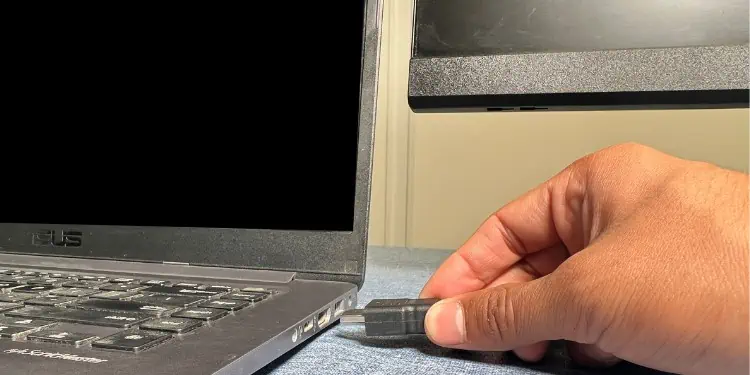
- Connect the first end of the cable to the laptop’s output port.

- Take the other end and plug it into the primary monitor’s input port.

Note: If you’re using a docking station, connect the device to USB 3.1 first. Then, plug the HDMI cable into its dedicated output port.
For daisy chaining, connect the DisplayPort or Thunderbolt cable to the docking station or laptop’s dedicated output port.
Connect Secondary Monitor
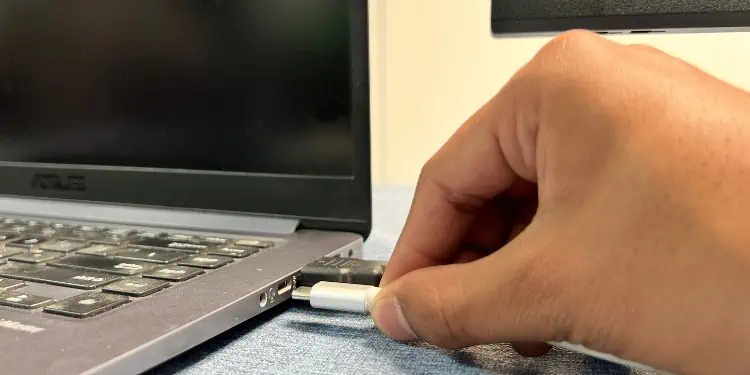
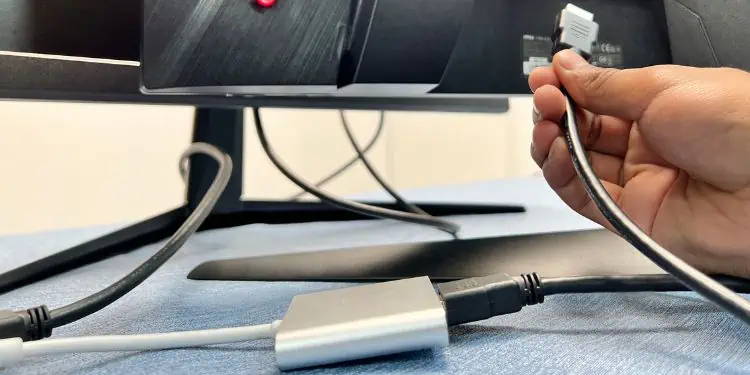
The secondary monitor connection can be a little different based on your choice and compatibility. In this section, we have utilized a USB-to-HDMI adapter to connect it to the secondary display. If your monitor supports a USB-C interface, you may directly attach the secondary monitor using a double-ended USB-C cable.
- Connect the USB-C cable to the laptop’s USB-C output port.

- Then, plug in the first end of an HDMI cable to the USB-to-HDMI adapter’s input port.

- Finally, insert the other end to the secondary monitor’s input port.

Note: In a daisy-chain setup, directly connect the DisplayPort or Thunderbolt cable to the secondary screen. If you’re using a docking station to connect dual monitors, you need an appropriate interface that is compatible with the secondary display.
Check Connectivity & Adjust Settings
Once you’ve properly attached the two monitors to a laptop, the final step is to check whether the connection is successful. Also, you may require tweaking the projection settings to extend or duplicate the display. Kindly follow the below guide on how to do just that:
- First, ensure that both monitors are connected to the power adapter, and are turned on.

- Now, power on your laptop, and log in to Windows.

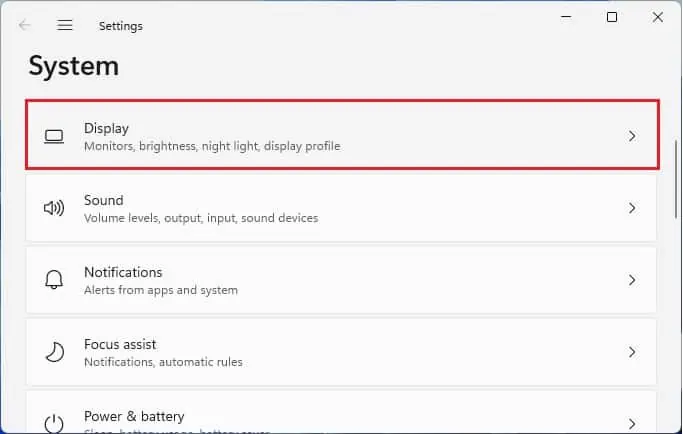
- By default, you’ll likely see only one screen duplicates/extends the display. To change this, open Settings using the Windows + I hotkey.
- Then, go to System > Display.

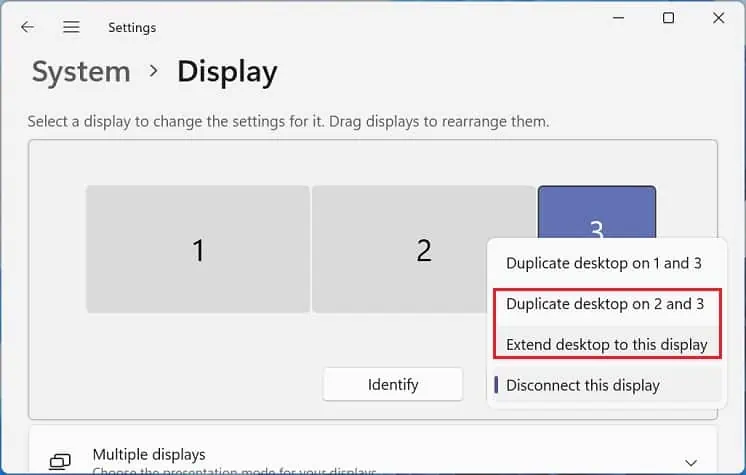
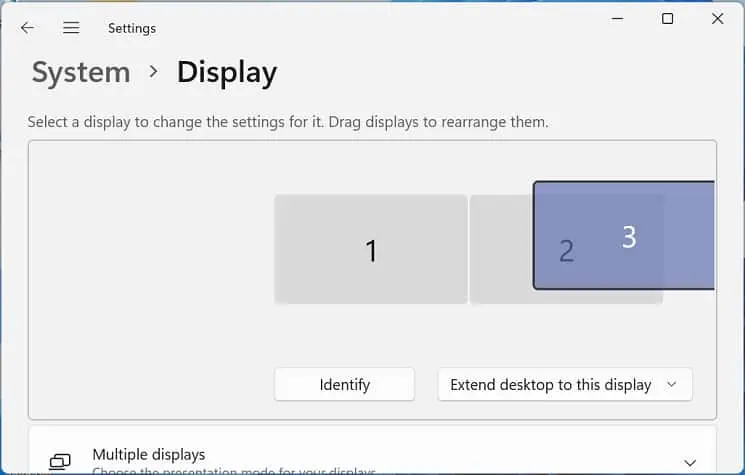
- You should see three screens numbered 1, 2, and 3. Select the display indicating no signal.
- Expand the drop-down and pick Duplicate desktop on 2 and 3 or Extend desktop to this display, as per your choice.

- All the screens will likely flash for a second and start working as per the configuration.
- Now, you may even drag and drop the displays to change their placement based on how you’ve adjusted the position.

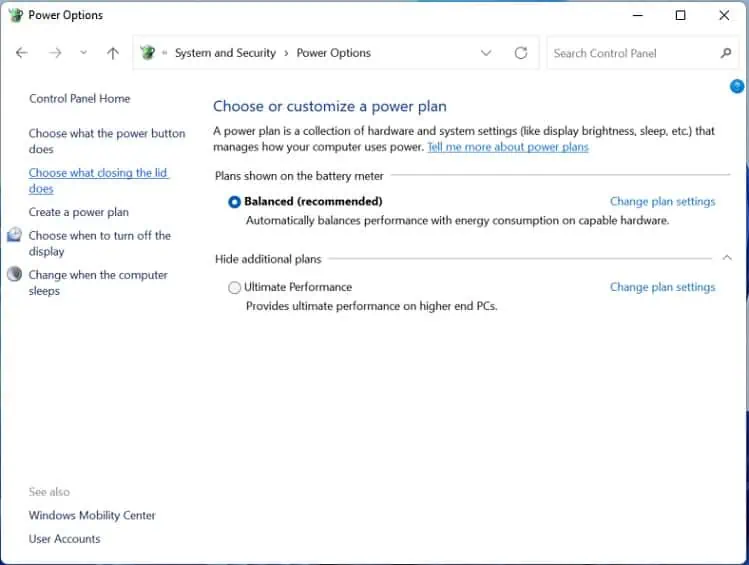
If you wish to close the laptop and continue enjoying a dual monitor setup, here’s what you should do:
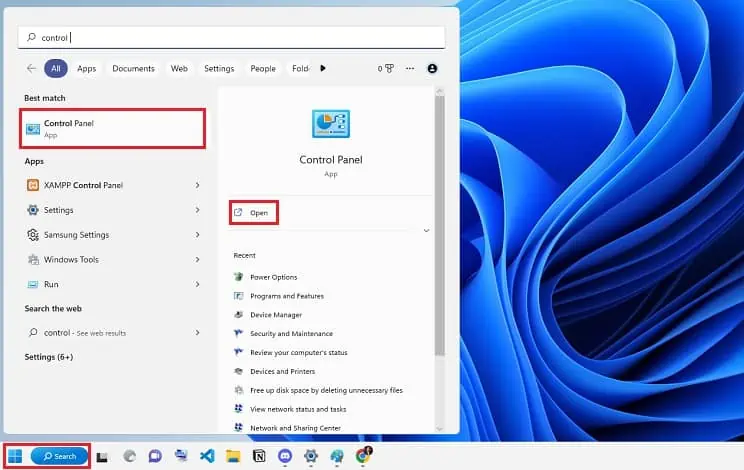
- Navigate to Control Panel from the Start Menu as demonstrated below.

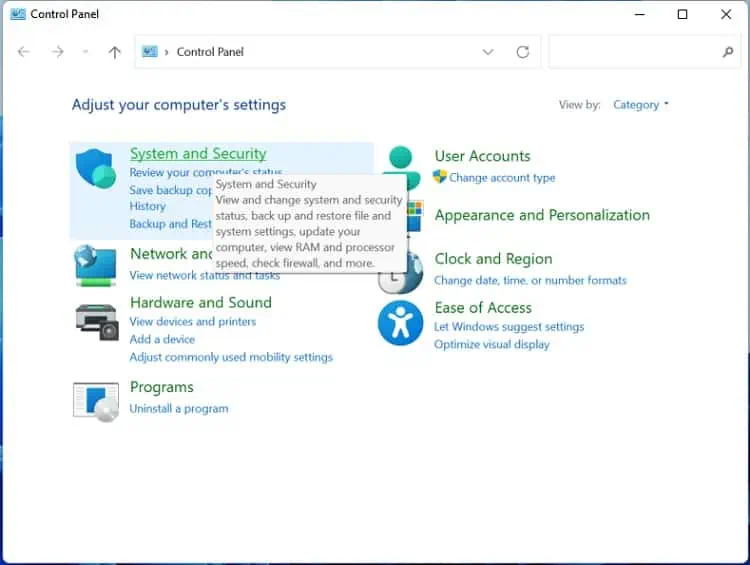
- Here, select System and Security.

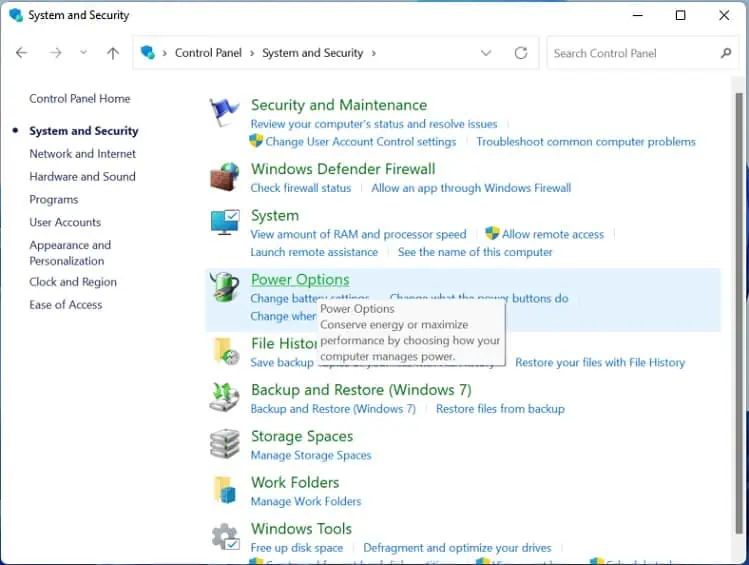
- Then, navigate to Power Options.

- From the left side of the window, pick Choose what closing the lid does.

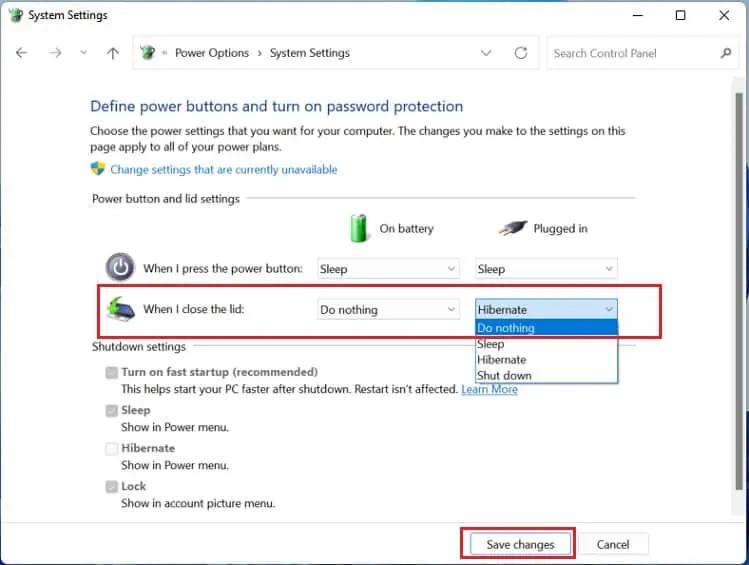
- Next, set the ‘When I close the lid option’ to Do nothing for both On battery and Plugged in.
- Now, hit the Save Changes button.

- Finally, your laptop will turn on even if its lid is closed. This way, you can continue working on the two screens.

