A guest account only has low-level privileges and doesn’t allow making any significant changes to the system and application data. So, creating Guest accounts is a good idea if you want others to access your computer but only in a limited manner. The general process to create such an account goes as follows,
- You need to first create a local user account without any password.
- Then, you need to make it a member of the “Guests” group, not the “Users” group.
- Finally, you have to prevent users from changing the password from within this account.
Microsoft removed the built-in “Guest” account for Windows 10 after build 10159, in July 2015. However, if you still have a previous version of Windows 10, you can also enable this account using certain programs.
Through Local Users and Groups
The Local Users and Groups utility is the best tool to perform any advanced tasks related to user accounts, including creating a guest account. You can also easily enable the built-in Guest account through this MMC snap-in.
- Open Run by pressing Windows key + R.
- Type
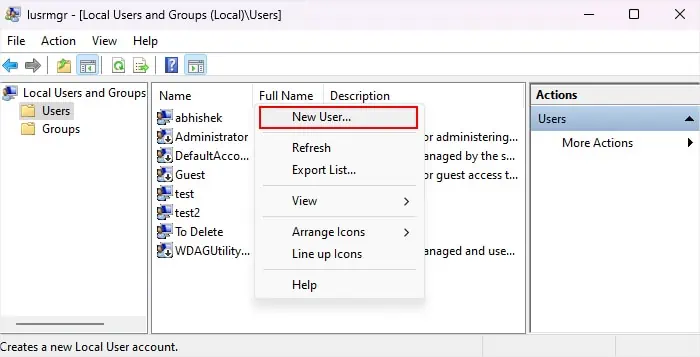
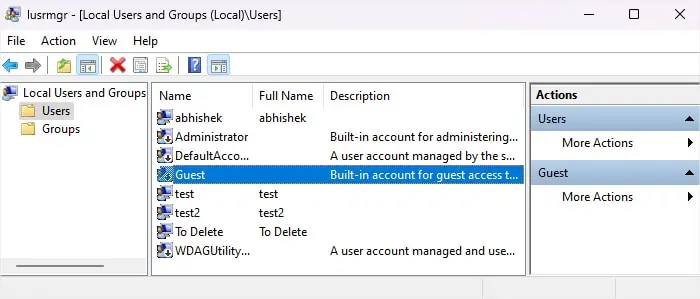
lusrmgr.mscand click OK to open Local Users and Groups. - Go inside Users. Here, you can enable the built-in Guest Account or create a new one.
- To create a new Guest Account,
- Right-click on an empty area of the middle pane and select New User.

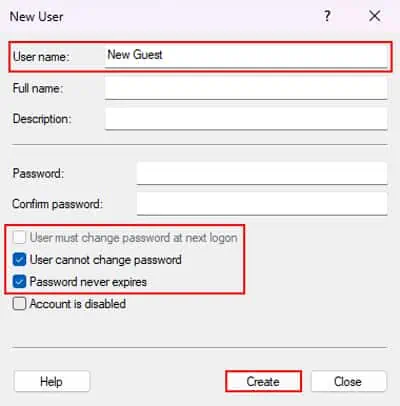
- Type the User name as you want and leave the passwords empty.
- Uncheck User must change password at next logon.
- Check User cannot change password and Password never expires.
- Click Create and then Close.

- Search for the newly created account and double-click on it.
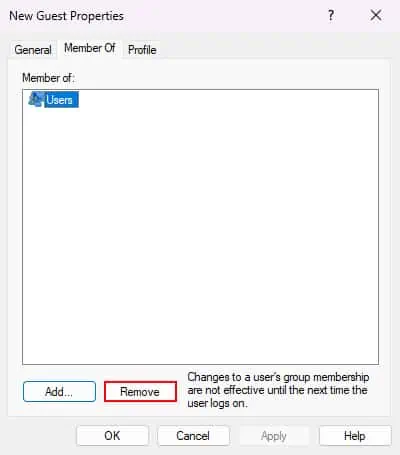
- Go to the Member Of tab.
- Select Users and click Remove.

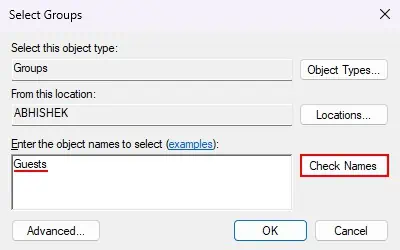
- Choose Add.
- Type Guests and click Check Names.

- Select OK > OK.
- Right-click on an empty area of the middle pane and select New User.
- To enable the built-in Guest Account,
- Look for Guest. It should have a downward arrow on its icon.

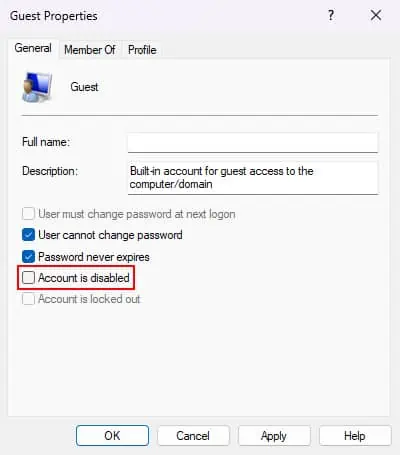
- Double-click on it to open its Properties.
- Uncheck Account is disabled and click OK.

- Look for Guest. It should have a downward arrow on its icon.
Using Command Prompt
You can also use Command-line Interfaces like the Command Prompt to create a new guest account or enable the built-in Guest account. The process for creating a new guest is the same in this method as well, i.e., you need to add a local account and then add it to the “Guests” group.
- Open Run.
- Type
cmdand press Ctrl + Shift + Enter to open Command Prompt as admin. - To enable the built-in Guest account, type the command
net users “Guest” /active:yesand press Enter.
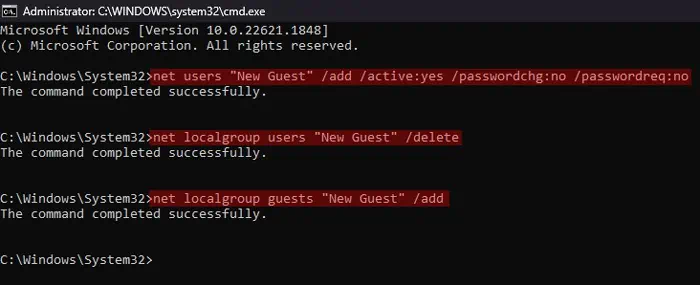
- To create a new Guest account, paste the following commands while replacing “Guest account name” with the username you want and press Enter after each.
net users “Guest account name” /add /active:yes /passwordchg:no /passwordreq:nonet localgroup users “Guest account name” /deletenet localgroup guests “Guest account name” /add
Using PowerShell
Like Command Prompt, you can also use PowerShell to create a new user and then add it to the Guests group using the appropriate cmdlets. In fact, since PowerShell allows pipelining its cmdlets, you only need to copy and paste a single long cmdlet.
Similarly, you can also use it to enable the built-in “Guest” account.
- Open Run.
- Type
powershelland press Ctrl + Shift + Enter to open the admin-level Windows PowerShell. If you use PowerShell core (PowerShell 6.x or 7.x), you need to use the Run commandpwshinstead. - To enable the built-in Guest account, type
Get-LocalUser -Name “Guest” | Enable-LocalUserand press Enter.
- If you want to create a new Guest account,
- Use the following cmdlet while replacing “Guest account name” with the name you want for the new Guest account.
New-LocalUser -Name “Guest account name” -PasswordNeverExpires -UserMayNotChangePassword | Add-LocalGroupMember -Group Guests - Press Enter without typing anything else to signify no password.

With Netplwiz tool
The Netplwiz utility is another graphical tool that helps manage the standard settings for your user accounts. While you can’t use it to enable the built-in Guest account, it allows specifying an account as a Guest account. However, you can’t enable other settings relevant to the default Guest account, such as restricting users from changing their password.
- Open Run.
- Type
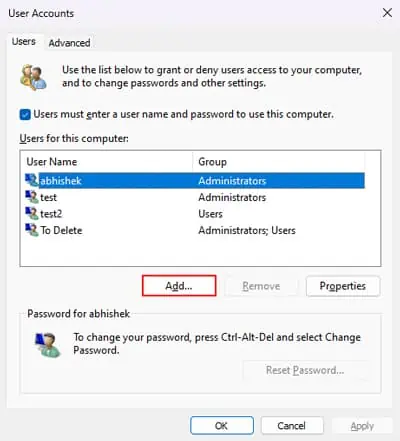
netplwizand press Enter to open this utility. - Click on Add.

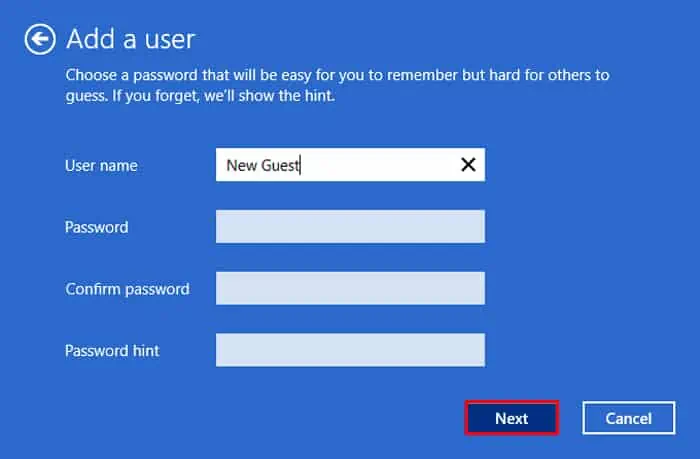
- Select Sign in without a Microsoft account (not recommended) and then Local account.
- Type the username and leave the password empty.
- Click on Next > Finish.

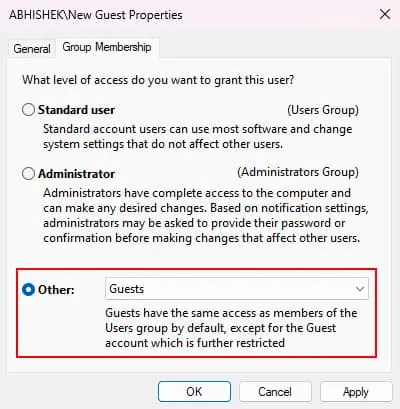
- Double-click the account you just created from the list to access its Properties.
- Go to the Group Membership tab.
- Check Other and set the drop-down box to Guests.

- Click Apply and OK.
Through Local Group Policy Editor
It is not exactly a method to create a new guest account on Windows 10. But if you want to enable the built-in “Guest” account, you can also do so by changing a local group policy.
- Open Run.
- Type
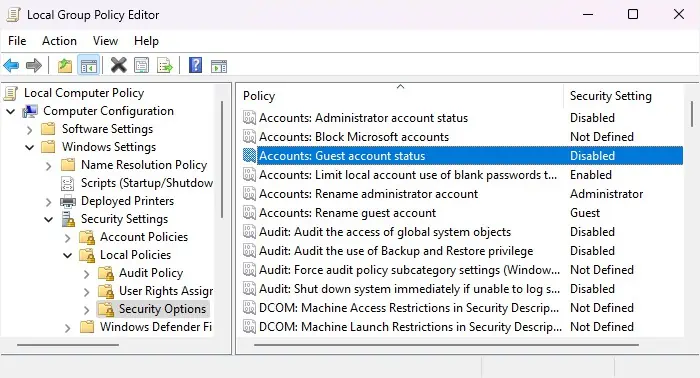
gpedit.mscand press Enter to open the Local Group Policy Editor. - Go to Computer Configuration > Windows Settings > Security Settings > Local Policies > Security Options.
- Look for Accounts: Guest account status and double-click on it.

- Check Enabled and click OK.
