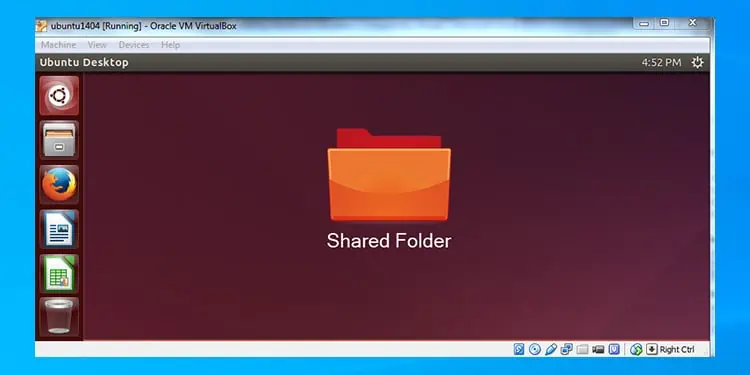
Creating a shared folder is one of the easiest ways to transfer files between your Virtual Machines (VMs) and the host PC. There are other simple methods as well, such as the network sharing process and Drag-and-Drop. However, network sharing is slightly more tedious, and Drag-and-Drop carries certain restrictions due to how elevation works.
Shared folders also allow symbolic links, provided that you enable such setting using the VBoxManage setextradata "VM name" VBoxInternal2/SharedFoldersEnableSymlinksCreate/sharename 1 command.
However, if you don’t properly create a shared folder or perform the prerequisite actions, you won’t be able to access them from your guest operating system. So, we have mentioned everything you need to do for this purpose in this article.
How to Create Shared Folders on VirtualBox?
VirtualBox allows creating shared folders without having to manually change the permissions of the folders. You even get an option to auto-mount these folders for easier access. Here’s what you need to do to create them:
- Create a folder you want to share on your Operating System.
- Then, open VirtualBox.
- Select the Virtual Machine (VM) for which you wish to share the folder and click Settings.
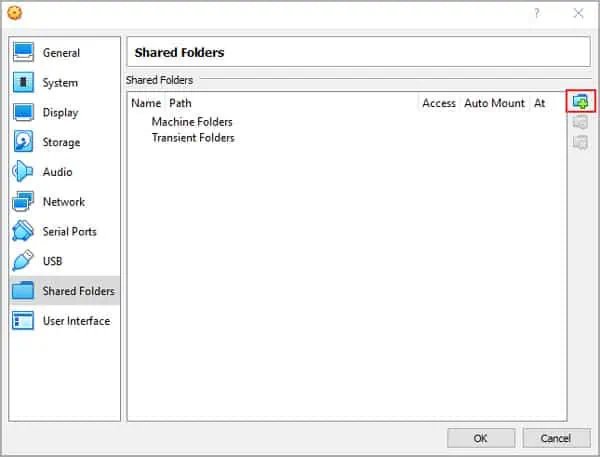
- Go to the Shared Folders tab.
- Click on the Add icon.

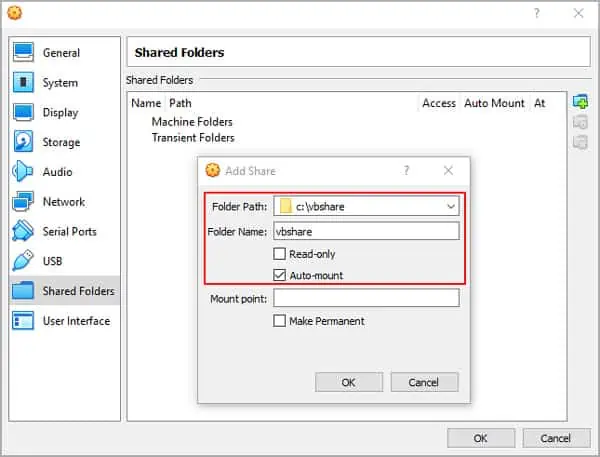
- Navigate to and select the folder you need to share. Then, click Open.
- Check Auto-mount. If you don’t do so, you need to manually mount the shared folder from your VM.
- Don’t check Read-only if you want to edit the folder contents from within the VM. You can also set another name for the folder before clicking OK.

- Hit OK to create the shared folder.
How to Access Shared Folders From VM?
Accessing the shared folders is easy. However, you need to have installed VirtualBox Guest Additions to access the folders.
Step 1: Install Guest Additions
First, follow the instructions below to install VirtualBox Guest Additions on your guest OS:
On Windows VM
- Open the Windows Virtual Machine inside VirtualBox.
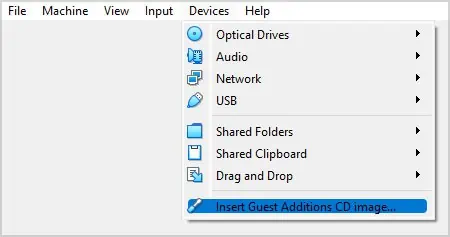
- On the menu, go to Devices and select Insert Guest Additions CD Image.

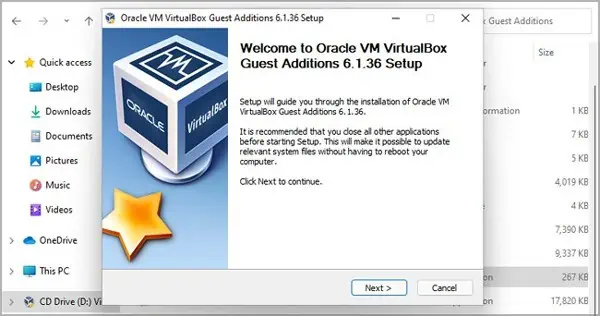
- Follow the on-screen instructions if the installer launches automatically.
- Otherwise, open File Explorer and go to the mounted CD drive.
- Run VBoxWindowsAdditions.exe and follow the on-screen instructions.

On Linux VM
- Open the Linux Terminal.
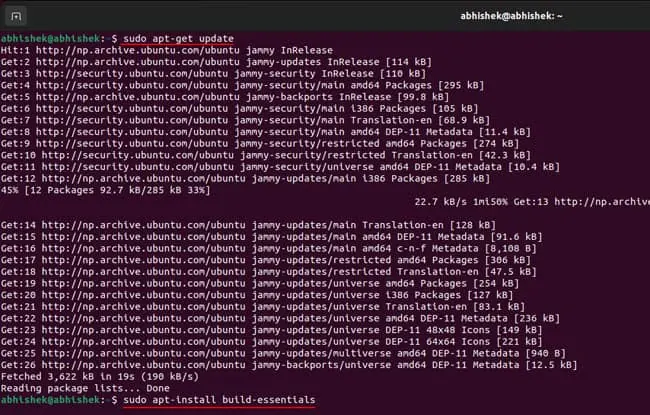
- First, you need to install build-essentials on the system. To do so, run the following commands:
sudo apt-get updatesudo apt-install build-essentialssudo reboot
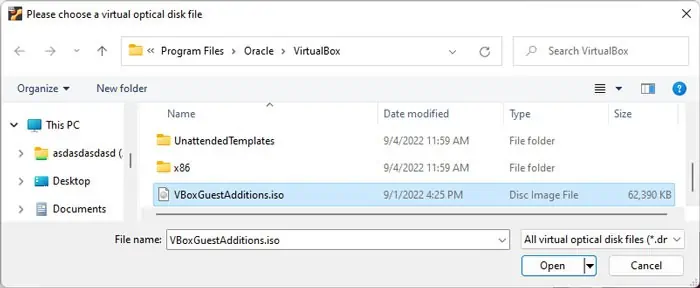
- After restarting, go to Devices > Optical Disks > Choose a disk file from the menu.
- On Windows, go to C:\Program Files\Oracle\VirtualBox and select VBoxGuestAdditions.iso. Then, click on Open. On Mac, the file is inside the Contents/macOS and on Linux, it’s usually in the /opt/VirtualBox/ directory.

- Open the Terminal again and enter the following commands:
sudo mkdir /mnt/cdromsudo mount /dev/cdrom /mnt/cdromcd /mnt/cdromsudo sh ./VBoxLinuxAdditions.run – nox11sudo restart
On Oracle Solaris VM
- Go to Devices > Optical Disks > Choose a disk file from the menu.
- Go to
C:\Program Files\Oracle\VirtualBoxand selectVBoxGuestAdditions.iso. Then, click on Open. (See the Linux steps above to know the location on other host systems) - If the ISO file is not mounted,
- Open a root terminal.
- Type
svcadm restart volfsand press Enter to mount the ISO file. - Change to the mounted directory using the
cdandlscommands. - Then, enter the
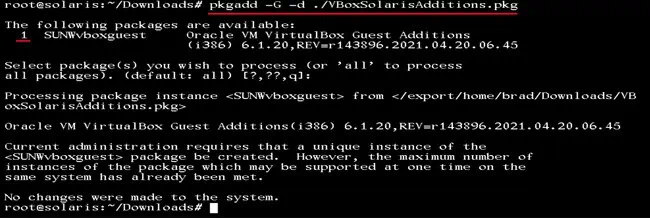
pkgadd -G -d ./VBoxSolarisAdditions.pkgcommand.
- Choose 1 and continue with the installation of the package.
On Mac OS VM
VirtualBox Guest Additions are not available for Mac OS X as of the date of this article. So, Shared Folder doesn’t work for a Mac VM. You need to use other methods to share files between the different host OS and the guest macOS, such as network share. However, it is possible to change the permissions on the /System/Library/Extensions/ folder of your Mac VM and force the installation of Guest Additions. Here’s how you can do so:
- First, you need to disable System Integrity Protection (SIP). To do so,
- Open the Terminal and enter the following command to boot in recovery mode.
sudo nvram "recovery-boot-mode=unused"sudo reboot
Some Mac systems may need a different command. Check with official sources if the above doesn’t work.- On the Recovery mode, run the Terminal and enter the commands below:
csrutil disable
spctl kext-consent add VB5E2TV963nvram -d recovery-boot-modereboot
- After that, open the Terminal again and enter the commands below:
sudo mount -uw /sudo chown :admin /System/Library/Extensions/sudo chmod 775 /System/Library/Extensions/
- Go to Devices > Insert Guest Additions CD and follow the instructions.
- If it doesn’t work,
- Go to Devices > Optical Disks > Choose a disk file.
- Navigate to the VirtualBox installation folder (see Linux VM steps), select
VBoxGuestAdditions.isoand click Open. - Open the mounted ISO drive and run the
.pkgfile.
- After that, open the Terminal and enter the following commands to revert the changes made earlier:
sudo chown :wheel /System/Library/Extensions/sudo chmod 755 /System/Library/Extensions/sudo nvram "recovery-boot-mode=unused"sudo reboot
- On Recovery mode, enable SIP using the commands:
csrutil enablenvram -d recovery-boot-modereboot
Reference : Github
Note: If you had previously installed Guest Additions but updated your VirtualBox app after that, you need to update the Guest Additions as well.
You can simply install the new Guest Additions for Windows and Linux guests to update them without having to uninstall them. However, on Oracle Solaris guest, you need to first uninstall the previous guest additions before installing the new one.
To do so, open a root terminal and enter the command pkgrm SUNWvboxguest. Then, follow the above steps to re-install the Guest Additions.
Step 2: Access Shared Folders
Here’s how you can access the shared folders on different VM guests:
On Windows VM
- Open the Windows Virtual Machine inside VirtualBox.
- Open your File Explorer.
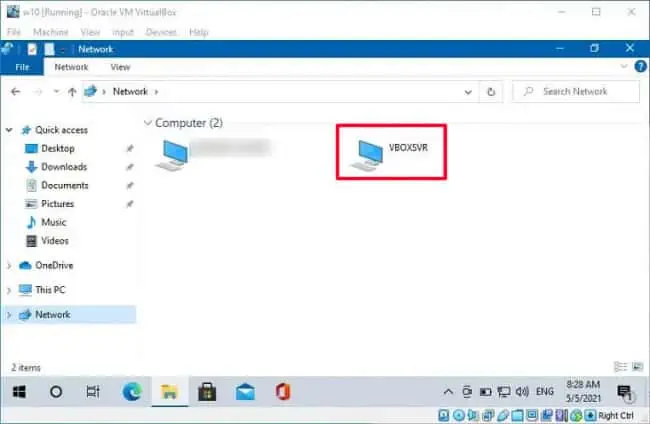
- Go to Network by clicking it from the navigation pane.
- Double-click on the Virtual Box Server (usually with the name VBOXSVR) to find the shared folder.

On Linux, Mac, and Oracle Solaris VM
- Open your Linux or Mac or Oracle Solaris Virtual Machine through VirtualBox.
- Go to Files or your File Explorer/Manager.
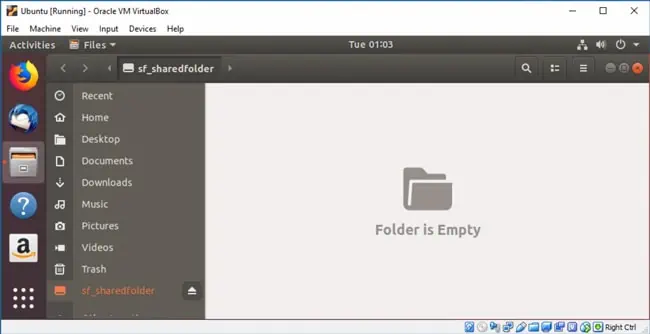
- You should see the shared folders as mounted folders, usually with the prefix “sf_”, if you enabled Auto-mount while creating them. You can just click on them to access the shared folders.

If you can’t access a file inside the shared folder on Linux, your user account doesn’t have the necessary permissions. Here’s how you can resolve the issue:
- Open the Terminal inside the Linux VM.
- Enter the command
sudo adduser “username” vboxsfwhile replacing “username” with your user account name.
