Windows Firewall always runs in the background providing two-way network filtering to the system. It does so by blocking unauthorized traffic into or out of your PC. However, there are situations where you need to disable the Firewall.
Sometimes, the Firewall detects a genuine application as malicious, restricting it from sending or receiving data packets from the network.
So, if you do not want to risk your system by disabling the entire Windows Firewall, you can opt for methods like enabling a single application through the Firewall or even setting rules for incoming or outgoing connections.
First, Find Network Profile Type
You can find three network profiles in Windows—Domain, Private, or Public Network profiles.
To figure out your network profile type for your network, open Windows settings, go to Network & Internet, and under Properties, you should see the network profile type.

Depending on the network you are connected to, you need to disable Firewall on your specific network type.
Through Windows Security
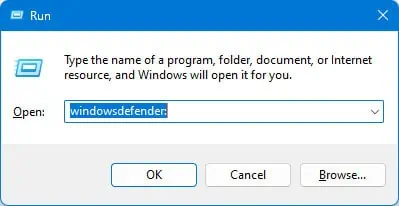
- Press the Windows + R key.
- In the Run dialog box, type
windowsdefender:and press Enter.
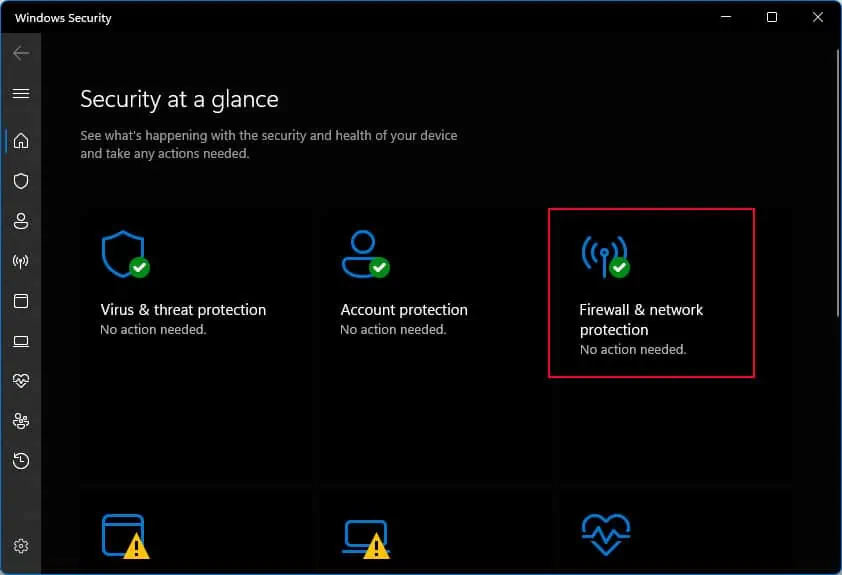
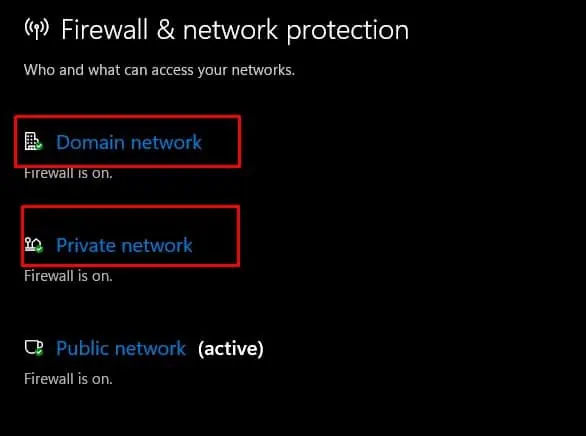
- Once the Windows Security window opens, click on Firewall & network protection.

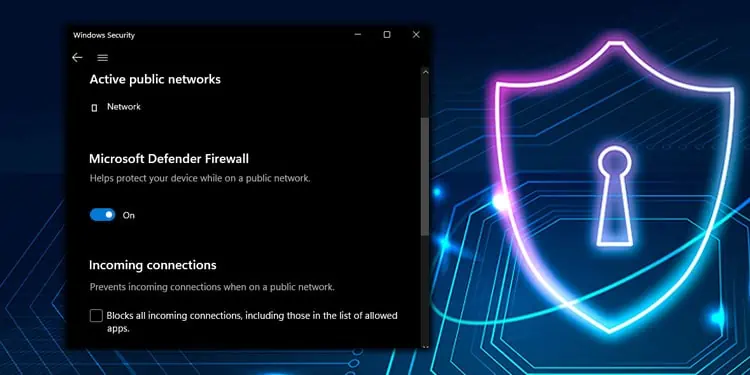
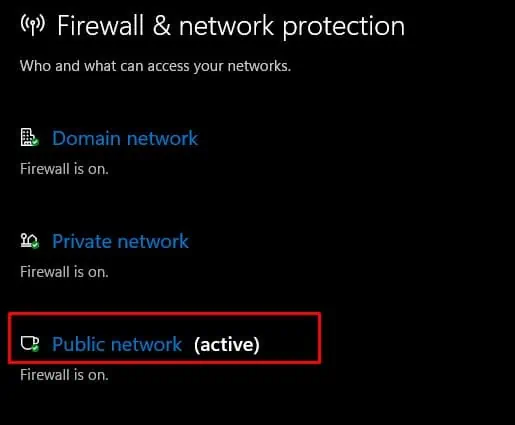
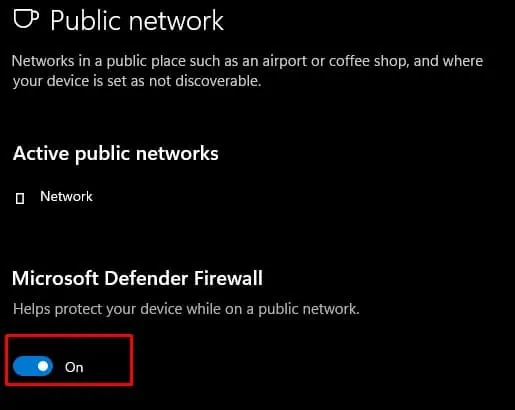
- Select the active network.

- Here, disable Microsoft Defender Firewall.

- If you want to disable Firewall on all networks, go back to Firewall & network protection.
- Disable Firewall & network protection on the remaining network profile as well.

Through Control Panel
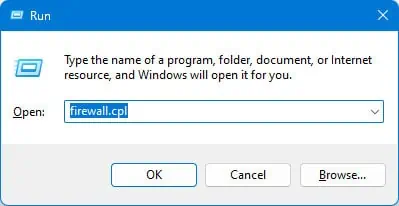
- Open Run.
- Type
firewall.cpland press Enter to open Windows Defender Firewall.
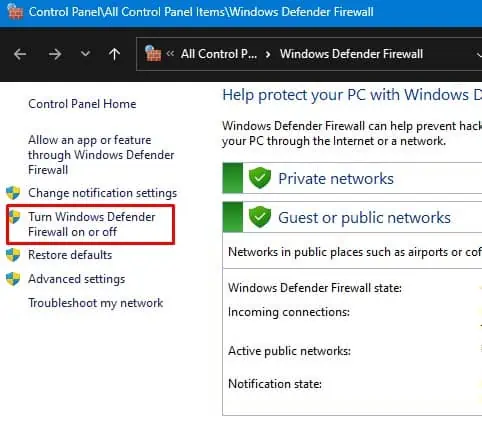
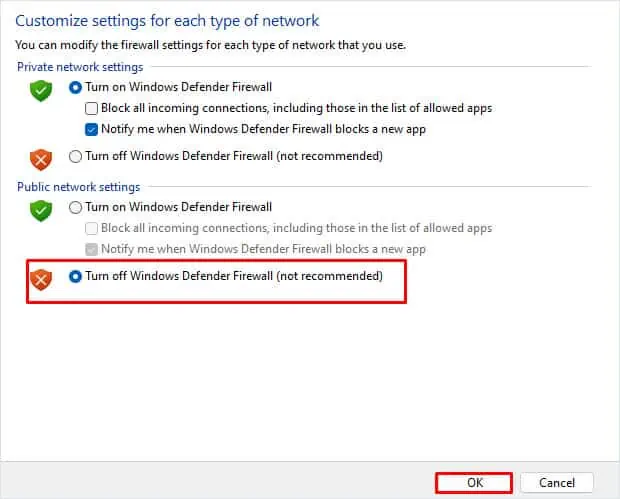
- On the left panel, click on Turn Windows Defender Firewall on or off.

- Click on Turn Windows Defender Firewall (not recommended) to disable Firewall on all networks or click on Turn off Windows Defender Firewall on the selected network profile.

- Click on OK.
Via Command Line Interface
If you are more into CLI, you can also use Command prompt or PowerShell to disable Windows Firewall.
Using Command Prompt,
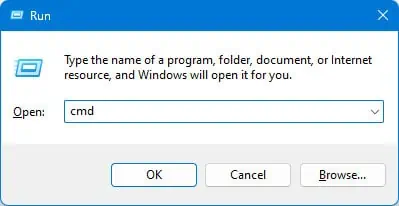
- Press Windows + R and press Enter.
- Type
cmdand press Ctrl + Shift + Enter to open the Command prompt as admin.
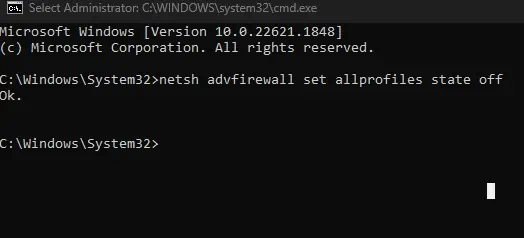
- Type
netsh advfirewall set allprofiles state offand press Enter to disable Firewall on all profiles.
- If you just want to disable Firewall on the current profile, type
netsh advfirewall set currentprofile state off. - To disable Firewall on a specific profile, type
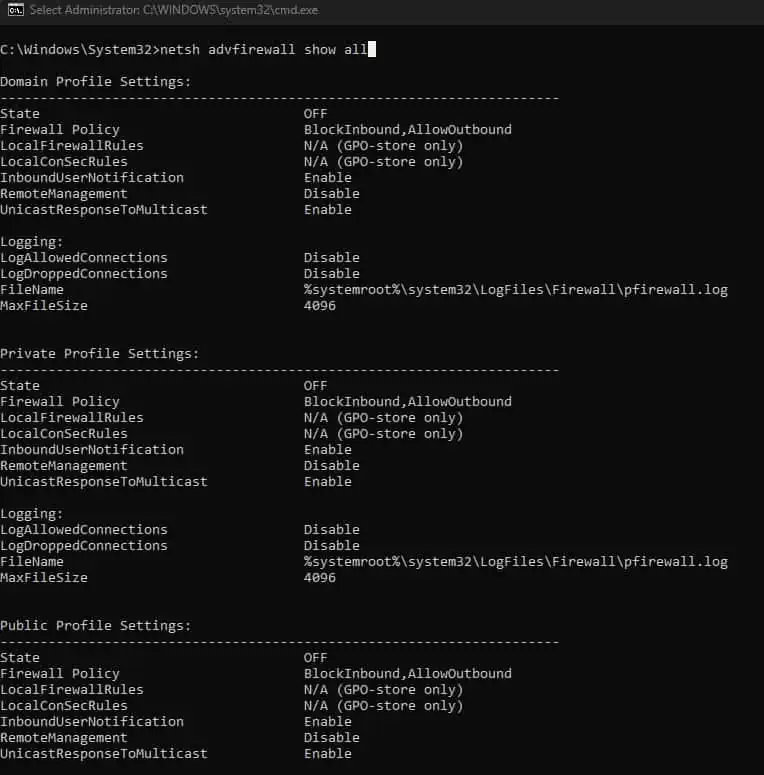
netsh advfirewall set publicprofile state off. Replace public with domain or private depending on the network profile that you want to disable. - To check whether the Firewall is disabled, type
netsh advfirewall show all.
Using PowerShell,
- Open Run.
- Type
powershelland press Ctrl + Shift + Enter to open PowerShell as admin.
- Type
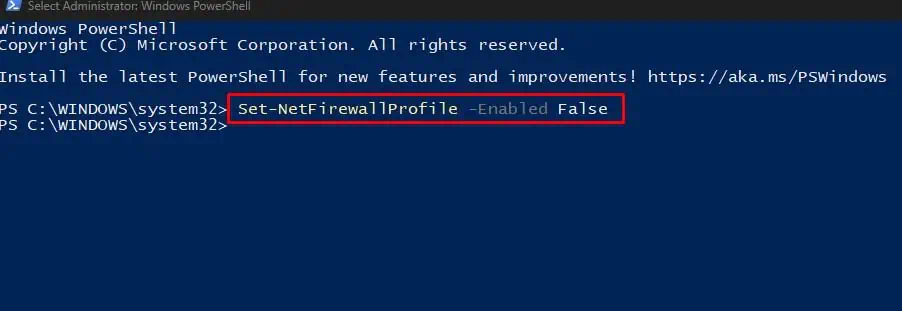
Set-NetFirewallProfile -Enabled Falseand press Enter. This will disable Firewall on all networks.
- If you want to disable Firewall on a selected network, type
Set-NetFirewallProfile -Profile <network> -Enabled False. Replace <network> with Domain, Public, or Private, depending on your preference.
Using Registry Editor
- Press the Windows and R key simultaneously.
- Type
regeditand press Enter. - Navigate to
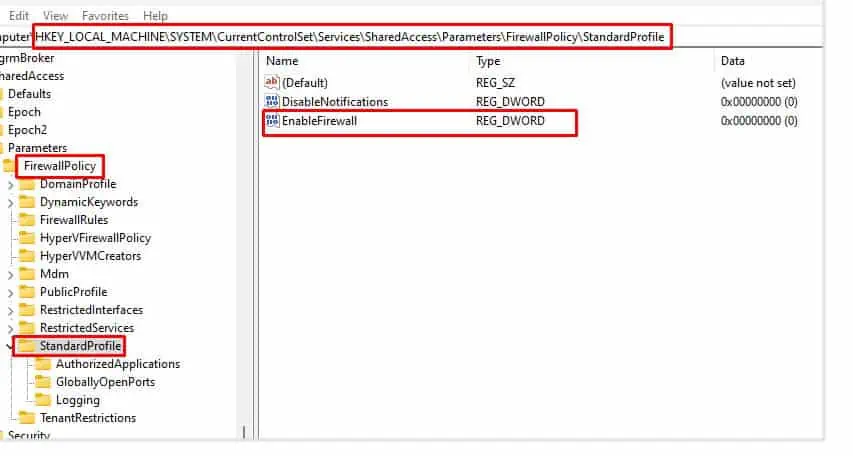
HKEY_LOCAL_MACHINE\SYSTEM\CurrentControlSet\Services\SharedAccess\Parameters\FirewallPolicy - On the left panel, you will see two entries, DomainProfile and StandardProfile. Changes to the Standard profile applies for Public and Private profile.

- Click on DomainProfile or StandardProfile, depending on your choice.
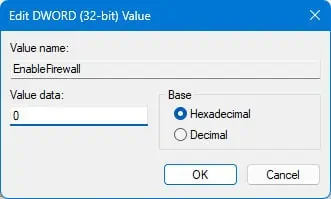
- On the right panel, double-click on EnableFirewall. Set value data to 0 to disable Firewall.

Using Group Policy Editor
- Press Windows + R key to open Run.
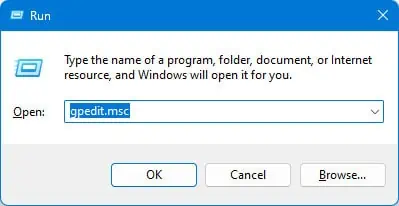
- Type
gpedit.mscand press Enter. This will open Local Group Policy Editor.
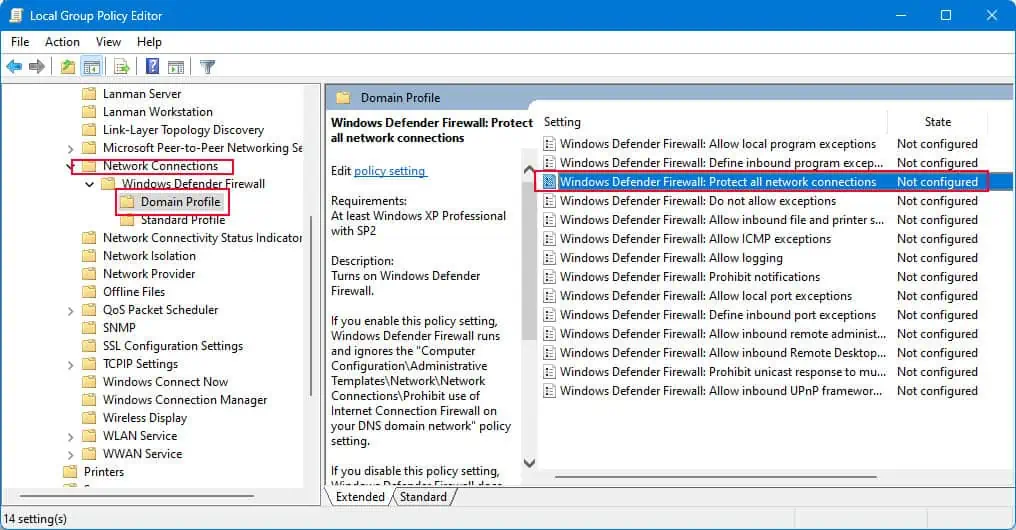
- Navigate to Computer Configuration > Administrative templates > Network > Network Connections > Windows Defender Firewall.
- Click on Domain Profile. If you want to disable the Firewall on the Public or Private profile, click on Standard Profile.
- Double-click on Windows Defender Firewall: Protect all network connections.

- Check Disabled.

- Click on Apply, then OK.
- Now, you cannot change the Firewall setting from Windows settings or the control panel unless you enable Firewall from the group policy.
Other Alternatives to Disabling Firewall
When installing an application, it issues a listen call specifying protocol or port information. By default, the Firewall blocks this action. Some applications or installers might automatically add an inbound rule that allows the connection.
In case it does not, you need to create an inbound exception or allow the app to pass through the Firewall.
In addition to this, the easy option, however, is to Allow the app through the Firewall.
Allow App Through the Firewall
In order to allow a specific application through the Windows Defender, follow these steps.
- Open Windows Defender Firewall.
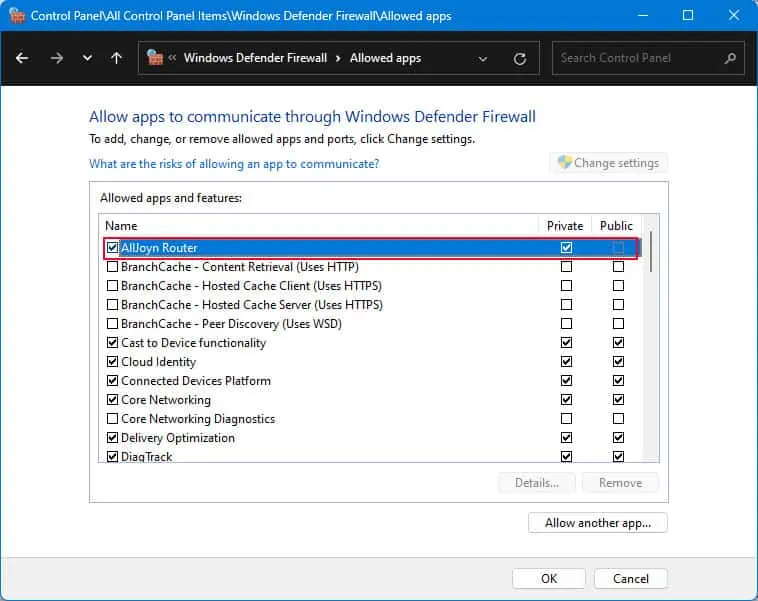
- Click on Allow an app through the Firewall.
- Click on Change Settings.
- Under Allowed apps and features, uncheck the application on which you want to disable Firewall.

- Click on OK.
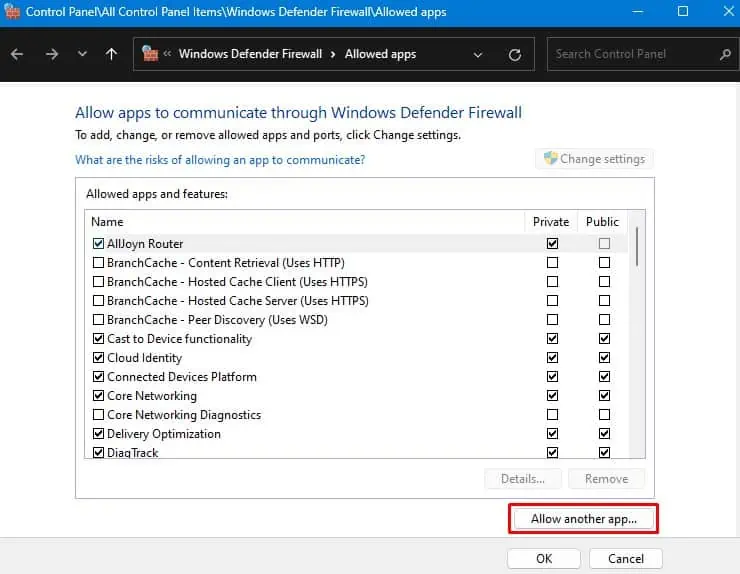
- If you cannot find the application, click on Allow another app.. and browse the application in which you want to disable the Firewall.

Set Firewall Rule
Inbound and outbound rule monitors the incoming and outgoing traffic from the network and allows or blocks connection to them based on the rule.
By default, Windows blocks all inbound connections and allows all outbound connections. Windows asks whether to allow or block the connection whenever there is an inbound request to the networked application or service.
When you allow, the Firewall creates an allowed-inbound rule that allows the inbound connection. If you block the connection, a block rule will be created for the application.
So, if you have blocked an inbound connection using the inbound rule, you need to allow the connection.
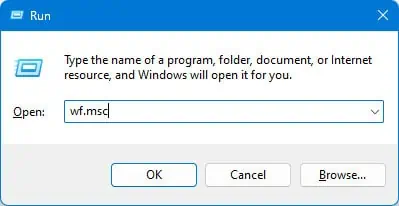
- Press the Windows + R key.
- Type
wf.mscand press Enter.
- Click on Inbound Rules.
- Here, you can see a list of rules. Check the Action column to see if the application you are trying to use is blocked.
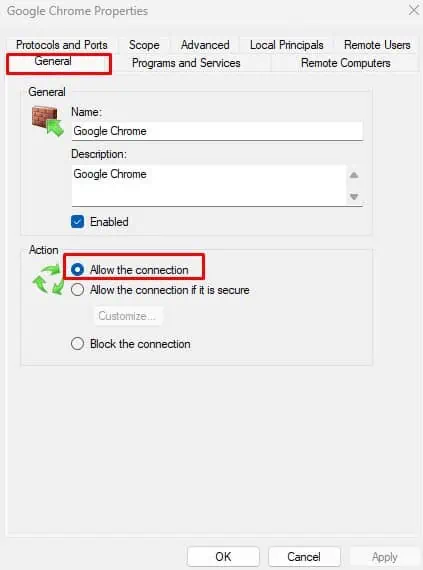
- If it is blocked, double-click on the rule, and check Allow the Connection under Action.

If you have installed an application that uses networking services and is blocked by the Firewall, you need to create an inbound rule to allow connection through the Firewall.
- Open Firewall with advanced security.
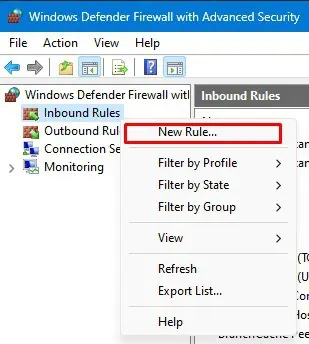
- Right-click on Inbound Rules and select New Rule.

- Here, select a Rule type.
- Program: If you want to disable Firewall on a specific program
- Port: If you want to specify a certain TCP or UDP port
- Custom: If you want to set a rule on both port and application
- Predefined: If you want to change the Firewall setting on connections that deal with the Windows experience
- Click on Next.
- Now, fill up the Program/Protocol and Ports/Scope, depending on your choice.
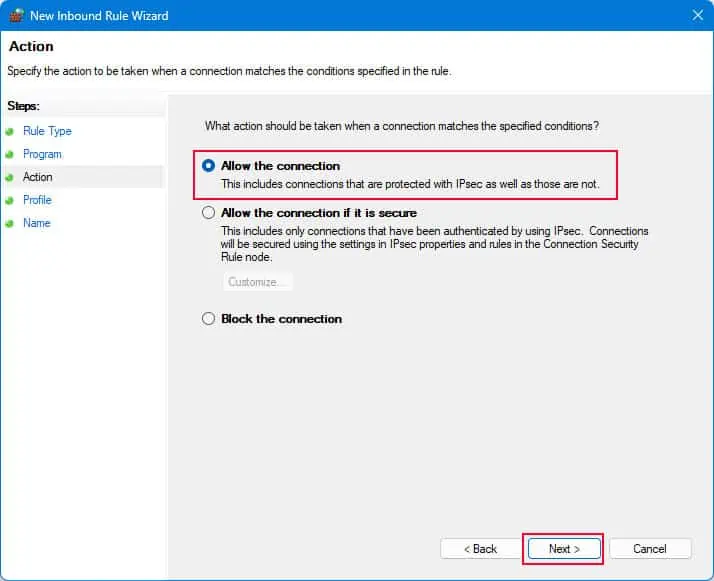
- Once you are in Actions, check Allow the connection to disable Firewall on this specific port or program.

- Click on Profile and select the profile to which you want to apply the rule.
- Now, click on Name, set a name and description to this new rule, and click on Finish.
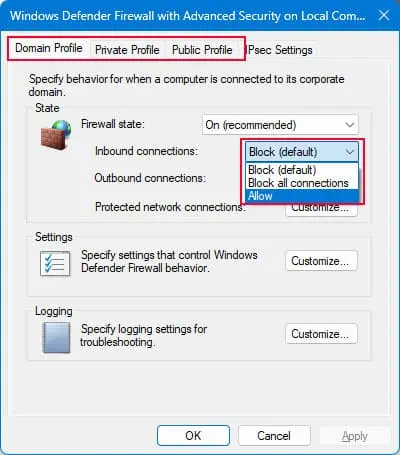
Finally, you can also allow all inbound connections while keeping the Firewall state on. However, this is not recommended as it leaves your system vulnerable to threats on the network
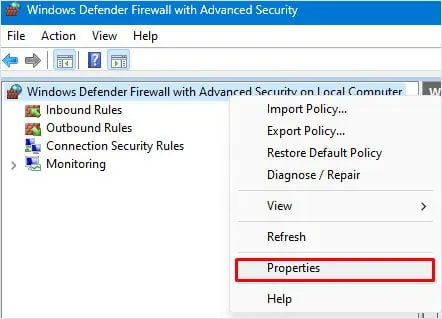
- In Windows Defender Firewall with Advanced Security, right-click on Windows Defender Firewall With Advanced Security on Local Computer.

- Select Properties.
- Click on Domain Profile, Private Profile, or Public Profile, whichever you are connected to.
- Set Inbound connections to Allow.

- Click on Apply, then OK.

