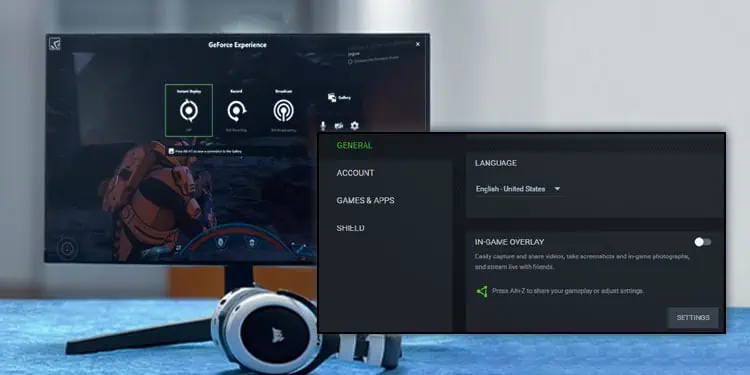
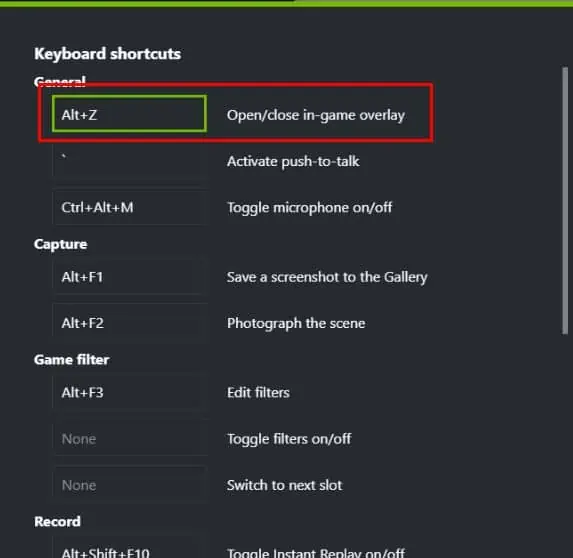
NVIDIA Overlay is a handy feature that lets you capture or record your screen and display current performance—including the FPS. The default key to display the NVIDIA overlay is the Alt + Z key. However, the overlay may still pop up even when you press other combination that includes the Alt and Z key.
Moreover, the NVIDIA overlay can cause significant lag on a low-end system, especially when the device is performing an intensive task. So disabling it would be the best course of action. To disable it, you simply need to disable overlay in GeForce Experience Application. However, there are several other ways to disable the overlay.
Disable Overlay in GeForce Experience
Let us first start with the straightforward method. Since the overlay is enabled by default, GeForce also gives you the ability to disable it. However, this setting is not available on older versions of GeForce Experience.
So, make sure that you update to the latest version of Geforce Experience.
- Once you have the latest version of GeForce Experience, open it.
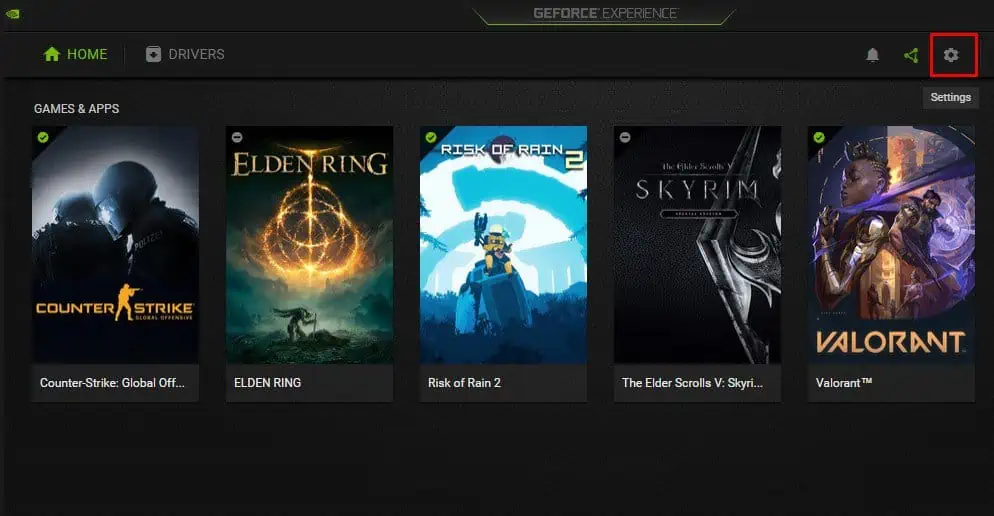
- Click on the Settings. If you cannot find settings, look for a gear icon on the top-right of the GeForce window.

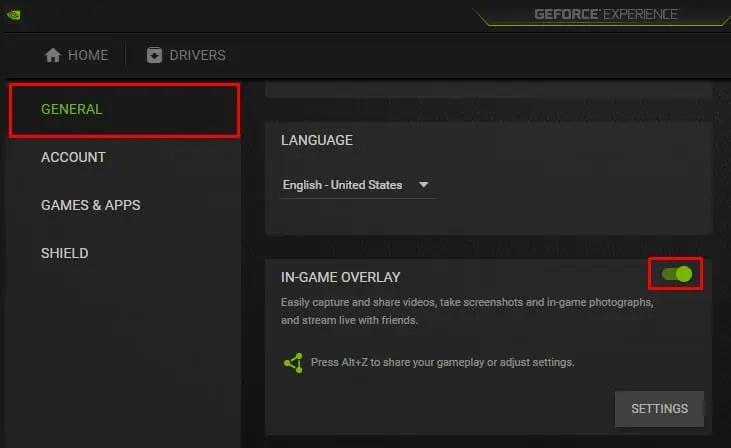
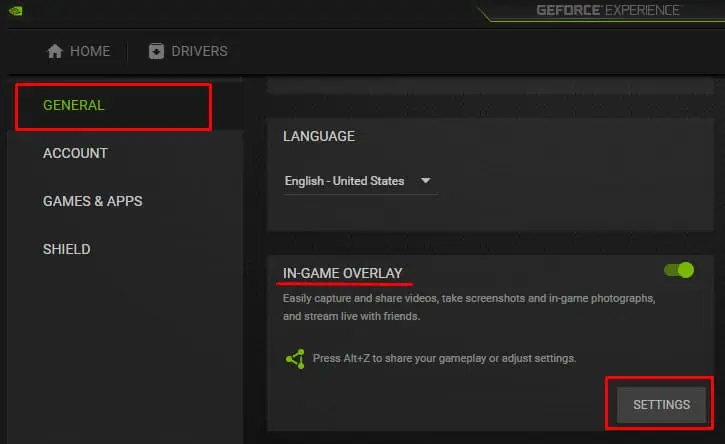
- Go to General Tab.
- Now, on the right panel, disable In-Game Overlay.

- Close GeForce Experience and press the default shortcut key for the overlay to see if it pops up.
Remove NVIDIA Background Process
Even if you don’t have GeForce Experience running in the background, the application will have several processes that run behind the scene. Some of these are NVIDIA Container, NVIDIA ShadowPlay Helper, NVIDIA share, NVIDIA Web Helper Service, and many more.
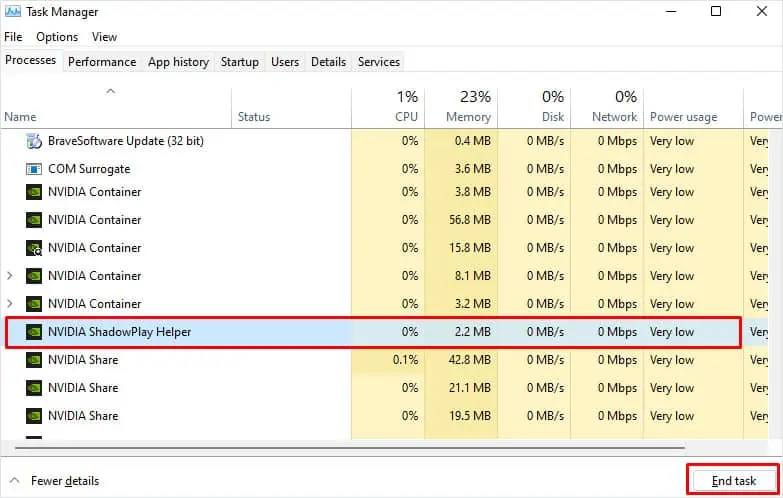
Among these services, NVIDIA ShadowPlay Helper handles the keyboard request that enables NVIDIA GeForce Experience Overlay. You need to remove this process in the background to disable the NVIDIA overlay.
- Open the Task Manager by pressing the Ctrl + Shift + Esc keys simultaneously.
- Head to the Processes tab.
- Scroll down and click on NVIDIA ShadowPlay Helper under Background Processes.

- Select End task.
- Press the shortcut key to check if it displays the NVIDIA overlay.
Stop NVIDIA Services
Besides background processes, Windows also runs several NVIDIA services. By default, these services automatically launch as soon as you launch GeForce Experience. Once the service runs, it will start the background processes.
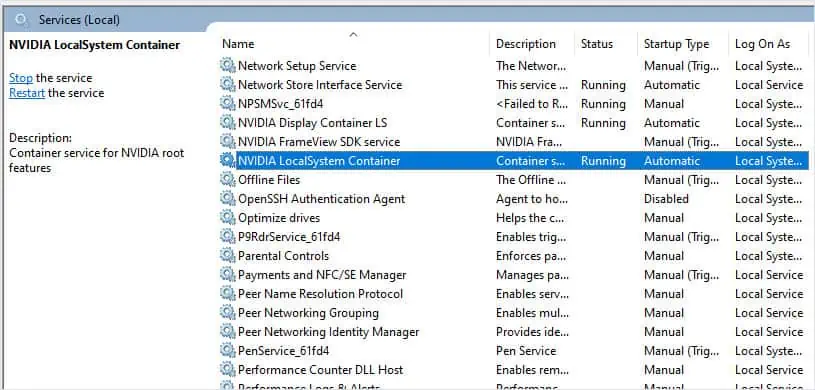
NVIDIA Localsystem Container handles the GeForce Overlay among other display tasks. Try Disabling LocalSystem Container Service to see if it disables NVIDIA overlay.
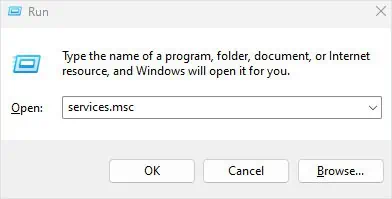
- Open Run by pressing the Windows + R key simultaneously.
- Type in
services.mscand press Enter.
- Scroll down and double-click on NVIDIA Local System Container.

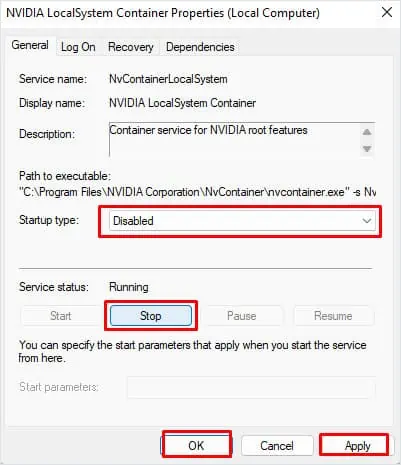
- Here, set the Startup type to Disabled.
- Click on Stop if the Service Status indicates Running.
- Click on Apply, and then OK.

- Restart your PC and check if the hotkey enables the NVIDIA ShadowPlay overlay
Change GeForce Hotkeys
You can also change the hotkey that activates the NVIDIA overlay from GeForce Experience. Set the hotkey that enables the overlay to a combination of keys. When setting the key combination, make sure that the key combination that you set does not perform any other functionalities in your system
- Open Geforce Experience and open its Settings.

- Ensure that you are in the General tab
- Under In-game Overlay, click on Settings.

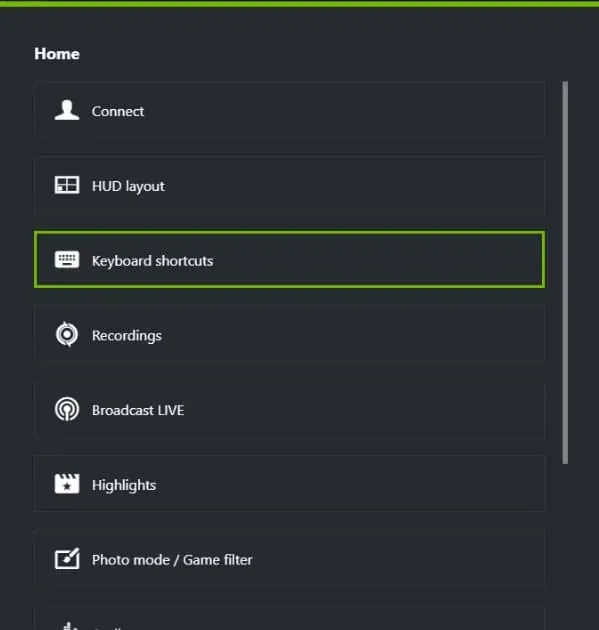
- Open Keyboard shortcuts.

- Select the shortcut key corresponding to the Open/close share overlay.

- Set a desired shortcut key combination.
Uninstall GeForce Experience
If none of the solutions mentioned above work, you can try uninstalling the entire GeForce Experience application. Uninstalling the application removes all its app data and features related to GeForce Experience. This includes the overlay and any screen capture abilities that it offers.
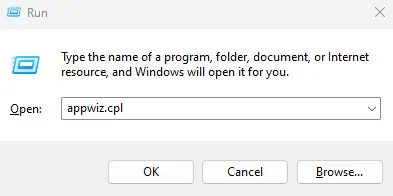
- Open Run by pressing the Windows and R key.
- Type
appwiz.cpland press Enter.
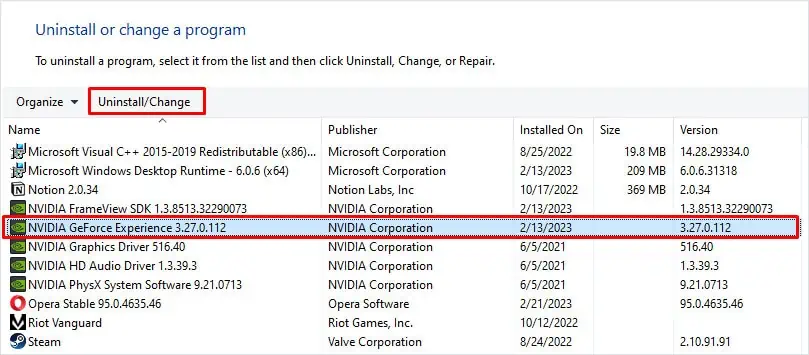
- Scroll down and select GeForce Experience.
- Click on Uninstall.

- Now, follow the uninstall process to completely remove GeForce Experience from your computer.

