IPv6 is a much more secure, scalable, and reliable successor to IPv4. However, this newer internet protocol is not backward compatible with IPv4 and most of the VPN service providers do not support the IPv6 protocol.
Microsoft doesn’t recommend users disable IPv6 or its components except when they need to troubleshoot network issues. But, if you are planning to disable or enable IPv6, there are multiple ways to do it on Windows—including command lines as well as Graphical interface-based tools.
Using Network Control Panel Applet
The most convenient option to disable or enable IPv6 on Windows devices is by using the control panel. This method is ideal for those preferring a graphical interface to manage network configurations.
- Press Windows Key + R. Then type
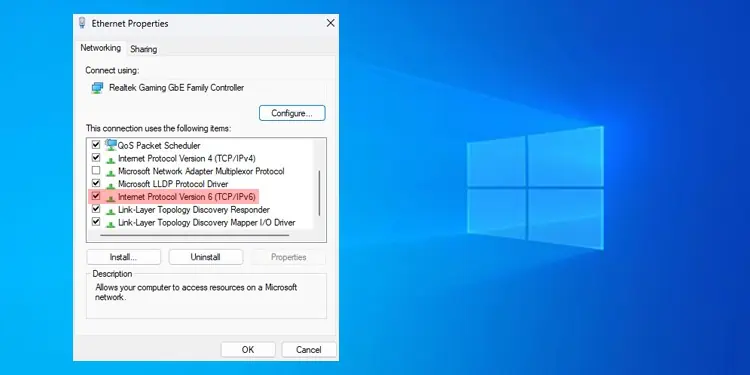
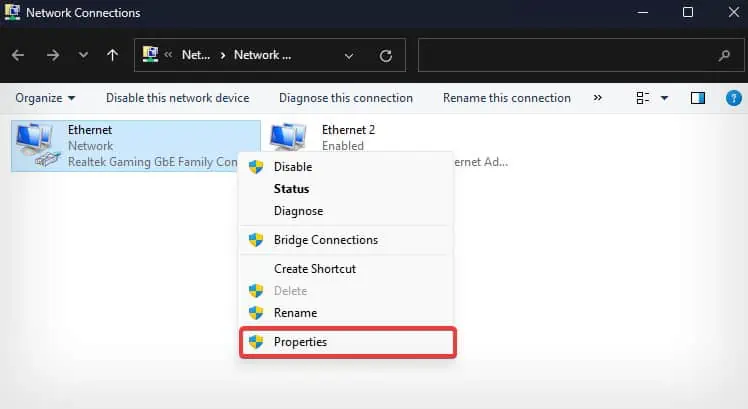
ncpa.cpl, and press Enter. - Right-click on the network adapter and select Properties.

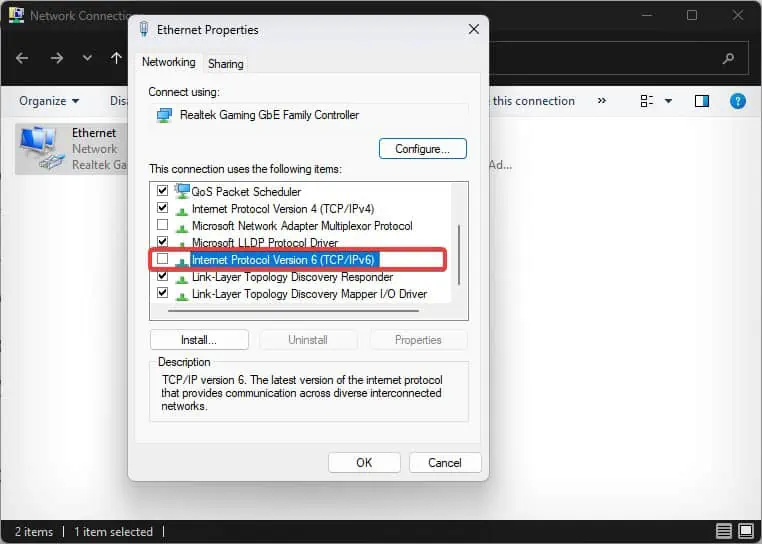
- Search for Internet Protocol version 6 (TCP/IPv6). If the option is already checked, uncheck it if you want to disable IPV6 and click on OK to save the changes.

- If you want to enable the option, check the Internet Protocol version 6 (TCP/IPv6) and click on Properties.
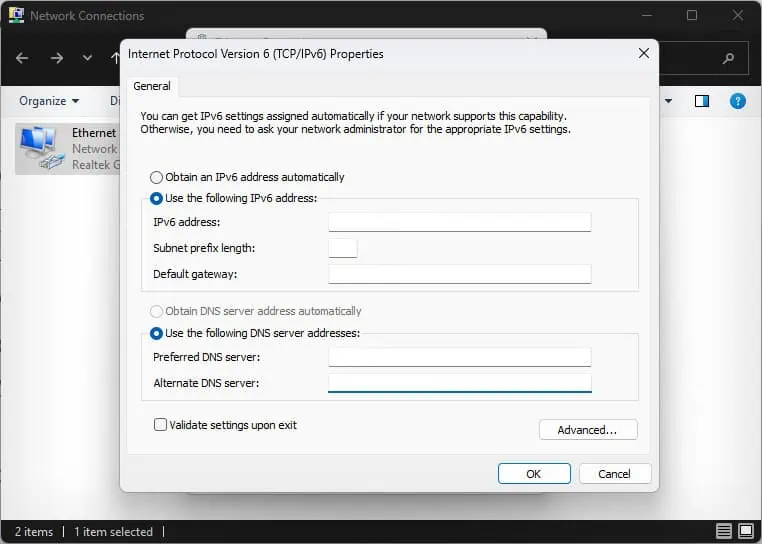
- Click on Ok if you are fine with the IP configurations. However, to add a custom IPv6 address click on Use the following IPv6 address option and enter the IPs in the respective field.

- If you want to add a custom DNS too click on Use the following DNS server address and enter the IP in the respective fields.
- Click on OK to save the changes.
Using PowerShell
On PowerShell, users can make use of the NetAdapterBinding cmdlet, which checks for all available bindings in a network adapter of the device and also enable/disable IPv6.
- Open PowerShell with administrative privileges.
- Now to check the status of IPv6 on your device, use this command line.
Get-NetAdapterBinding -ComponentID ms_tcpip6
- Note down the name of the active network for which you wish to disable/enable IPv6.
Note: If the network is named as Wi-fi, replace the Ethernet with Wi-fi in the command line in steps 4-5 with Wi-Fi.
- Now, use this command to disable the binding of IPv6.
Disable-NetAdapterBinding -Name "Ethernet" -ComponentID ms_tcpip6
- If you wish to enable IPv6 for the desired network, execute this command.
Enable-NetAdapterBinding -Name "Ethernet" -ComponentID ms_tcpip6
Using Registry Editor
You can even disable IPv6 on your computer by adding a new registry entry to the existing registry configuration. To re-enable IPv6 you can delete the entry which reverts the configurations to their defaults.
Note: Back up the registry before you make any changes to the registry values.
- Press Windows Key + R, type
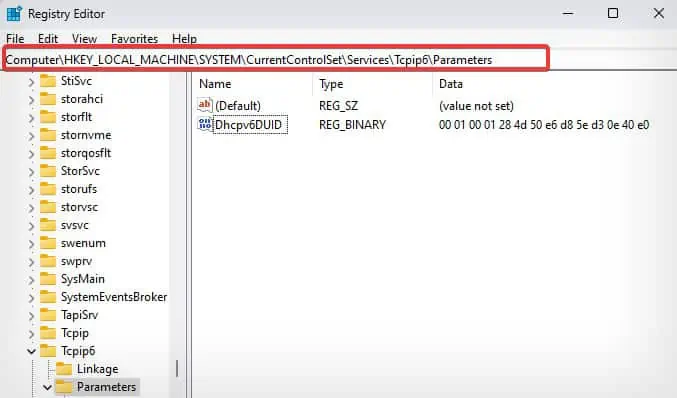
regedit, and hit Enter. - Go to this registry location.
Computer\HKEY_LOCAL_MACHINE\SYSTEM\CurrentControlSet\Services\Tcpip6\Parameters
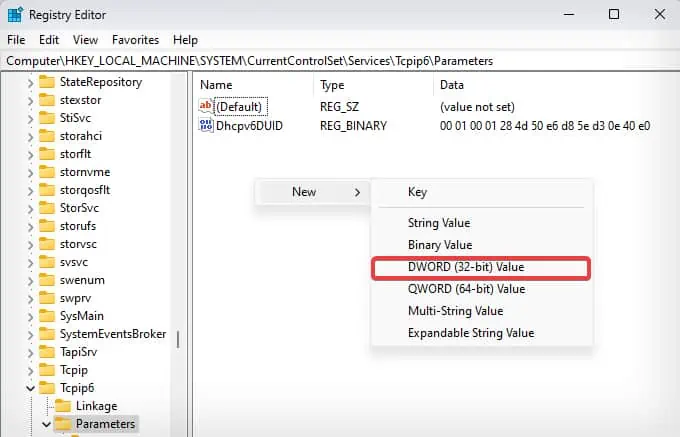
- Right-click on the empty space of the registry location and select New > DWORD (32-bit value).

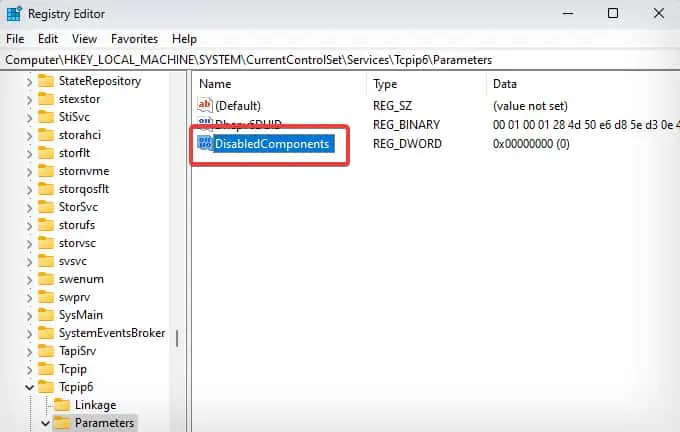
- Assign the key with the name DisabledComponents.

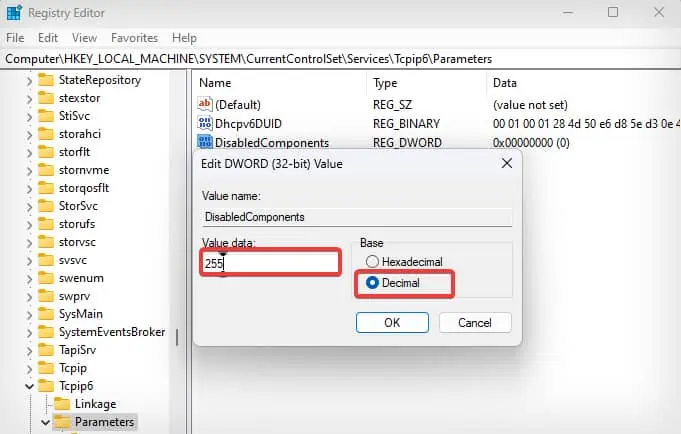
- Open the key and select the Decimal Base.
- Enter 255 in the value data field and click OK to save the changes.

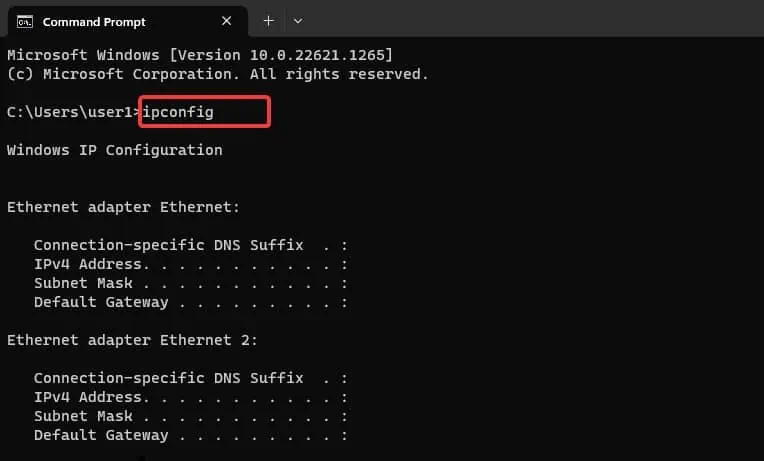
- Restart the system, open the command prompt, and check the IPv6 status using the
ipconfigcommand.
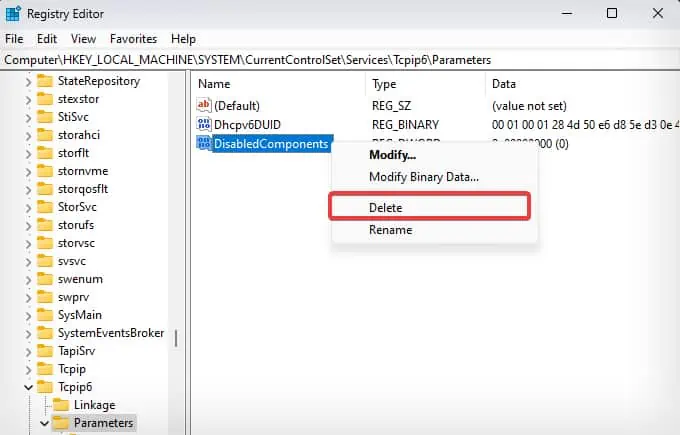
- To enable IPv6 go to the same registry location and delete the key named DisbaledComponents.

You can also do the same through the command prompt. You just need to open the Command prompt with elevated privileges and enter this command.
reg add "HKLM\SYSTEM\CurrentControlSet\Services\Tcpip6\Parameters" /v DisabledComponents /t REG_DWORD /d 255 /f


