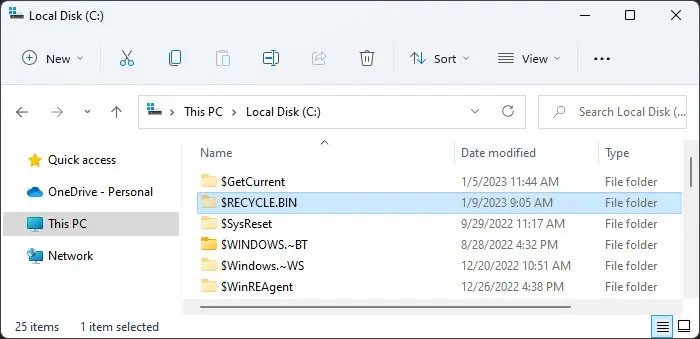
Windows creates separate Recycle Bins for each of your drives or partitions with the name $RECYCLE.BIN. If you open this folder (after unhiding it), you may see more than one subfolder.
The first folder is named just Recycle Bin contains the temporarily deleted folders for the current user account. This folder is actually linked across all drives so you will see the deleted data of all of them even though it contains the data for the current drive only.
The other folders are named as the Security Identifier (SID) number of other user accounts on your local computer (for example, S-1-5-21-...-1003 and S-1-5-21-...-1005. And as you may have guessed, they store the temporarily deleted data of their respective accounts.
If you log in to the account with the SID S-1-5-21-…-1003, you will still see their deleted data on the ‘Recycle Bin’ folder and the $RECYCLE.BIN folder contains the SID folders of other accounts excluding their own (following the example, S-1-5-21-…-1001 and S-1-5-21-…-1005).
The Recycle Bin that you normally use is the same linked folder we discussed earlier. So, if you right-click on it and select Empty Recycle Bin, it simply permanently deletes the files from the current user account, not others. The only way to clear the Recycle Bin for all users is by deleting the $RECYCLE.BIN folder altogether from your drives, which also removes the SID folders.
There are many ways to delete this folder on Windows and you can use any method according to your preference.
Using Command Prompt
The easiest way to remove the Recycle bin folder is by using the rmdir or rd command on Command Prompt.
- Open Run by pressing Win + R.
- Type
cmdand press Ctrl + Shift + Enter to open the Elevated Command Prompt. - Enter the command
rd /s <drive letter>\$Recycle.binto empty the recycle bin for that particular drive. Then, typeyand press Enter as a confirmation.
- You can also use the
/qflag to avoid having to confirm the command. For instance,rd /s /q C:\$Recycle.bin
Create Batch Script
If you want to avoid having to type this command every time you want to clear Recycle bin, it’s better to create a batch script instead.
- Open Run.
- Type
notepadand press Enter to open this text editor. - Type the command
rd /s /q <drive letter>\$Recycle.binwhile replacing the drive letter as necessary. You can even put this command multiple times while including all your drive letters to empty recycle bin for all these drives.
- Press Ctrl + Shift + S to open the ‘Save as’ window.
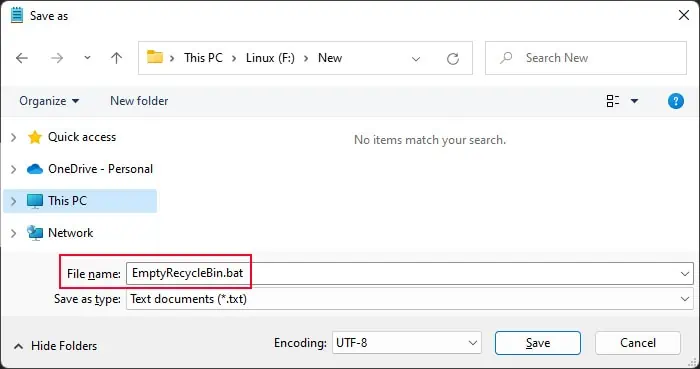
- Go to any location you want. Then set the file name with the
.batextension, for instance,EmptyRecycleBin.bat - Click Save.

- Then, you can go to that file location and double-click on the
.batfile to run the command.
Automate Batch Script
You can further automate this batch script by using the Task Scheduler. To do so,
- Open Run.
- Type
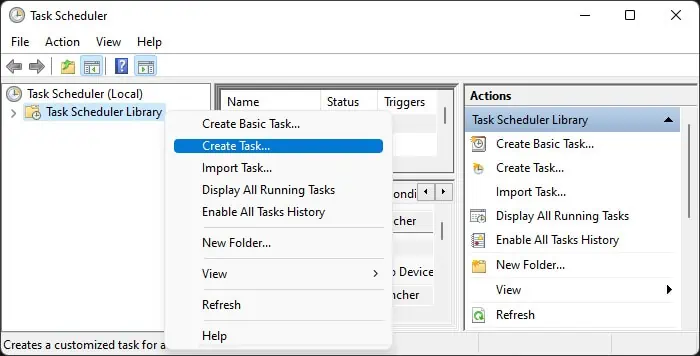
taskschd.mscand press Enter to open the Task Scheduler. - Right-click on Task Scheduler Library and select Create Task.

- Enter the Name and Description as you wish and configure other options inside the General tab if necessary.
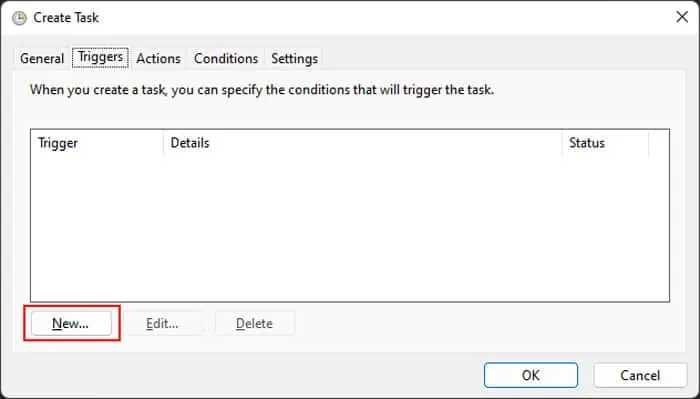
- Go to the Triggers tab and select New.

- Choose the type of trigger you want next to Begin the task. For instance on a specific schedule or right after logging into your account.
- The other options change depending on the previous choice. They are self-explanatory, so pick them accordingly.
- Click OK.

- You can add other triggers or edit previous ones by clicking on New and Edit respectively.
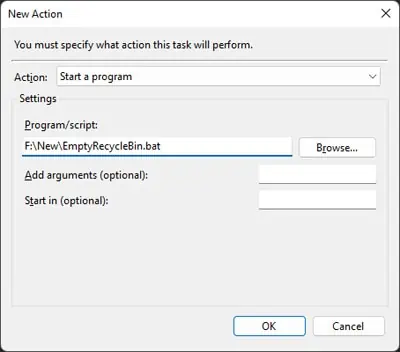
- Go to the Actions tab and click New.
- Set the options to the following values:
- Action: Start a program
- Program/script: the full path of your batch script. For instance,
F:\New\EmptyRecycleBin.bat
- Leave the other options empty and click OK.

- Go to the Conditions and the Settings tabs and set the options there if necessary.
- After you are done, click OK to create the task.
Using PowerShell
If you want to delete the Recycle Bin contents using PowerShell, you can use the PowerShell alternative of the CMD commands above in a similar manner.
- Open Run.
- Type
powershelland press Ctrl + Shift + Enter to open the Elevated Windows PowerShell. If you use PowerShell core, use the Run commandpwshinstead. - Enter the command below while replacing C with the letter of the drive you need:
Get-ChildItem “C:\`$Recycle.bin\” -Force | Remove-Item -Recurse -force
You need to use the back quote (`) sign before the dollar ($) sign as PowerShell would treat $Recycle as a variable name otherwise.
Manually Deleting
You can also manually delete the contents of the root Recycle Bin folder to clear its contents for all users. However, keep in mind that this method might be slower since you need to make multiple confirmations
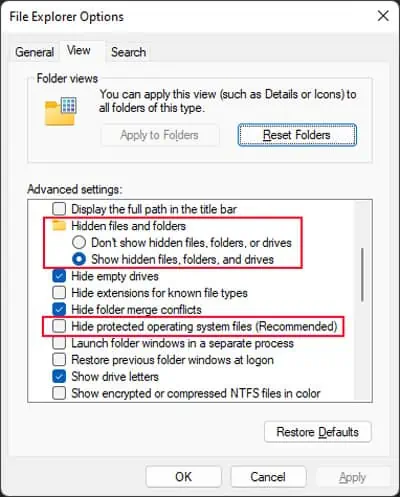
- First, you need to unhide your protected files and folders.
- Open Run.
- Type
control foldersand press Enter to open File Explorer Options. - Go to the View tab.
- Check Show hidden files, folders, or drives and uncheck Hide protected operating system files.

- Confirm by clicking Yes if prompted.
- Then, open the File Explorer (Win + E) and go inside the drive whose recycle bin you want to clear.
- Select
$RECYCLE.BINand press Ctrl + Shift + Del to permanently delete it.
- Confirm all the following prompts.
