Secure Boot is a security standard that oversees that the computer does not boot using unreliable software. This can restrict and prevent different attacks on the system from malicious software and rootkits.
If you want to make an upgrade to Windows 11, you must first make sure that the device is Secure boot capable, although you do not need to enable it. But enabling it will add an extra layer of security to your device.
On Gigabyte devices that use UEFI firmware, you can enable the secure boot easily from the BIOS. However, you may need to disable the Compatibility Support Mode (CSM) as the Secure Boot cannot operate along with the Legacy BIOS.
Before You Begin
Check the Secure Boot Status
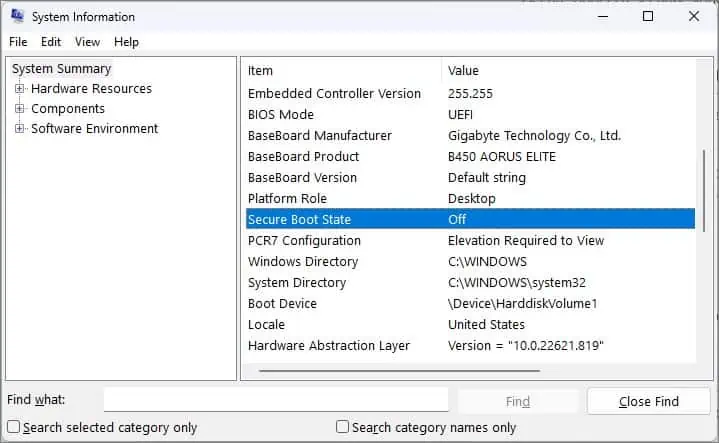
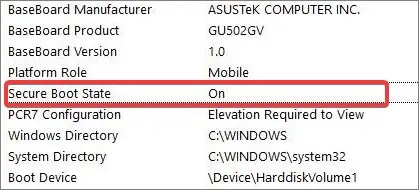
The secure boot might have been disabled to install some operating systems like Linux or older versions of Windows on some UEFI-enabled devices. On Windows, you can check if the secure boot is enabled/disabled from the System information.
- Press Windows Key + R, type
msinfo32, and hit enter. This will open the System Information window. - Under the System Summary, find Secure Boot State. If it is labeled as off, Secure Boot is disabled on the device.

Check for GPT partition
Secure boot is one of the features of the United Extensible Firmware Interface (UEFI) firmware. Unlike the traditional BIOS, UEFI does not boot from the disks with Master Boot Record (MBR) partition. The UEFI is only compatible with the disks using GUID Partition Table (GPT) partition style.
Therefore, you need to check if the disk on your device is a GPT disk before we go on to enable the secure boot.
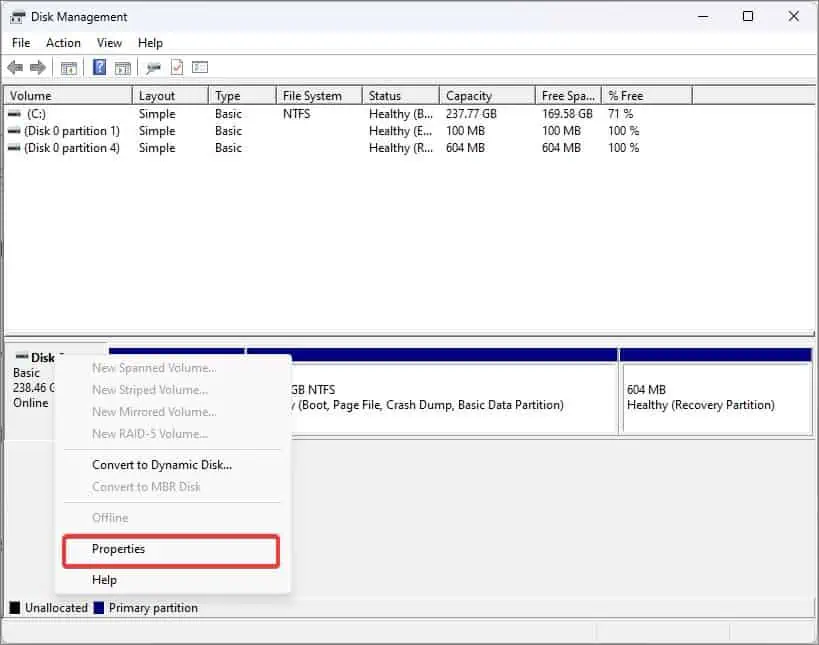
- Press Windows Key + X and open Disk Management.
- Right-click on the Disk and select Properties.

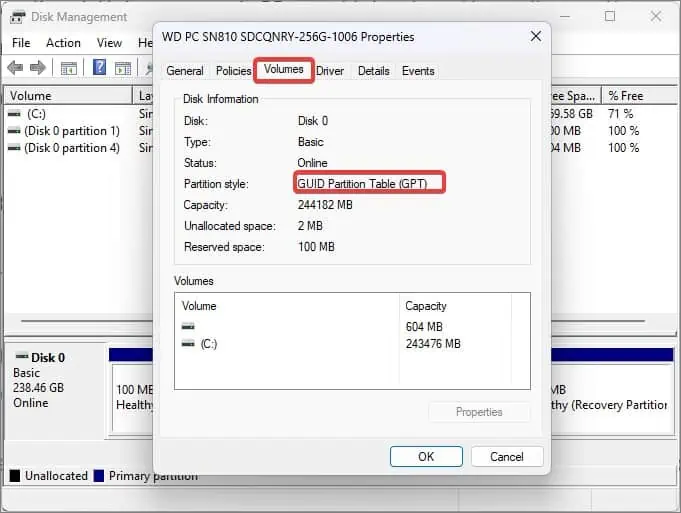
- Go to the Volumes tab.

- In the Partition style field, check that it is GUID Partition Table (GPT).
If the partition style is Master Boot Record (MBR), here’s how to change it into GPT.
Note: Back up all the data that is in the MBR disk before you proceed with the conversion. All the contents of the disk including the partition or volumes in the disk will get deleted in the process.
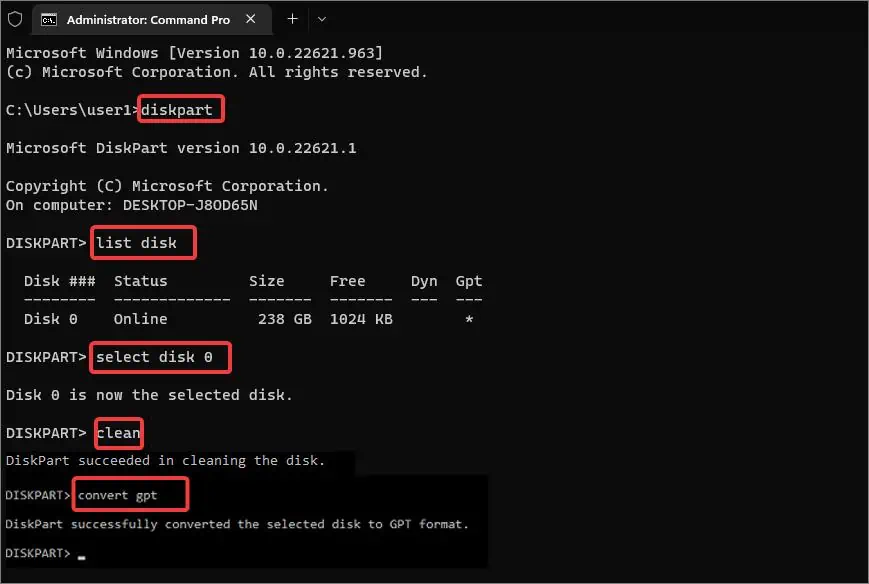
- Open Command Prompt with elevated privileges.
- Enter
diskpartand hit enter. - Now enter
List disk. This command will give you the list of disk partitions on your computer. Note the volume which you are willing to convert. - Then, type
select disk 0. The disk we are trying to convert here is disk 0. Replace it with the disk name you noted earlier. - Now, enter
clean. This will delete all the partitions on the disk.
- Finally, type
convert gptand press enter.
Check for UEFI Support
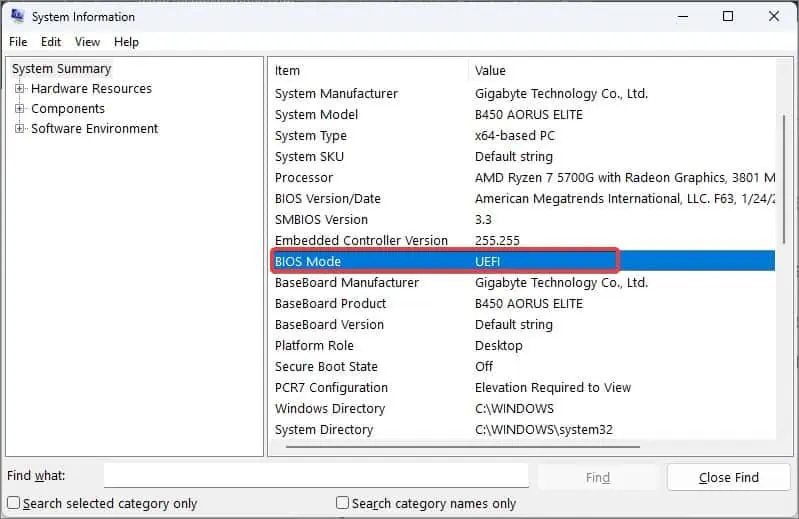
The Secure boot is a security feature for the UEFI firmware which you won’t find on the older legacy BIOS firmware. Therefore, the next thing you should do is check if the BIOS mode on your Windows device is set to UEFI.
- Open Run, type
msinfo32, and hit enter to launch the System Information. - In the System summary, check the BIOS mode field. If UEFI is mentioned there, you can proceed with enabling the secure boot.

Enabling the Secure Boot
Once you have assured that the BIOS mode is set to UEFI, you can then boot into the BIOS and enable the Secure Boot.
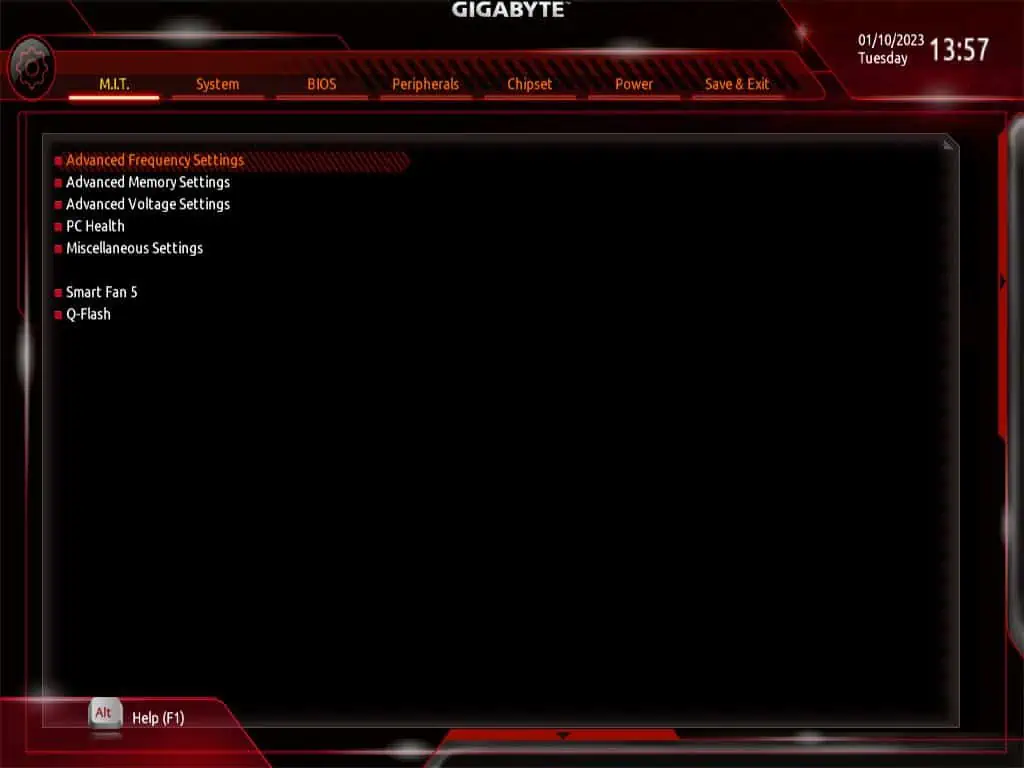
- Restart the computer and press the Del Key continuously during the initial boot-up. The system will then boot into the BIOS.

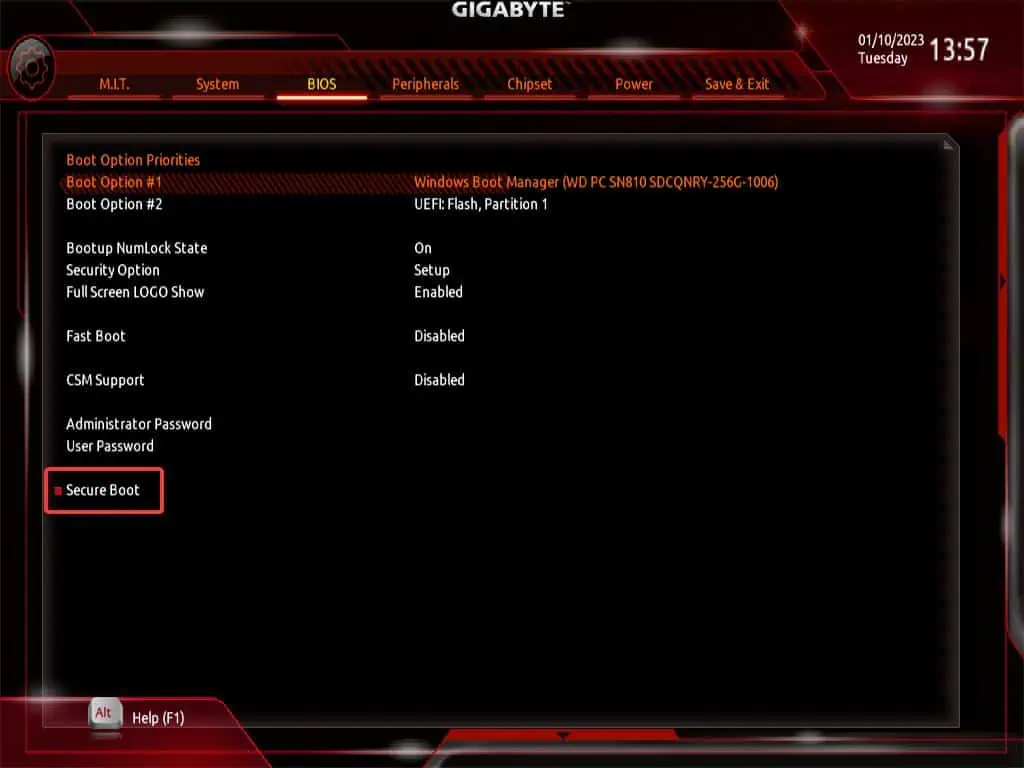
- Go to the BIOS tab.

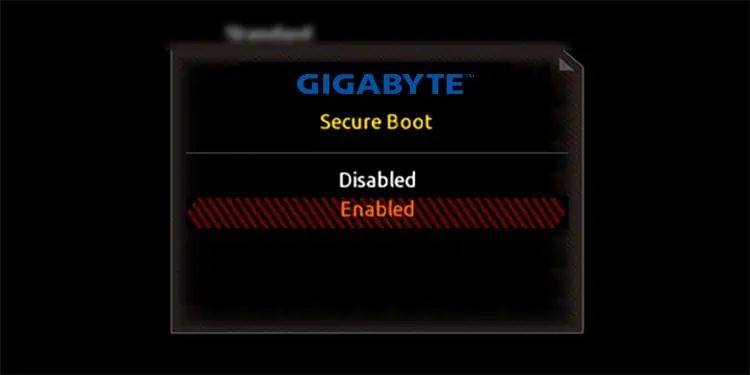
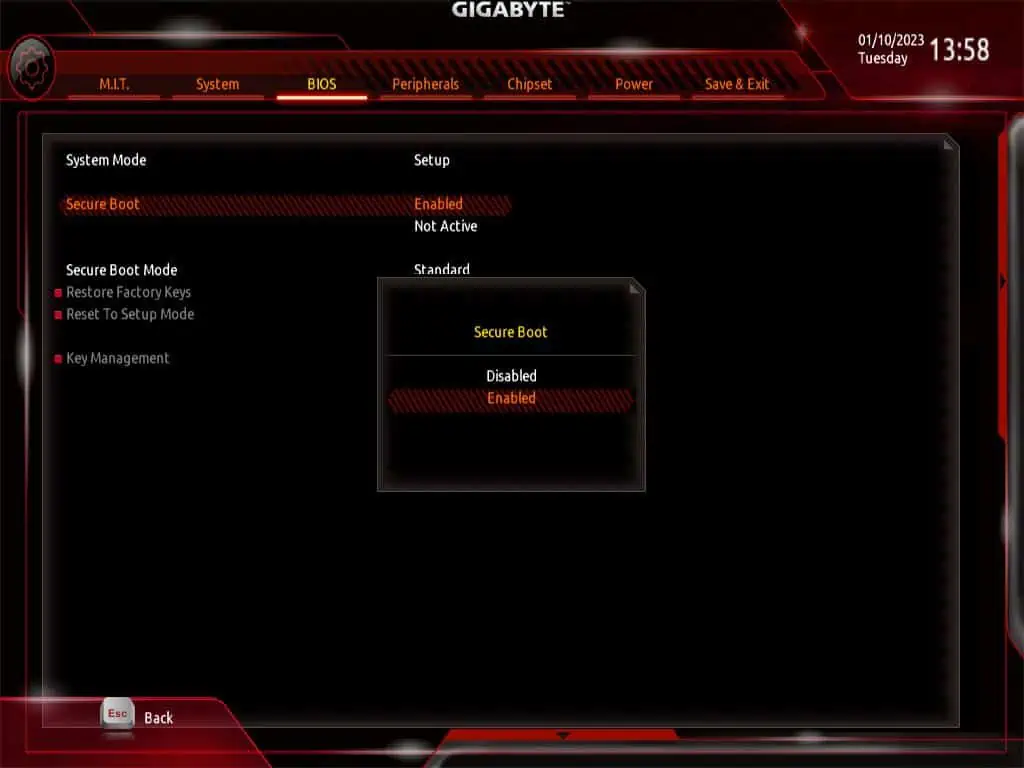
- Go to Secure Boot and Select Enabled.

- Finally, Save and exit from the BIOS.
- When the computer boots into Windows, go to the System Information and again check the status of the Secure Boot.

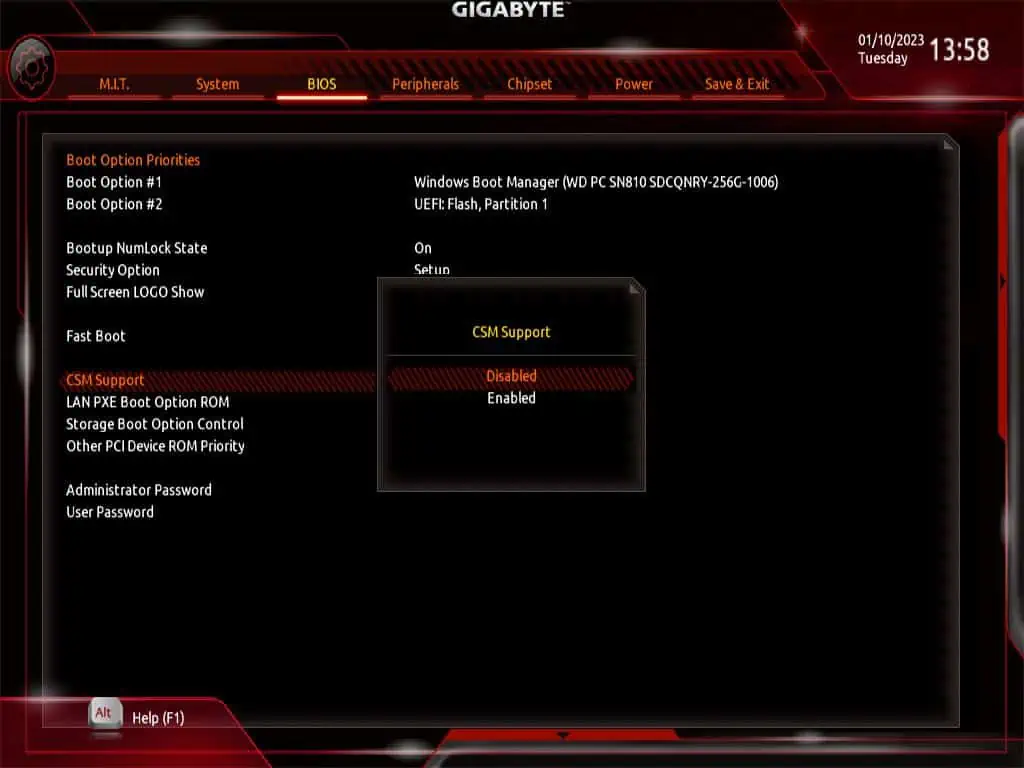
On some Gigabyte devices, the section for the secure boot is hidden in the BIOS. To make the option available, you have to disable the Compatibility Support Mode (CSM). The CSM provides Legacy BIOS backward compatibility for the UEFI. Unless this mode is disabled, the UEFI won’t operate fully, and thus the secure boot cant is enabled.
To disable the CSM on Gigabyte devices,
- Boot into BIOS for your device.
- Go into the BIOS tab.
- Navigate to the CSM support and press enter.

- Select Disabled

