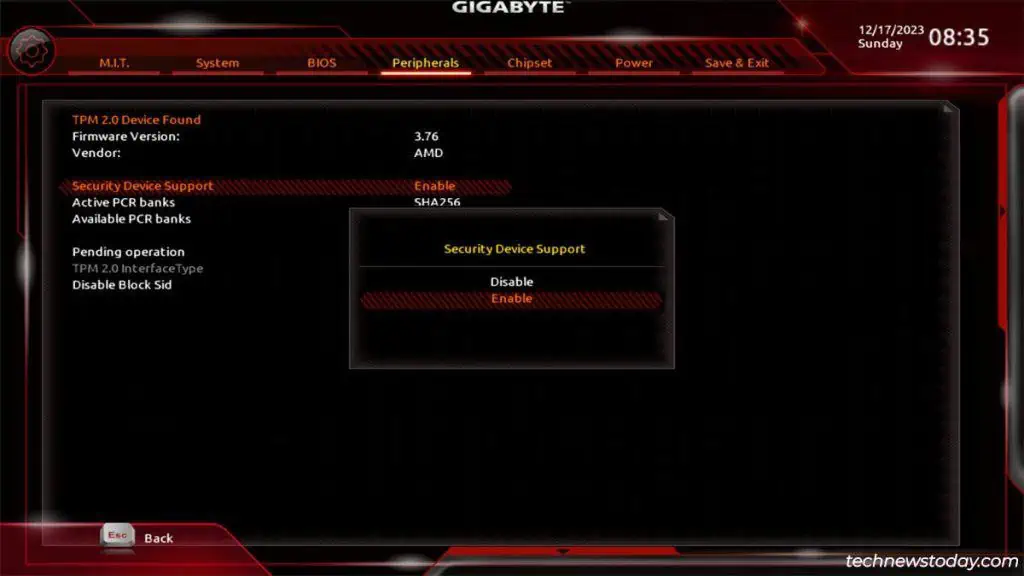
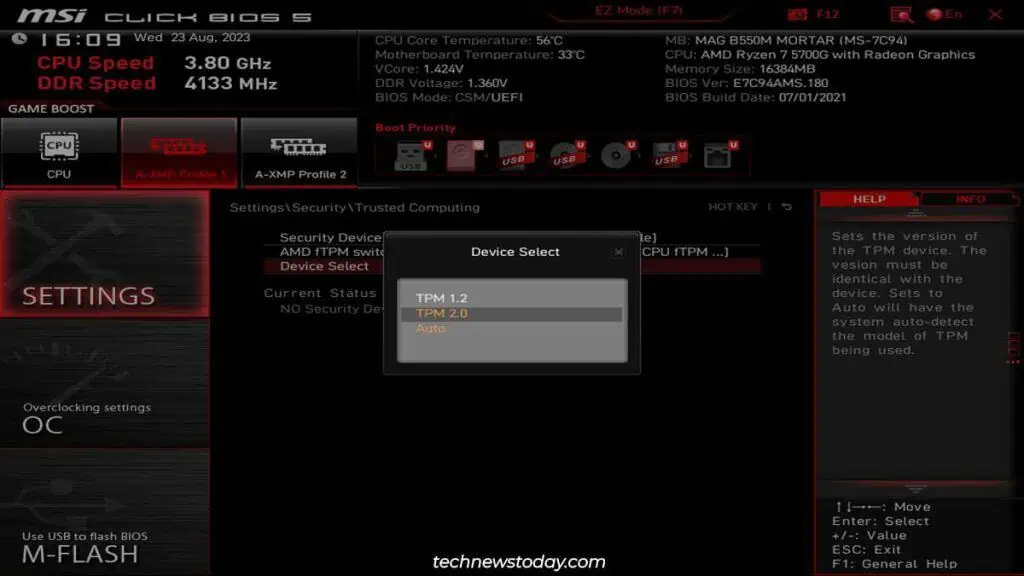
TPM used to be installed as a dedicated chip on motherboards. But since TPM 2.0, it’s more commonly implemented via a board’s chipset.
This means that even without a discrete TPM chip on your board, you can still enable TPM 2.0 from the BIOS.
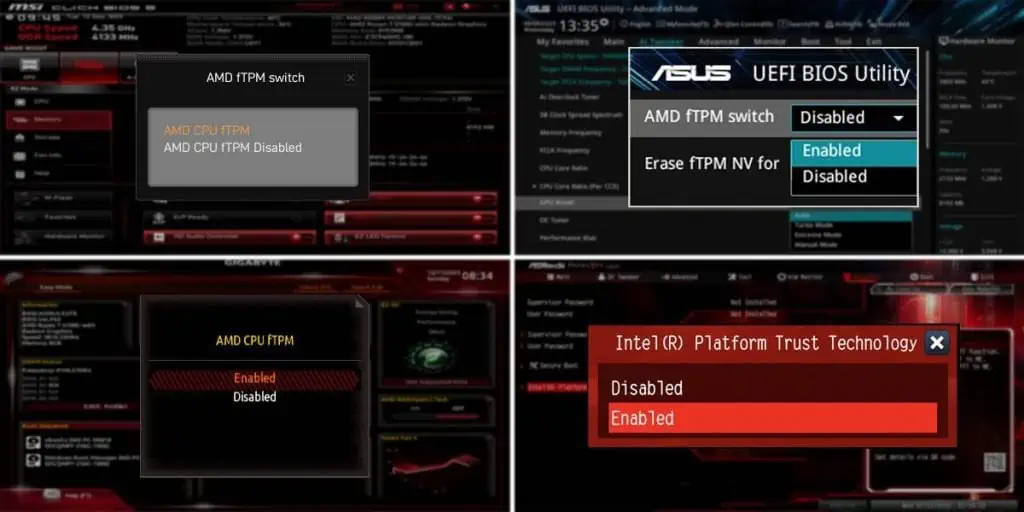
Specifically, you’ll need to enable the fTPM (AMD), PTT (Intel), and Security Device Support settings in the BIOS.
But before you do this, take a minute to understand what TPM is and why you may want to enable it.
What is TPM? Should You Enable It?
TPM (Trusted Platform Module) is a technology that improves the security of your system in various ways. Mainly,
- It creates and stores cryptographic keys for security services like BitLocker and Windows Hello.
- It only lets the PC boot if system integrity is verified through a mechanism called Measured Boot.
- It helps mitigate common attack vectors like dictionary, ransomware, and firmware attacks.
In the current context, enabling TPM 2.0 is also a requirement for installing Windows 11 and playing Valorant.
If you need to enable TPM 2.0 for these reasons or simply want the security benefits, start by getting to your system’s BIOS UI.
Access the BIOS Setup Utility

Turn on your PC and repeatedly press the BIOS key (Del on most systems). The PC should boot to the BIOS/UEFI.
If this method doesn’t work, you can also use alternative methods like WinRE to get to the firmware interface. This guide on entering the BIOS covers such methods in detail.
Enable TPM in the BIOS
What we’re trying to configure is firmware-based TPM. Intel calls it the Platform Trust Technology (PTT) while AMD calls it firmware-TPM (fTPM).
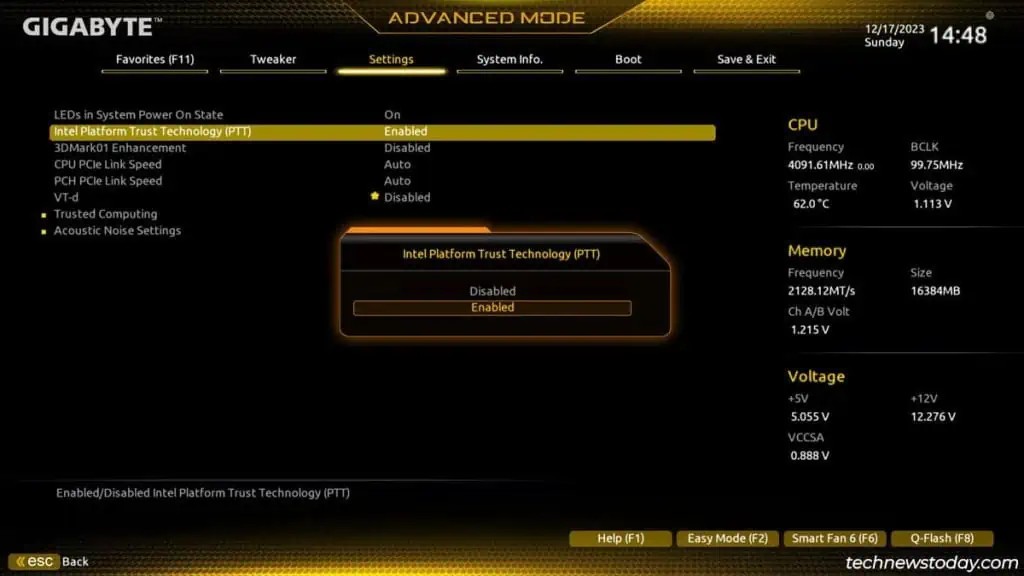
To enable Intel PTT,
- Go through sections like Advanced or Trusted Computing in the BIOS.
- Set Intel PTT to Enabled.

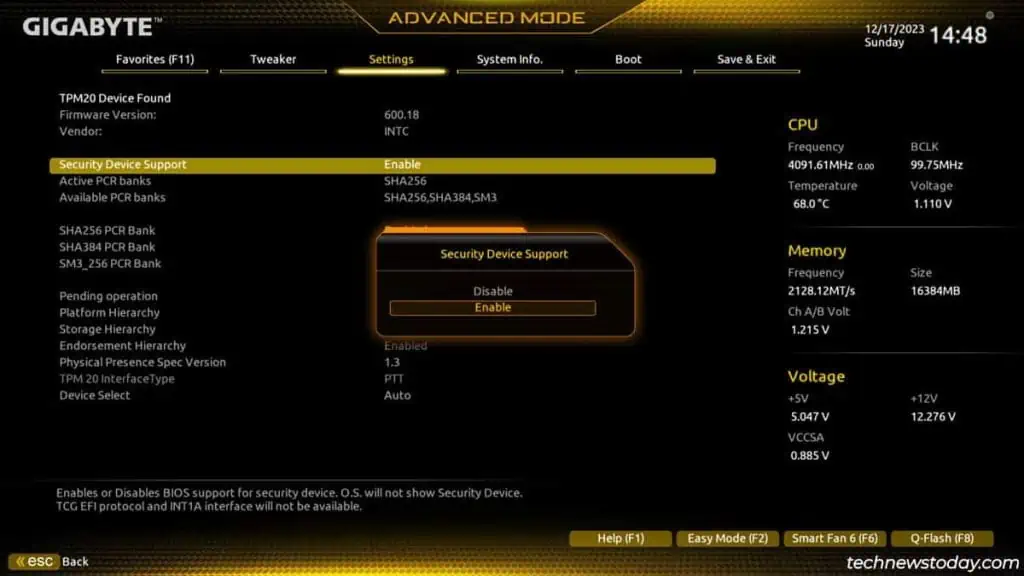
- Ensure Security Device Support is Enabled as well.

- Press F10 to save the changes and exit the BIOS.
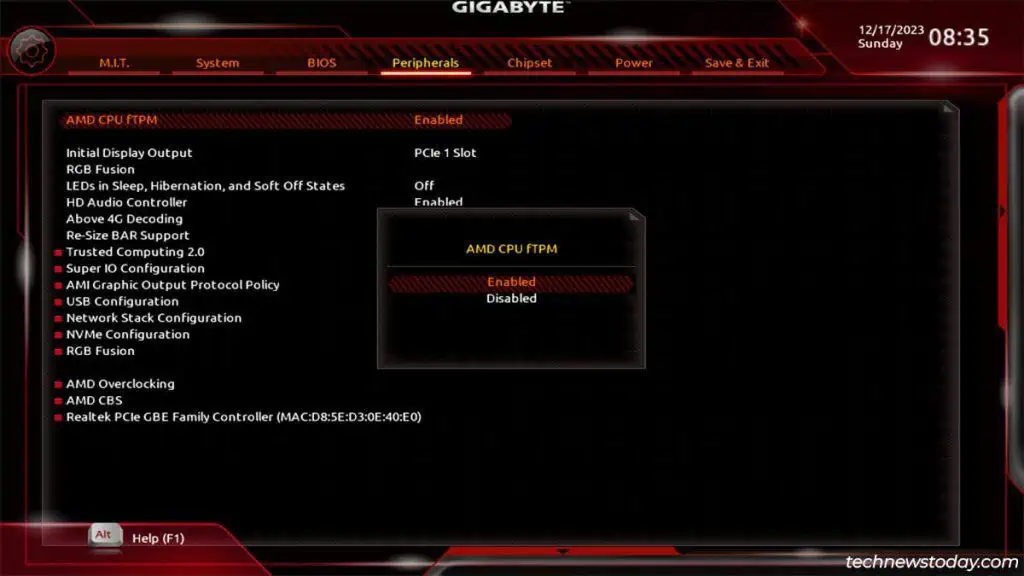
To enable AMD’s fTPM,
- Search sections like Security, Advanced, Peripherals, Trusted Computing, etc.
- Set AMD CPU fTPM to Enabled.

- Ensure Security Device Support is Enabled.

- Press F10 to save the changes and exit the BIOS.
Besides setting the TPM version, there’s not much else to do here. Some boards let you configure advanced settings like PCR banks and Platform Hierarchy but these are best left to default.
As for resetting TPM, I recommend doing that from Windows instead of the BIOS.
Note: The BIOS UI differs according to the manufacturer and even between different BIOS versions from the same manufacturer. If you’re having a hard time enabling TPM, check out our dedicated guides on enabling TPM on different systems:
Verify TPM Status
After enabling TPM and exiting the BIOS, the PC should reboot to Windows. Open the TPM Management Console with the tpm.msc run command.
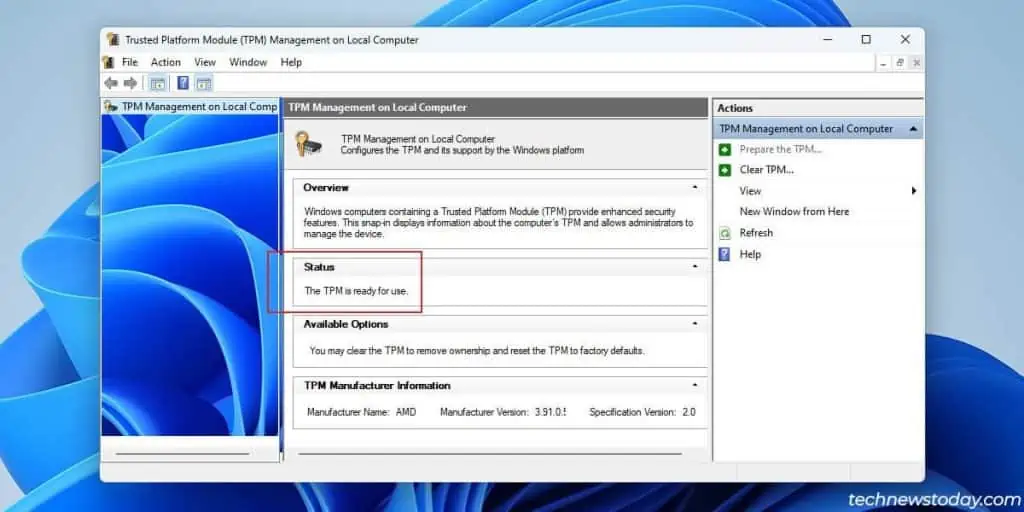
The status should read “The TPM is ready for use”.
If you ever need to reset the TPM to the default state, you can do so from here with the Clear TPM option.
What If TPM Isn’t Working
Sometimes, users encounter errors like Compatible TPM not found despite enabling in the BIOS.
I recommend the following troubleshooting process in such cases:
- Follow the same process as earlier to get to the TPM settings in the BIOS.
- Ensure both the PTT/fTPM setting and Security Device Support are enabled.
- If required, manually set the TPM device version to 2.0.

- Make sure to save the BIOS settings properly.
- If you’re trying to use a discrete TPM chip, ensure it’s compatible with your board. Check the manufacturer’s TPM 2.0 support list to do this.
- If the error is preventing you from installing Windows, you can bypass the TPM requirement.
- Finally, if TPM is still not working, refer to our guide on dealing with a TPM device that’s not detected.

