Windows has provided us with several power plan settings depending on how you use the PC. Most of us are familiar with the Balanced and Power saver mode. However, there is a third option named Ultimate Performance mode.
Ultimate Performance mode allows the system to use maximum hardware resources, usually for higher-end PCs, such as servers or a workstation. However, you can enable this power plan mode on every PC and give the system a slight performance boost, on idle, under stress and anywhere in between.
How does Ultimate Performance Work and Is It Safe?

Ultimate Performance mode gets rid of micro-latency when supplying power. This latency is the time between the system, determining when a hardware component requires more power and delivering that power to the component.
Although this time difference is minuscule, it can be what’s stopping your PC from achieving maximum performance. However, operating on ultimate performance also means that the hardware components suffer from extreme temperatures.
In other power plan configurations, the hardware thermal throttle once it reaches an extreme temperature. However, in Ultimate performance mode, the system does not let the component thermal throttle, meaning that the hardware constantly runs at high temperatures.

To cool down the components, the system fan will continuously run at a high RPM. Once the system reaches extreme temperature, the fan alone may not be enough to cool down the hardware components. Hence, the entire PC may run into a critical error or may even abruptly shut down.
Ultimate Performance mode can benefit you if you want your system to get a slight boost. However, constantly running your PC in high-performance mode may drastically decrease your system’s life span.
How to Enable Ultimate Performance Mode in Windows?
Before you enable Ultimate Performance, here are some instructions for a laptop user. Since Ultimate Performance uses high power, make sure that you only allow Ultimate Performance mode when your laptop is plugged into a wall outlet. The laptop’s battery will drastically decrease if the laptop is not plugged into a power source.
Now that you know a little about Ultimate Performance mode and whether it is good for you, let us see how you can enable it.
From Power Options
As with other power plan settings, you can change the power plan to Ultimate Performance mode in Power Options. You can also change advanced power settings in Ultimate Performance mode if you don’t like the presets.
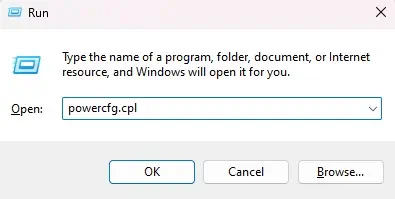
- Press the Windows + R key to open Run.
- Type
powercfg.cpland press Enter to open Power Options.
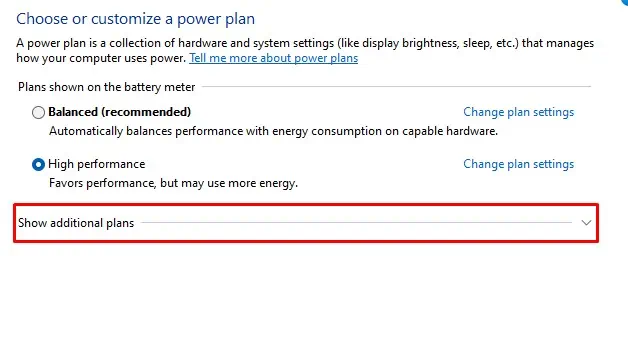
- Expand Show additional plans.

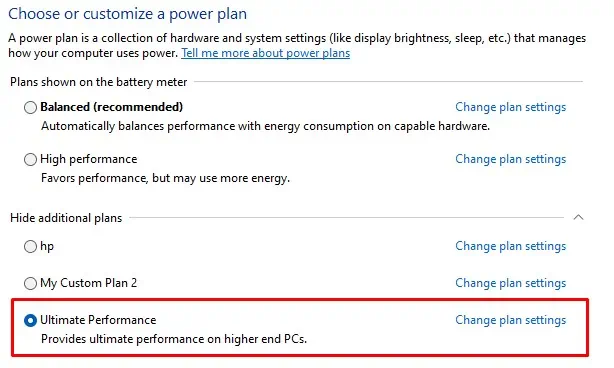
- Check Ultimate Performance.

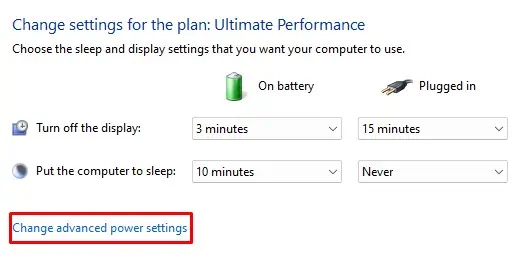
- If you want to change the presets, select Change plan settings. Here, you can set the time taken to turn off the display or the time limit after which the computer goes into sleep mode.
- Click on Change advanced power settings. Here, you can adjust power consumption to all the settings on the list.

- Click Apply, and then OK.
- Again, click on Save changes.
Using Command Prompt
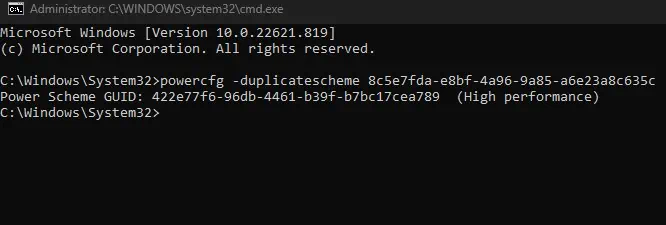
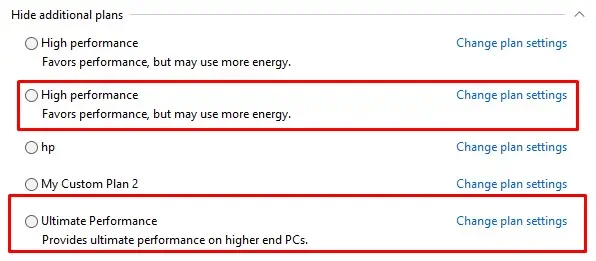
If you cannot find Ultimate Performance on Power Options, you will need to activate it using the command prompt. Besides Ultimate Performance mode, you can also add High-performance mode.
- Press the Windows + R key to open Run.
- Type
cmdand press Ctrl + Shift + Enter to open Command Prompt as admin. - Type
powercfg -duplicatescheme e9a42b02-d5df-448d-aa00-03f14749eb61and press Enter to access Ultimate Performance mode.
- Type
powercfg -duplicatescheme 8c5e7fda-e8bf-4a96-9a85-a6e23a8c635cand press Enter to access High-performance mode.
- Now, go to Power Options and expand Show additional plans.

- Check the power plan that you want for your PC.


