Your motherboard’s BIOS is responsible for setting up your system at the most basic level. Whether you want to monitor your hardware components, control fans, or tweak other essential settings, you first need to know how to enter the firmware interface.
On every PC and laptop, hitting the manufacturer-specified key during the startup should do it. You can even enter the latest UEFI Utility from the Windows Recovery Environment or from a specific section within your motherboard’s recommended software.
While I prefer spamming or holding down the dedicated key as soon as the PC starts, there are times when I want to do this even more quickly. For this purpose, I have now created a Desktop shortcut that automatically reboots my computer and takes me to its UEFI screen.
Without delaying further, let’s jump straight into the six different ways to enter BIOS.
Use BIOS Key During Startup
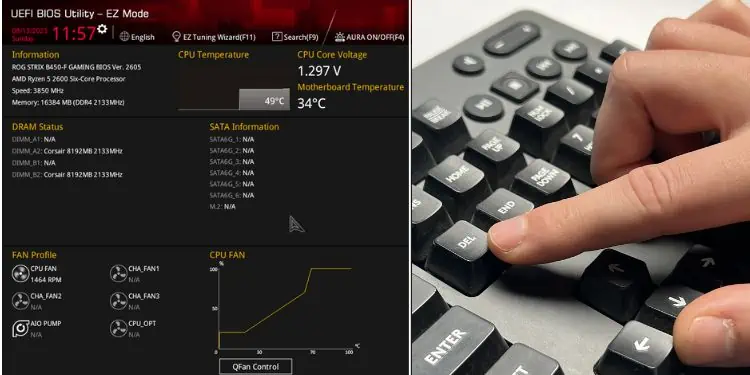
The quickest and easiest method to access your motherboard’s firmware interface is by using the specific BIOS key before the POST (Power On Self Test) completes. There’s no standard way as the key varies for every laptop and motherboard manufacturer.
Most use Del and F2 keys. But it can also be Esc, F1, F10, F12, etc. You can find yours from the bottom section in the manufacturer logo screen (during startup). However, if you do not encounter any messages, I suggest looking up your user manual.
For some systems, even two or more keys work. For instance, I can use both Del and F2 to boot into BIOS on my ASUS PRIME B450-PLUS motherboard.
Here, I have listed the common keys used on the most popular motherboards and laptops. You may navigate to each of the provided links to get even more detailed information about entering BIOS on each of these systems:
| Manufacturer | BIOS Key |
| ASUS | F2, Del, F9 |
| MSI | Del, Delete |
| Gigabyte | Del, F2 |
| ASRock | F2, Del |
| Dell | F1, F2, F3, F12, Del, Ctrl + Alt + Enter |
| HP | F1, F2, F10, F12, Del |
| Lenovo | F2, F12, Fn + F2, Fn + F12 |
| Samsung | F2, F10, F12 |
| Acer | Del, F2 |
| Toshiba | F2, F12 |
For normal users, entering BIOS isn’t a matter of concern. And if you’re relatively new to this topic, my general instructions below should work for accessing both the UEFI/Legacy BIOS:
- Start or restart your computer.
- Wait for the manufacturer logo to pop up and also note the message on the screen. It should read something like this– “Please press Del or F2 to enter UEFI BIOS Setting”.

- Hit the BIOS key as soon as you encounter the message. I like to repeatedly hammer it and this always works.

- If you hit the wrong key or your system boots up too fast, restart your PC again. This time, try holding it down from the beginning and you should get to the BIOS interface.
Additional Tip: You can even use the dedicated key to enter Boot Menu and pick the Enter Setup option to access the BIOS interface.
Boot From Windows Recovery Environment
Are you unable to enter BIOS even after trying the manufacturer-specified key multiple times? Its main reason could be Fast Boot, which skips hardware initialization (including keyboard) during the startup.
In such scenarios, the best approach would be getting to the Windows Recovery Environment and loading UEFI Firmware Settings. Do note that this method won’t work if your system uses Legacy BIOS.
There are a plethora of ways to navigate to the recovery console. You can try the Shift + Restart technique, use a bootable Windows drive (select Repair your computer in the setup window), or even execute a CLI command (shutdown /r /o).
Amongst all, I prefer the first method, and let me demonstrate the necessary steps for it:
- If you’re in the Windows logo screen, navigate to the bottom-right corner and press the power icon. But if you’re already logged into the OS, open the start menu to get here.
- Hold down the Shift key and press the Restart option.

- You’ll likely encounter the ‘Please Wait’ message on the screen. Within a few seconds, you’ll enter the Windows RE.

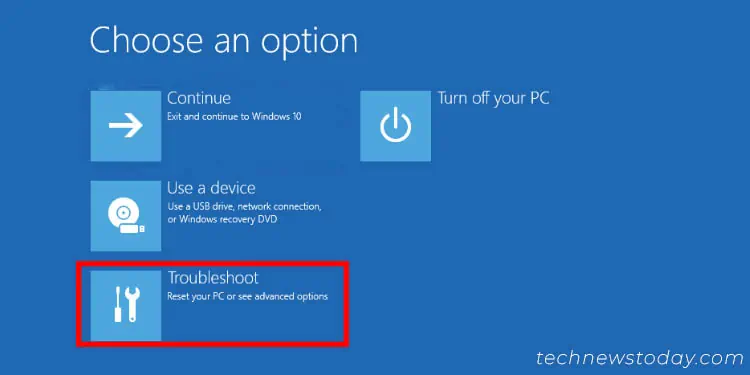
- Now, choose Troubleshoot.

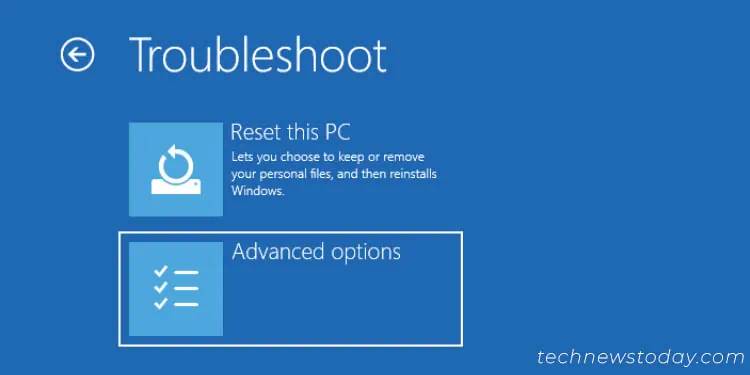
- Then, pick Advanced Options.

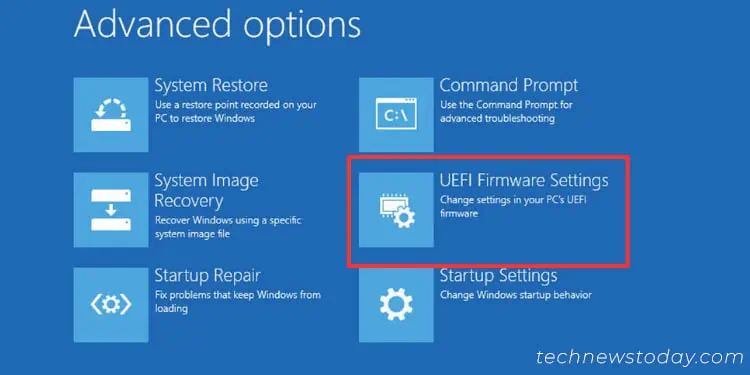
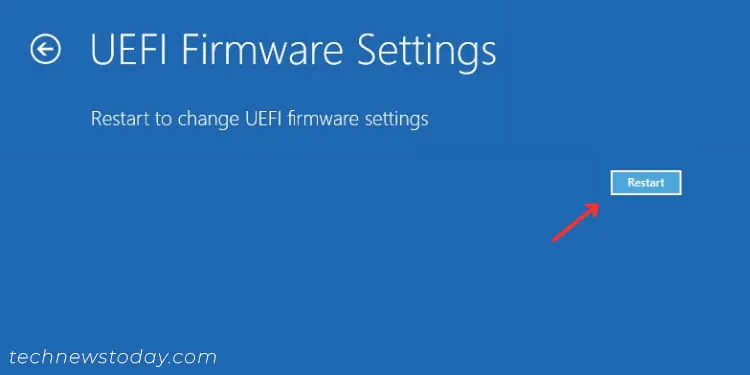
- Select UEFI Firmware Settings.

- Finally, click the Restart button and this should take you to the UEFI Utility.

From Command Line Interface
While I did mention the possible way to enter Windows Recovery Environment from CLI earlier, there’s a command that can directly take you to the UEFI utility. Launch Command Prompt or Powershell as an administrator before executing the following:shutdown /r /fw
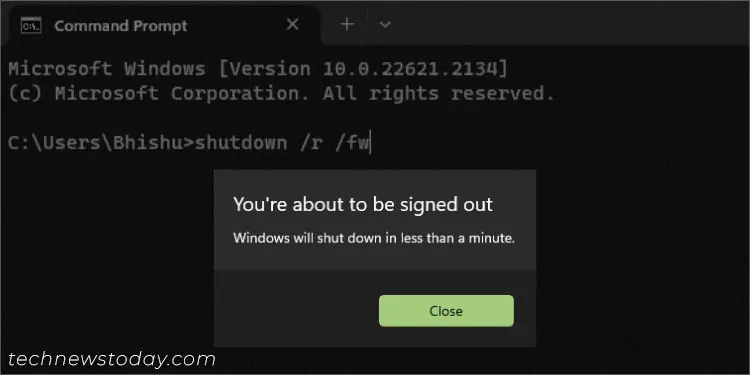
Here, /r performs a full shutdown and /fw combines with the earlier parameter to take you to the firmware interface in the next boot.
If you get the “The system cannot find the environment option that was entered” error, you’ll need to make changes to your Windows environment variables in order to make use of this feature.
On the other hand, Linux users can execute the sudo systemctl reboot --firmware-setup command to quickly navigate to their BIOS Setup page from their distro’s Terminal.
Create and Execute a Desktop Shortcut
I have even created a Desktop shortcut on my PC (using the same command discussed earlier). This provides an even more straightforward way to access my BIOS settings and I do not need to worry about pressing a dedicated key during the startup or even navigating to the Windows RE.
- First, navigate to your Desktop.
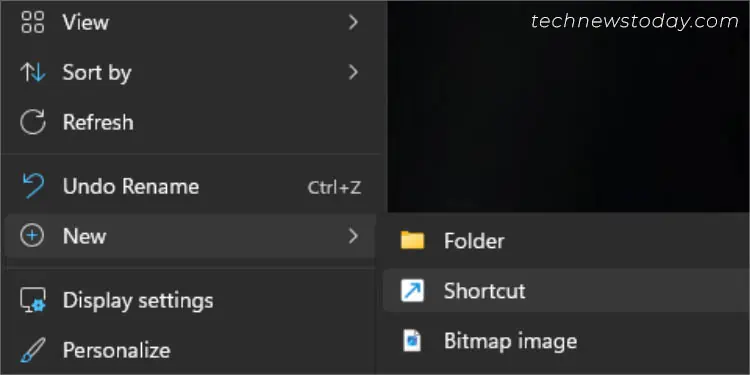
- Right-click anywhere on the empty screen and pick New > Shortcut.

- Under ‘Type the location of the item’, enter
shutdown /r /fwand hit Next.
- Then, name it and click Finish.

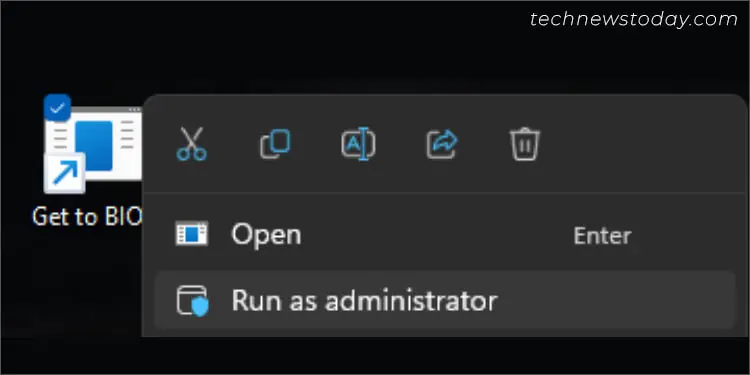
- From now on, you may directly execute this shortcut with administrative privilege. Your PC should automatically restart and you’ll enter the BIOS Setup page.

From now on, you may directly execute this shortcut with administrative privilege. Your PC should automatically restart and you’ll enter the BIOS Setup page.
Use Motherboard Utility
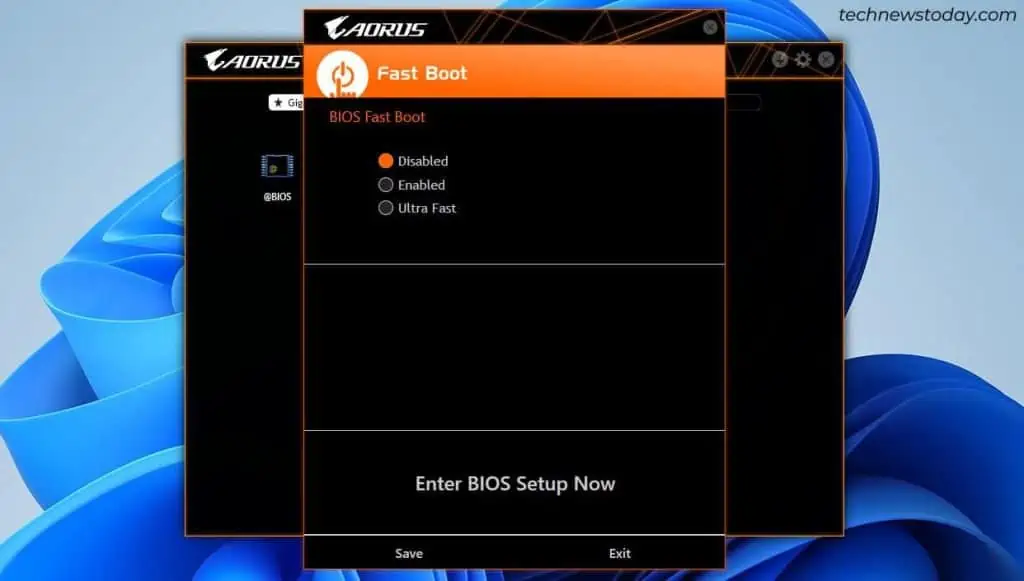
Some motherboard manufacturers allow you to enter the firmware interface easily through their recommended application. For instance, ASRock offers the Restart to UEFI Utility and Gigabyte users can utilize the Fast Boot app.
You may download such tools from your manufacturer’s official support page. You need to select your OS and search for it under the Download or Drivers & Utilities section (based on the system model).
The exact process of entering BIOS differs on every utility. Look for Enter UEFI setup on next boot, Enter BIOS Setup Now, or similar options.
Press Dedicated Button(s)
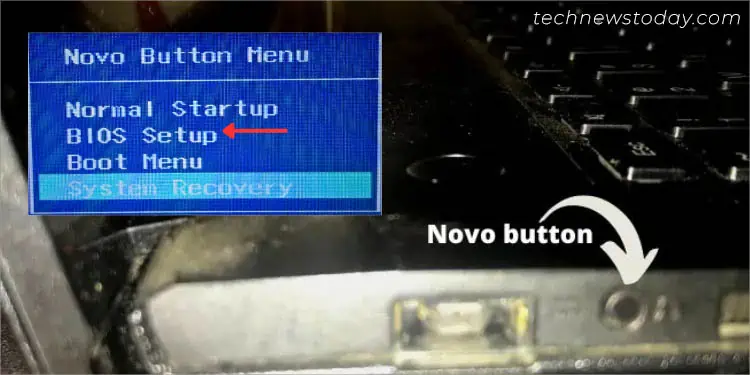
Some laptops provide a dedicated button to let you select a series of options, including BIOS settings. For instance, Lenovo’s Ideapad series offer a Novo button or a pinhole, from where you can choose the BIOS Setup option.
Likewise, Microsoft’s Surface laptops do not offer any dedicated key. Instead, you’ll have to press and release the power button while holding Volume Up at the same time.
To find out if your device includes such a feature, take a peek at your user manual or look up its specifications online.

