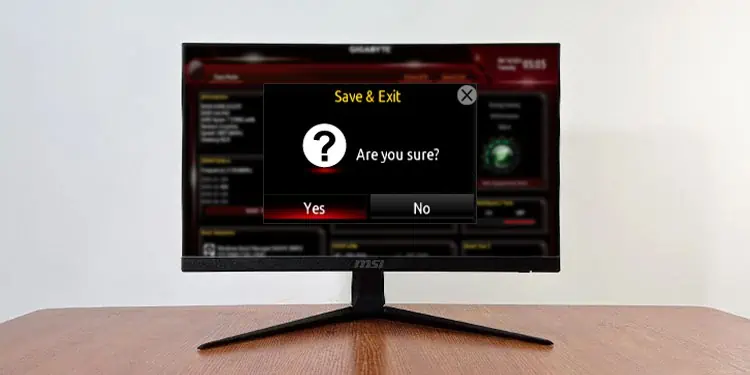
It’s really important to “Save & Exit” the BIOS after making changes to it. Exit without saving, and all the changes would be discarded.
On the other hand, “Discard & Exit” the BIOS if you want to get out of it without making unnecessary changes.
To exit the BIOS, navigate to the “Exit” menu and select the option that best suits your needs, such as “Save Changes and Exit” or “Discard Changes and Exit.”
If you find navigating the menu challenging, you can often press the F10 or Esc key as a shortcut to exit.
Confirm any prompts that appear to complete the process and reboot your computer.
For a complete guide on exiting BIOS, read the full article below.
First Find if You’re on Advanced Mode or EZ Mode
To begin with, let me quickly tell you that the steps to exit BIOS can vary slightly depending upon its interface mode.
So the first step would be to find out if you’re on the advanced mode or the EZ mode.
If you’re already making changes on the BIOS, most likely, you’re in the advanced mode.
To verify it, quickly have a look at the top-left or top-right of the BIOS screen.
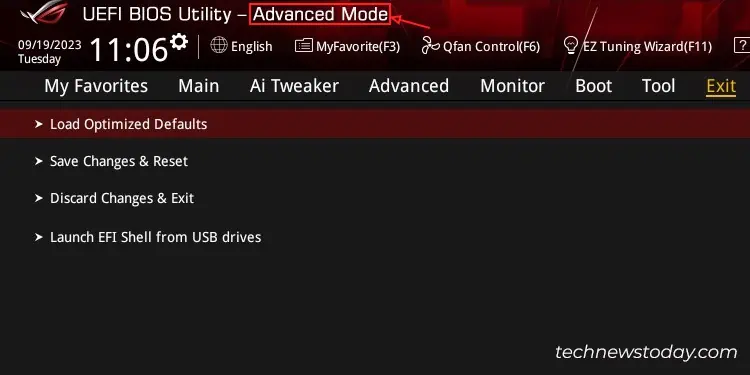
As you can see, my ASUS ROG STRIX B450-F GAMING PC is currently in advanced mode.
Should there be EZ mode written, you can confirm you’re in EZ mode.
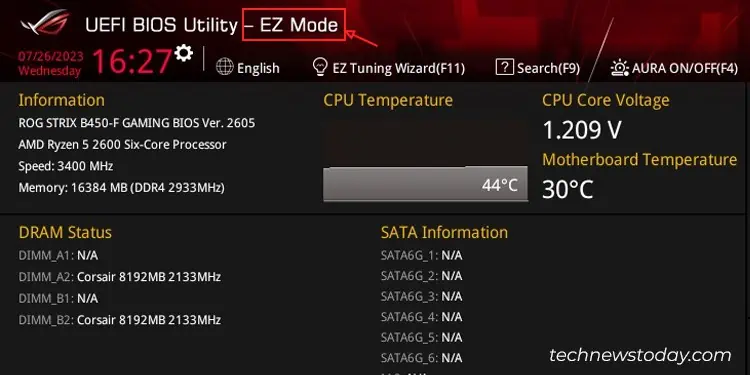
Exit BIOS On Advanced Mode
If you’re in advanced mode, the option to exit BIOS often lies at the end of the menu bar on the top.
Simply navigate to the Exit menu and choose whether you want to “Save changes and Exit” or “Discard changes and Exit.”
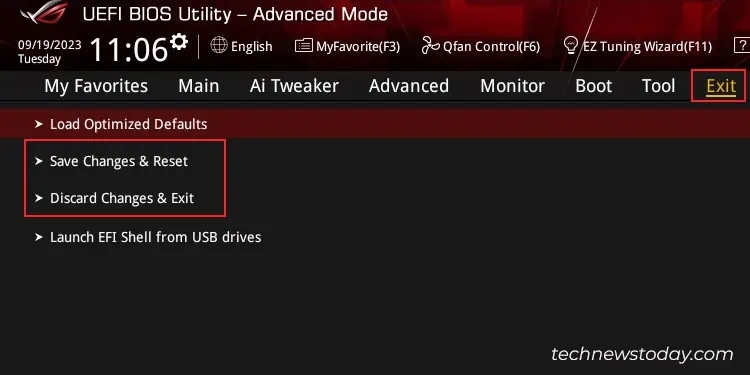
Do note that you may need to dig a bit deeper to find the exit menu in some boards.
For instance, my MSI MAG B550M MORTAR has a “Save & Exit” menu inside the Settings tab.
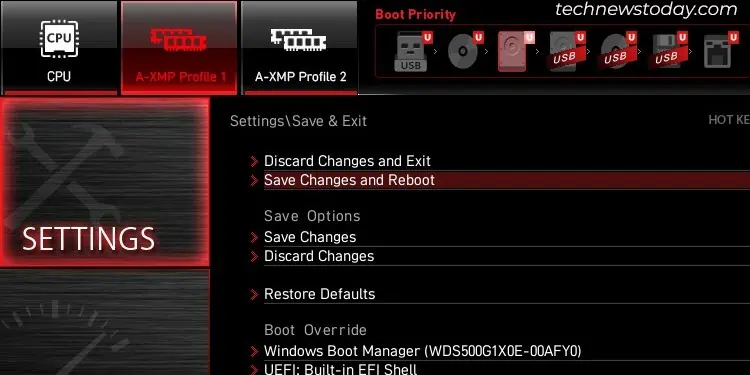
Upon testing, I further found that this motherboard, including the ASUS ROG STRIX B450-F also show the changes made to the BIOS before exiting.
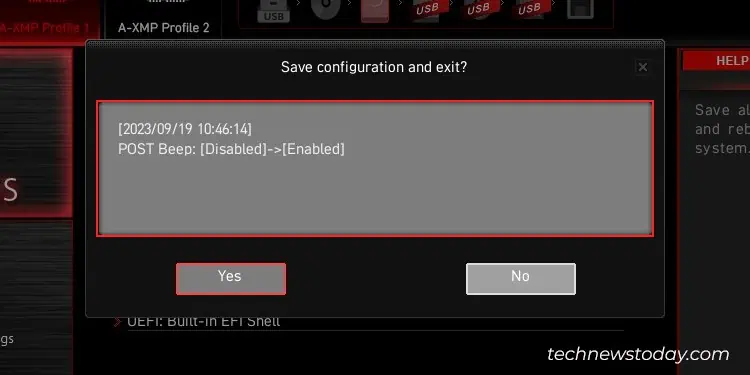
This way, it would be a lot easier to decide if you should save the changes or exit without saving.
I strongly advise you to “Discard changes and exit” if you are unaware of the changes you made.
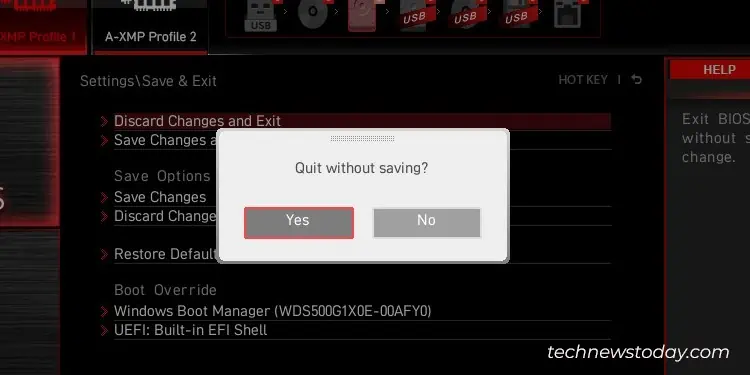
Once you exit from the BIOS, wait till the computer restarts and boots normally to Windows.
Exit BIOS On EZ Mode
Getting out of the BIOS is quite easier if you’re on EZ mode.
Unlike Advanced mode, you don’t need to navigate to the Exit tab to get out of it.
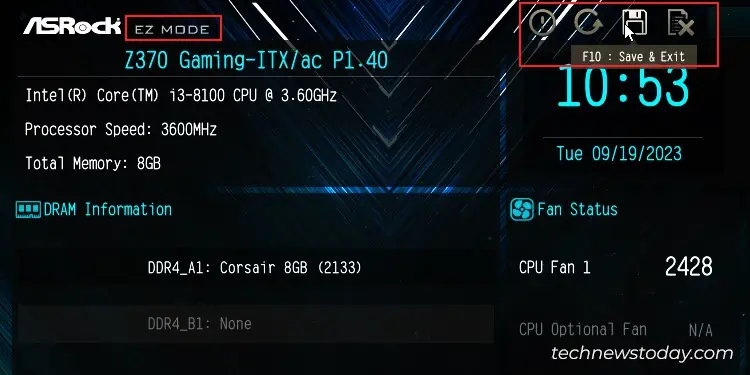
You’ll get the Exit options in the BIOS startup screen only. Inspect the top or bottom section of the BIOS screen to locate the options.
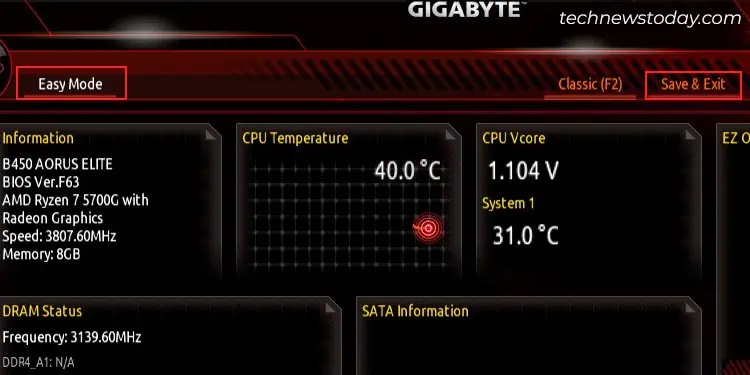
Yet, you need to choose between “Save & Exit” or “Discard and Exit,” as you did in advanced mode.
Do note that few boards like ASRock Fatal1ty Z370 even come with icons to denote the exit options. Simply click the exit icon and you will get out the BIOS.
Exit BIOS Using Shortcut Keys
If you don’t prefer rummaging through the boring menus of BIOS, shortcut keys are always there to rescue you.
Press F10 key to save the changes you made in the BIOS and exit out of it.
On the other hand, press the Esc key to exit without saving the changes.
Interestingly, these keys work regardless of whether you are in the EZ mode or Advanced mode.
Having said that, I did find some exceptions during testing. I wasn’t able to use the Esc key to escape from EZ mode of my ASUS ROG STRIX B450-F BIOS.
I was bound to enter the Advanced mode before I could use Esc key to quit from BIOS. But there’s nothing to worry about.
If you have not made any changes, even saving and exiting would do no harm.
Do note that these shortcut keys might not work in some manufacturers. In such cases, go to the Help section of the BIOS or press F1 key.
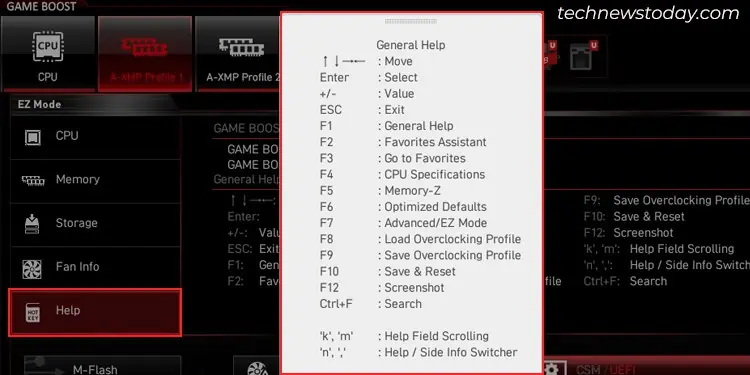
You will then know the shortcut key to get out of the BIOS.
Troubleshooting PC That Keeps Entering BIOS
The methods I discussed above should easily take you out of the BIOS. But, I found that some users were still unable to do it.
If you are on the same boat, here’s a quick fix to resolve the issue.
First check if your disk drive is detected in the BIOS. For this, see under the Boot Sequence or Boot Priority heading in the BIOS startup screen.
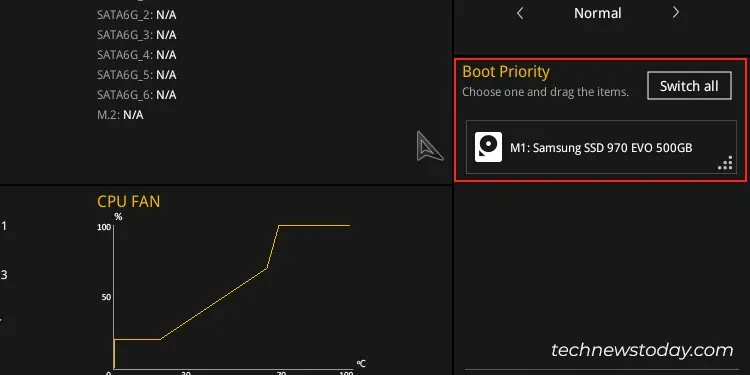
If you don’t find your disk there, most probably you are using a disk with MBR partition style in the UEFI system.
You can easily resolve the issue by enabling the CSM (Compatibility Support Module) on your BIOS settings.
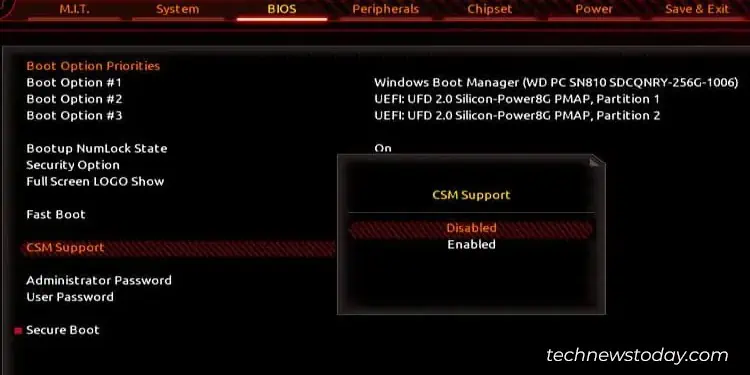
Enabling this feature will make the MBR-partitioned drives compatible with the UEFI system.
Here’re our comprehensive guides to help you enable CSM on ASRock, MSI, GIGABYTE and ASUS motherboards.

